
Taking screenshots on your Mac is incredibly useful for capturing and sharing information, whether it’s a funny chat, an important error message, or a visually appealing webpage. But what if you need a physical copy? Printing your screenshots is just as straightforward as capturing them. This guide will walk you through everything you need to know about taking and printing screenshots on your Mac, ensuring you can easily go from digital capture to a printed hard copy.
Capturing Screenshots on Your Mac
Before you can print, you need to take a screenshot. macOS offers several built-in tools to capture your screen in different ways. Here’s how:
Capture the Entire Screen
If you want to capture everything visible on your display, here’s the quickest method:
- Press and then release these three keys simultaneously: Shift, Command, and 3.
- A thumbnail will briefly appear in the corner of your screen. Clicking it allows you to edit the screenshot immediately. Otherwise, the screenshot is automatically saved to your desktop as a file named “Screen Shot [date] at [time].png”.
Capture a Portion of the Screen
Sometimes you only need a specific section of your screen. The following steps will guide you to capture just a part of your display:
 mac-snipping-tool-key-combo-diagram
-
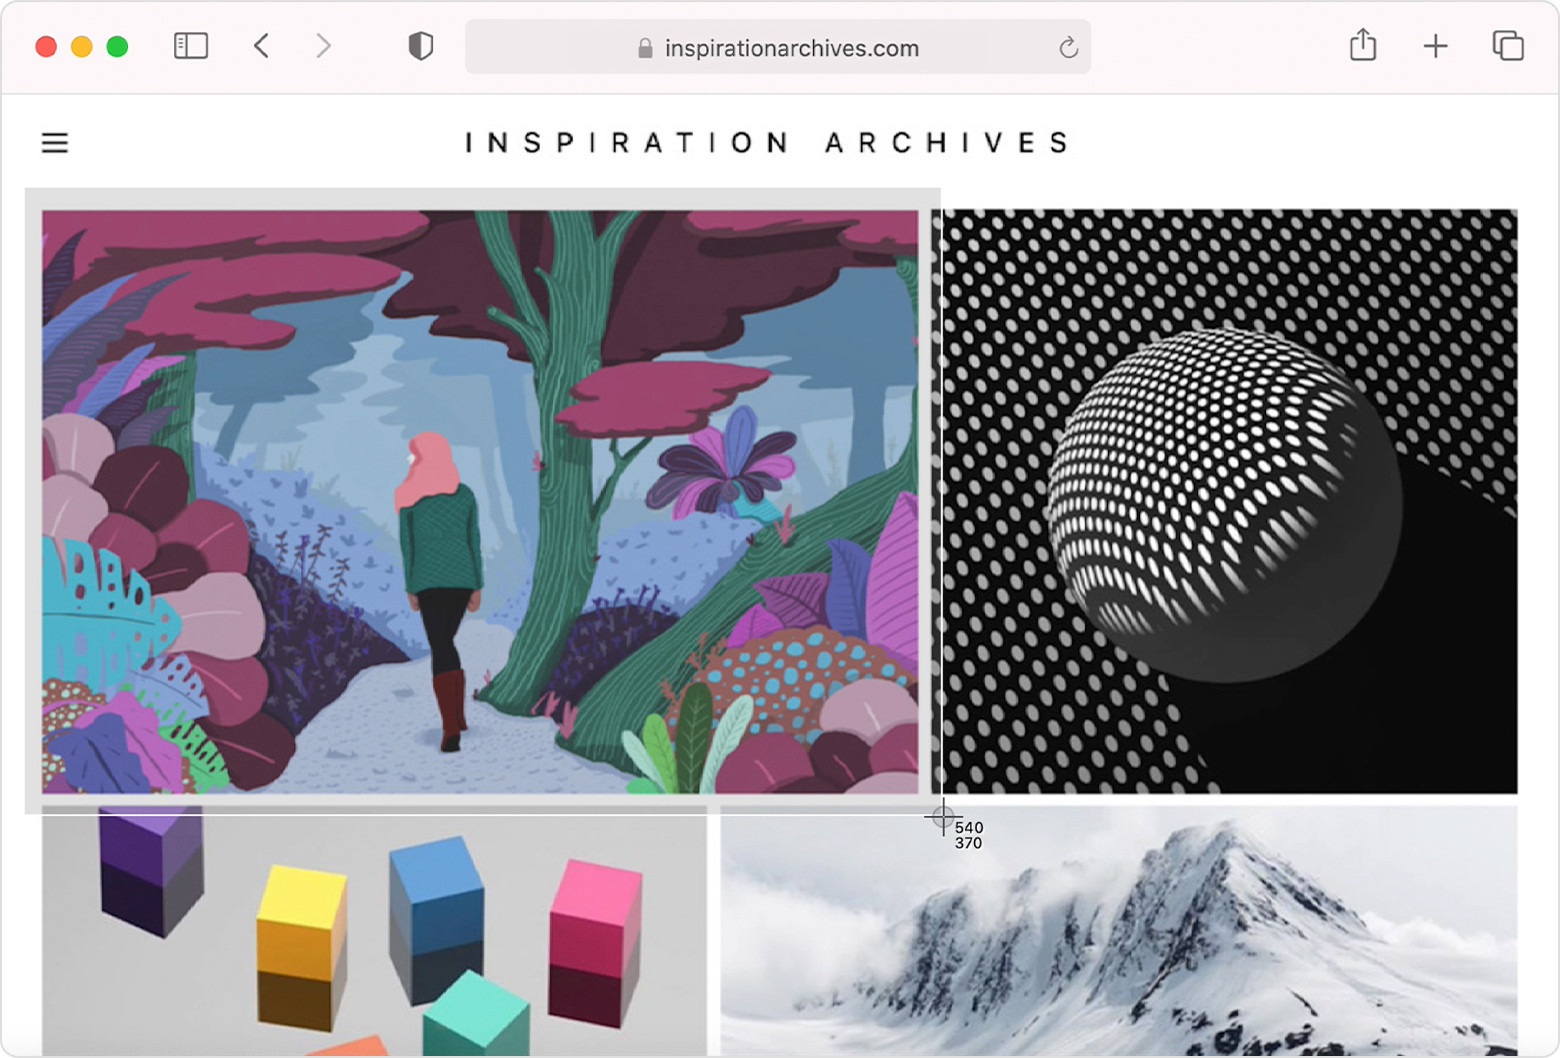
Press and then release these three keys together: Shift, Command, and 4. Your cursor will transform into a crosshair.
-
Click and hold your mouse or trackpad button, then drag the crosshair to select the desired area you want to capture.
-
Release the mouse or trackpad button to take the screenshot.
- To cancel the screenshot, press the Esc (Escape) key.
- To reposition the selected area without resizing it, hold down the Space bar while dragging.
 macos-big-sur-safari-screenshot-portion
 -
Like capturing the entire screen, a thumbnail will appear for quick editing, or the screenshot will save to your desktop.
Capture a Window or Menu
To capture a specific window or a dropdown menu, follow these steps:
-
First, ensure the window or menu you wish to capture is open and active on your screen.
-
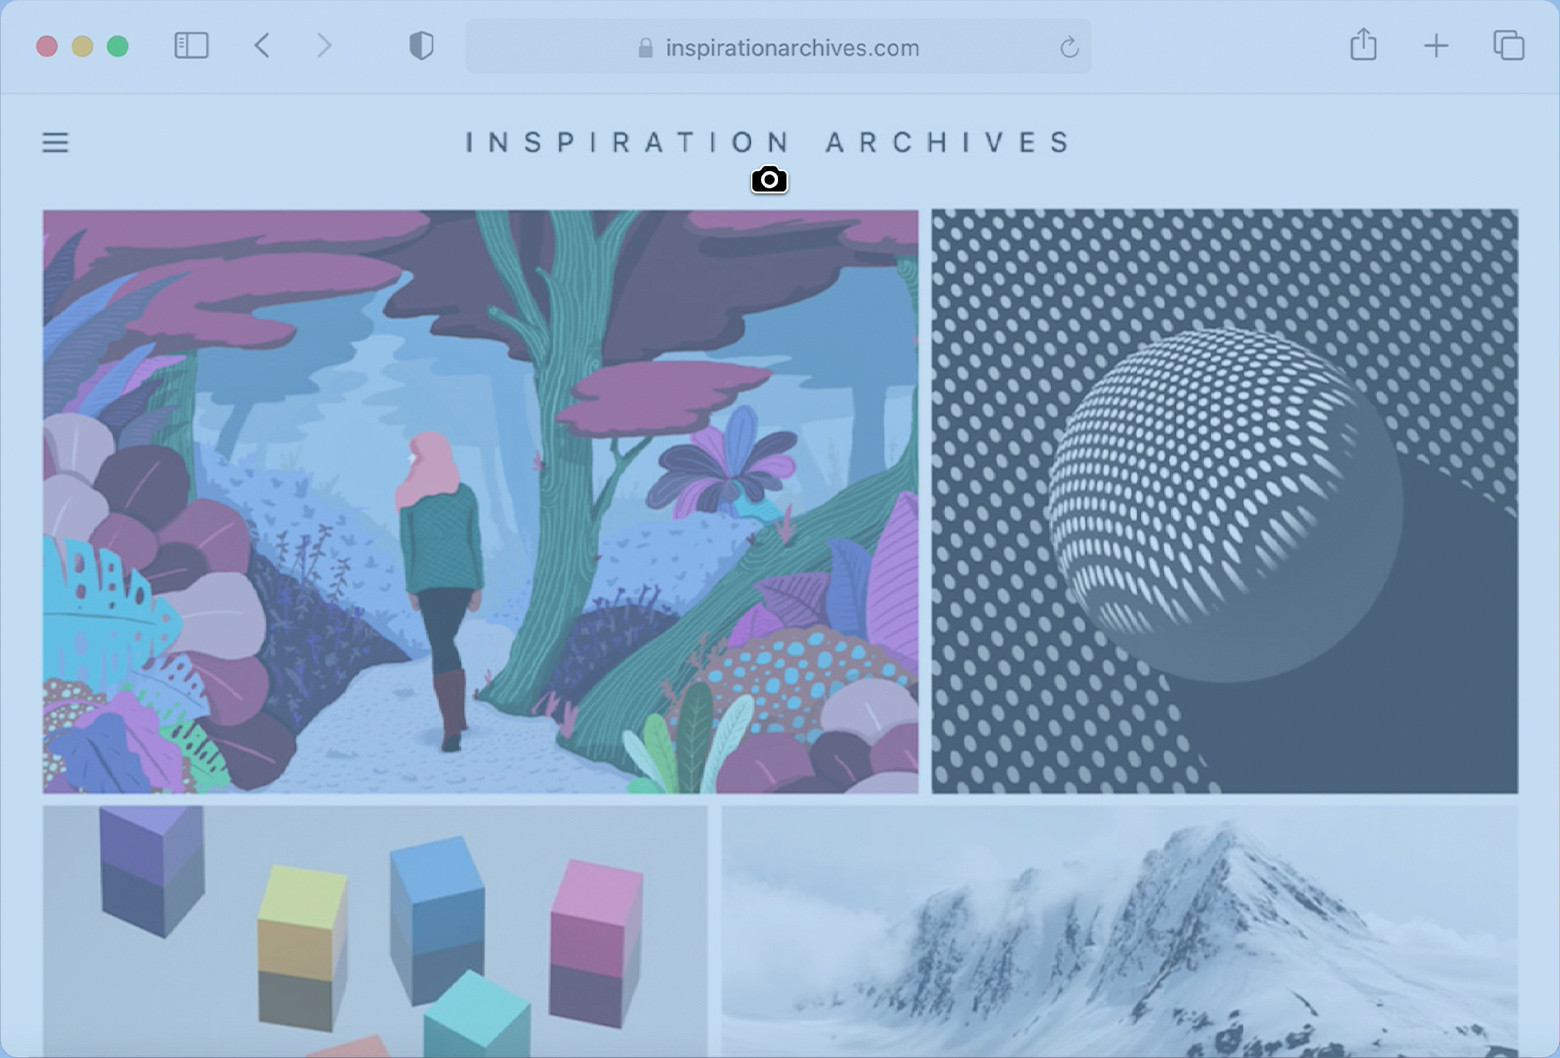
Press and release these three keys together: Shift, Command, and 4, and then immediately press and release the Space bar. The crosshair pointer will change into a camera icon.
-
Click on the window or menu you want to capture.
- To exclude the window’s shadow from the screenshot, press and hold the Option key while clicking.
- To cancel, press the Esc (Escape) key.
 macos-big-sur-safari-screenshot-window
 -
Again, a thumbnail will appear for editing, or the screenshot will save to your desktop.
Printing Your Screenshots on Mac
Once you have your screenshot, printing it is a breeze. macOS seamlessly integrates with printers, making it easy to get a hard copy of your digital captures. Here’s how to print your screenshot:
Opening Screenshots for Printing
By default, screenshots are saved as PNG files on your desktop. To print them, the simplest way is to use the Preview application, which is the default image viewer on macOS.
- Locate your screenshot: Find the screenshot file on your desktop (or wherever you saved it). The default naming convention is “Screen Shot [date] at [time].png”.
- Open with Preview: Double-click the screenshot file. It will automatically open in the Preview application. Alternatively, you can right-click the file, select “Open With,” and choose “Preview.”
Printing from Preview: Step-by-Step Guide
With your screenshot open in Preview, you are just a few clicks away from printing:
- Access the Print Menu: In the Preview menu bar at the top of your screen, click on “File” and then select “Print…” (or use the keyboard shortcut Command + P).
- Printer Selection: In the Print dialog box, choose your desired printer from the “Printer” dropdown menu. Ensure your printer is properly connected and turned on.
- Choose Print Settings: Adjust any necessary print settings. This includes:
- Presets: If you have saved print presets, you can select one here.
- Copies: Specify the number of copies you want to print.
- Pages: Usually set to “All” for a single screenshot.
- Paper Size: Select the appropriate paper size for your printer (e.g., Letter, A4).
- Orientation: Choose between “Portrait” (vertical) or “Landscape” (horizontal) orientation, depending on how you want your screenshot to be printed on the paper.
- Scaling: You can adjust the scaling to fit the screenshot perfectly on the paper. Options include “Scale to Fit” or adjusting the percentage manually.
- Print! Once you’ve configured your settings, click the “Print” button. Your Mac will send the screenshot to the printer, and your printed copy will be ready shortly.
Printer Settings and Options for Screenshots
Consider these tips for optimal printing of your screenshots:
- Paper Type: For screenshots with a lot of visual detail, consider using photo paper for better print quality, especially if you are printing in color. Plain paper works well for most standard screenshots.
- Color vs. Black & White: Decide whether you need a color print or if black and white is sufficient. Printing in black and white can save on color ink.
- Print Quality: Most printers offer different print quality settings (e.g., Draft, Standard, High). For important screenshots, choosing a higher quality setting will result in a clearer and sharper print.
- Margins: Check the margins setting if you need to ensure the entire screenshot fits within the printable area of the paper.
Finding Your Screenshots
If you can’t immediately see your screenshots on the desktop, here are a couple of tips to locate them:
- Finder Window: Open Finder, and in the sidebar, click on “Desktop.” This will show you all the files on your desktop, making it easier to spot your screenshot files. Alternatively, from the menu bar in Finder, choose Go > Desktop.
- Screenshot App (macOS Mojave and later): If you are using macOS Mojave or later, you can use the Screenshot app (Shift-Command-5). This app allows you to choose a different default save location for your screenshots if you prefer not to save them to the desktop.
Conclusion
Printing a screenshot on your Mac is a simple process that combines macOS’s efficient screenshot tools with its user-friendly printing system. Whether you need a hard copy for record-keeping, presentations, or simply for sharing information offline, macOS provides all the necessary features to capture and print your screen content effectively. By following these steps, you can easily manage and print your Mac screenshots whenever needed.