Connecting your HP printer to your Windows computer using a USB cable is a straightforward and reliable method for printing. This guide will walk you through the necessary steps to ensure a successful setup, allowing you to quickly start printing your documents and photos. Using an Hp Printer Usb Cable provides a direct connection, often preferred for its simplicity and consistent performance.
Before you begin the installation process for your hp printer usb cable setup, there are a few essential steps to prepare your Windows system and HP printer. This preparation is crucial for a smooth and error-free installation.
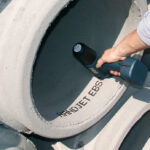
Firstly, ensure that your HP printer is powered on and in a ‘ready’ state. This means it should be turned on and not displaying any error messages. Next, gather a USB cable that is no longer than 3 meters (approximately 9 feet 10 inches). Using a cable within this length ensures optimal signal strength and reliable communication between your printer and computer. Locate an available USB port directly on your Windows computer. Avoid using USB hubs or docking stations if possible, as these might not provide sufficient power or a stable connection for your printer to operate correctly.
If you have previously connected this HP printer to your computer via USB and installed drivers, it’s important to remove any existing printer software. This prevents potential conflicts and ensures a clean installation of the latest drivers. To uninstall previous installations, disconnect the hp printer usb cable from your computer. Do not reconnect it until you are prompted to do so during the driver installation process.
To remove any old printer installations, search for ‘Devices and Printers’ in the Windows search bar and open the Control Panel setting.
In the ‘Devices and Printers’ window, locate the icon representing your HP printer model. Right-click on the printer icon and select ‘Remove device’. If you see multiple icons for the same printer, remove all of them to ensure a complete cleanup. Once you have removed all instances of your printer, close the ‘Devices and Printers’ window.
With the preparation steps completed, you are now ready to install the necessary HP printer driver for your hp printer usb cable connection. To get the most out of your HP printer and access all available features, it is recommended to install the full feature driver.
To download the correct driver for your HP printer, visit either 123.hp.com if your printer was released in 2013 or later, or go to the official HP Customer Support – Software and Driver Downloads website. These websites will guide you through the process of finding and downloading the appropriate driver for your specific HP printer model and operating system. Simply follow the on-screen instructions to download and install the driver.
Once you have downloaded the driver, run the installer file. The installation wizard will guide you through the steps. It is crucial to only connect the hp printer usb cable when the installer prompts you to do so. Typically, the installer will ask you to connect the cable at a specific point during the installation process. Follow the prompts carefully to ensure correct installation.
By following these steps, you should have successfully set up your HP printer using an hp printer usb cable. This direct USB connection offers a reliable printing solution for your Windows computer. For more detailed instructions or troubleshooting, you can always refer to the comprehensive guides available on the HP support website. Enjoy seamless printing with your HP printer!