For Star Wars Day on May the 4th, a meticulously designed 3d Printed Lightsaber was created in collaboration with Ultimaker. While numerous 3D printed lightsaber designs exist, this project aimed to surpass existing models in accuracy, surface finish, and ease of assembly. The goal was to create a replica that is not only printable but also faithfully represents the iconic prop from the Star Wars series.
 Reference design
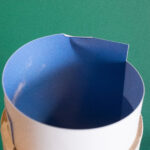
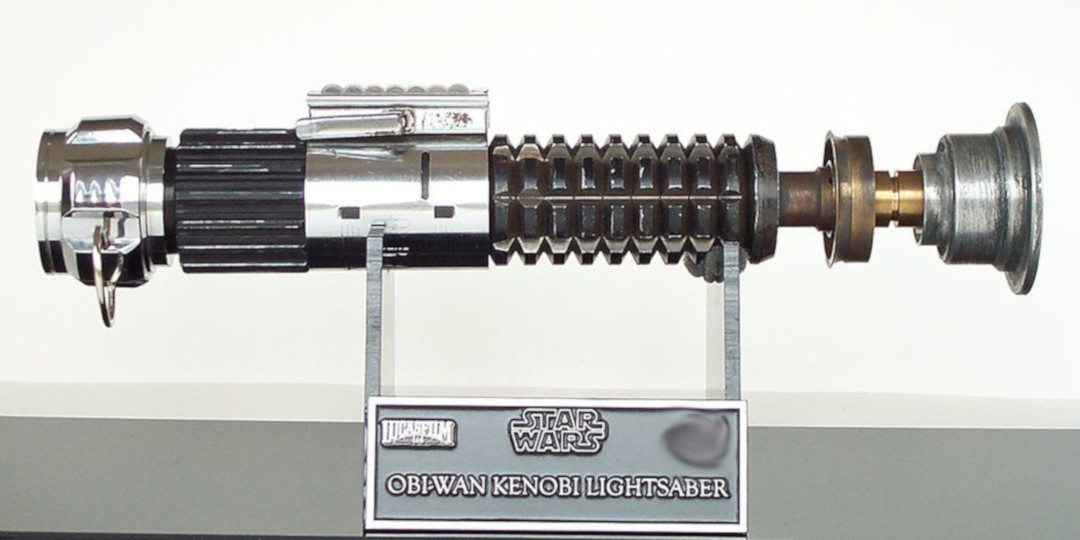
Reference design of the lightsaber prop.
4-Piece vs. 14-Piece Design: A Tale of Two Lightsabers
Two distinct versions of the lightsaber were developed to cater to different priorities: a 4-piece version prioritizing straightforward printing and assembly, and a 14-piece version engineered for uncompromising surface quality and accuracy. The 4-piece model was initially released on May the Fourth, and the more detailed 14-piece model followed on July 2nd. This article delves into the design choices behind these two versions, highlighting the trade-offs between simplicity and fidelity in 3D printed lightsaber design.
 Design comparison
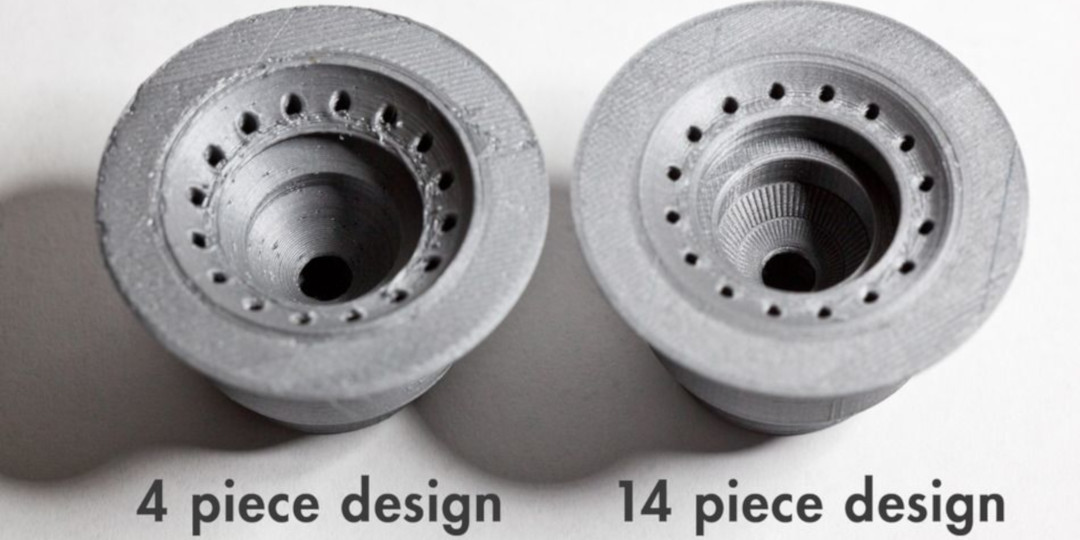
Comparison of the 4-piece (left) and 14-piece (right) 3D printed lightsaber designs, showcasing the enhanced surface quality achieved through multi-part printing.
Overcoming 3D Printing Limitations with Multi-Part Design
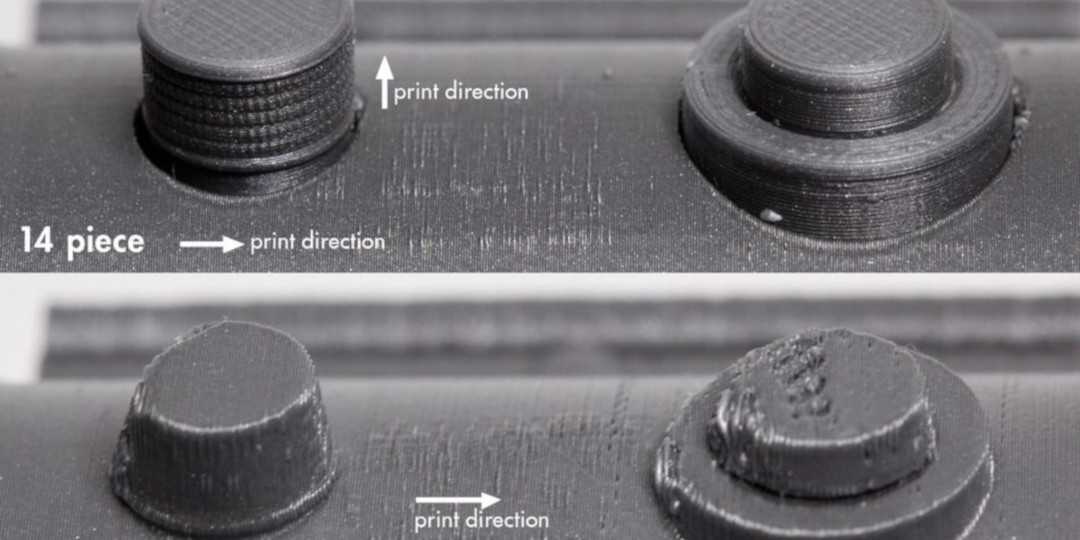
Printing direction is a crucial consideration in 3D printing, often dictating design constraints. A single-piece print, like the example on the left, necessitates design compromises. To print face down as one piece, certain interior angles must be widened, which deviates from the original prop’s design. Even with these modifications, surface imperfections remain visible. Conversely, the 14-piece design, exemplified on the right, overcomes these limitations by dividing the model into multiple parts, allowing for optimized printing orientation for each section and achieving a superior surface finish without compromising design accuracy.
 3_piece_nozzle
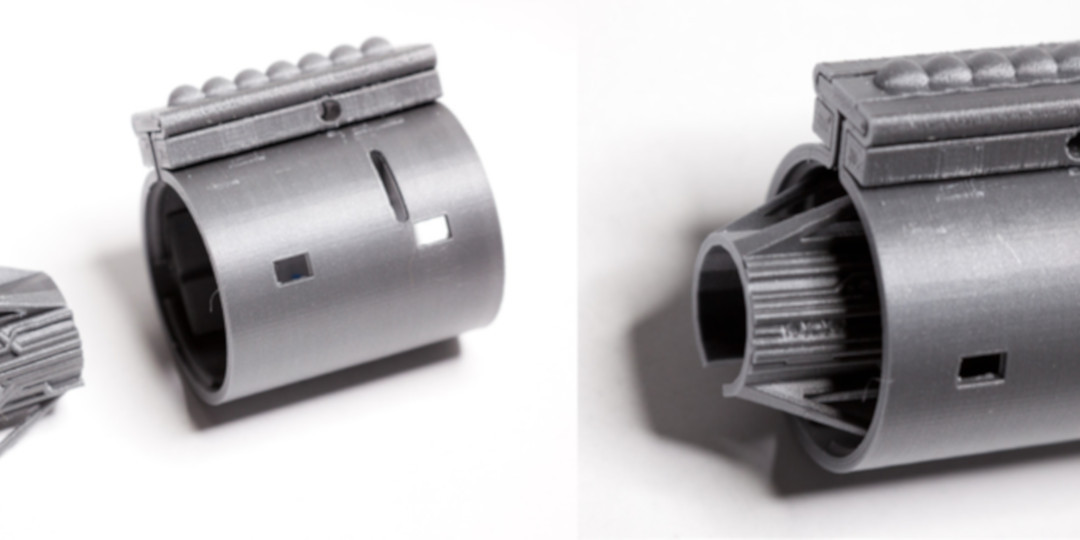
Close-up view of the 3-piece nozzle section of the 14-piece lightsaber, printed separately to optimize surface quality and detail.
Button Details: Capturing Accuracy in 3D Print
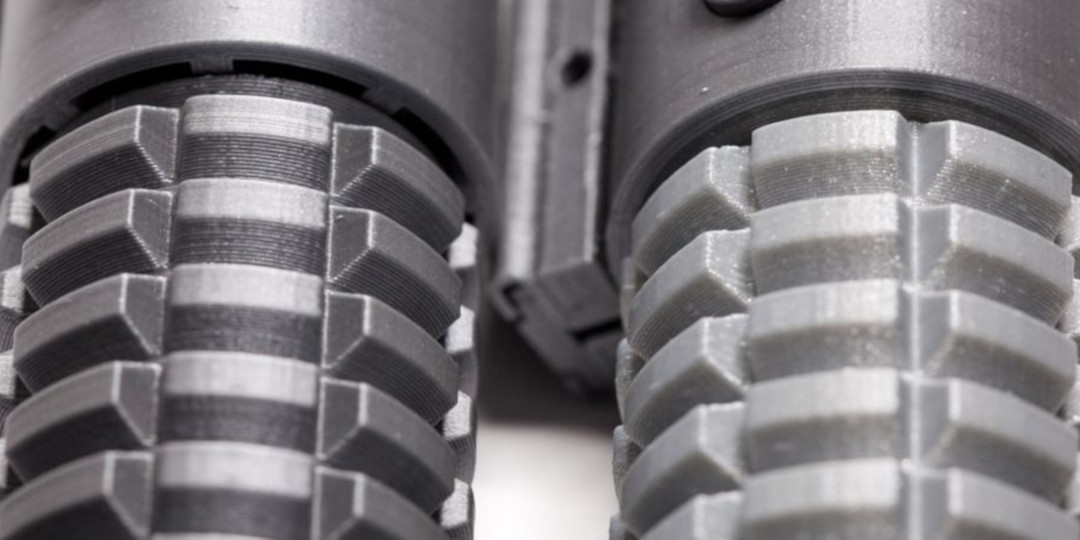
Button details are another area where the design philosophy diverges. Printing buttons in a different orientation from the clamp allows for significantly higher levels of detail. The 4-piece design prioritizes ease of assembly, resulting in compromises on these finer details. As seen in the comparison, the 4-piece model lacks the crisp details and exhibits overhang artifacts around the buttons, which are present and refined in the 14-piece version.
 Knobs_comparisons
A detailed comparison of button and knob details between the simplified 4-piece design and the detailed 14-piece design, highlighting the enhanced fidelity of the latter.
 overhang artifacts
Visible overhang artifacts on the button area of a single-piece 3D print, a challenge overcome by the multi-part approach of the 14-piece lightsaber design.
To ensure the buttons stay securely in place in the 4-piece design without glue, a ‘core’ component was engineered. This core maintains internal tension once the clamp is assembled, holding everything together. Furthermore, this core is removable in the 14-piece version, providing an internal cavity for customization, such as integrating crystal chambers or lighting modules, a popular modification among lightsaber enthusiasts.
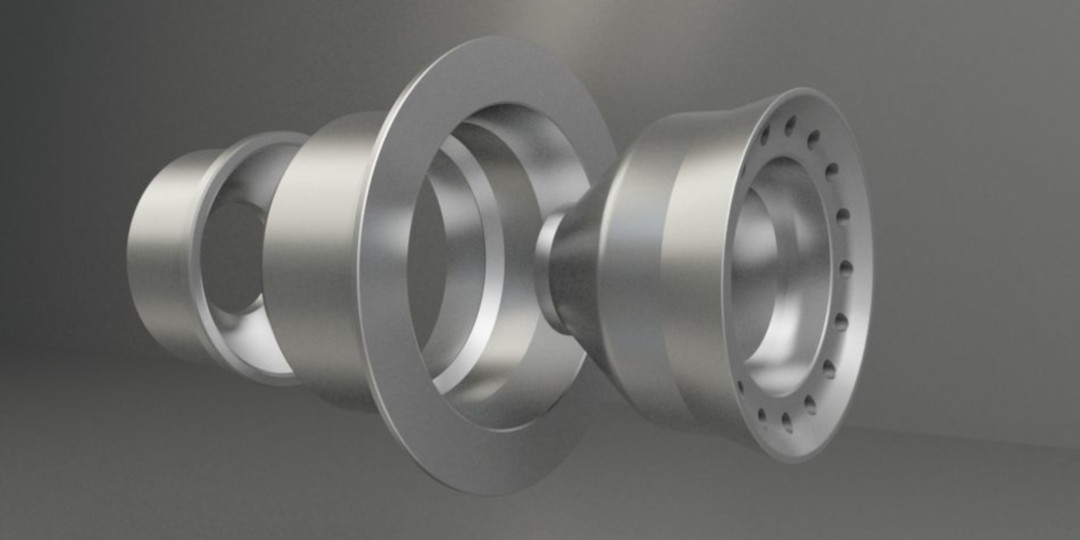
Exploded view of the 3D printed lightsaber, showcasing the internal core designed for structural integrity and potential customization with electronics.
The internal space in the complex version is designed to accommodate modifications. Research into custom lightsaber builds revealed the common practice of incorporating crystal chambers and lighting. The 14-piece design was intentionally created to be modification-friendly, with ample space within the hilt to house a flashlight or laser modules, enabling stunning visual effects. 3D printing empowers designers to not only shape the exterior but also engineer the interior functionality.
 Lightsaber expert -4
Example of a lighting module being installed within the hilt of a 3D printed lightsaber, demonstrating the customization potential of the design.
Seams and Battery Access: Design for Functionality and Aesthetics
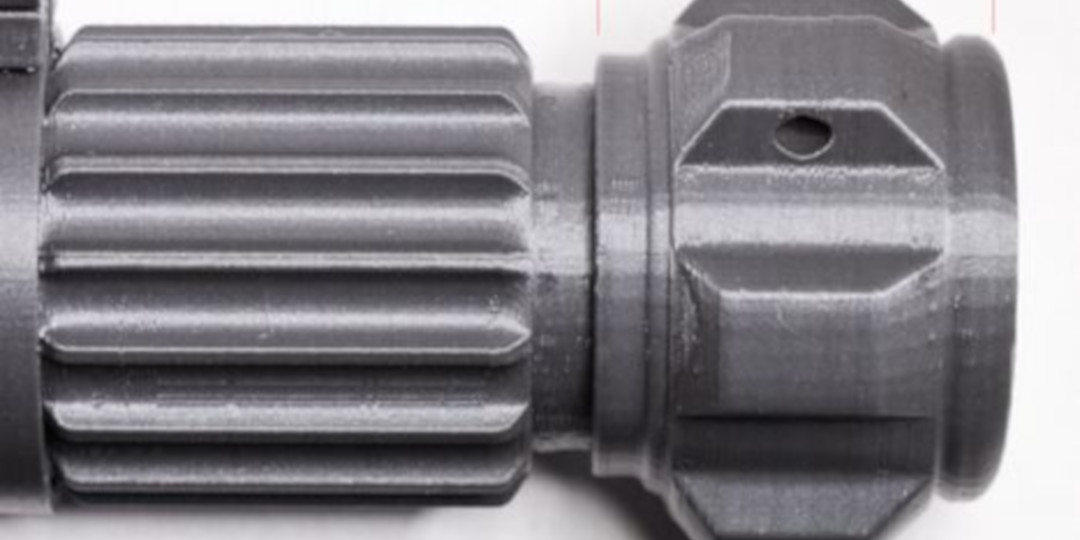
Seams are integral to the visual authenticity of mechanical objects. However, they often pose 3D printing challenges related to overhangs. By designing the cap as a separate piece in the 14-piece lightsaber, both aesthetic and functional benefits are achieved. This separation creates the correct seam line and provides a practical access point for battery replacement should a lighting module be installed.
 Lightsaber expert -11
Close-up view highlighting the clean seam lines and separate cap design of the 14-piece lightsaber, facilitating battery access for potential lighting modifications.
Another instance where part separation enhances both aesthetics and functionality is the ‘grenade’ piece. Dividing the design allows the ‘grenade’ section to be seamlessly slotted inside the clamp in the 14-piece version, resulting in a cleaner and more integrated appearance compared to the 4-piece counterpart.
Is the 14-Piece Lightsaber Worth It? Accuracy vs. Complexity
 10 extra parts
Visual representation of the additional 10 parts in the complex 14-piece lightsaber design, prompting consideration of the value of increased accuracy.
Is the added complexity of 10 extra parts justified for a marginal increase in accuracy? Beyond accuracy, there are practical advantages. For those planning to paint their 3D printed lightsaber, the multi-part design significantly streamlines the painting process. Painting parts individually, separated by material type, eliminates the need for masking tape, leading to a more efficient workflow and a more professional, crisp finish.
 extra parts
Parts of the 14-piece lightsaber design grouped by material for efficient painting, eliminating the need for masking and ensuring a cleaner finish.
 airbrushed
Partially assembled and airbrushed components of the 14-piece lightsaber, demonstrating the ease of painting individual sections for a professional result.
The 14-piece design, prioritizing precision, and the simplified 4-piece design, emphasizing ease of use, offer choices based on user needs. The beauty of 3D prototyping lies in this flexibility – quick iterations and immediate results. The 14-piece design was initially conceived, and the 4-piece version was subsequently derived from it, showcasing the adaptability of 3D design.
 Lightsaber renders
Rendered images of both the 4-piece and 14-piece 3D printed lightsaber designs, allowing for visual comparison of the two versions.
Download, Print, and Assemble Your Detailed Lightsaber
To experience the difference firsthand, download the 14-piece lightsaber design for a detail-oriented build here.
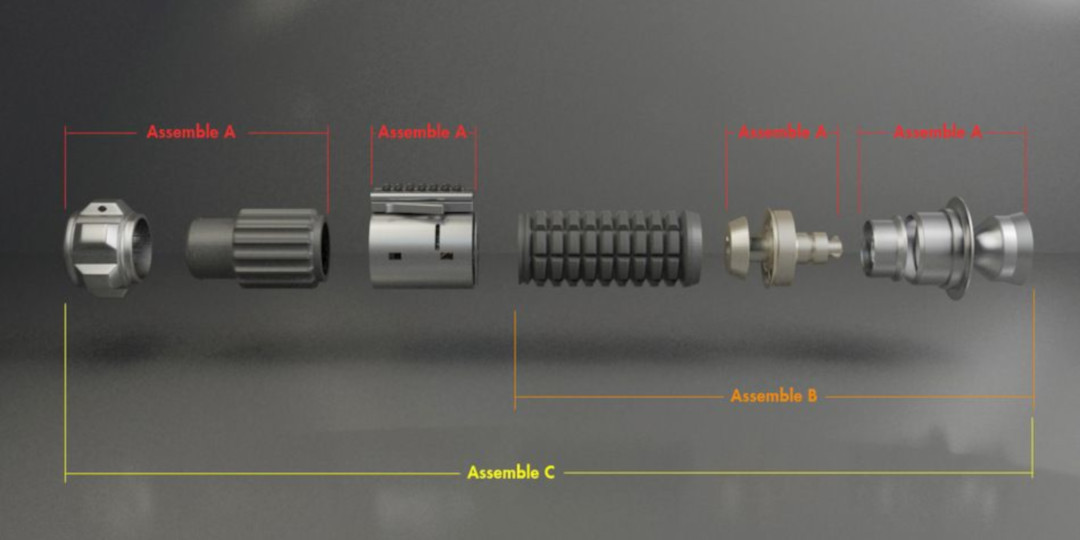 Lightsaber profile Assembly
Assembly diagram for the 14-piece lightsaber, indicating the order of component grouping for easier construction.
 Assembly Clamp instructions
Detailed assembly instructions for the clamp section of the 14-piece lightsaber, highlighting the most intricate part of the assembly process.
The clamp assembly is the most complex part, where the final pin will encounter significant friction, crucial for holding the entire structure together. Minor adjustments to parts 8 or 9 might be necessary to ensure a snug fit.
Printing Instructions for Optimal Results
For best results, print with low temperature (filament dependent) and slow speed (~40mm/s) due to the hollow design of most parts. Parts 8 and 9, due to their size, require particularly slow printing. Print them simultaneously, spaced 2cm apart, at 30% of 40mm/s. Brim and supports are unnecessary and will hinder part fitting. This model was printed at a 0.15mm layer height. Crucially, ensure all parts fit together before painting, as sanding or filing painted parts will damage the finish.
For those unfamiliar with 3D printing, it’s important to recognize its capabilities extend far beyond simple trinkets. The Ultimaker 3D printer serves as a powerful tool, seamlessly translating digital designs into tangible objects, and empowering creators to bring their visions to life.