
Multifunction devices located across all UC Davis library locations provide a convenient all-in-one solution for printing, copying, and scanning. For specialized needs, microform devices are also available at Shields Library.
To utilize these services, users simply need to swipe their Student ID or ReproGraphics card at any multifunction device to release print jobs or access copying and scanning functionalities. Detailed information on payment methods can be found in the “Methods of Payment” section of this guide.
Finding Device Locations
Easily locate multifunction devices within each library by looking for the “Copy / Print” icon on the library floor maps:
Shields Library Floor Maps
Blaisdell Medical Library Floor Map
Printing and Copying Services at UC Davis Libraries
Printing Options
Printing services are readily available at all UC Davis library locations for a nominal fee. Users have the flexibility to print from any library computer workstation or from their personal devices using the campus wireless network.
Step-by-Step Printing Instructions
Whether you are using a library workstation or your own device, Uc Davis Printing is designed to be straightforward. Below are detailed instructions for each method:
Printing from Library Workstations
-
Initiate Print Job: Begin by navigating to http://campusprinting.ucdavis.edu and clicking the prominent “PRINT” button.
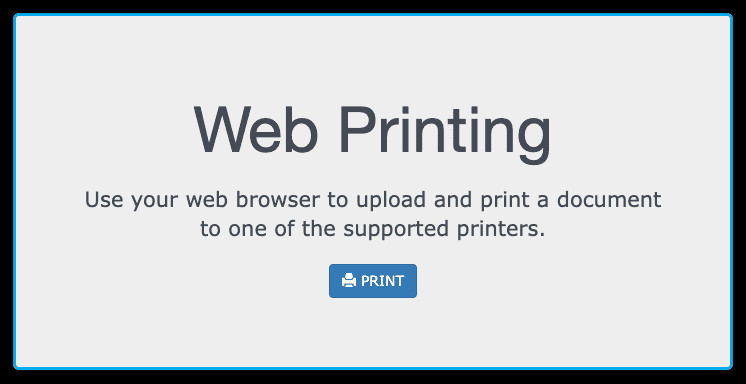 Screenshot of Campus Printing website print button
 -
Select Your Printer: Under the “Printer Name” dropdown menu, choose from the following options:
- “Library Black and White” for standard black and white printing.
- “Library Color” for color prints.
-
Enter Document Information: Complete the form with the following details:
- Document: Click “Choose File” or “Browse” to upload your document for printing.
- Copies: Specify the number of copies needed (default is 1, maximum is 10).
- Page Range: Indicate the desired page range to print (default is all pages).
- Student Kerberos ID: Enter your Repro Graphics Card/ID# (for Visitors, Staff, and Faculty) or your Kerberos ID (for Students). Repro Graphics cards can be purchased from a Paystation located on the 1st floor of Shields Library.
-
Proceed to Print Options: Click the green “CONTINUE” button to advance to the next step and configure your print settings.
-
Configure Print Options: In the “Page Settings” section, verify and adjust the “Paper” dimensions, “Duplex” (single or double-sided printing), and “Orientation” as needed. Click “CONTINUE” to submit your print job.
-
Job Submission Confirmation: Upon successful job processing, a “Complete” message with a green check mark will appear. Take note of the “Job ID” number displayed, as this will be required to retrieve your print job. Close the browser window to complete the printing process from the workstation.
 Screenshot of job completion confirmation with green check mark
 -
Retrieve Your Print Job: Go to the nearest multifunction printer/copier and swipe your Repro Graphics card (Visitors, Staff, Faculty) or Student ID Card (Students) through the Equitrac card reader to release and collect your print job.
Wireless Printing from Your Own Device
UC Davis also provides convenient wireless printing, allowing you to print directly from your laptop or mobile device.
![]() UC Davis Campus Print and Copy Services Wireless Printing Logo
UC Davis Campus Print and Copy Services Wireless Printing Logo
- Access the Printing Portal: Visit http://campusprinting.ucdavis.edu on your device.
- Click “Print”: Locate and click the “Print” button under the “Online Printing” heading.
- Enter ID Number: Enter your Repro Graphics card ID number (or your student Kerberos ID or departmental copy card number) when prompted.
- Choose Printer Option: Select either “Library Black & White” or “Library Color” as your printer option for campus libraries.
- View Details and Pricing: Click on “Details” to review paper size options and associated printing costs.
- Select Document and Options:
- To print a document from your device, browse and locate the file.
- To print a webpage, type in the URL.
- Choose the number of copies and specify the page range.
- Press “Continue”.
- Verify Print Options: Check the print options for paper size, duplex printing, and orientation.
- Submit Job: Click “Continue” to submit your print job.
- Job Approval and Cost Display: The system will process your job, and upon approval, the total cost will be displayed. Click “Submit Job to Printer”. Note the “Job ID number” for retrieval.
- Print at Multifunction Device: Go to any multifunction printer and use your copy card to release and print your job.
- Log Out: Click the “Log Out” button at the bottom of the screen to return to the Wireless Printing homepage.
- Print Job Retention: Note that print jobs are held in the print queue overnight and will be deleted the following day.
Advanced Windows Printing
For users requiring more advanced printing options, UC Davis offers Advanced Windows Printing. This feature allows you to print directly from Windows applications using the “File > Print” command.
- Navigate to Campus Printing Website: Go to http://campusprinting.ucdavis.edu.
- Access Windows Print Drivers: Click on the link “More about Windows print drivers” under the “Advanced Windows Printing” heading.
- Download Print Driver: Click the hyperlinked word “downloaded” to begin the driver installation. Save the “PWhere.exe” file to your desktop for easy access.
- Install Print Driver: Double-click the “PWhere.exe” file to launch the installation wizard and agree to the License Agreement.
- Launch Choose a Printer: Once installed, “Choose a Printer 3.6” will appear on your desktop. Open this application.
- Search for UC Davis Printers: In the Keywords search box, type “ucdavis” and click “Search”. This will display the available printers for wireless printing at UC Davis.
- Select Library Printer: Choose either “Library Black and White” or “Library Color” and click “OK” to connect.
- Confirm Printer Selection: After connecting, it may ask you to “Select” and confirm if you allow the program to make changes to your computer. Choose “Yes”.
- Print from Application: Open the document you wish to print and go to “File > Print”.
- Select PrintWhere Printer: In the print dialog box, choose “PrintWhere 3.6” from the “Name” drop-down menu. If you have multiple printers, click “Printer Properties” to select the desired UC Davis library printer.
- Retrieve Print Job: After sending the job, go to a printer and swipe your Repro Graphics or Student ID Card (magnetic stripe up) to finalize and retrieve your print job.
Troubleshooting Printing Issues
Encountering difficulties with UC Davis printing? Here are some helpful tips:
- Webpage Printing with Login: To print a webpage that requires a login, save the page as an HTML file on your computer and then print the saved file.
- Email and Attachment Printing: For emails or email attachments, save them as files to your computer and then select the file for printing using the “Browse” button.
- Important Note: Library computer workstations do not support downloading files directly to the hard drive.
For further assistance, you can also try printing via the Campus Printing website directly.
Still having trouble? Contact [email protected] for dedicated support.
Copying Services
Self-service copying is available at all UC Davis library locations. Instructions for using the copiers are conveniently posted near each machine. Standard fees apply for copying services.
Printing and Copying Costs
| Format | 8.5 x 11 | 11 x 17 |
|---|---|---|
| Black and white | $0.10 | $0.20 |
| Color | $0.25 | $0.50 |
| Double-sided | Charged as two pages | Charged as two pages |
 Square image of print, scan, and copy icons
Scanning Services
Self-service scanning is also available at all UC Davis library locations for a small fee. Select the scanning option from the main menu on any multifunction device to begin.
Important Scanning Tip: Due to card reader timeout limitations, it is recommended to save or send your scans every two minutes to prevent data loss.
Scanning Price
$0.05 per scan
 Square image of Microform Reader
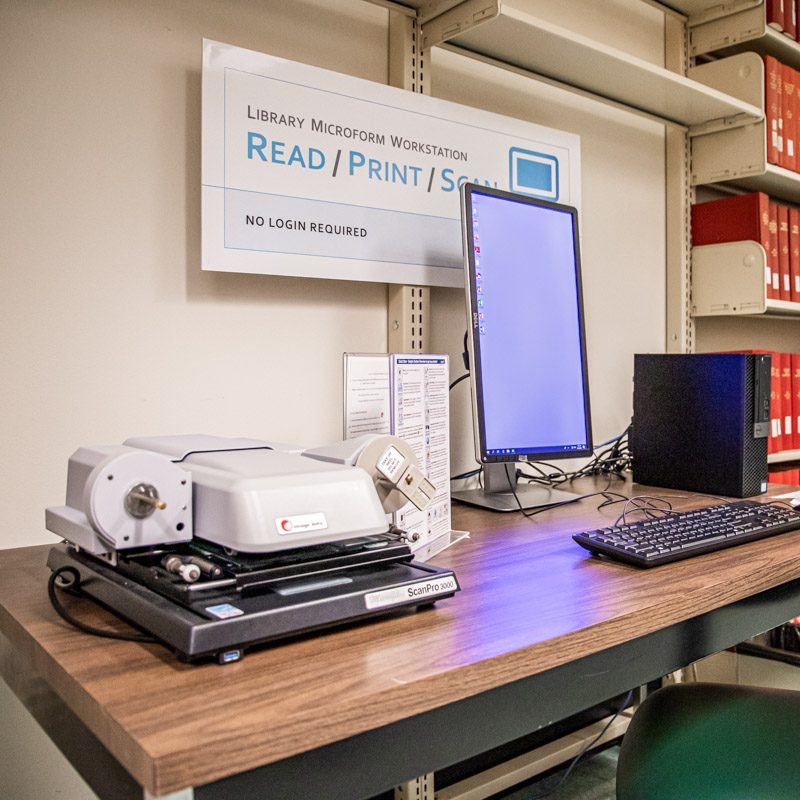
Microform Reading and Scanning at Shields Library
Shields Library houses a dedicated microform reader located on the lower level in the Microforms Reading Room. This specialized equipment supports microfilm, microfiche, and microcard formats. A connected scanning workstation allows users to convert microform content into digital PDFs.
The microform reader is available on a first-come, first-served basis with a 2-hour time limit when others are waiting. UC Davis affiliates with an active @ucdavis.edu email address can reserve the microform reader online up to two weeks in advance for extensive projects.
Assisted scanning services are available through the circulation desk. For assistance with the microform reader, please contact the Shields circulation desk at 530-752-8792 or [email protected].
Microform Scanning Price
$0.10 per scan
Payment Methods for UC Davis Printing and Copying Services
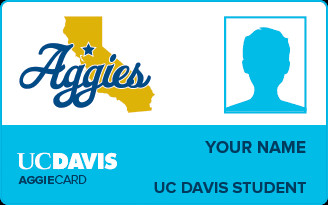 Image of student ID card for payment
Student ID Card Payment
Students can conveniently use their Student ID card for printing, copying, and scanning services. Usage is tracked, and student accounts are billed at the end of each academic term. A minimum charge of $5.00 per billing cycle applies. If actual usage is less than $5.00, the remaining balance will be carried over as a credit to the next billing period.
 Image of Repro Graphics Card
Repro Graphics Card Payment
Repro Graphics cards can be purchased from vending machines located at:
- Shields Library: First Level, near the entrance, to the left of New Books.
- Blaisdell Medical Library: Adjacent to the multifunction devices, next to the stacks.
Vending machines accept cash only. Credit cards and coins are not accepted, and change is not provided. A $0.50 fee is deducted from the initial purchase price for the card itself. Cards are initially dispensed with a $0.50 value. Follow the instructions on the vending machine carefully to ensure the full amount paid is credited to the card.
If you encounter issues adding value to your card, contact Repro Graphics at [email protected] to request a credit. Please allow several days for credit processing. Additional value can be added to Repro Graphics cards at any vending machine that dispenses these cards.
Lost or Damaged Cards
For lost or damaged Student ID cards, replacements can be obtained at the AggieCard Office in 253 Memorial Union.
For Repro Graphics cards, contact Repro Graphics for replacement options.
Contact Repro Graphics
[email protected]
530-754-2127
For any further inquiries or assistance regarding UC Davis printing services, do not hesitate to contact Repro Graphics.