Have you ever been captivated by a graphic that seems to shift and move as you walk past? Perhaps an image that suddenly gains depth, pulling you into its visual story? You’re not imagining things; you’ve likely encountered the fascinating world of Lenticular Prints.
Those nostalgic, moving image stickers from childhood – the ones where a slight tilt brought She-Ra’s sword to life or transformed a robot before your eyes – are early examples of the lenticular principle. Today, this technology has evolved far beyond simple novelties, creating stunning visual effects that capture attention and enhance communication in various applications.
The Allure of 2D to 3D: How Lenticular Prints Work
One of the most compelling features of lenticular prints is their ability to deliver a striking 3D or animated experience without requiring special eyewear or digital displays. In environments like museums, trade shows, or retail spaces, lenticulars offer an engaging, cost-effective way to add depth and motion to static panels. These prints ingeniously simulate movement and dimension using specially prepared two-dimensional images.
But how exactly do these 2D prints conjure a 3D illusion? The secret lies in a technique called stereoscopy, a visual phenomenon that occurs when each of your eyes is presented with slightly different perspectives of the same scene simultaneously. Your brain then merges these two offset views, interpreting them as a single image with added depth and volume. Think of it as your brain combining Image 1 and Image 2 to construct a far more dynamic optical illusion. This process is achieved by the designer through a technique known as image interlacing.
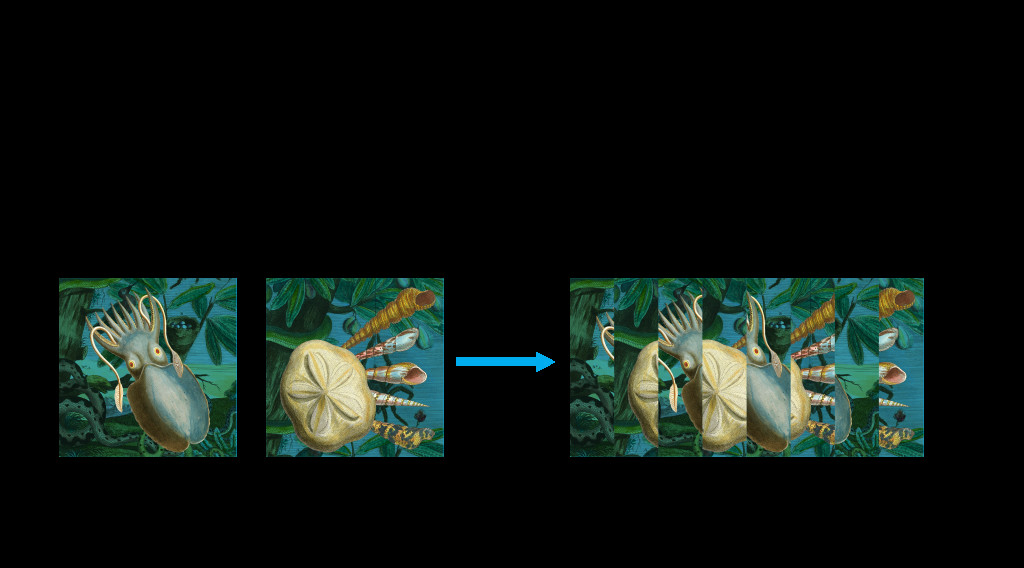 infographic showing how two images are combined into an interlaced graphic
Decoding the Interlaced Image: The Role of the Lenticular Lens
You might wonder why an interlaced image, on its own, doesn’t appear as a jumbled mess. And what exactly is “lenticular”? The term “lenticular” originates from “lenticule,” referring to a small lens. In this context, a lenticular lens is a sheet of plastic with a series of these lenticules, or convex lenses, running parallel across its surface.
These tiny, precisely shaped lenses are crucial. They refract light in a way that allows you to view different interlaced images from distinct angles. Essentially, the lenticular lens acts as a decoder, directing your left and right eyes to see different sets of image strips within the interlaced print. This clever manipulation of light and image angles is what brings the “changing” graphic to life.
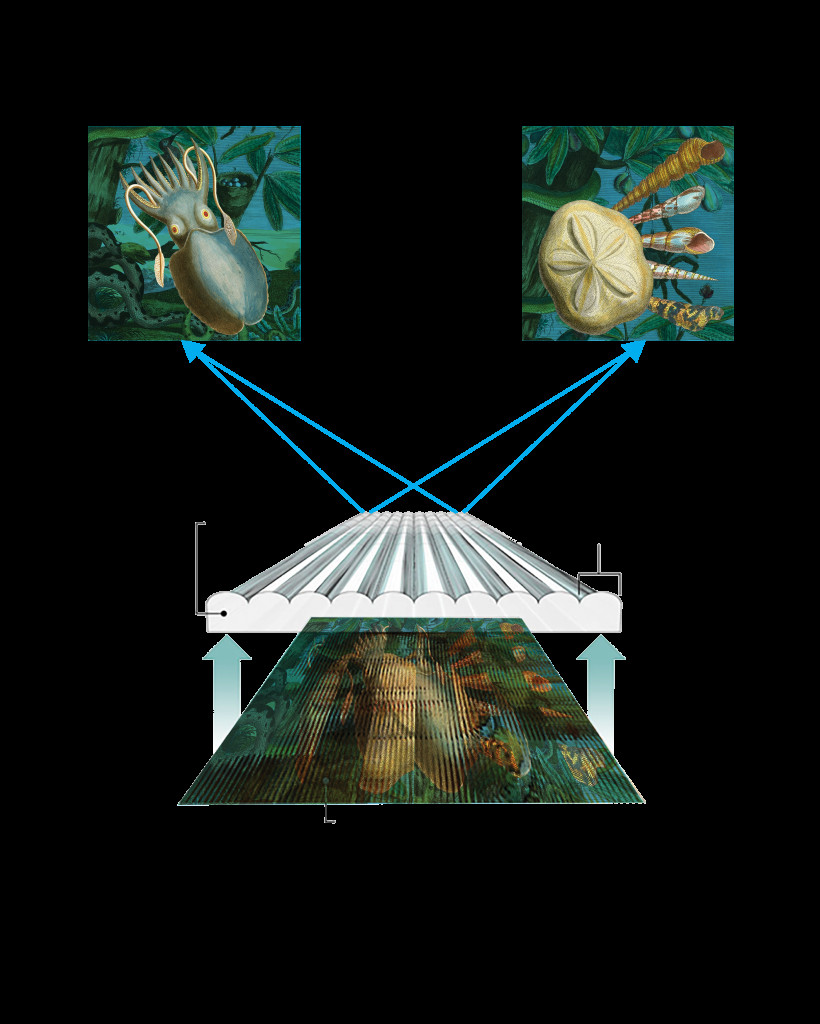 the different images can only be seen from one direction because of the lens on top of the graphic
Why Choose Lenticular Prints? Applications and Impact
Beyond their inherent novelty, lenticular prints offer significant advantages for visual communication. They inject dynamism into displays of static photographs and graphics, instantly making them more engaging and memorable. Lenticulars can also enhance content depth. By layering images, they can effectively showcase before-and-after scenarios, illustrate processes, or present a series of related images on a theme, revealing subtle shifts and connections.
Museums and educational institutions have found lenticular prints particularly useful for enhancing exhibits. For instance, the Smithsonian Libraries utilized lenticular prints for their Magnificent Obsessions: Why We Collect exhibition. Visitors witnessed an object from a collection transform into the image of its collector, forging a visual link and hinting at the interwoven stories behind the object and its owner. This application demonstrates the power of lenticulars to create visual narratives and deepen audience engagement.
Crafting a Lenticular Print: A Three-Phase Process
Creating a lenticular print involves a meticulous process, generally divided into three key phases: design, printing, and mounting.
Phase 1: Design – Laying the Foundation
The design phase is critical and begins with determining the type of lenticular effect desired. There are primarily three options:
- Flip Lenticulars: These create transitions between distinct images, smoothly flipping from one to another as the viewing angle changes. They can use up to 15 frames, ideal for simple animations or showcasing a sequence of different images.
- 3D Lenticulars: Utilizing specialized 3D photography or 3D rendering techniques, these prints simulate depth and dimensionality. They offer a convincing three-dimensional effect that draws the viewer in.
- “4D” Lenticulars: These combine the elements of flip and 3D effects, creating complex visuals that incorporate both motion and depth.
Next, establishing the viewing distance is paramount. The intended distance between the viewer and the final print directly impacts how the design software interlaces the images. This factor also dictates the selection of the appropriate lenticular lens material to ensure optimal visual clarity at the designated viewing distance.
Finally, file preparation involves assembling the images. Depending on the chosen lenticular type, the designer compiles a series of images, typically in a layered Photoshop document. The layering order is crucial for 3D lenticulars, where images intended to appear further back are placed on lower layers, creating a sense of depth.
The following screenshots illustrate the layering process used by designer Madeline Wan for the Magnificent Obsessions lenticular.
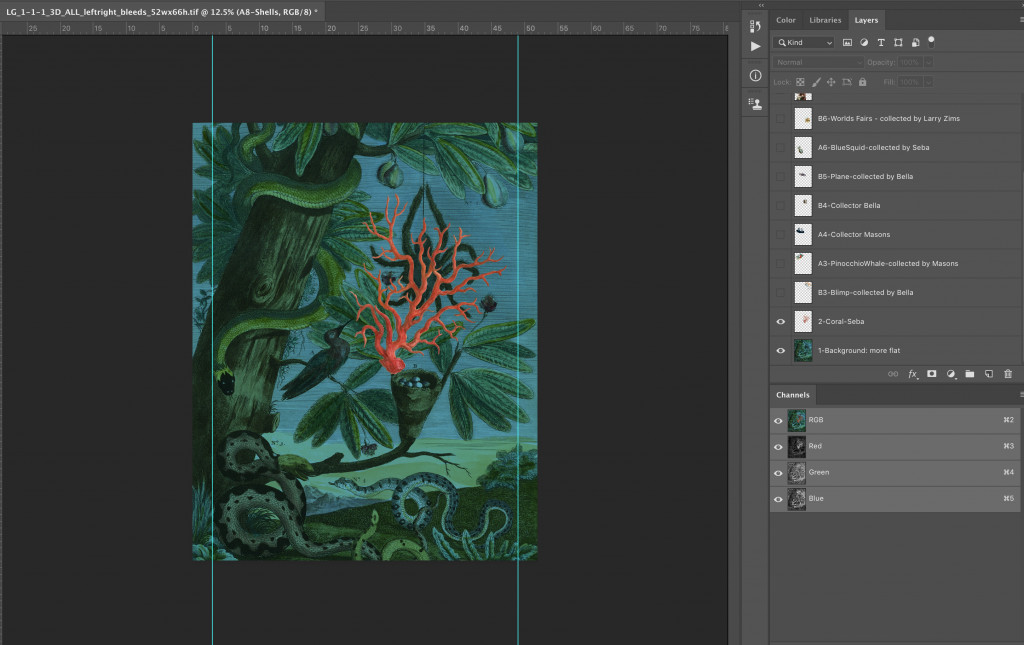 image of natural elementThe background image is prepared without a 3D effect to establish the base layer.
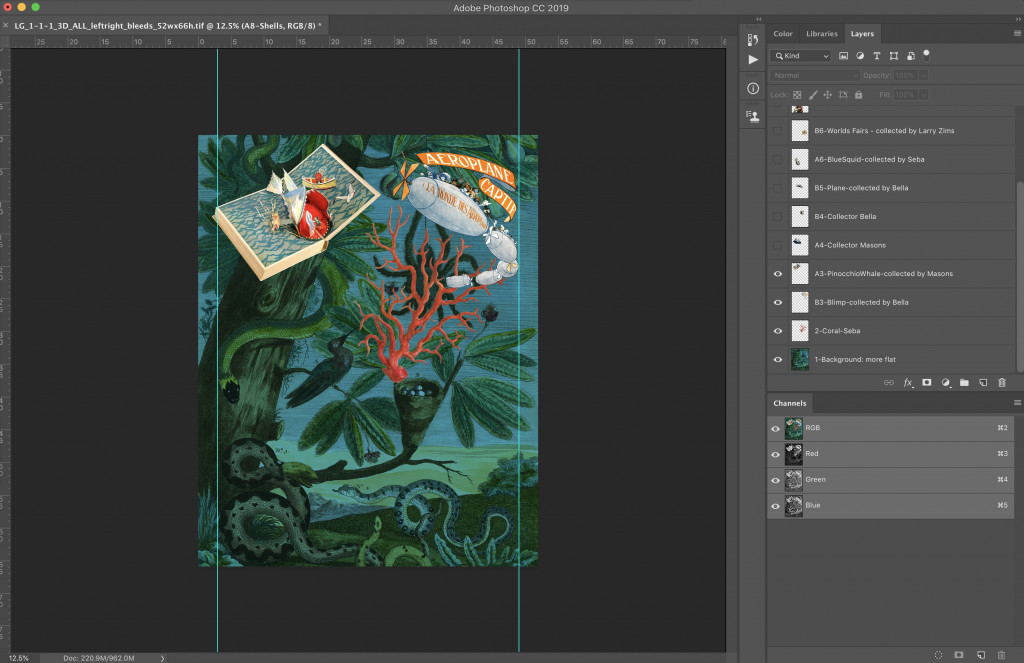 image of book and airshipSubsequently, images of a book and an airship are layered above the background, adding elements of interest.
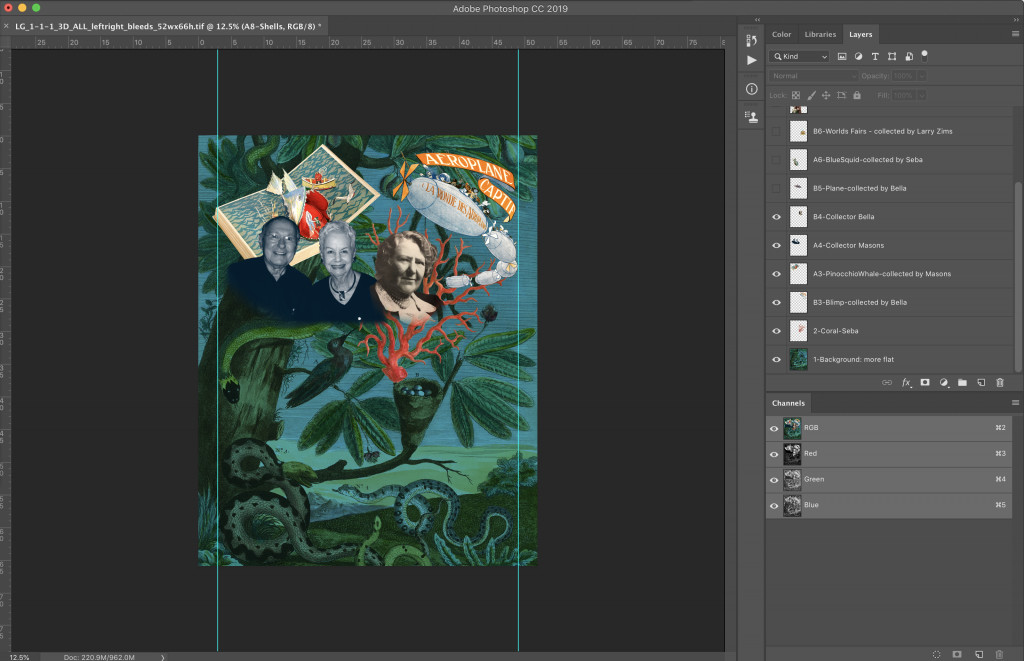 image of three peopleAn image featuring three individuals is then positioned on top of the book and airship layer, building visual depth.
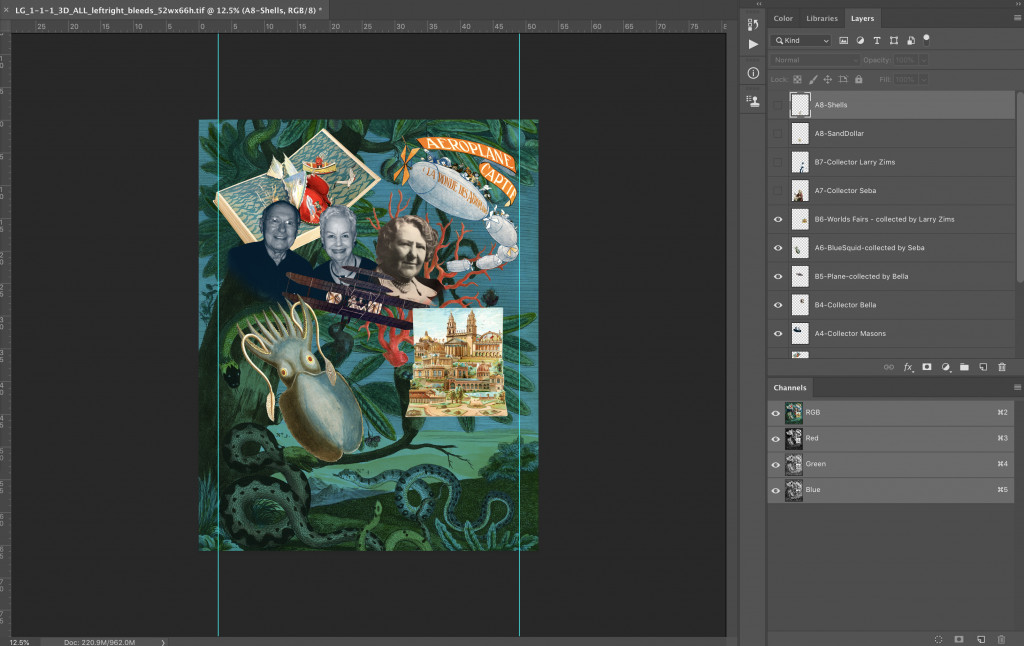 image of aquatic creature and souvenirImages of an aquatic creature and a souvenir from the 1893 World’s Fair are added to the next layer, enriching the visual narrative.
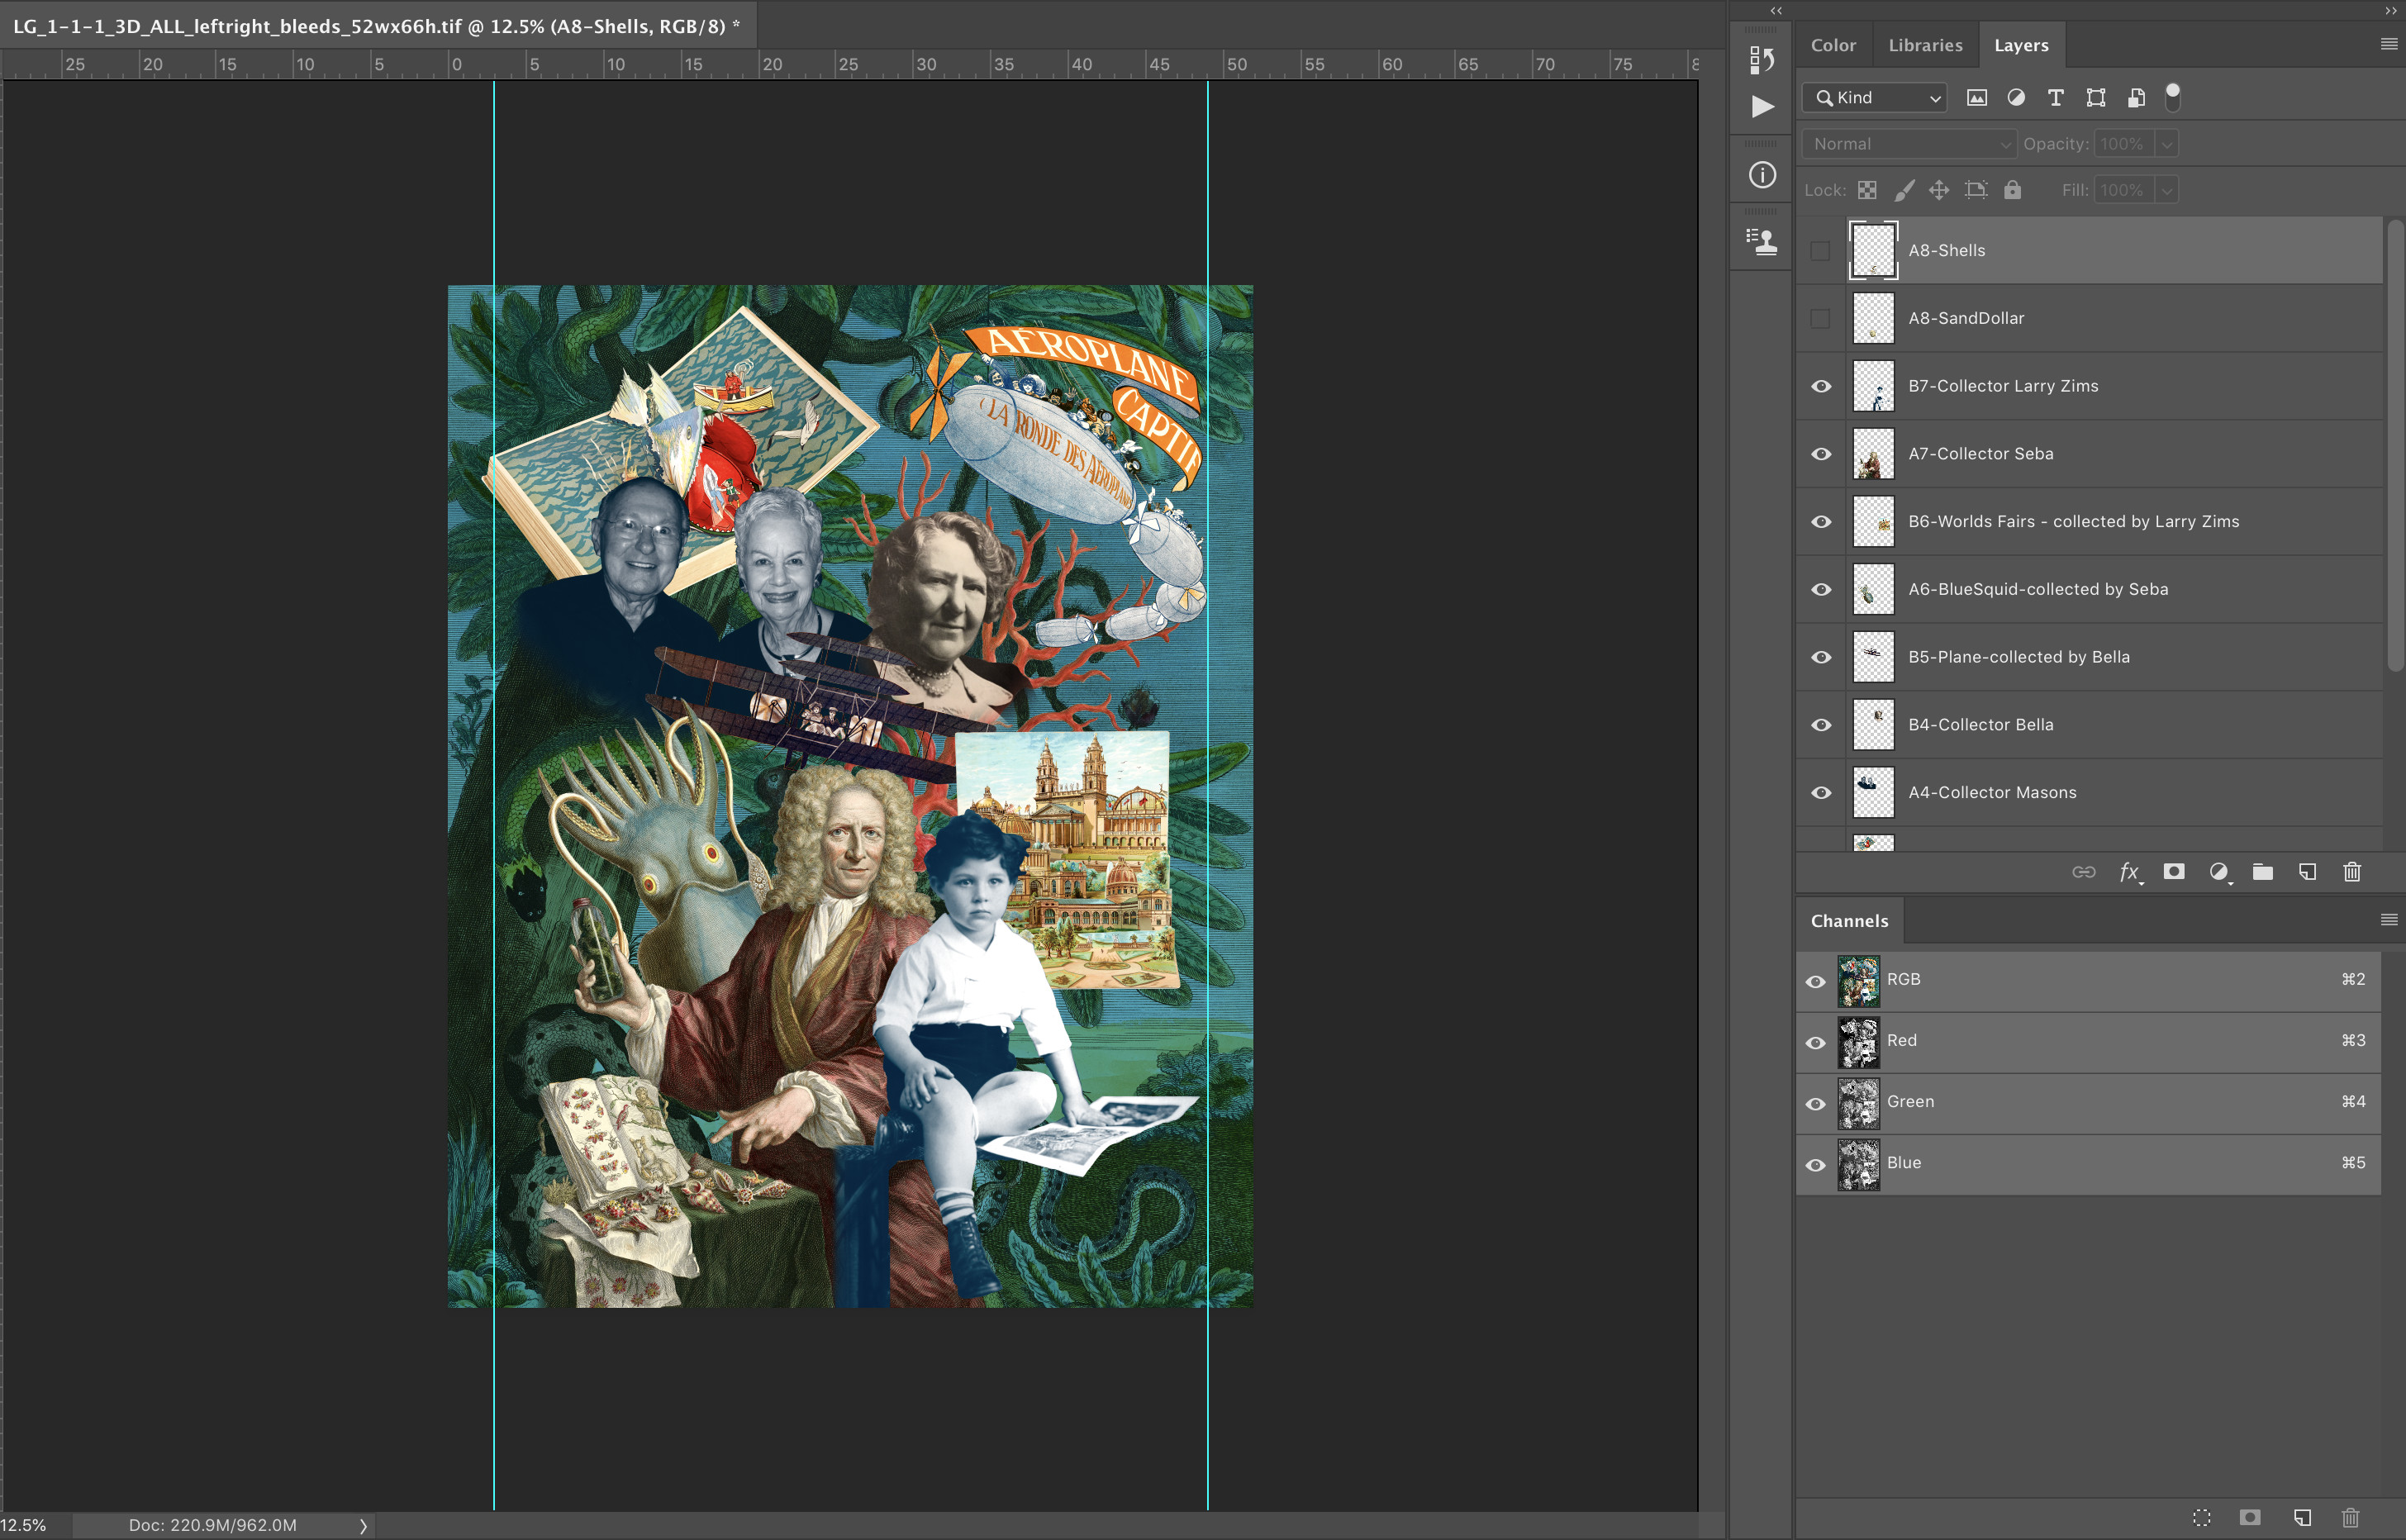 image of boy and gentlemanThe final layer incorporates images of a young boy and a gentleman in a powdered wig, completing the layered composition.
Following image preparation, specialized graphics software is used to interlace the layered images, preparing them for printing.
Phase 2: Printing – Bringing the Design to Life
The interlaced files are then printed using traditional wide format printers. For projects like the Magnificent Obsessions graphic, specialty lenticular printing companies, such as Parallax Lenticular Printing, are often engaged to handle the interlacing and final print production due to their specialized equipment and expertise.
It’s important to note that the printed interlaced image will appear distorted at this stage. If the final lenticular is intended to be a 15-frame animation, the print will resemble a chaotic arrangement of 15 images seemingly shredded and incorrectly reassembled. This unusual appearance is normal and necessary for the lenticular effect to function correctly.
Phase 3: Mounting – The Final Transformation
The printed interlaced sheet then undergoes mounting onto a clear plastic lenticular lens sheet. This lens sheet is patterned with rows of lenticules, each precisely designed to capture and redirect specific image strips from the interlaced print.
Perfect alignment between the image strips and the lenticules is absolutely critical. This precise alignment is what allows different parts of the graphic to recede into the background, seemingly float above the surface, or transition smoothly from one image to another as the viewing angle shifts.
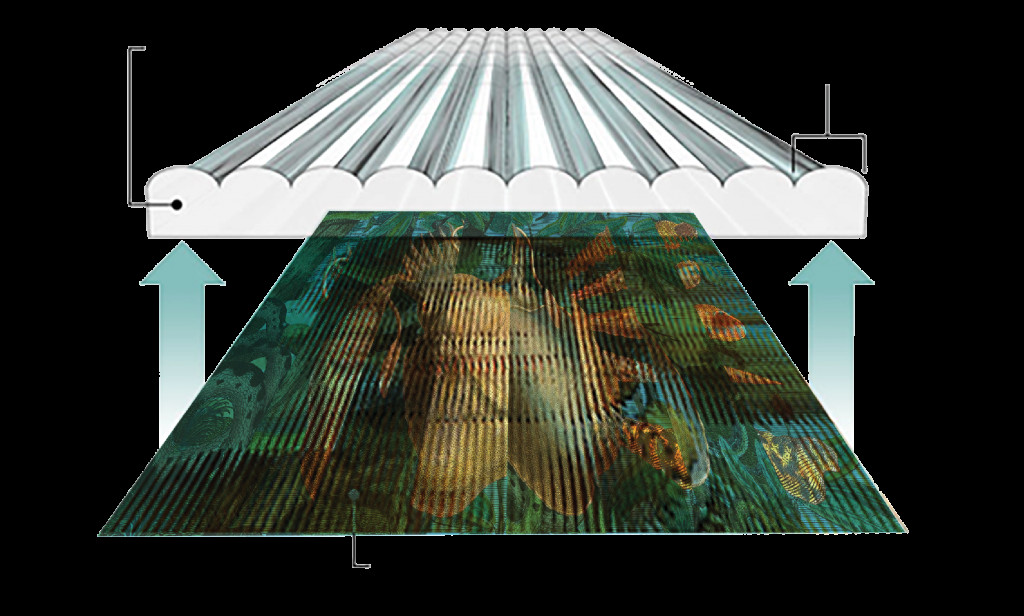 lenticular lens being mounted on interlaced graphicThe lenticular lens is carefully applied on top of the interlaced graphic. Accurate alignment of the lenticules with the segmented images is the most vital step in ensuring the desired visual effect.
Alternative Method: Direct Print to Lens
An alternative, more streamlined method involves printing directly onto the reverse side of the lenticular lens film. This approach bypasses the often complex and potentially problematic step of laminating and mounting the interlaced print onto the lens, mitigating risks such as trapped dust or air bubbles. However, this direct print method generally requires more advanced printing technology, such as screen printers or UV inkjet printers.
If you’re interested in experiencing lenticular prints firsthand, consider visiting Magnificent Obsessions at the National Museum of American History’s Dibner Gallery in 1 West when the Smithsonian reopens. In the meantime, explore the Smithsonian’s extensive online resources to delve deeper into the world of collections and exhibitions.