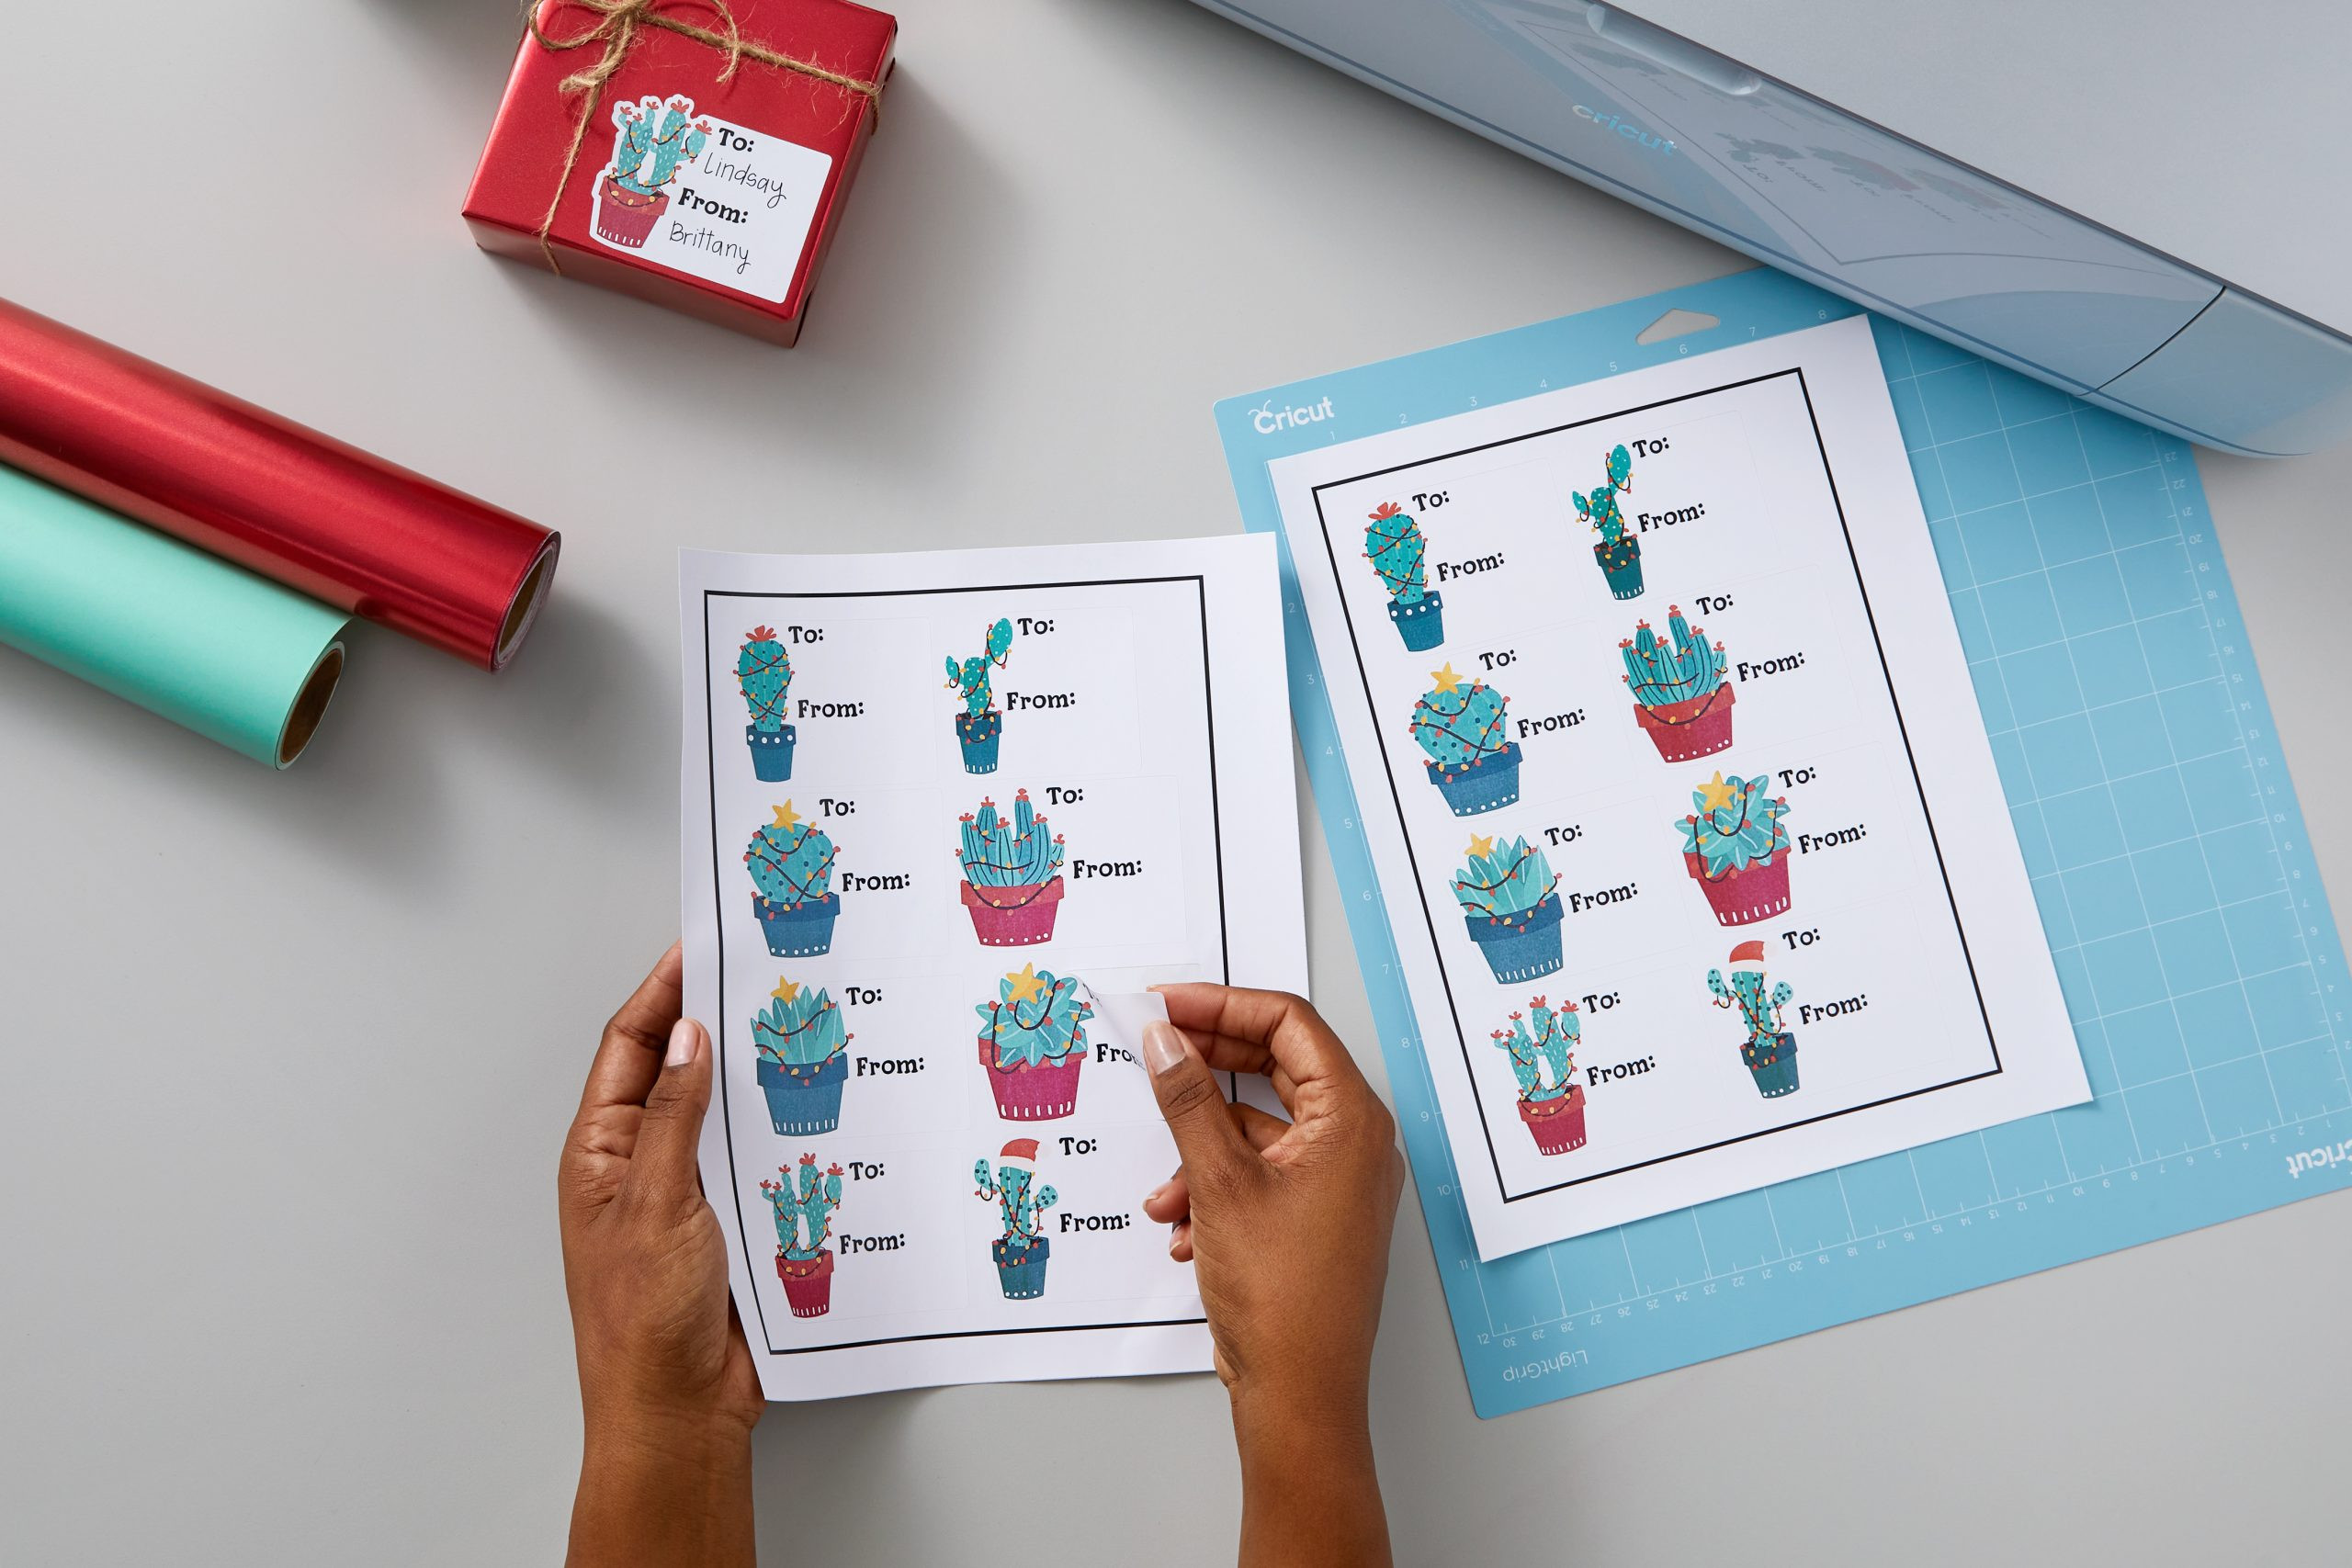
Cricut machines are incredibly versatile, and one of their standout features is the “Print Then Cut” capability. This function allows you to create custom stickers, labels, cards, and much more by printing designs from your home printer and then precisely cutting them out with your Cricut machine. If you’re new to this feature or looking to refine your technique, this guide will walk you through everything you need to know about How To Print And Cut On Cricut, ensuring you achieve professional-looking results every time.
Understanding Cricut Print Then Cut
What Exactly is Print Then Cut?
Print Then Cut is a powerful operation within Cricut Design Space software that seamlessly integrates your home printer with your Cricut cutting machine. It works by first printing your designed images or text onto your chosen material using your inkjet printer. Crucially, Design Space adds a black rectangular box, known as sensor marks or registration marks, around your design during the printing process. These marks act as guides for your Cricut machine’s built-in sensor.
After printing, you place the printed sheet onto your Cricut cutting mat and load it into your Cricut machine. The machine then uses its sensor to scan these registration marks, accurately identifying the boundaries of your printed design. Once scanned, your Cricut precisely cuts around your printed elements, giving you perfectly cut printed images.
The benefits of using Print Then Cut are numerous:
- Precision Cutting: Achieve accurate cuts around intricate designs that would be difficult or impossible to cut by hand.
- Custom Sizes: Create printed items at the exact dimensions you need.
- Design Versatility: Utilize Cricut’s extensive image and font library to create unique print then cut designs.
- Material Flexibility: Cut various printable materials of different thicknesses, expanding your project possibilities.
 Print then cut Cricut how to do
Compatible Cricut Machines for Print Then Cut
Before you start, ensure you have a Cricut machine that supports the Print Then Cut feature. The following Cricut models are compatible:
- Cricut Maker 3
- Cricut Explore 3
- Cricut Maker
- Cricut Explore Air 2
- Cricut Explore Air
Essential Supplies for Print Then Cut
To get started with Print Then Cut, gather these essential supplies:
- Compatible Cricut Machine: (Refer to the list above)
- Inkjet Home Printer: An inkjet printer is crucial for Print Then Cut. Laser printers are not compatible. Many Cricut users recommend specific inkjet printer models for optimal results, so it’s worth researching user reviews for printer recommendations.
- Printable Material: Choose your material based on your project. Popular options include:
- White Cardstock: Ideal for cards, tags, and projects where stiffness is needed.
- Printable Sticker Paper: Perfect for creating custom stickers.
- Printable Vinyl: Durable and water-resistant, great for labels and outdoor stickers.
- Printable Clear Sticker Paper: For transparent stickers and overlays.
- Design Space: Cricut’s design software, accessible on compatible devices (Windows/Mac computers, iOS devices). Note that while you can design Print Then Cut projects on the Android app, printing and cutting must be done using Design Space on a Windows/Mac computer or iOS device.
- LightGrip Cutting Mat: The blue-colored LightGrip mat is recommended for most printable materials.
 Cricut Print then cut which devices
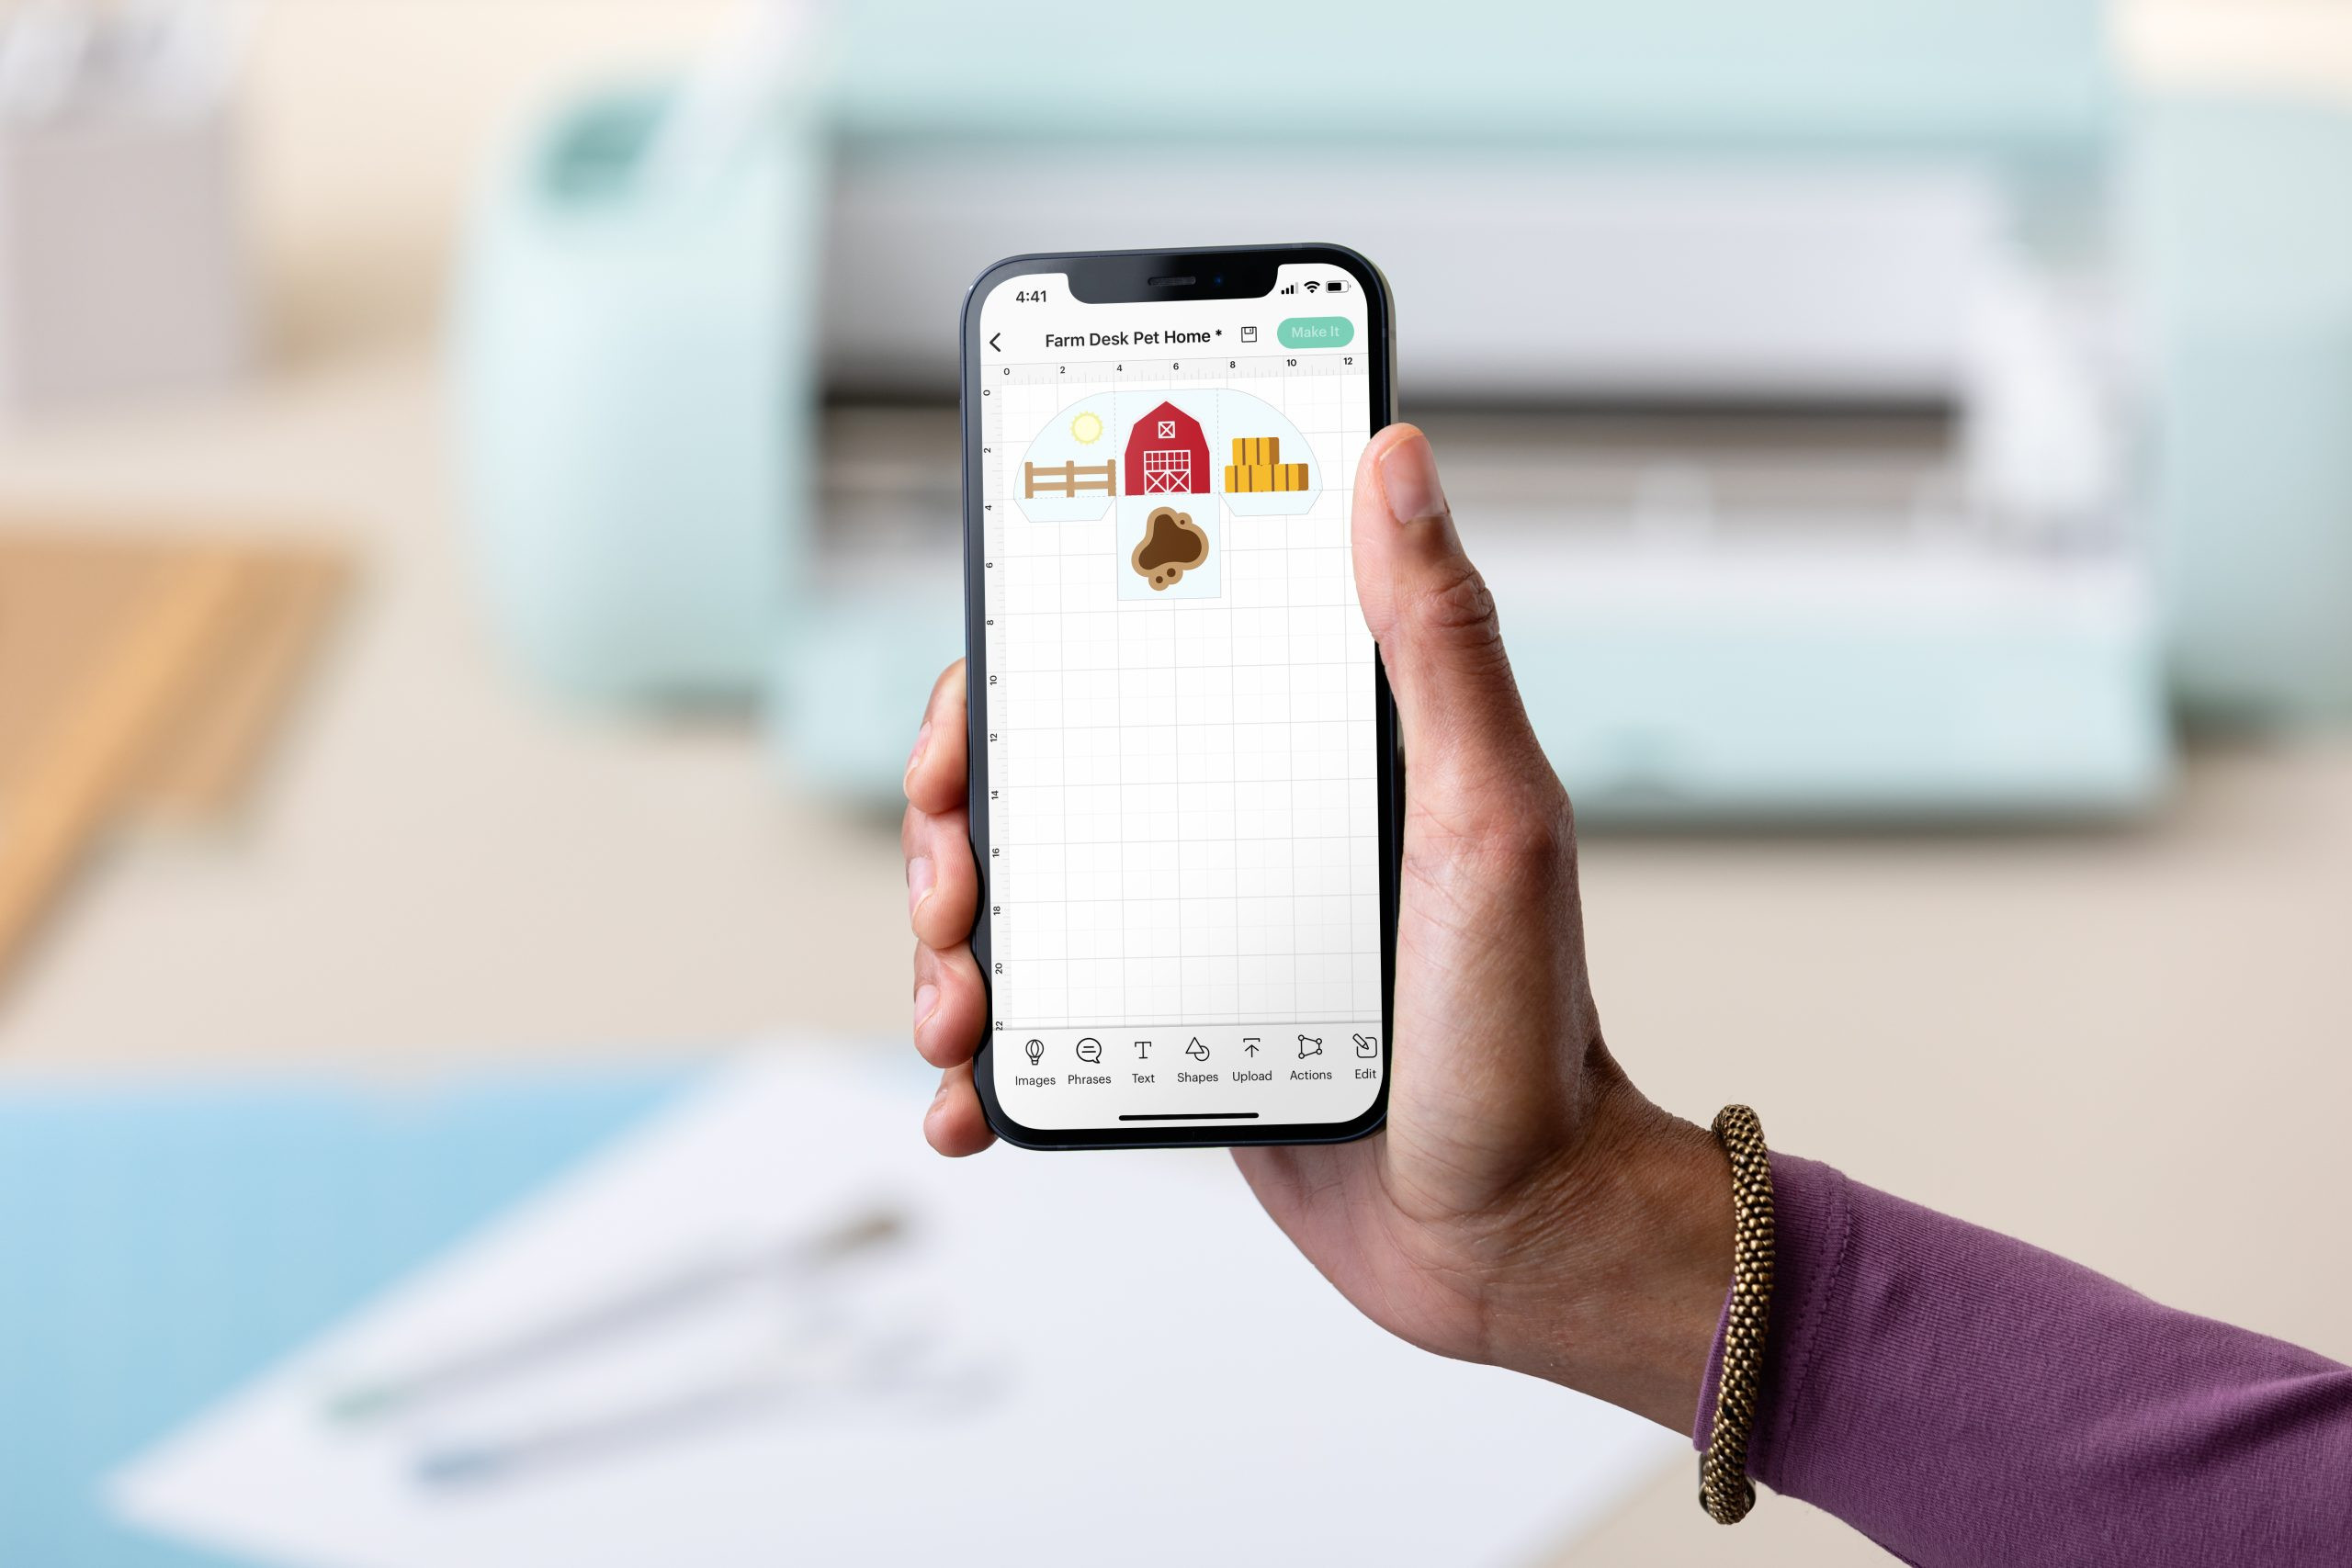
Designing Your Print Then Cut Projects in Design Space
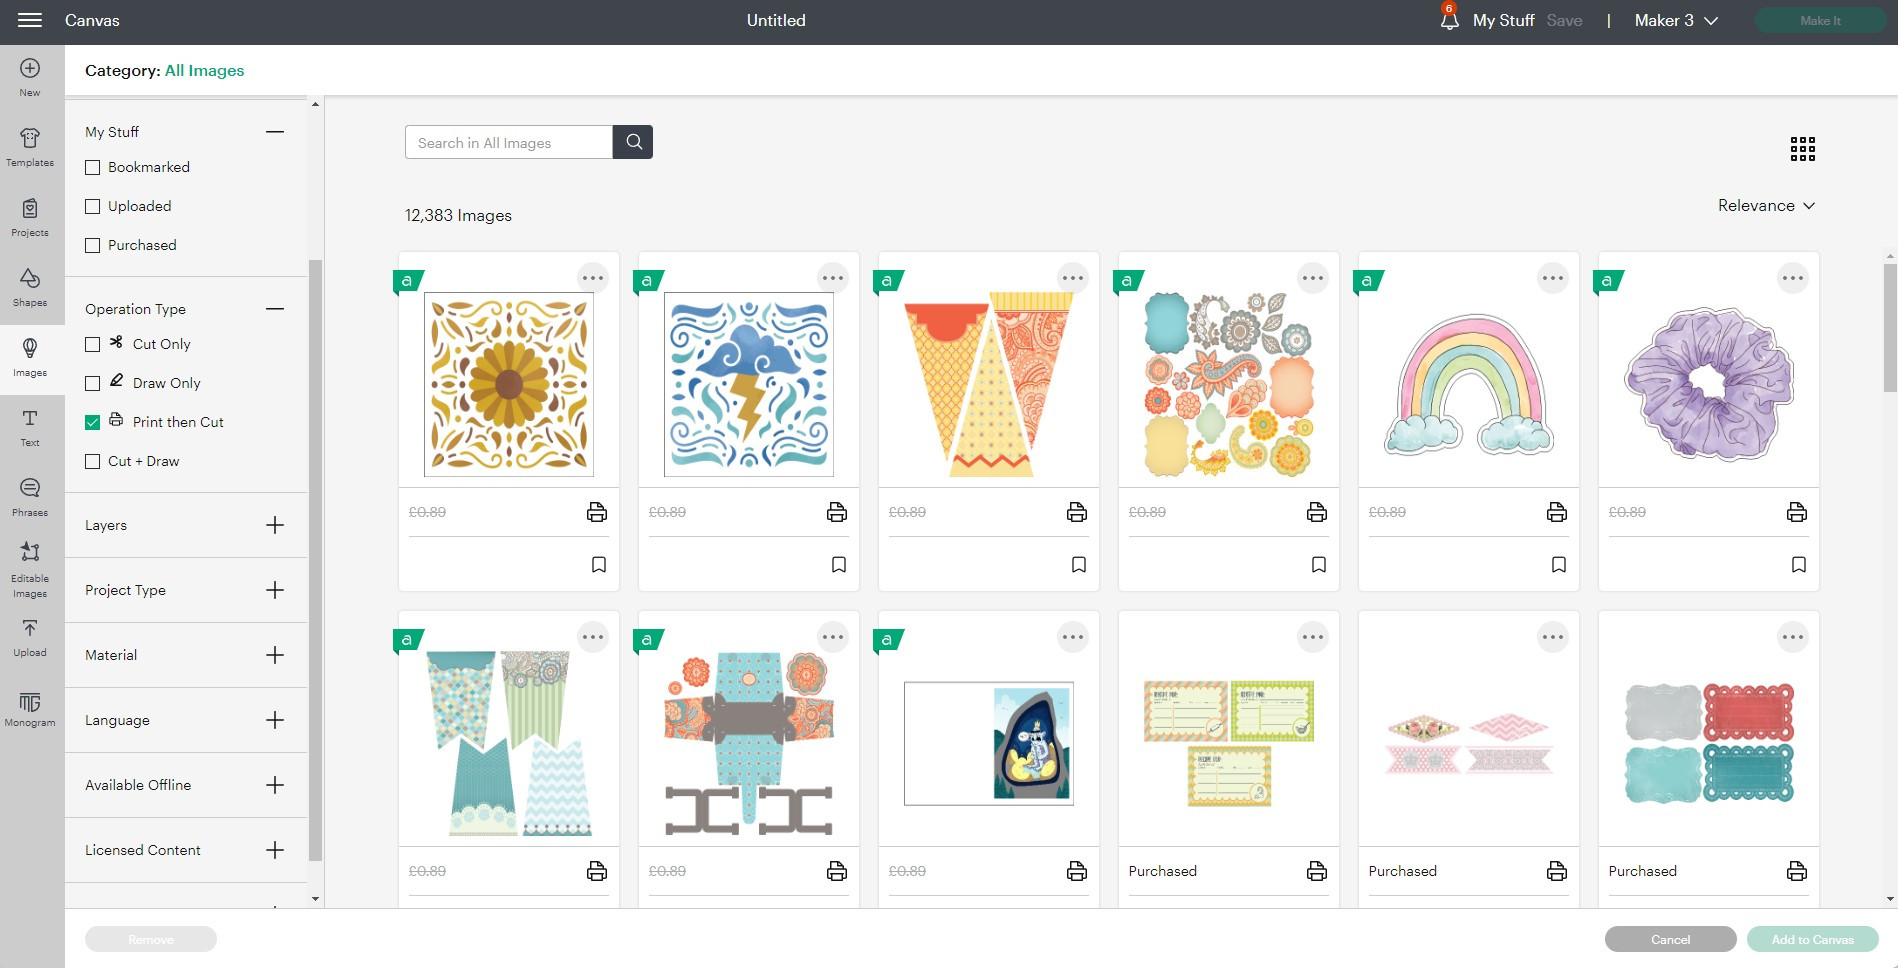
Finding Ready-Made Print Then Cut Images
Cricut Design Space offers a vast library of images, many of which are already formatted for Print Then Cut. To find these images:
- Open Cricut Design Space and start a New Project.
- Click on “Images” in the design panel on the left-hand side.
- Access the “Filters” menu, usually located on the top left or right of the image library.
- Scroll down or find the “Operation Type” filter.
- Select or tick the “Print Then Cut” option.
This filter will display all images in the Cricut library that are pre-designed for Print Then Cut projects, saving you time and effort in converting images.
 How to find print then cut images in Cricut Design Space
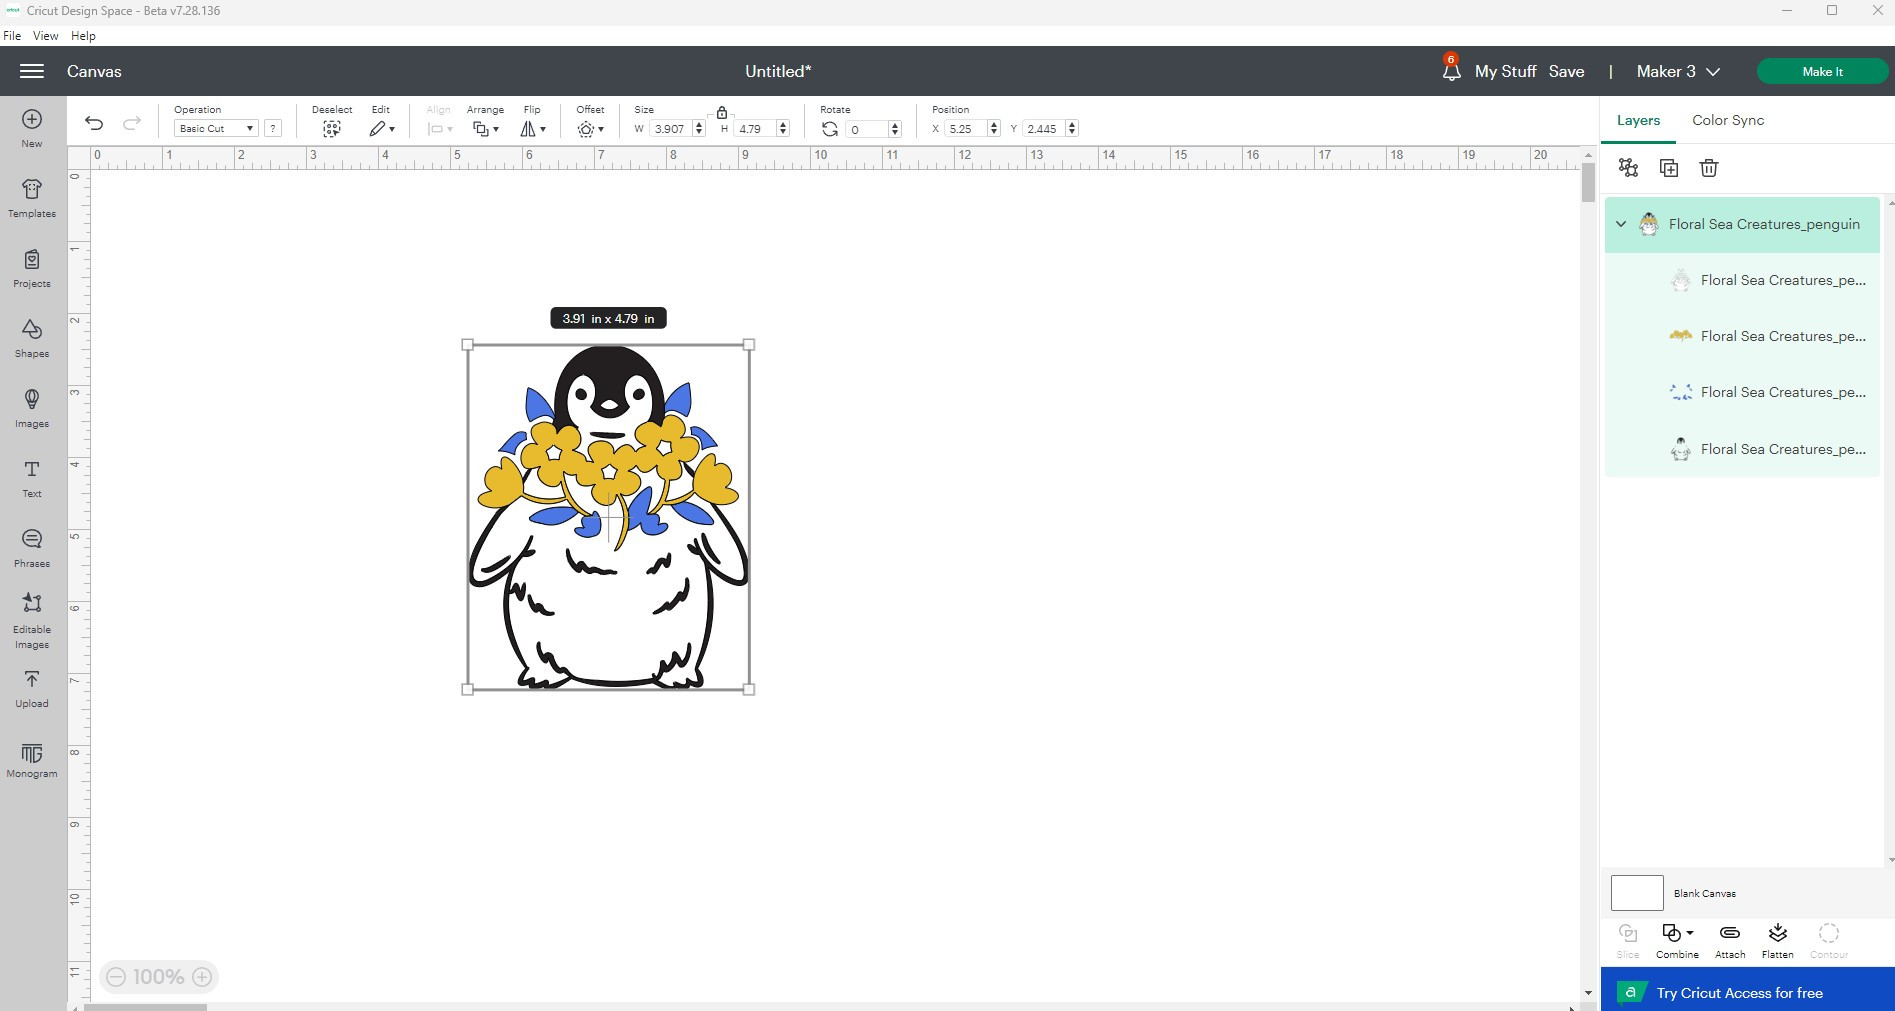
Creating Your Own Print Then Cut Images
You can transform any “Cut” image in Design Space into a “Print Then Cut” image. This allows for complete creative freedom. Here’s how:
- Insert a “Cut” Image: Choose any image from the Cricut library or upload your own SVG or JPG file and add it to your canvas.
- Add an Offset (Background Layer): If your image doesn’t already have a background layer, creating an offset is essential for making stickers or printed elements with a clean border.
- Select your image.
- Go to the “Offset” tool, typically found in the top edit bar.
- Adjust the “Distance” slider to control the thickness of the offset border. A preview will show you how the offset will look.
- Click “Apply” to create the offset layer.
 How to make your own print then cut image in Design Space
- Flatten the Layers: To convert your cut image and its offset into a Print Then Cut layer, you need to flatten them.
- Select all layers of your image (the original cut image and the offset layer).
- Click the “Flatten” tool located in the bottom right-hand corner of the Layers panel (or in the “Actions” menu).
- After flattening, you’ll see that all layers are merged into a single “Print Then Cut” layer in the Layers panel. You can “Unflatten” if you need to edit individual layers again, but remember to flatten before proceeding to “Make It.”
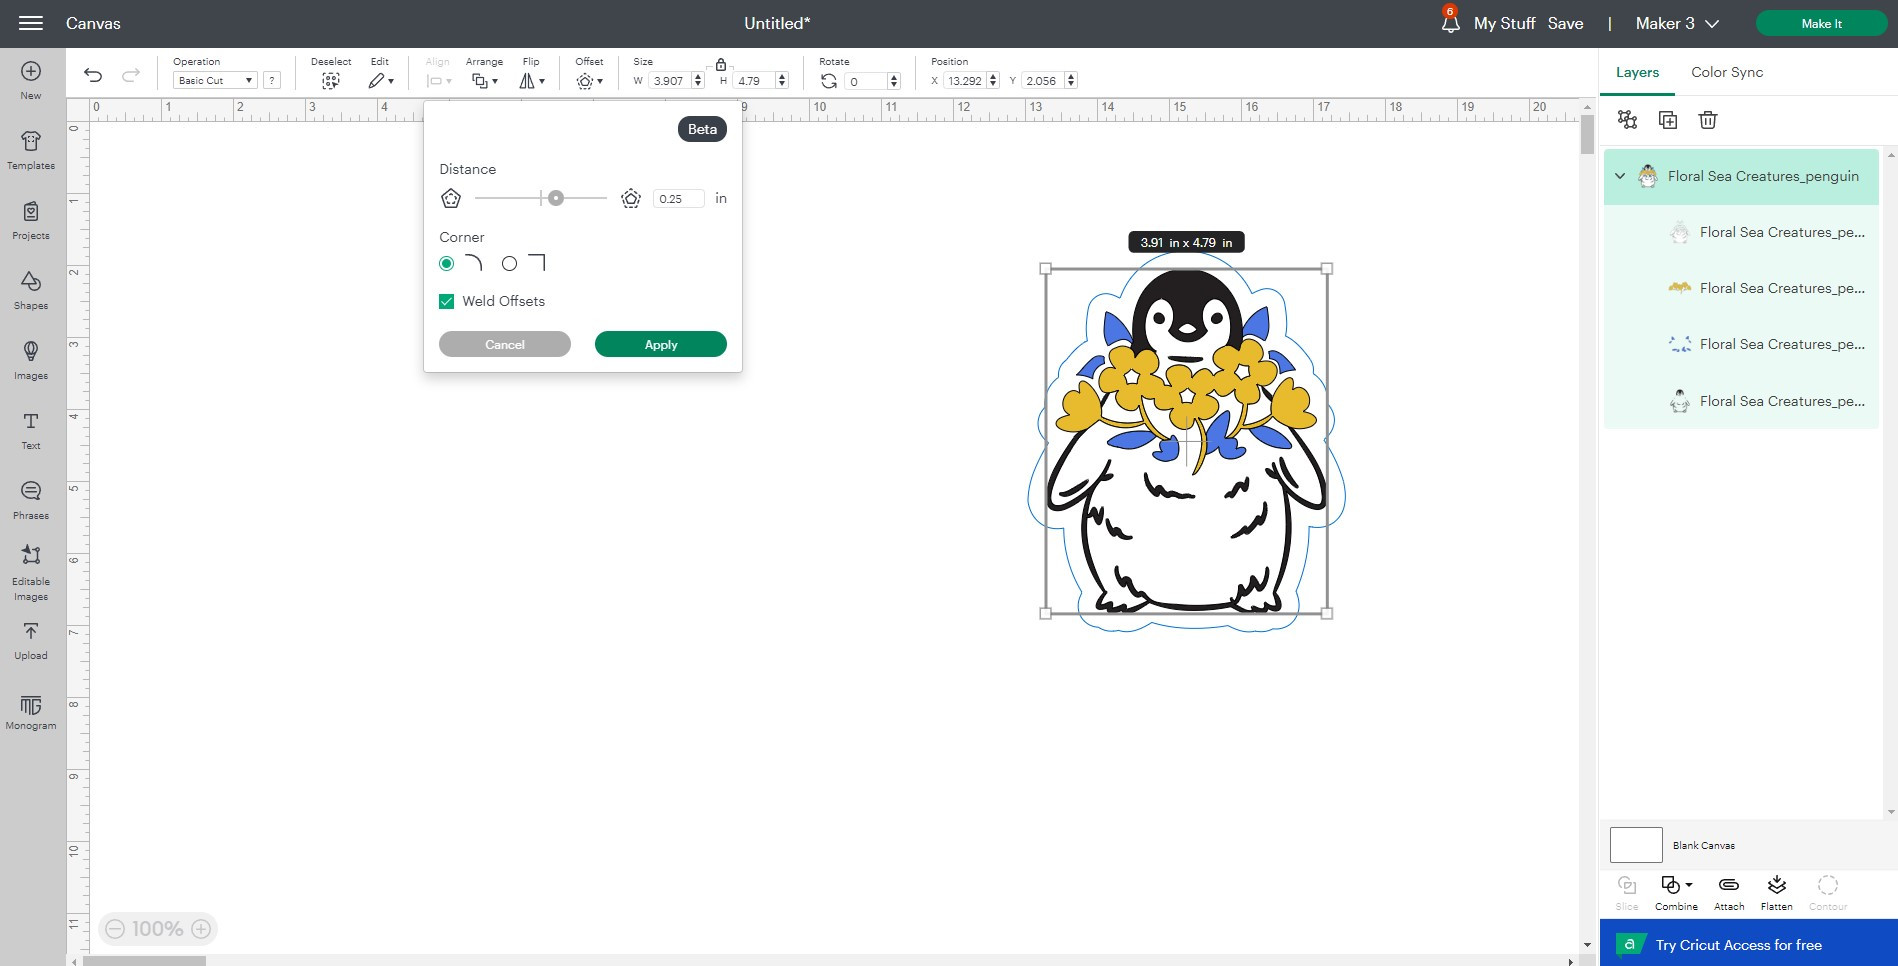 Use offset tool for stickers in Design Space
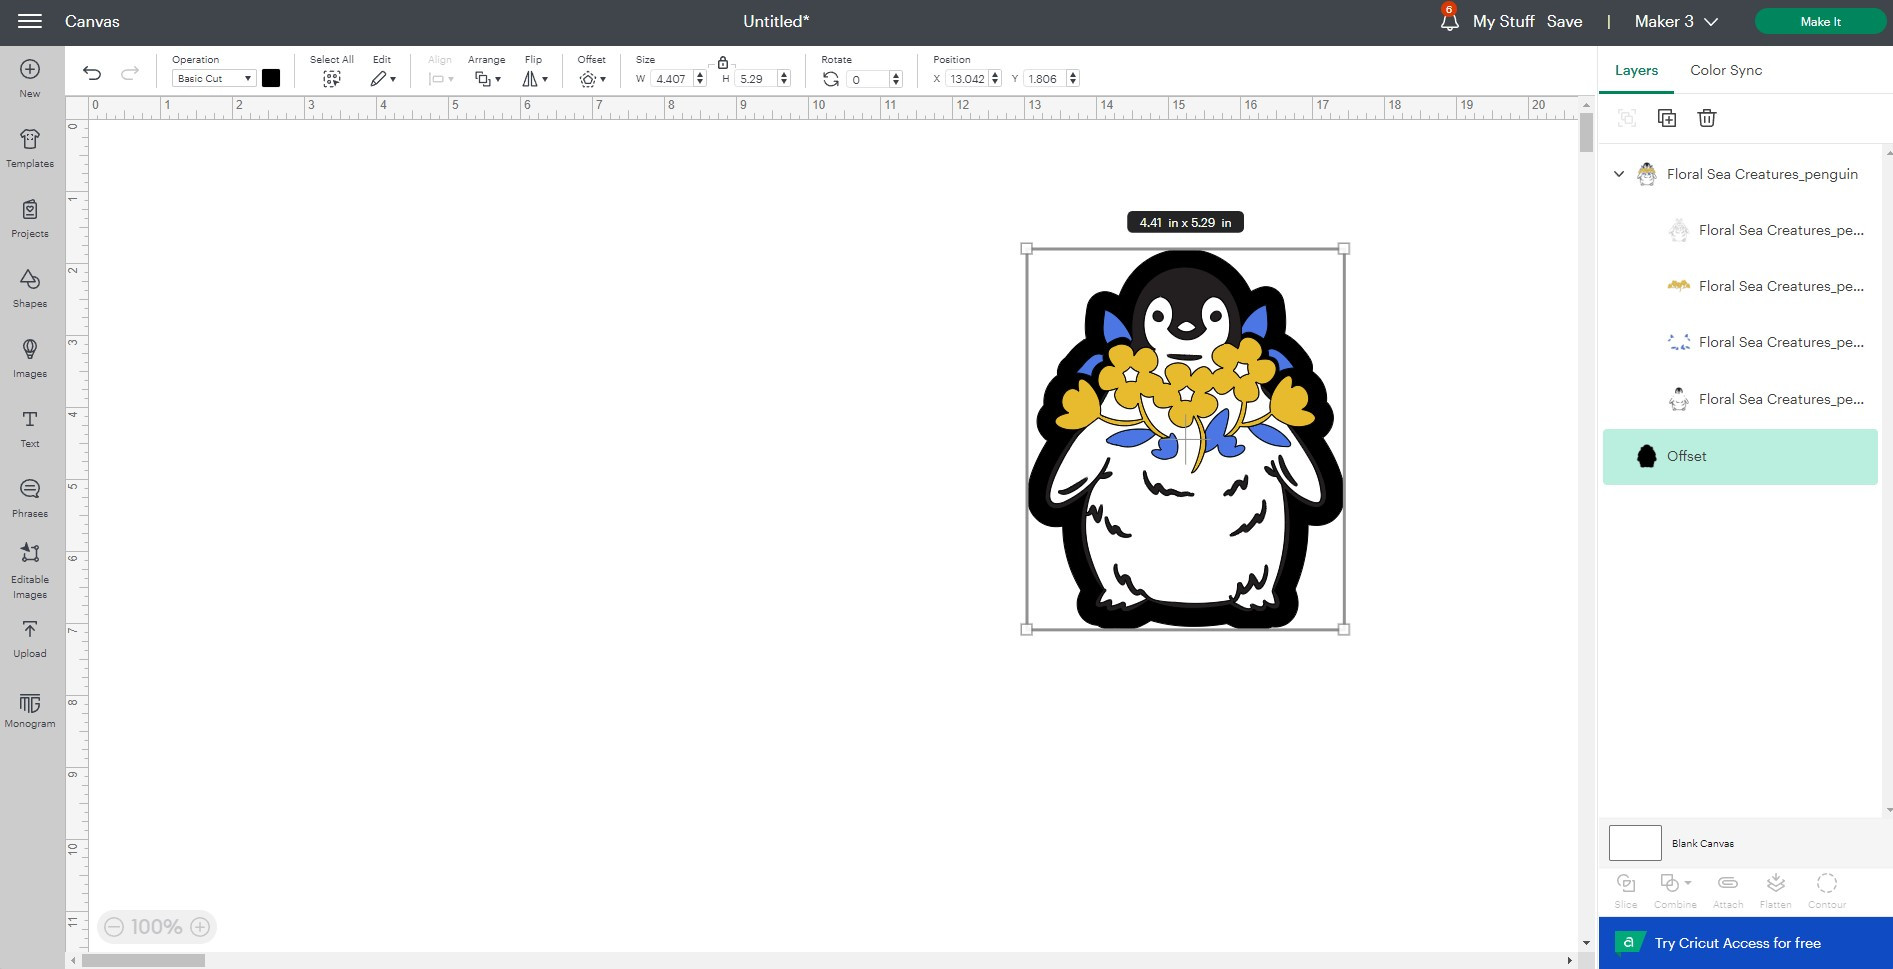 Flatten tool for print then cut images
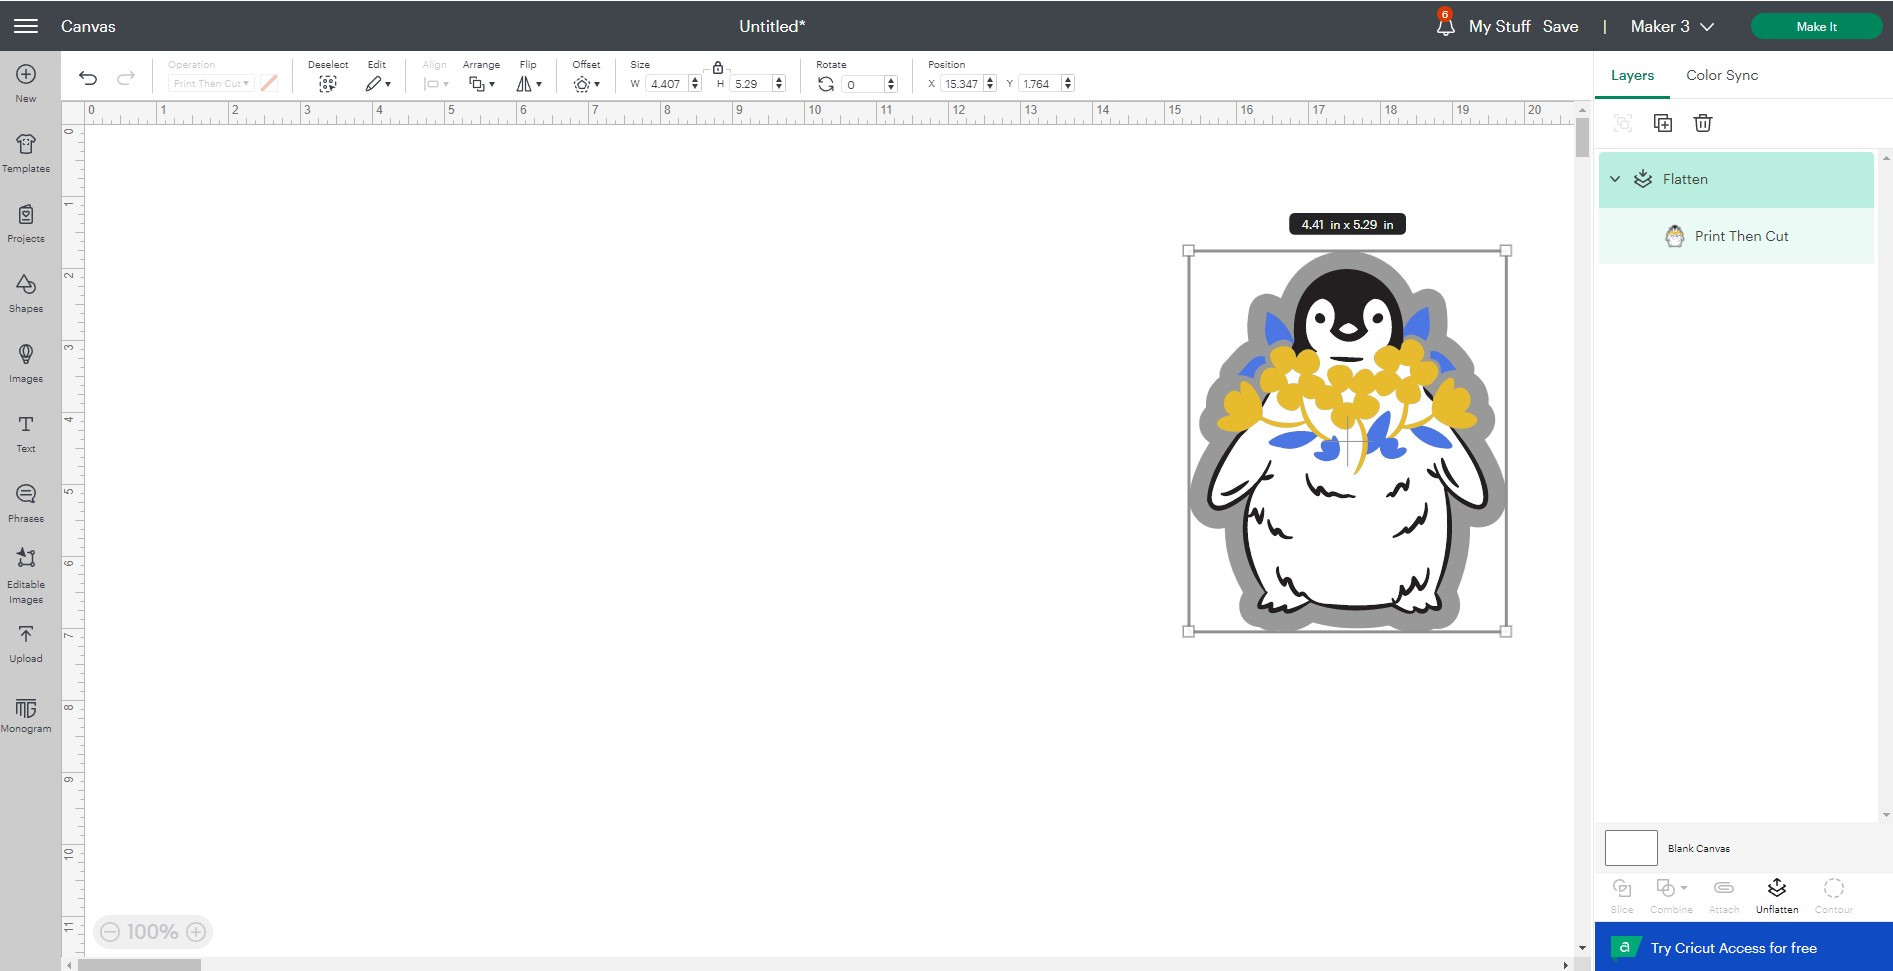 Creating a sticker in Cricut Design Space
Optimizing Print Then Cut Settings for Best Results
Adjusting Material Size in Design Space
Design Space allows you to print on various material sizes, up to A3. Always verify that the correct material size is selected before printing:
- Go to the top-left menu in Design Space.
- Select “Settings” from the dropdown menu.
- In the Settings window, click on “Load Type.”
- Find the “Print Then Cut Page Size” dropdown menu and choose the correct material size you are using (e.g., Letter, A4, A3).
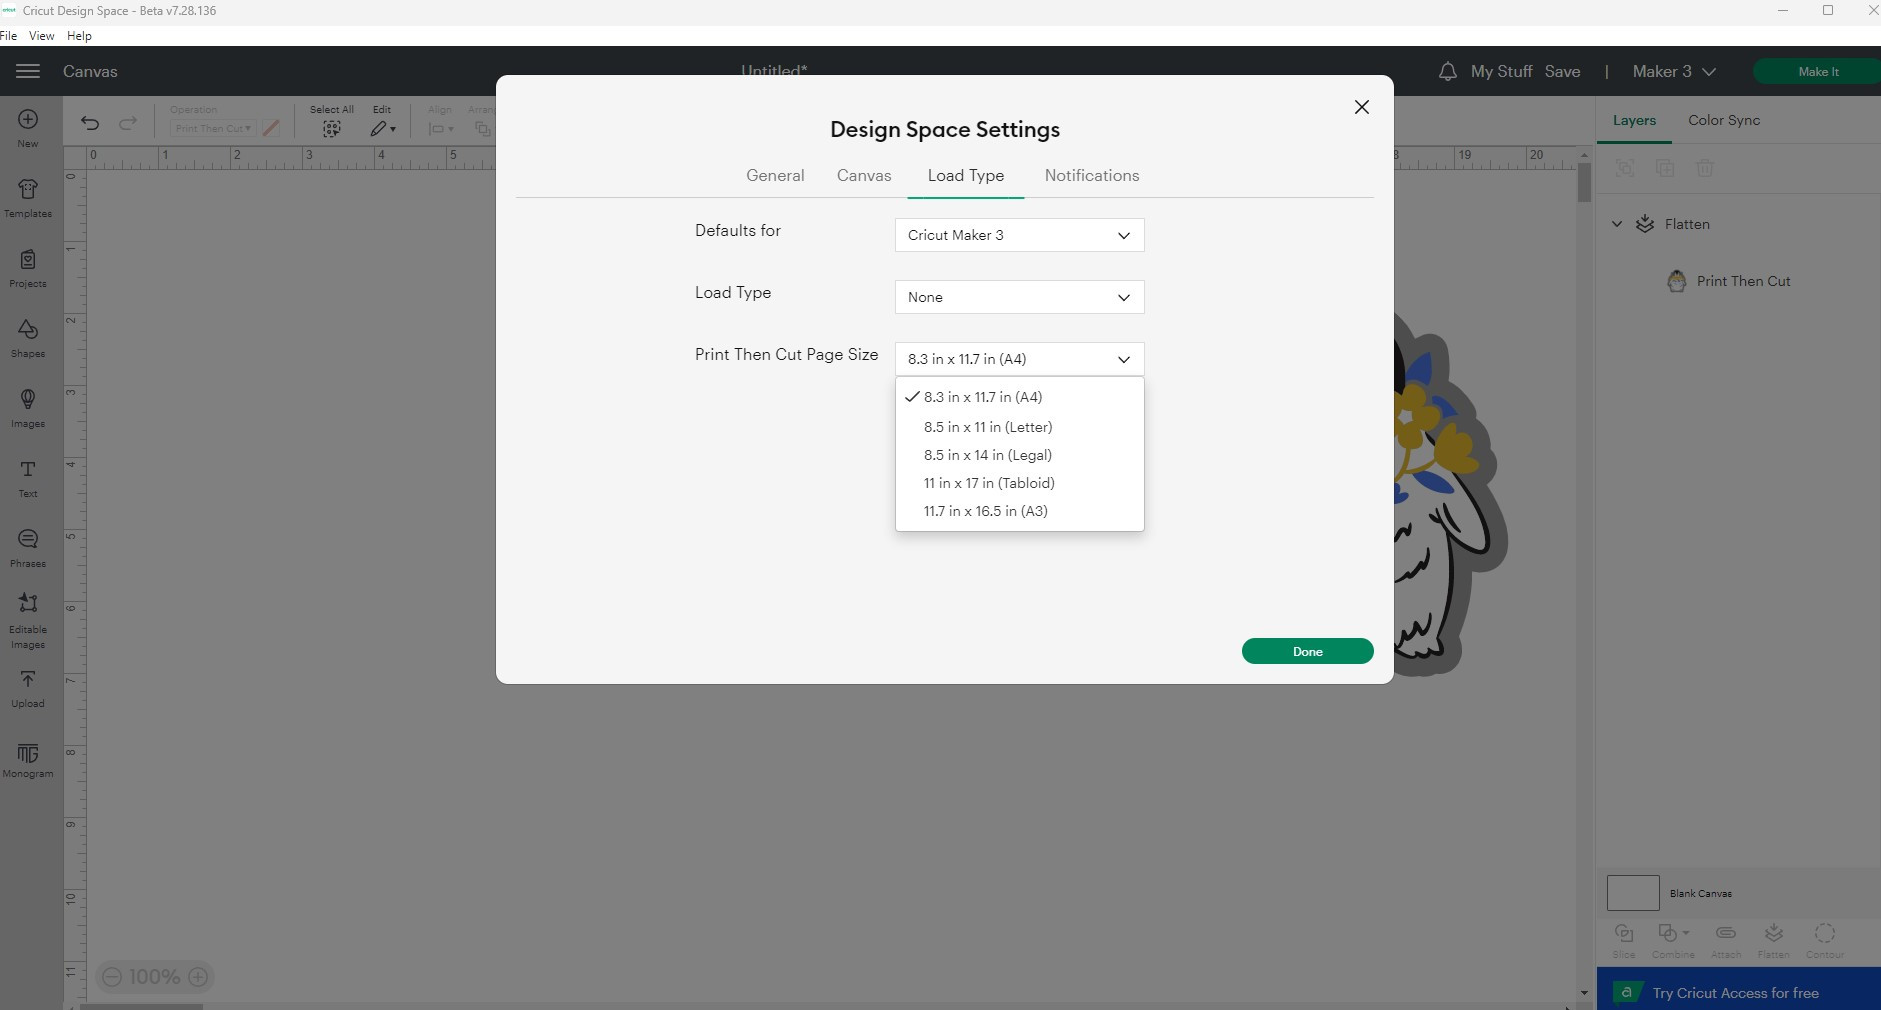 Changing Print then Cut materials size in Design Space
Choosing the Right Material
While white cardstock is generally recommended, Cricut offers a range of printable materials specifically designed for Print Then Cut, including various sticker papers and vinyls. Always select the material setting in Design Space that corresponds to the material you are using for optimal cutting performance.
Printer Settings and Utilizing System Dialogue
Achieving accurate colors and print quality involves adjusting your printer settings correctly. Here’s how to access and optimize them:
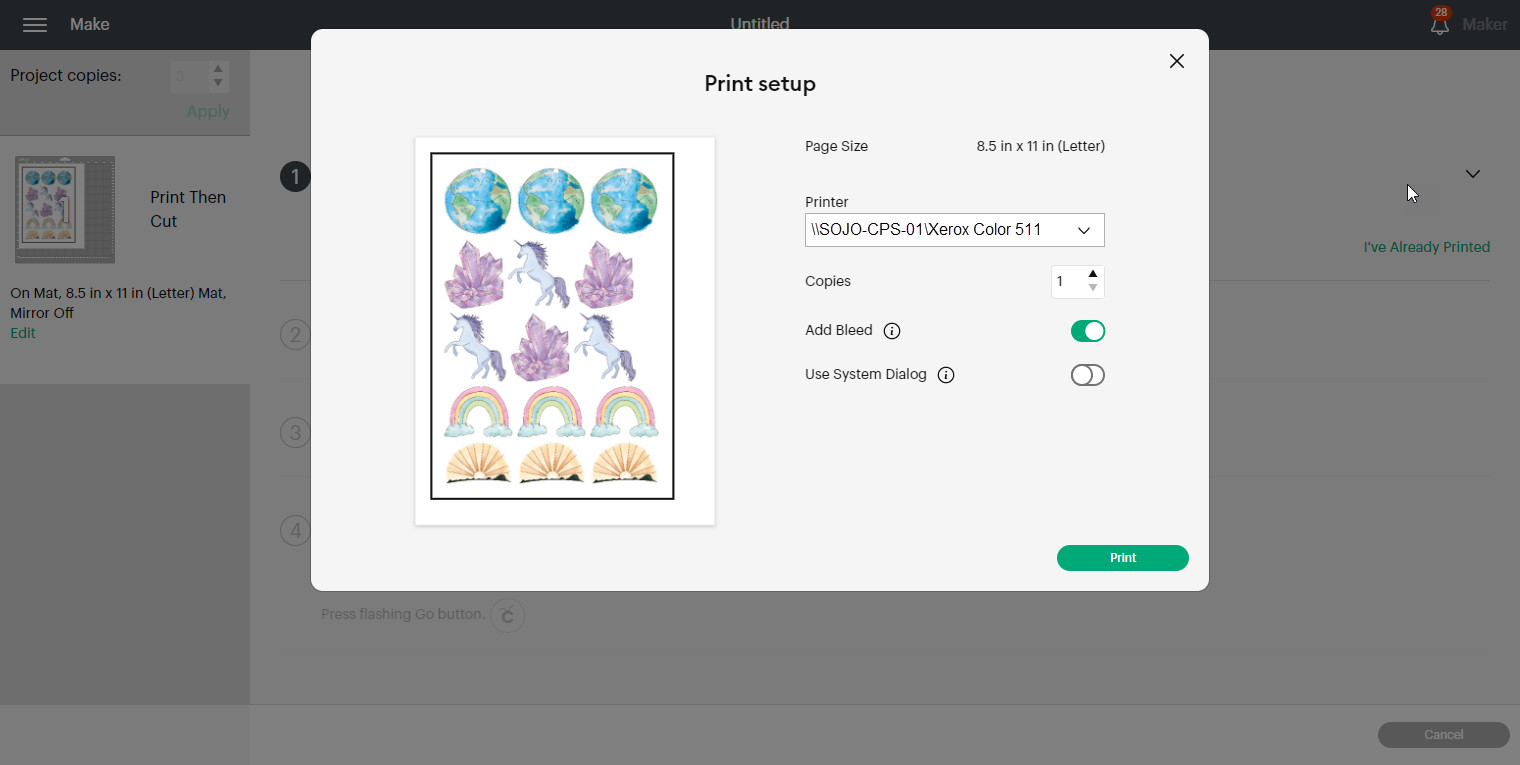
- After the mat preview stage in Design Space and clicking “Continue,” you’ll reach the “Send to Printer” screen.
- You’ll see options for “Bleed” and “Use System Dialogue.”
- Bleed: It’s generally recommended to keep “Add Bleed” ticked. Bleed adds a small margin of extra color around your design, ensuring no white edges appear after cutting, especially for edge-to-edge color designs. Untick it if you don’t need bleed.
- Use System Dialogue: Always tick “Use System Dialogue.” This is crucial as it opens your printer’s native settings window after you click “Print” in Design Space.
- Printer Settings Window: In your printer’s settings window (which appears after ticking “System Dialogue” and clicking “Print”), you can customize print quality, paper type, and color settings.
- Paper Type: Match the paper type setting to your material (e.g., if using sticker paper, choose a setting like “Glossy Paper” or “Labels” if available).
- Print Quality: Select “High Quality” or “Best” for crisp, vibrant prints.
- Disable “Fit to Page”: Ensure options like “Fit to Page” or similar resizing options are un-ticked. These can alter the size of your design, causing cutting inaccuracies.
Experiment with different printer settings to find what works best for your printer and materials. Keep notes of your successful settings for future projects.
 Use System Dialogue for Print then cut in Cricut Design Space
Material Settings for Sticker Sheets
For creating sticker sheets using Cricut printable sticker paper, printable vinyl, or printable clear sticker paper, Design Space has pre-set material settings. When choosing your material setting before cutting, select the specific Cricut printable material you are using from the material dropdown list. These settings are tested to ensure optimal kiss-cut performance for stickers, cutting through the sticker layer but leaving the backing intact.
Calibration for Print Then Cut Accuracy
Calibration is vital for ensuring your Cricut machine cuts precisely along the edges of your printed designs. If your cuts are misaligned, calibrating your machine is usually the first step to resolve the issue.
You can find step-by-step calibration instructions within Design Space: Menu > Calibration > Print Then Cut. Follow the on-screen prompts to calibrate your machine for accurate Print Then Cut results. Regularly calibrating your machine, especially after moving it or changing blades, is a good practice.
Tips and Troubleshooting
Why White Cardstock and Inkjet Printers are Recommended
- Sensor Mark Readability: Cricut machines rely on reading the black sensor marks printed around your design. Dark or patterned materials, or reflective surfaces, can interfere with the sensor’s ability to accurately detect these marks. White materials provide the best contrast for the sensor marks.
- Inkjet vs. Laser Printers: Inkjet printers use ink that is absorbed by the material, while laser printers use toner that sits on top. Inkjet ink is generally better suited for Print Then Cut as it less likely to cause issues with the sensor reading the registration marks, and compatible with a wider range of printable media for crafting.
- Cricut Maker Series Exception: Cricut Maker and Maker 3 machines have more advanced sensors and can handle Print Then Cut on light to medium-colored papers, offering slightly more flexibility than Cricut Explore series machines. However, white materials are still generally recommended for best results across all Cricut models.
Addressing Color Matching Issues
Slight color variations between what you see on your screen in Design Space and your printed output are common due to differences in screen calibration and printer color profiles. However, significant color mismatches can often be minimized by:
- Using System Dialogue and Optimizing Printer Settings: As discussed earlier, using “System Dialogue” and selecting appropriate paper type and quality settings in your printer settings window is crucial for color accuracy.
- Printer Color Calibration: Consider calibrating your printer’s colors using your printer’s software or a dedicated color calibration tool for more precise color matching.
- Test Prints: Before committing to a large print job, always do a test print on your chosen material to check color accuracy and adjust printer settings as needed.
With practice and attention to detail, mastering Cricut Print Then Cut opens up a world of creative possibilities. From personalized stickers to custom cards and labels, this feature empowers you to bring your printed designs to life with professional precision. Happy crafting!