3D printers, once a futuristic concept, are now increasingly accessible. The core components are relatively simple: stepper motors, switches, a control board, a heating element, and a nozzle. The democratization of 3D printing is largely due to software advancements and the expiration of key patents.
But can you build a functional 3D printer for under $100? iNSTONE believes it’s possible, and their Desktop DIY kit aims to prove it.
 The iNSTONE Desktop DIY 3D printer kit, showcasing its compact and basic design.
This iNSTONE Desktop DIY is arguably the most printer you can assemble for just $99. It’s basic, it’s quirky, and it’s definitely not for everyone. While it might not be the 3D printer you should buy, it’s a fascinating example of just how affordable 3D printing technology can be.
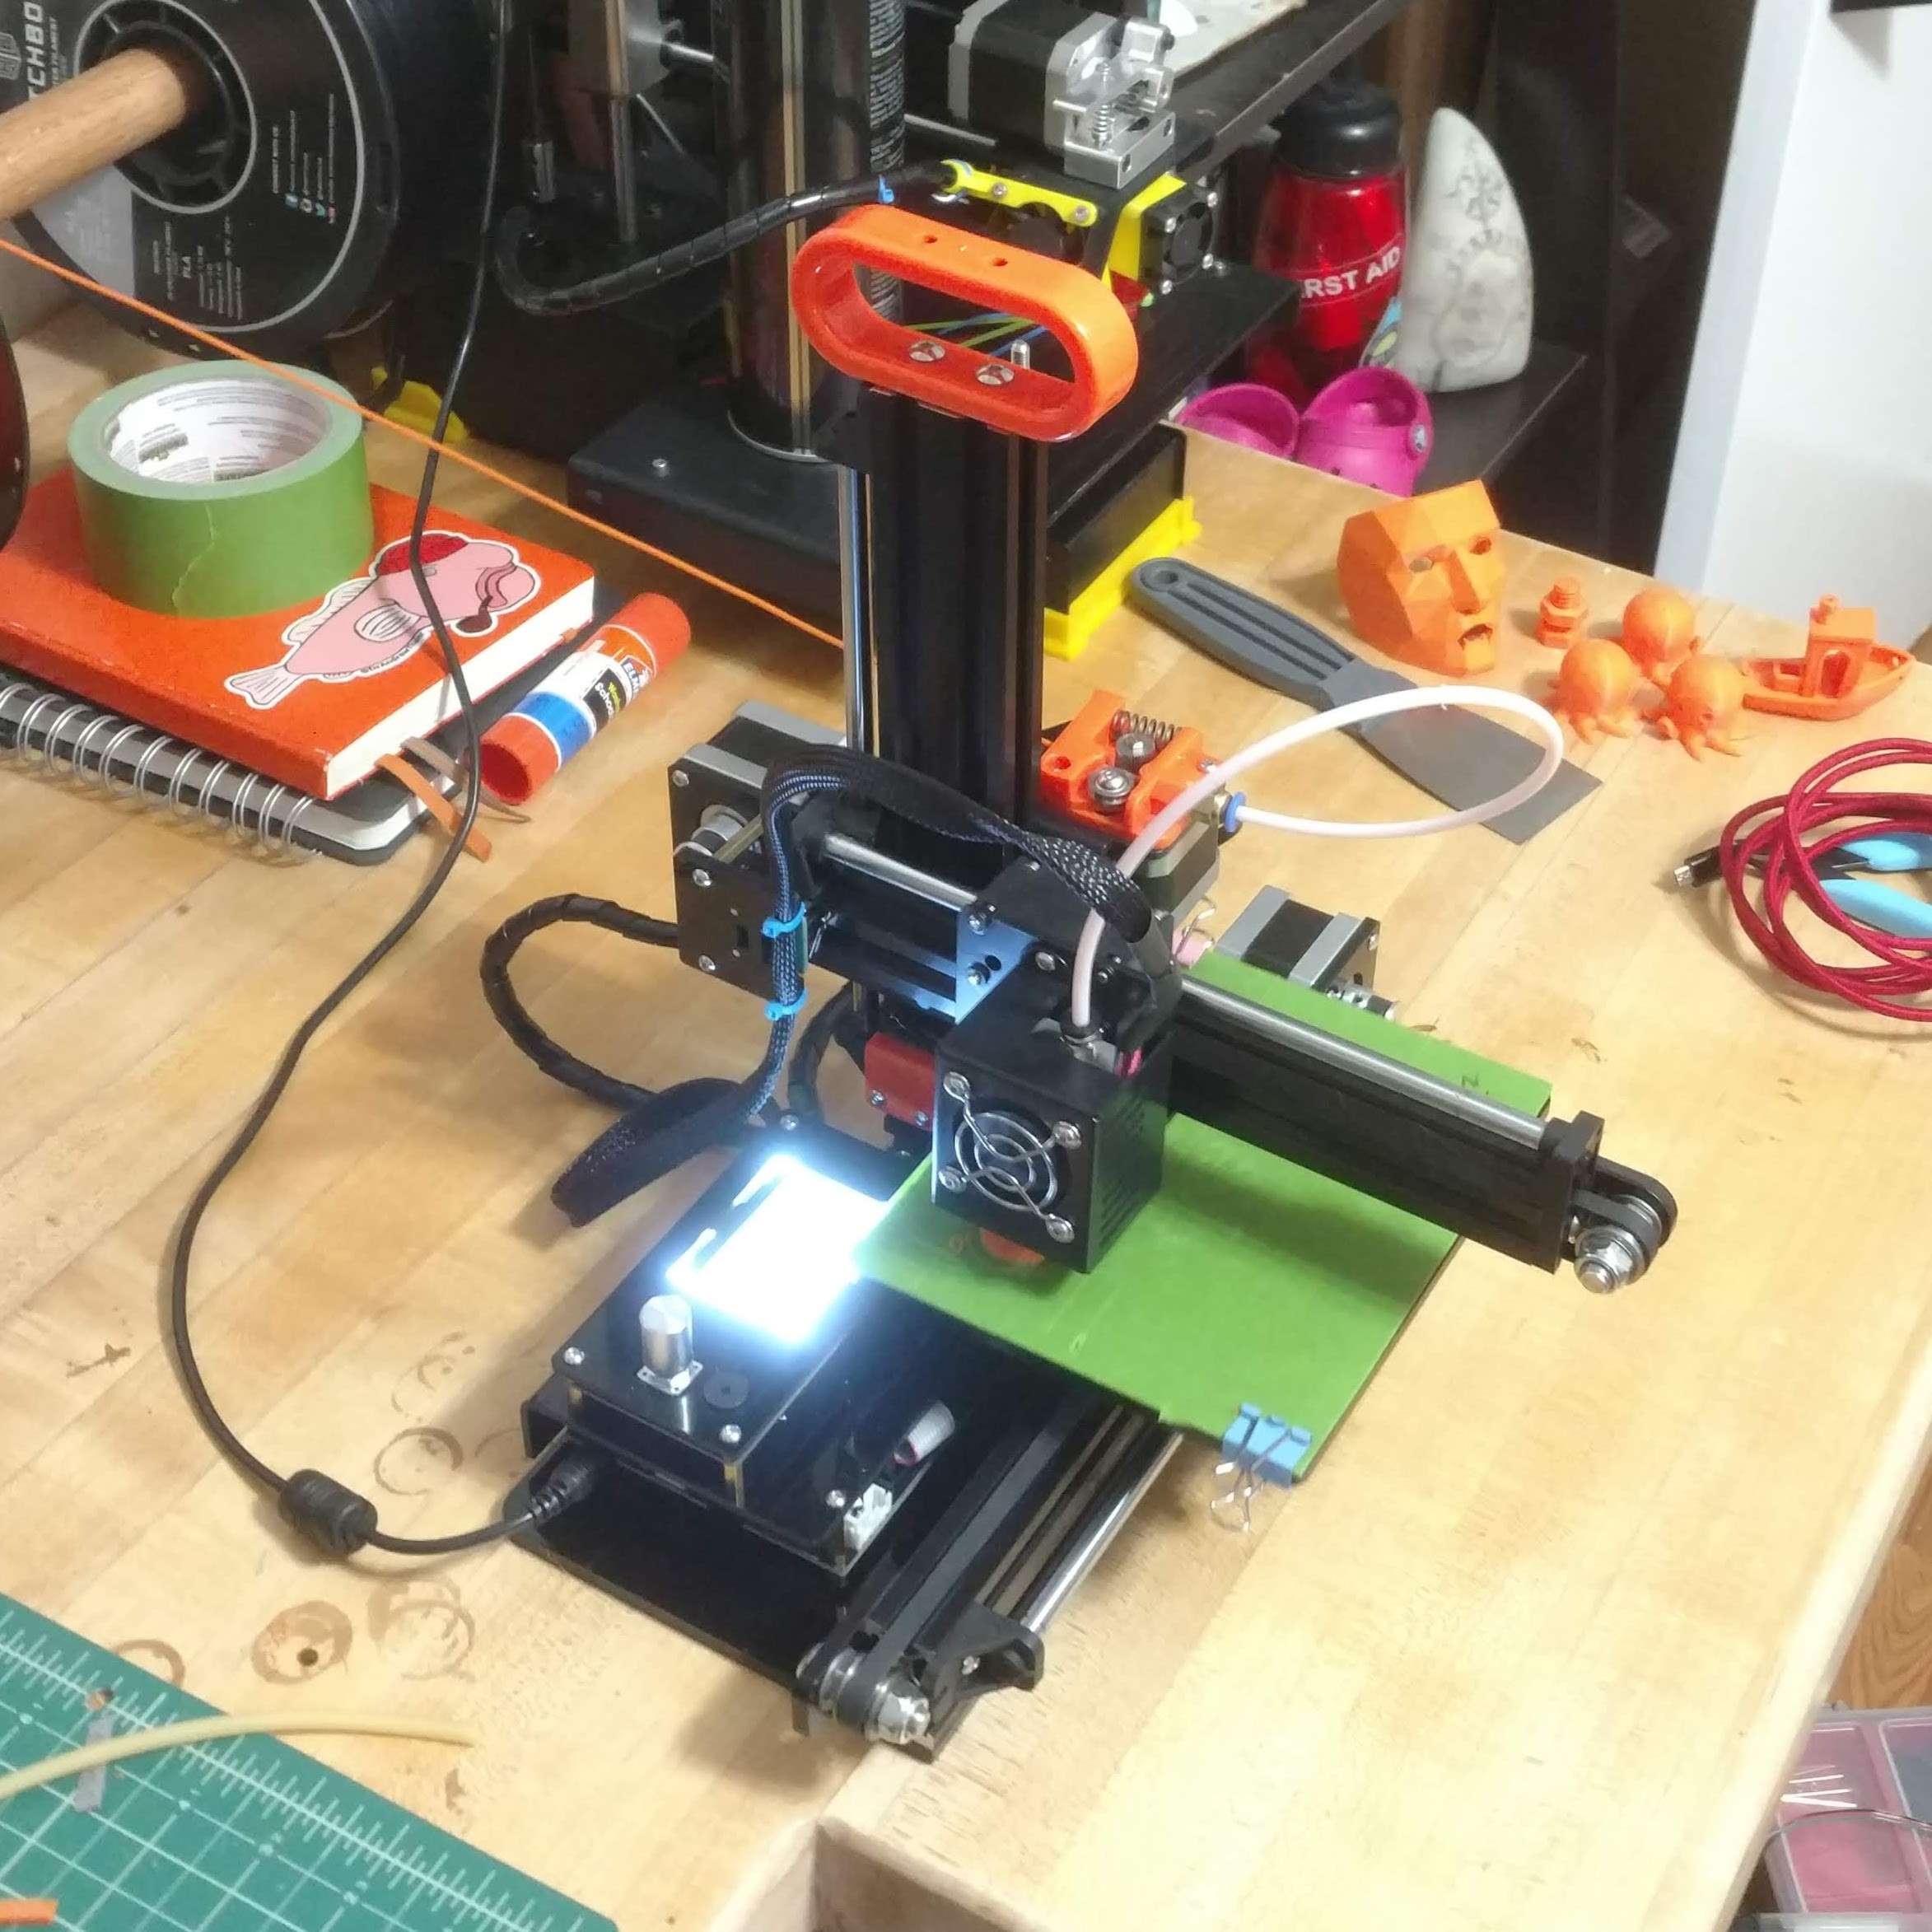
This cantilever printer is characterized by its small build volume and lack of a heated bed. It utilizes a standard, albeit somewhat outdated, operating system connecting via a Type-B USB port. There are no extra features or comforts here – just the bare essentials. The included power supply is functional but basic.
If printers like the Anet A6 aim to maximize features for the $200 price point, the iNSTONE Desktop DIY focuses on delivering a workable 3D printer experience for under $100. Incredibly, it succeeds. Despite its small size, the machine boasts more metal in its construction than many pricier models, utilizing extruded aluminum for its main structural elements. The stepper motors are of reasonable quality, and the hot end is a clone of the popular E3D design, keeping costs down. The Bowden extruder mechanism is made from dense, injection-molded plastic. The overall build feels surprisingly solid and portable without constant recalibration concerns.
Unlike some other budget options like the Monoprice Mini Delta, this kit includes a rotary encoder on the control board, offering a more user-friendly interface.
The iNSTONE kit also surprisingly includes a more comprehensive set of tools than many competitors, featuring essential tools and even a useful snipper tool, alongside some wrenches that, humorously, don’t quite fit the printer’s bolts.
If challenged to assemble the best possible 3D printer in Shenzhen with a mere $100 budget, it’s doubtful you could surpass the iNSTONE Desktop DIY. The printer reveals numerous clever design choices, reflecting significant engineering effort to achieve functionality at such a low cost. This printer is a testament to budget innovation, making it a noteworthy addition to any workshop, purely as a demonstration of what’s achievable at the lower end of the price spectrum.
View this post on Instagram [The iNSTONE $99 3D printer in operation, showing progress on an initial print.]
However, despite its impressive achievement in budget engineering, the iNSTONE Desktop DIY is, objectively, not a high-performance machine. Unless you are a 3D printing enthusiast interested in exploring the absolute bottom end of the market, or seeking a fun, challenging build project, this printer is likely not a practical purchase for everyday use.
For detailed information about the testing methodology used, refer to: Comprehensive testing protocols for budget 3D printers: Evaluating performance for fieldwork applications.
Assembly and Initial Operation.
Building the iNSTONE Desktop DIY printer is an engaging and educational experience. The provided instructions are generally clear for those with some prior 3D printing knowledge, but may be challenging for absolute beginners. The printer utilizes t-nuts to mount components to the extruded aluminum frame, resulting in a robust and stable structure. While the kit was missing a few minor parts in this review, replacements were readily available in a typical workshop.
Axis adjustments are straightforward. However, the z-axis coupler is uniquely unconventional. Instead of a standard machined or 3D-printed coupler, the iNSTONE ingeniously uses a small section of PVC tubing (more on this later).
Beyond this, the printer’s design is quite basic. It lacks a heated bed and a print cooling fan. The fiberglass build plate is simply secured with two standard binder clips.
View this post on Instagram [Assembling the iNSTONE DIY $99 3D printer, highlighting the included tools and basic components.]
Achieving acceptable prints from this machine demands considerable patience. Leveling the build plate, adjusted by three thumbscrews, is cumbersome, especially with one screw being difficult to access. The three-point leveling system is inherently less stable, and the build plate frequently loses alignment, sometimes mid-print. It required nearly a week of daily adjustments, tightening, and calibration to reach a point where the printer could consistently lay down a solid first layer and maintain printing.
Many initial test prints failed due to z-axis wobble (more details below). Eventually, after extensive effort, the first successful print emerged from the provided g-code – a somewhat eerie mask model.
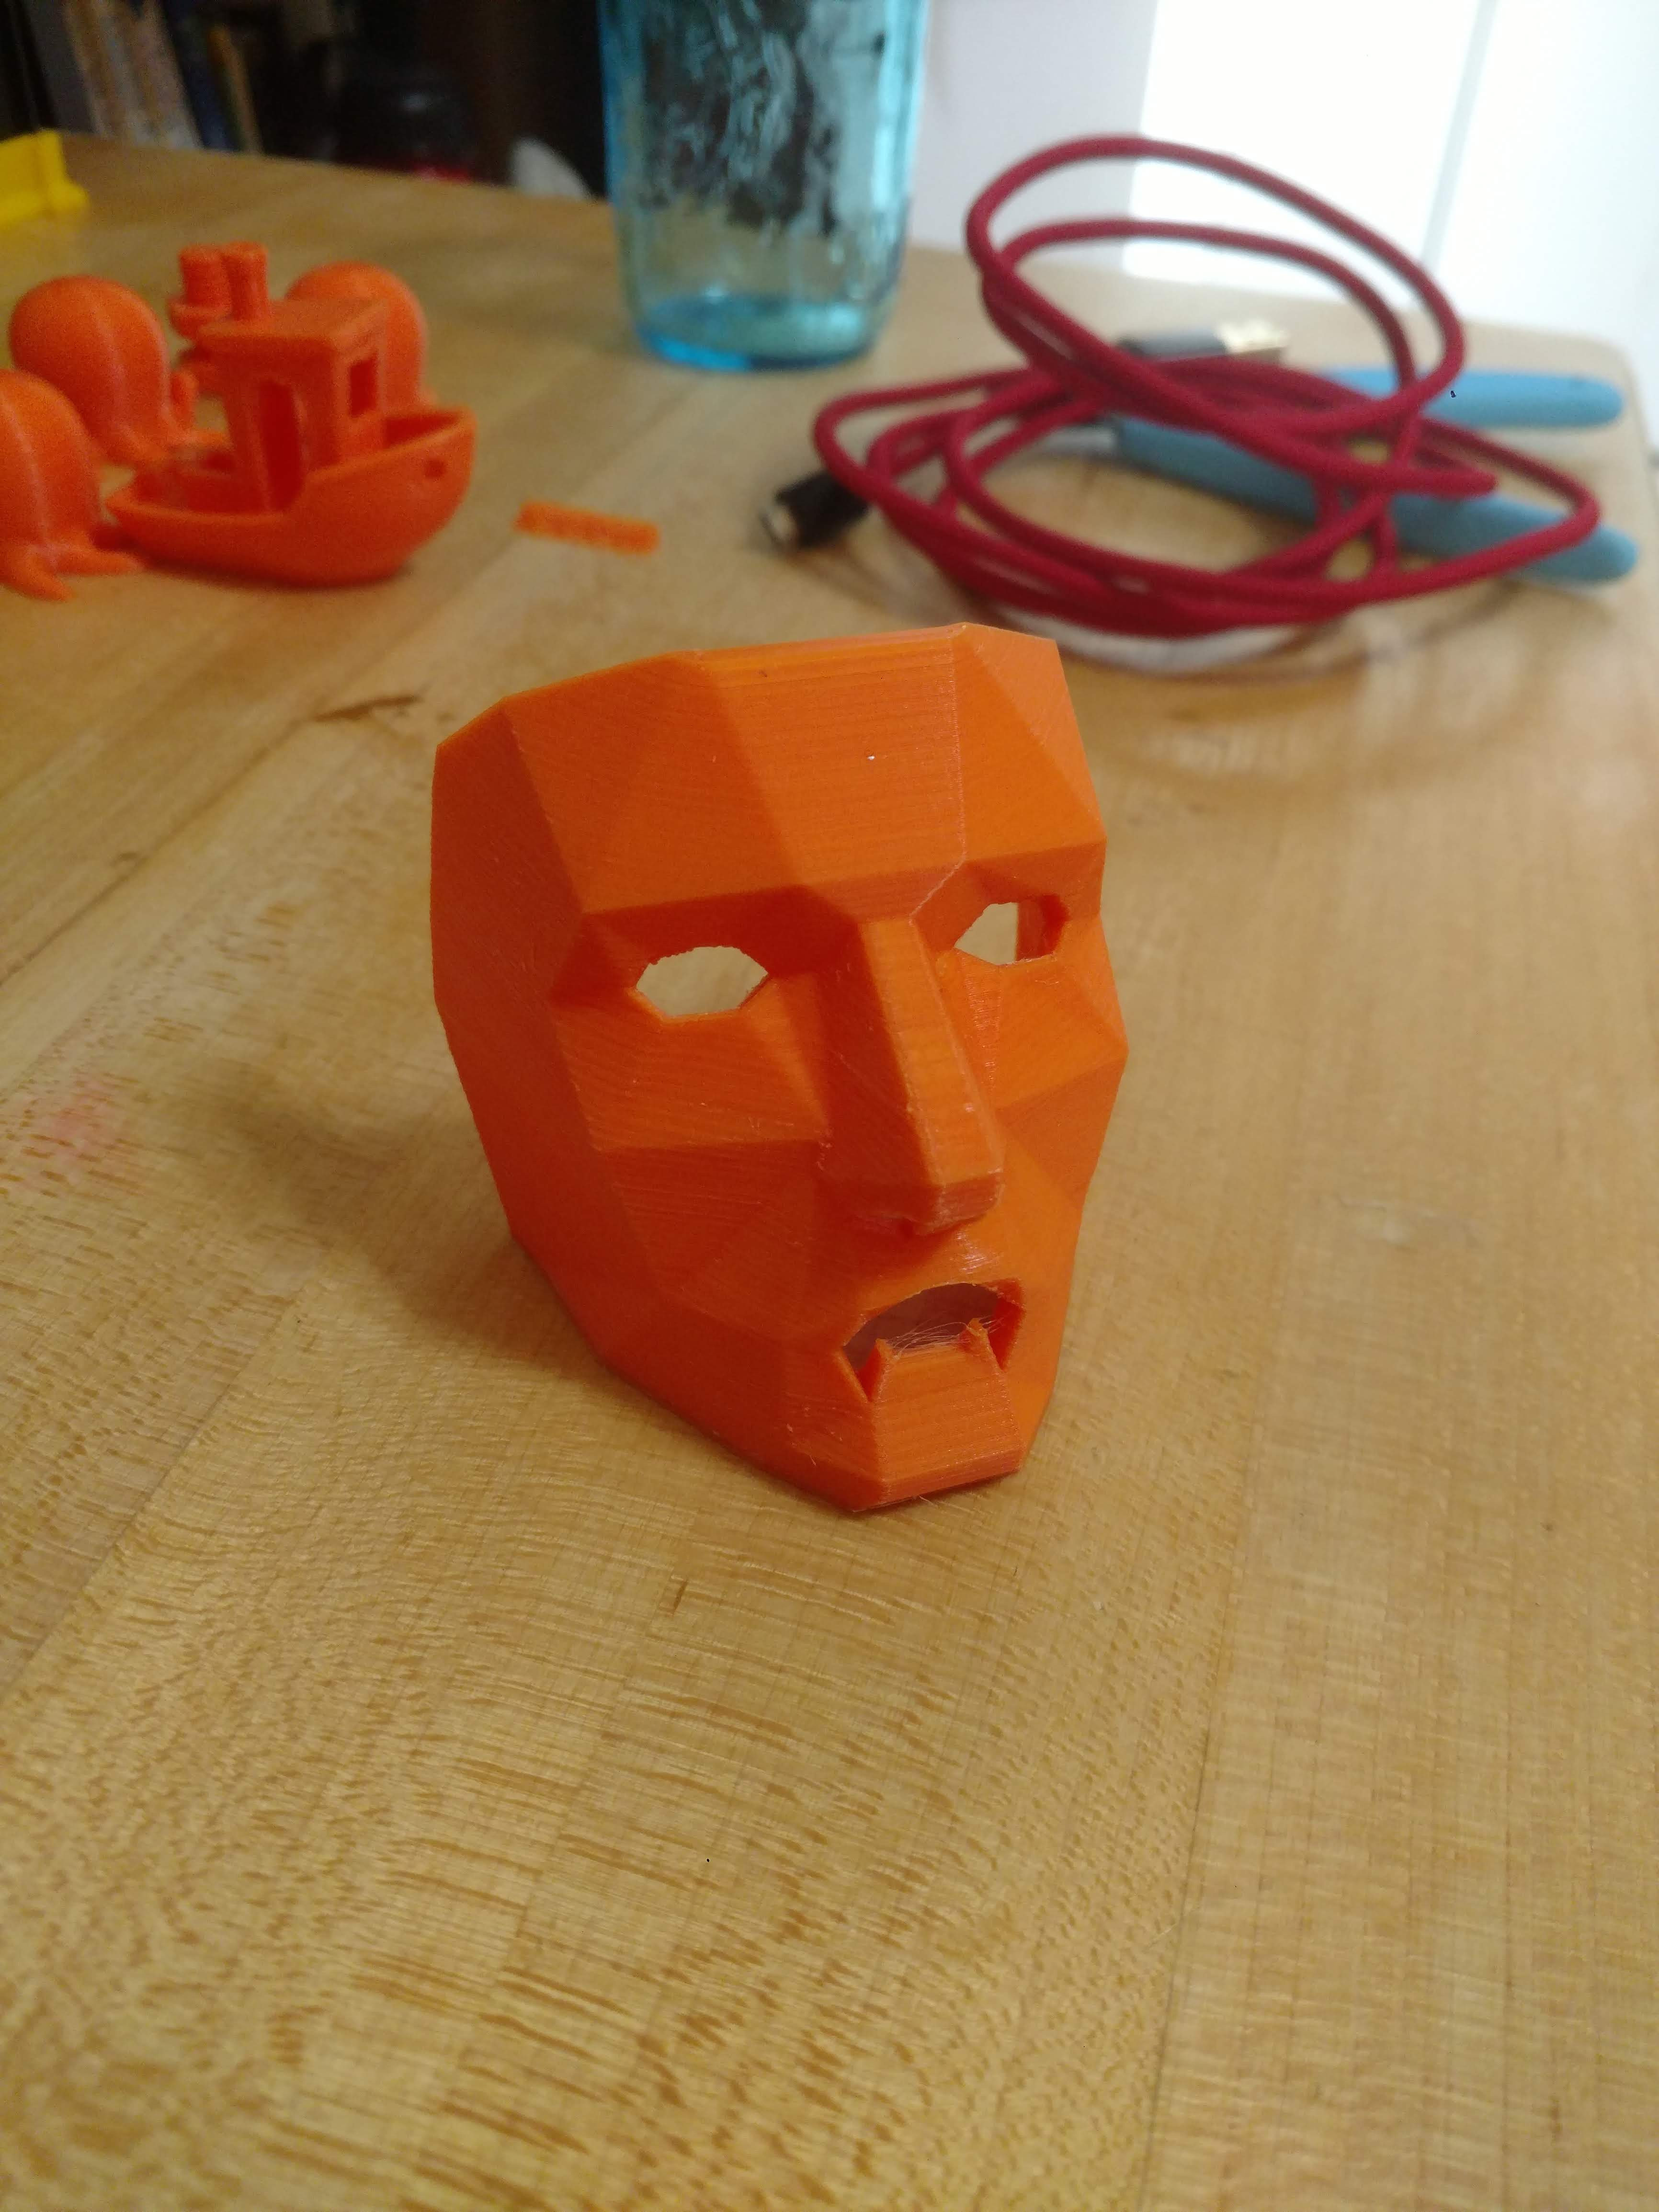 A sample print from the iNSTONE Desktop DIY, showcasing a vaguely spooky mask, printed after extensive calibration efforts.
Initial Operation Score: C
Benchmark Print Quality.
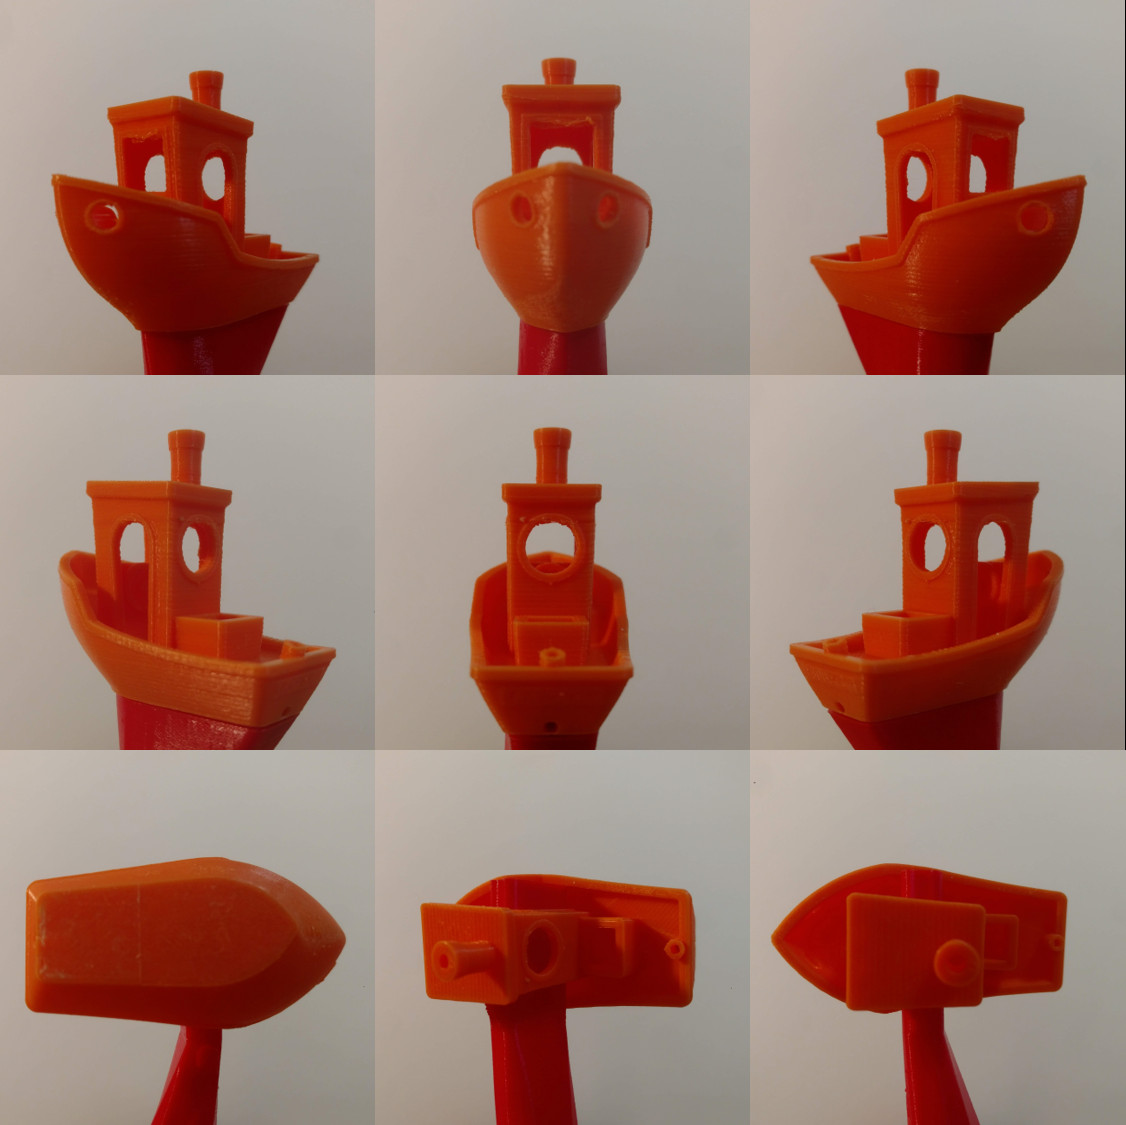 A Benchy test print from the iNSTONE Desktop DIY, revealing noticeable wobble and print quality issues.
The Benchy test print reveals no catastrophic failures, but exhibits consistent wobble throughout. While it completed the print, over-extrusion and an unstable build plate obscure details on the bottom layers, and slight elephant’s foot is present. A significant vertical shift near the top indicates z-axis slippage (further details below). Overall, the Benchy is functional but lacks precision and refinement.
Benchmark Score: C
Consistency Test: Multiple Prints.
The goal of the replication test is to assess consistency across multiple identical prints, not simply to produce acceptable individual models. The lack of print cooling, the unstable build plate, and the absence of a heated bed result in each replicated Octo model warping and deforming uniquely.
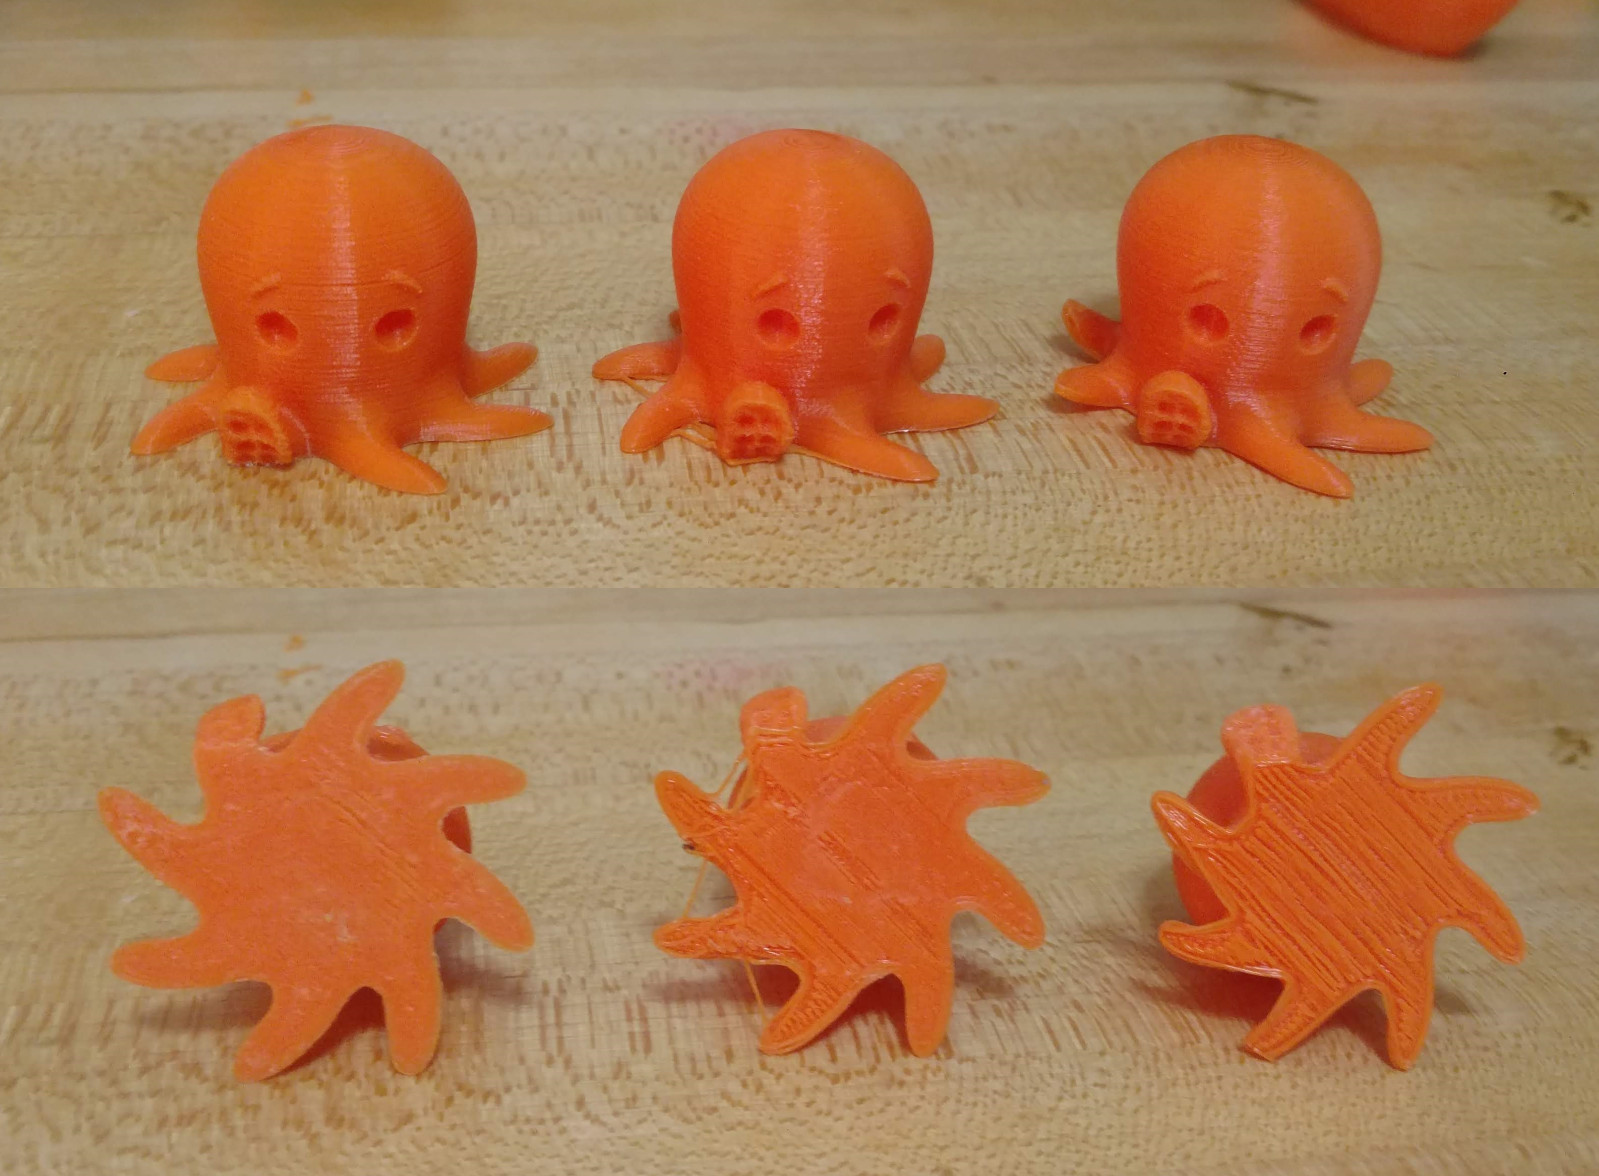 Three replicated Octo prints from the iNSTONE Desktop DIY, each exhibiting significant warping and inconsistencies due to printer limitations.
This test demonstrates a clear failure in print consistency.
Replication Score: F
Functional Part Accuracy.
Producing functional parts, especially those with threads, heavily relies on precise z-axis control. This is where the iNSTONE printer struggles significantly (as detailed further). Threaded parts printed on this machine are loose and imprecise. Significant wobble between mating parts prevents a firm hold. While the parts are technically functional, their looseness makes them largely impractical for real-world applications requiring secure threaded connections.
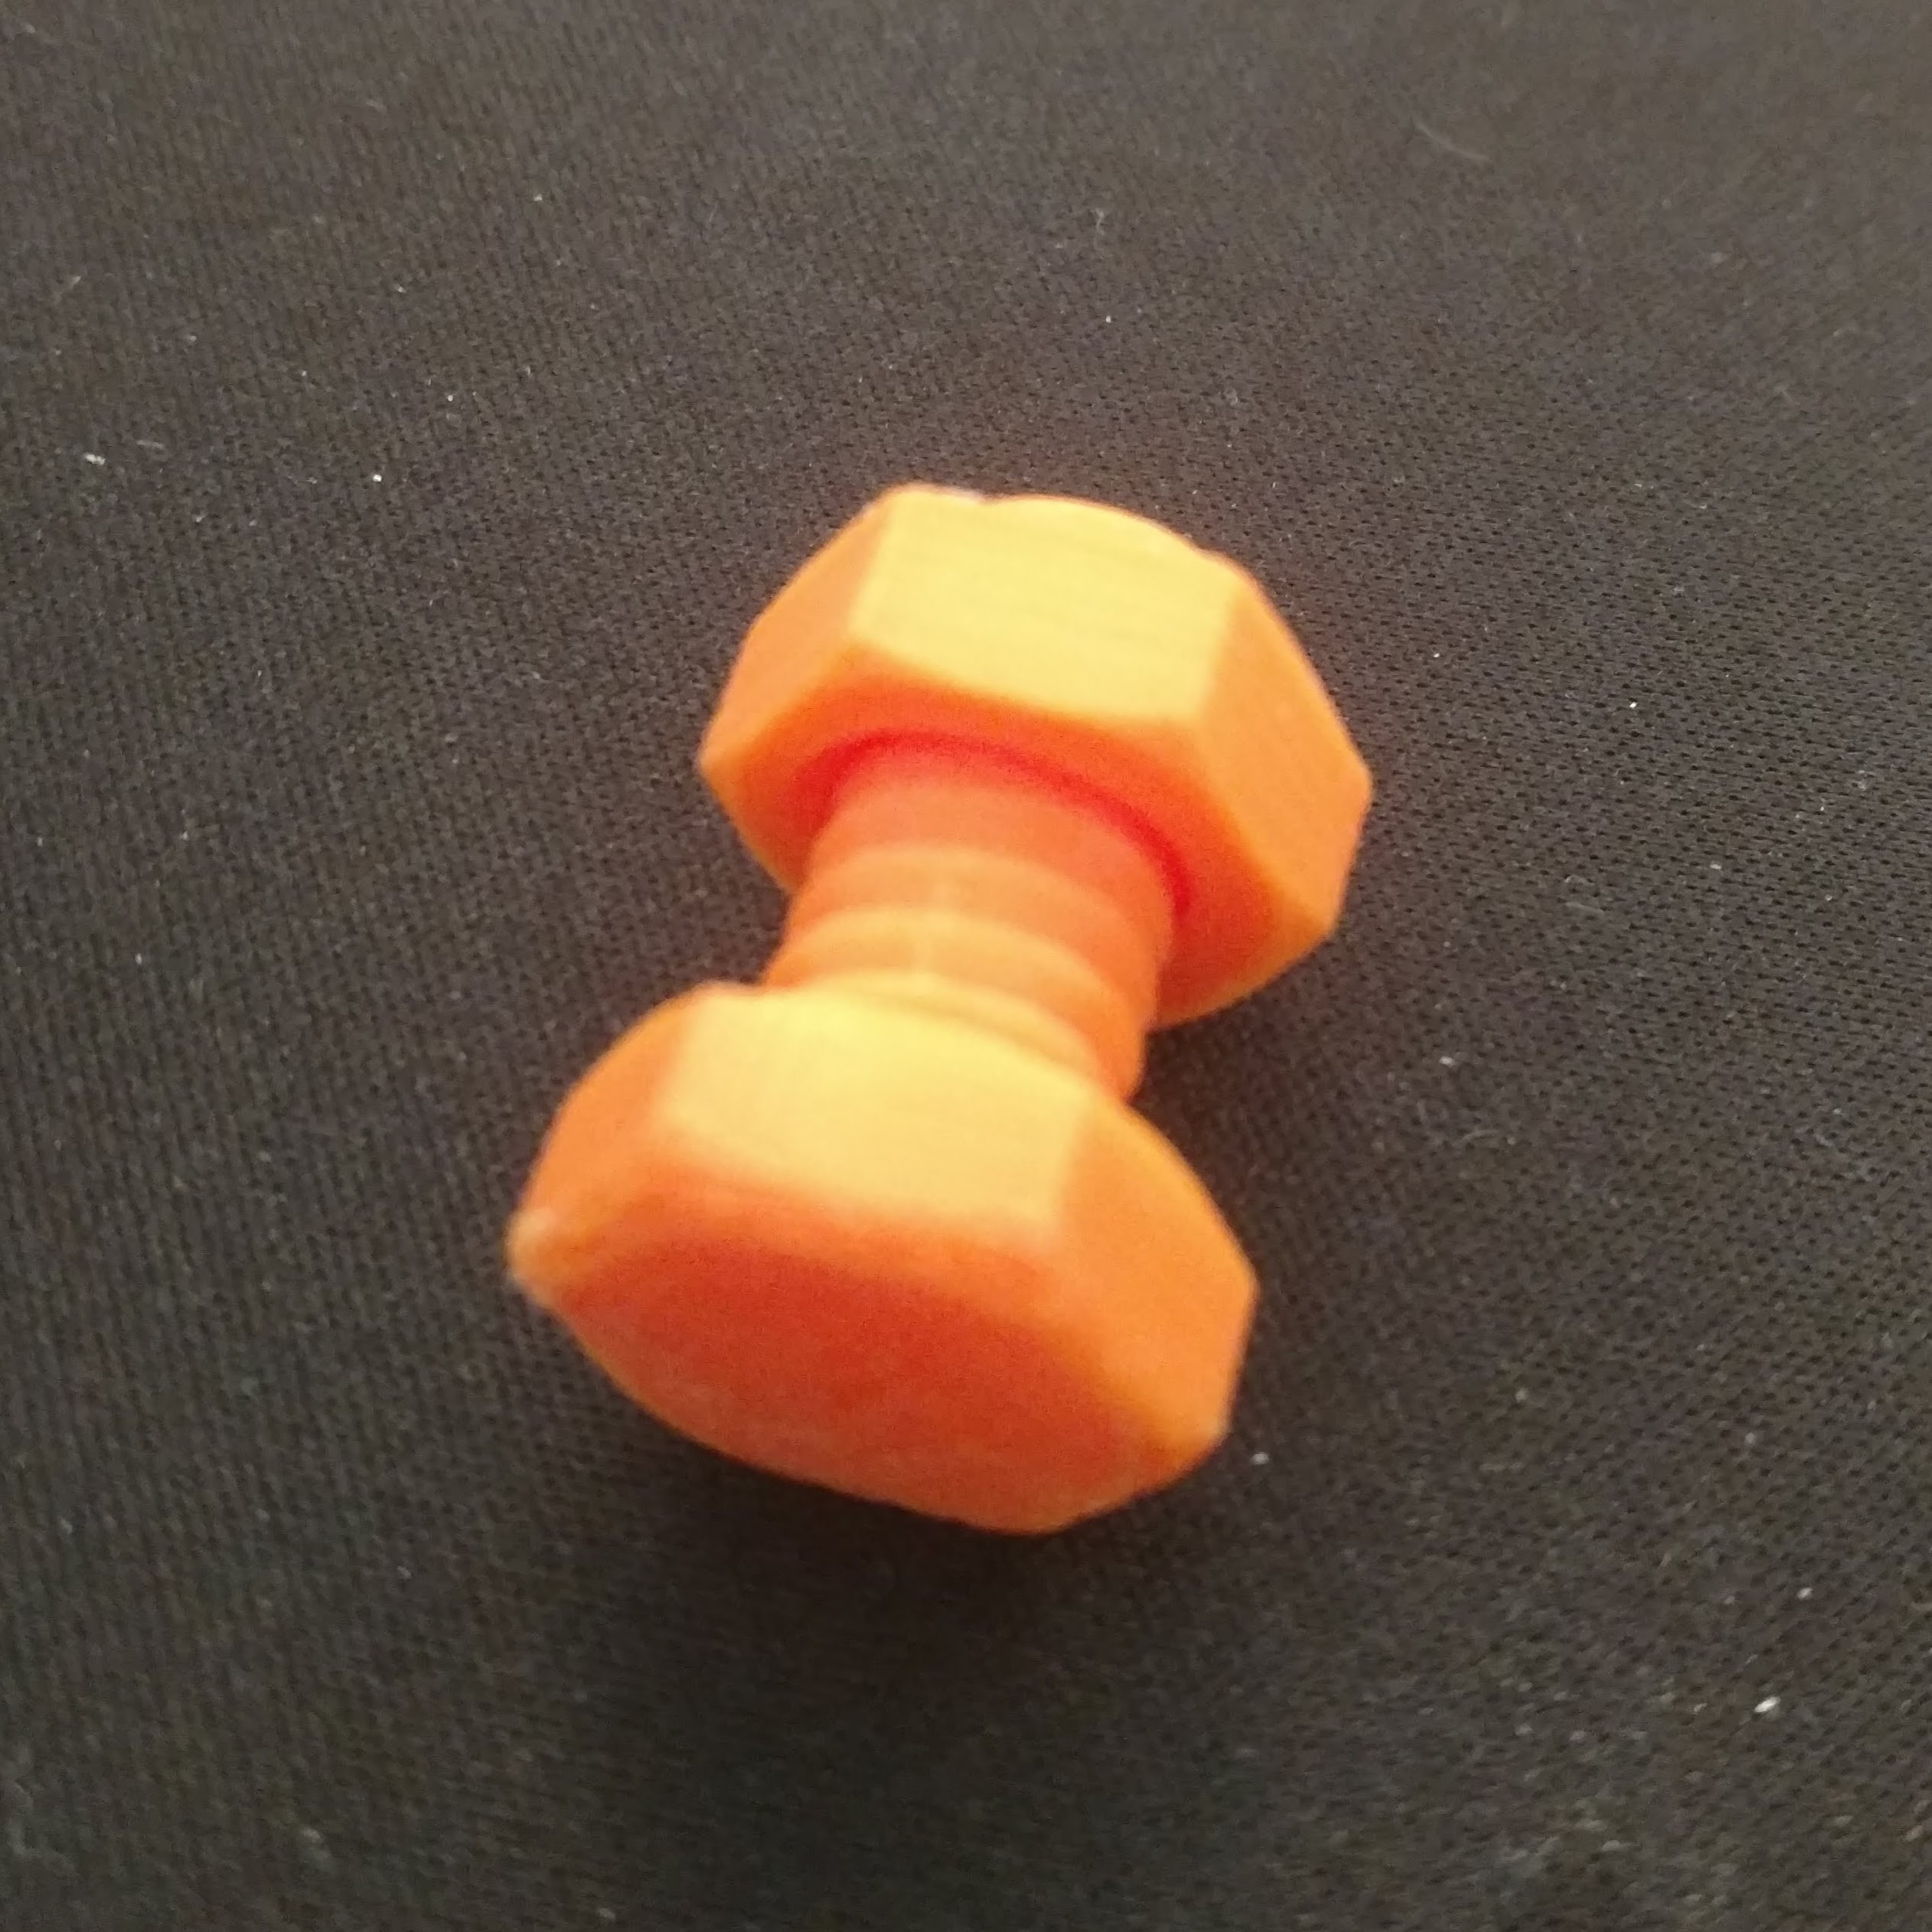 Close-up of functional parts printed on the iNSTONE Desktop DIY, illustrating the lack of precision and loose threads.
Functional Part Score: D
Complex Print System Capability.
The z-axis mechanism is the critical limitation of this printer. While flexible couplers on other budget printers like the Anet A6 were considered problematic, the iNSTONE’s z-axis coupling is even more rudimentary:
The unconventional z-axis coupler of the iNSTONE Desktop DIY, utilizing a piece of PVC tubing for connection.
The z-axis motor connects to the lead screw using a short piece of PVC tubing, held solely by friction. This design choice, while perhaps cost-effective, severely compromises z-axis control. It explains the pervasive wobble, gaps in vertical surfaces, and poor performance at finer resolutions, such as 200 microns:
 A failed high-resolution print from the iNSTONE Desktop DIY, demonstrating severe layer misalignment and print quality issues due to z-axis instability.
The printer’s limitations become apparent when attempting complex prints requiring precision. Printing a Niskin bottle receiver at 100 microns, which typically takes 2-4 hours on other tested printers, took 11 hours on the iNSTONE. The resulting part was flimsy, the servo motor fit loosely, and overall part tolerances were poor. Despite these flaws, and thanks to the robust design of the Niskin3D project, the water sampler was still functional, albeit fragile and unsuitable for practical in-water deployment.
View this post on Instagram [Attempting to print a Niskin bottle component with the iNSTONE $99 3D printer, highlighting the limitations for complex functional parts.]
Complex System Score: D
Precision Printing Performance.
Can a $99 3D printer produce a precision scale for a navigational instrument at a 50-micron resolution?
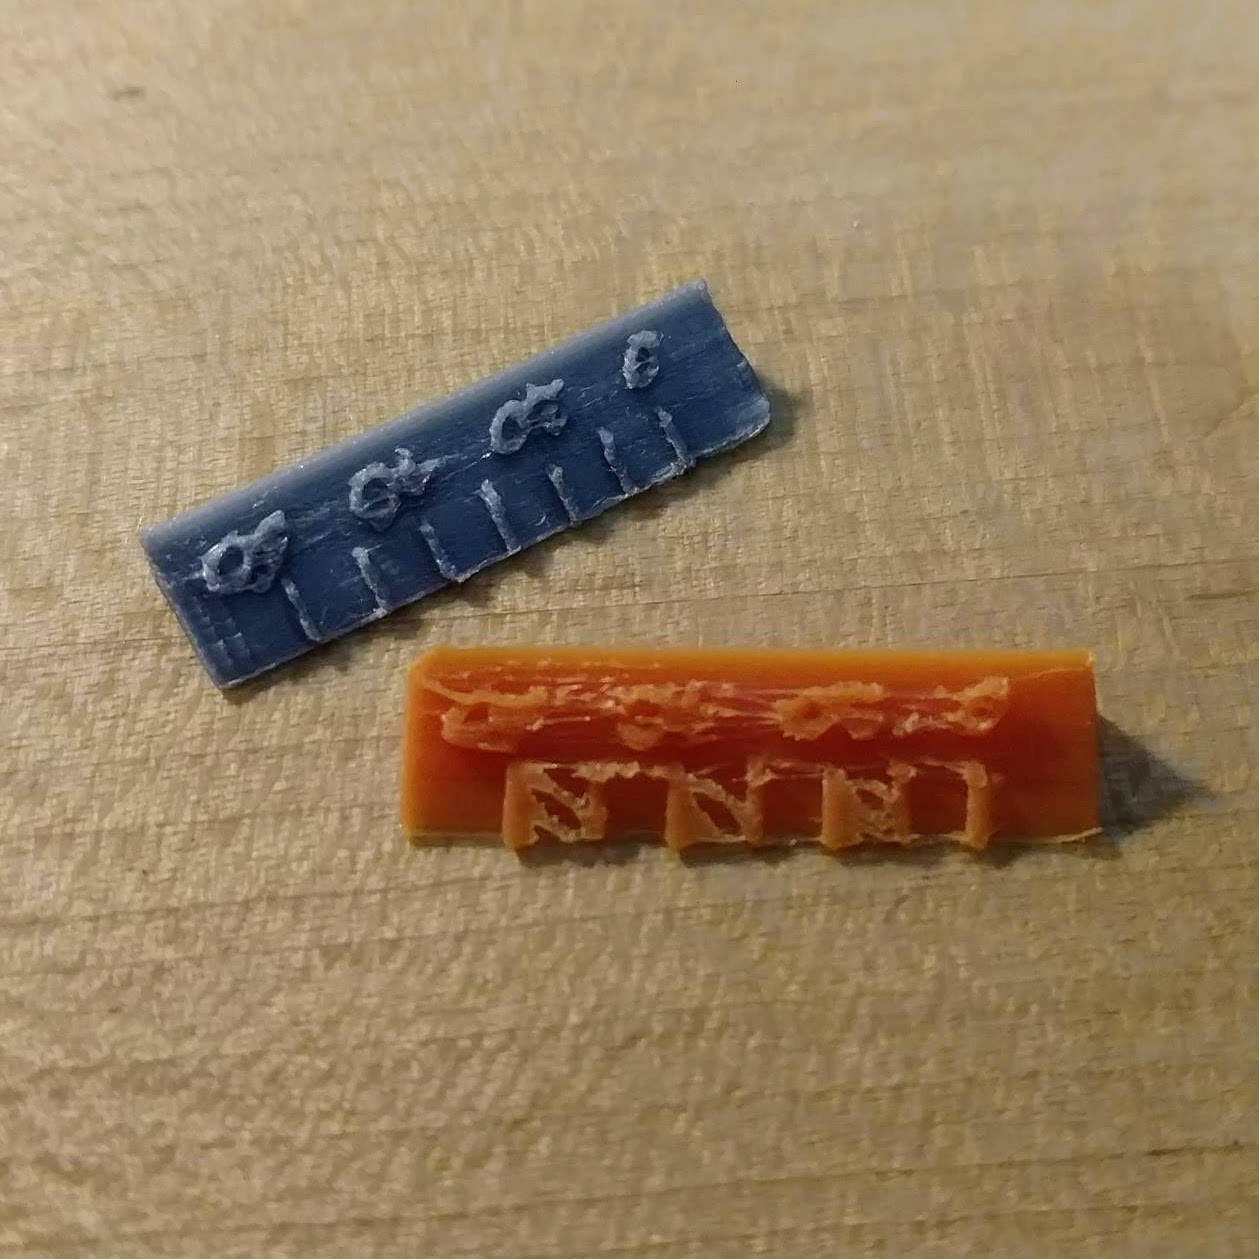 Comparison of precision scales printed by a Printrbot (silver) and the iNSTONE Desktop DIY (orange), showcasing the iNSTONE’s lack of precision.
The iNSTONE Desktop DIY is incapable of achieving the precision required for this task.
Precision Score: F
Educational Print Quality.
The Isopod model test was approached with optimism. As the final test print, printer settings were optimized as much as possible, and the Isopod model is designed for easy printing even on basic 3D printers.
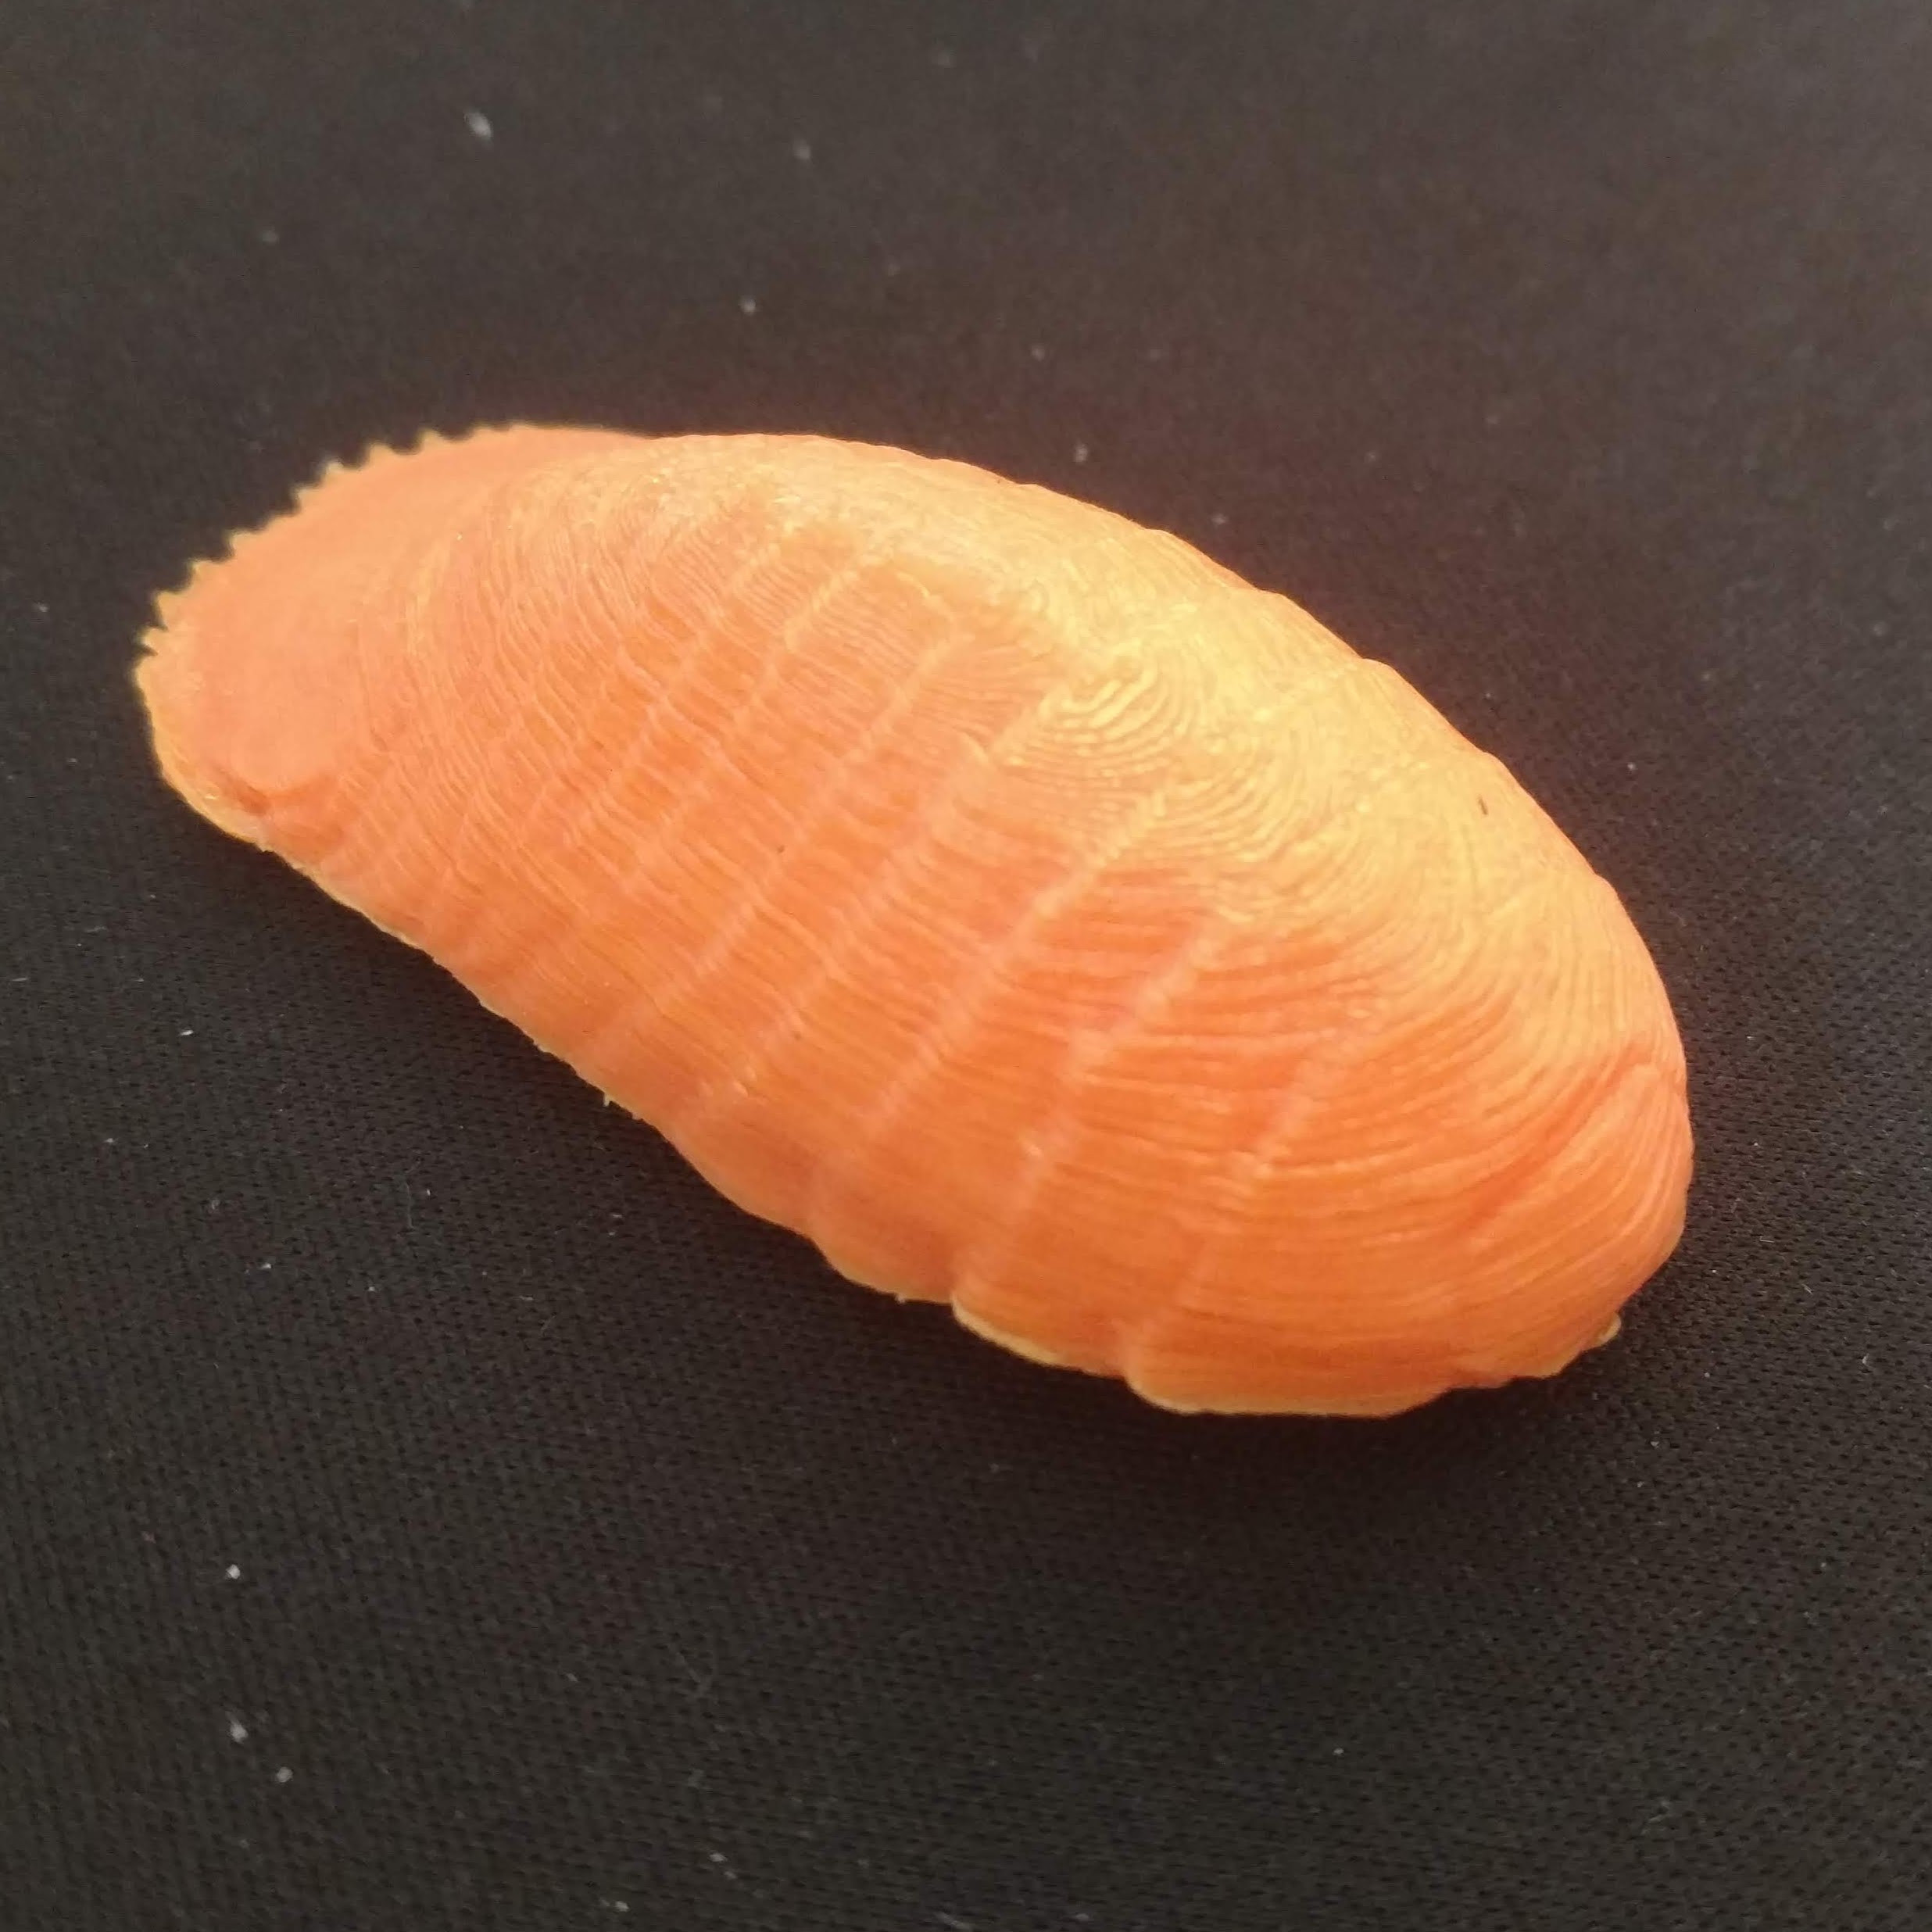 An Isopod model printed on the iNSTONE Desktop DIY, exhibiting z-axis wobble and reduced detail.
However, z-axis wobble persists. Vertical layers are inconsistent with significant gaps, fine details are lost, the base is poorly formed, and warping is evident on the telson. While the print is recognizably an isopod, its overall quality is low.
Educator’s Score: D
Disassembly Analysis.
Like the Anet A6, the iNSTONE Desktop DIY features an open design, making disassembly straightforward. After extensive use during this review, a detailed understanding of its construction was gained. It reinforces the assessment that this is indeed the best possible printer achievable at the $99 price point. The design and manufacturing are surprisingly competent. The Bowden extruder shows minor signs of stress from filament movement, but otherwise, no significant wear, friction issues, or potential failure points were observed.
The printer is remarkably robust for its price, but its fundamental design limitations restrict its overall performance.
Note: Burn-in and tear-down analyses are often inversely proportional for kit vs. pre-built printers. Kits like the iNSTONE receive detailed burn-in assessments, while pre-builts get more extensive tear-down evaluations. The overall evaluation balances out across both types.
Tear-down Score: A
Filament Waste Assessment.
The iNSTONE Desktop DIY produced considerably more waste filament than any other printer tested, even excluding filament wasted during initial calibration and failed prints during the burn-in phase.
Total mass of waste filament: 27.71g
Reviewer’s Reflections.
Numerous potential improvements could enhance this printer. An all-metal or even a 3D-printed z-axis coupler would significantly improve print quality. Redesigning the build plate and adding a heated bed would also yield substantial benefits. A cooling fan directed at the print area is also essential.
However, such modifications would deviate from the core concept of this machine. The iNSTONE Desktop DIY is explicitly a $99 3D printer, not a $99 printer plus further engineering and advanced 3D printing expertise.
The motivation behind building a hundred-dollar 3D printer isn’t about practicality, but about exploring the limits of possibility.
Final Verdict.
Assigning a numerical score to this printer is almost irrelevant. It is not recommended for purchase.
Final Score: Avoid.
Current 3D Printer Rankings:
The final printer in this budget review series is the highly recommended $194 Creality Ender 3. Stay tuned for the concluding results.
Depending on the response to this project, future reviews may expand to include printers in the $200 to $400 price range. To support this expansion, consider using the provided Amazon Affiliate links for purchases, or contribute to Southern Fried Science via *[Patreon*](https://www.patreon.com/Andrew_Thaler)**.