3D printers once seemed like futuristic technology, but now, they are surprisingly simple machines. Essentially, you need stepper motors, switches, a control board, a heating element, and a nozzle. The real revolution in 3D printing came from software advancements and the expiration of key patents, making it more accessible than ever.
But how incredibly cheap can a 3D printer be and still function? Can you really gather the necessary components and assemble a working 3D printer for less than $100? iNSTONE decided to find out, and they might have proven it’s possible, in a very limited sense.
Introducing the iNSTONE Desktop DIY.
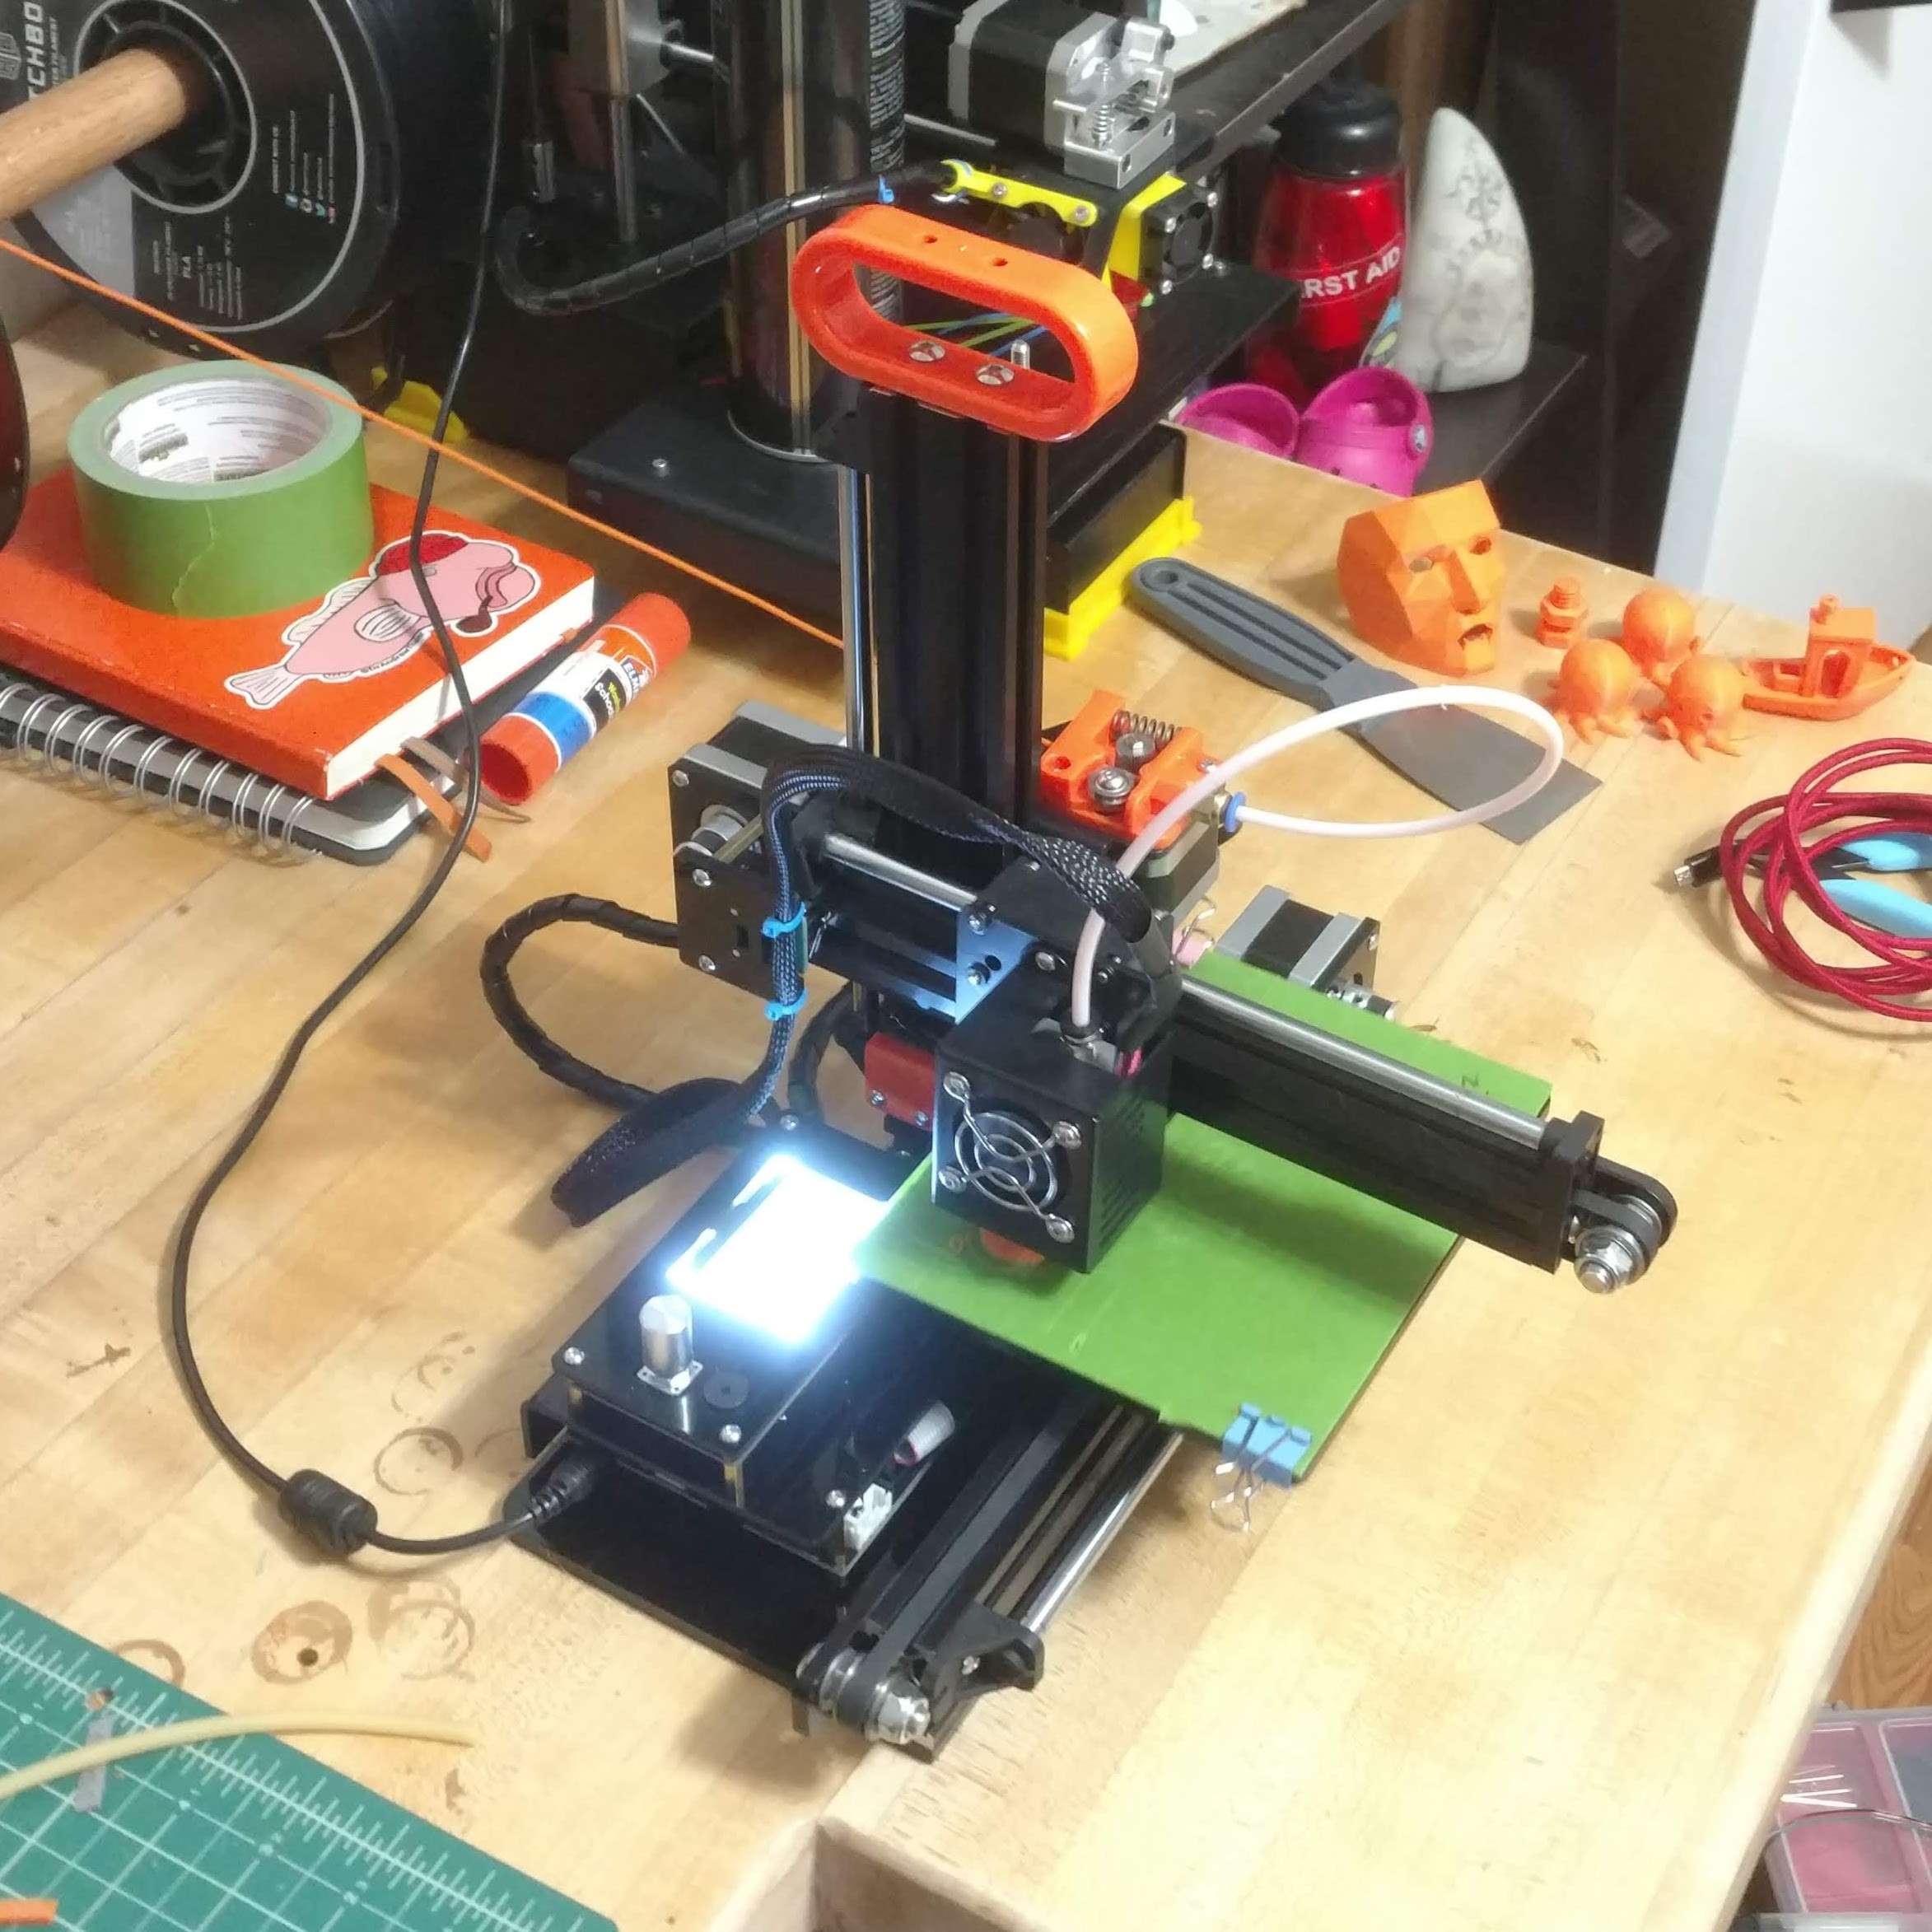
The iNSTONE Desktop DIY 3D printer kit, showcasing its compact cantilever design, illustrating the core components of an ultra-budget 3D printing machine.
This is arguably the Cheapest Printer you could possibly build for just $99. And yes, it’s quite terrible, but in a fascinating way. It’s a machine you might strangely appreciate, but almost certainly shouldn’t buy unless you’re a very specific type of enthusiast.
This 3D printer uses a cantilever design, featuring a small build area and no heated bed. It comes with a basic operating system and connects via a type-B USB port, a somewhat outdated connection in today’s electronics. Frills are absolutely absent. Even the provided power supply doesn’t inspire confidence.
If the Anet A6’s design philosophy was about maximizing 3D printer capability for around $200, the iNSTONE’s approach seems to be: “How do we create the most functional 3D printer for under $100?”. In that extreme budget context, they might have succeeded. Despite its small build volume (a quarter of the Anet A6), the iNSTONE surprisingly incorporates more metal in its construction. Its structural elements are made of extruded aluminum. The stepper motors are of reasonable quality, and the hot end is a very inexpensive clone of the E3D. The Bowden extruder mechanism is constructed from dense, injection-molded plastic. You can actually move this assembled printer without feeling like you’re going to completely disrupt its calibration.
It even includes a rotary encoder on the control board, a feature missing from the Monoprice Mini Delta.
The kit also includes a surprisingly generous set of tools, more than other printer kits in this price range. It comes with everything needed for assembly, including a useful little snipper tool, and a collection of wrenches, some of which, humorously, don’t actually fit any of the printer’s bolts.
If you were tasked with finding components in a Shenzhen market with a $100 budget to build a 3D printer, you’d likely struggle to create something better than this. There are numerous clever design choices that reveal considerable engineering effort went into making this incredibly cheap printer function at all. This machine, despite its flaws, earns a place of interest in a workshop.
View this post on Instagram Well, I got the $99 #3Dprinter running and printing, which is progress.
A post shared by Andrew David Thaler (@drandrewthaler) on
However, let’s be clear: the iNSTONE Desktop DIY is objectively a terrible 3D printer in terms of performance. Unless you’re a 3D printing aficionado seeking a novelty item for your collection—and enjoy a challenging build process—you should definitely avoid buying this as your primary or only 3D printer.
For details on the testing methodology used in this review, please refer to: We’re gonna beat the heck out of these machines: The search for the best dirt-cheap 3D printer for fieldwork.
The Burn In: Assembling the Cheapest Printer Kit
Building this cheapest printer kit was surprisingly enjoyable. The assembly instructions were reasonably clear if you have some prior experience with 3D printers, but might be too unclear for a complete beginner. Everything attaches to the extruded aluminum frame using t-nuts, resulting in a robust and stable structure. The kit was missing a few minor parts, but luckily, replacements were available in a typical workshop.
Simple mechanisms are included for adjusting each axis. However, the z-axis coupler is particularly unusual. Instead of a machined aluminum part or even a 3D-printed component to connect the threaded rod, the iNSTONE Desktop DIY uses a short length of PVC tubing (more on this critical design choice later).
Beyond that, the design is quite basic. The printer lacks a heated bed and a blower fan for print cooling. The fiberglass build plate is held in place with standard binder clips.
View this post on Instagram Today we’re building the iNSTONE DIY $99 3D printer. It’s the cheapest printer currently available in the USA. Some early observations: it’s the only one so far that’s come with a full set of real tools (not the dinky sheet metal wrenches). They also sent the wrong power adapter, so this’ll be fun. #3dprinting #conservation #ecology
A post shared by Andrew David Thaler (@drandrewthaler) on
Achieving a decent print from this machine requires significant patience. The build plate is leveled using three thumbscrews, one of which is very difficult to access. The three-point leveling system is inherently unstable. The build plate frequently loses its alignment, sometimes even during a print job. It took nearly a week of daily adjustments, tightening, and calibration to get the printer to consistently lay down a solid first layer and begin printing reliably.
Many initial test prints failed due to z-axis wobble (more details on this critical issue later). Finally, after considerable effort, the first somewhat acceptable print emerged from the provided sample g-code: a vaguely spooky mask.
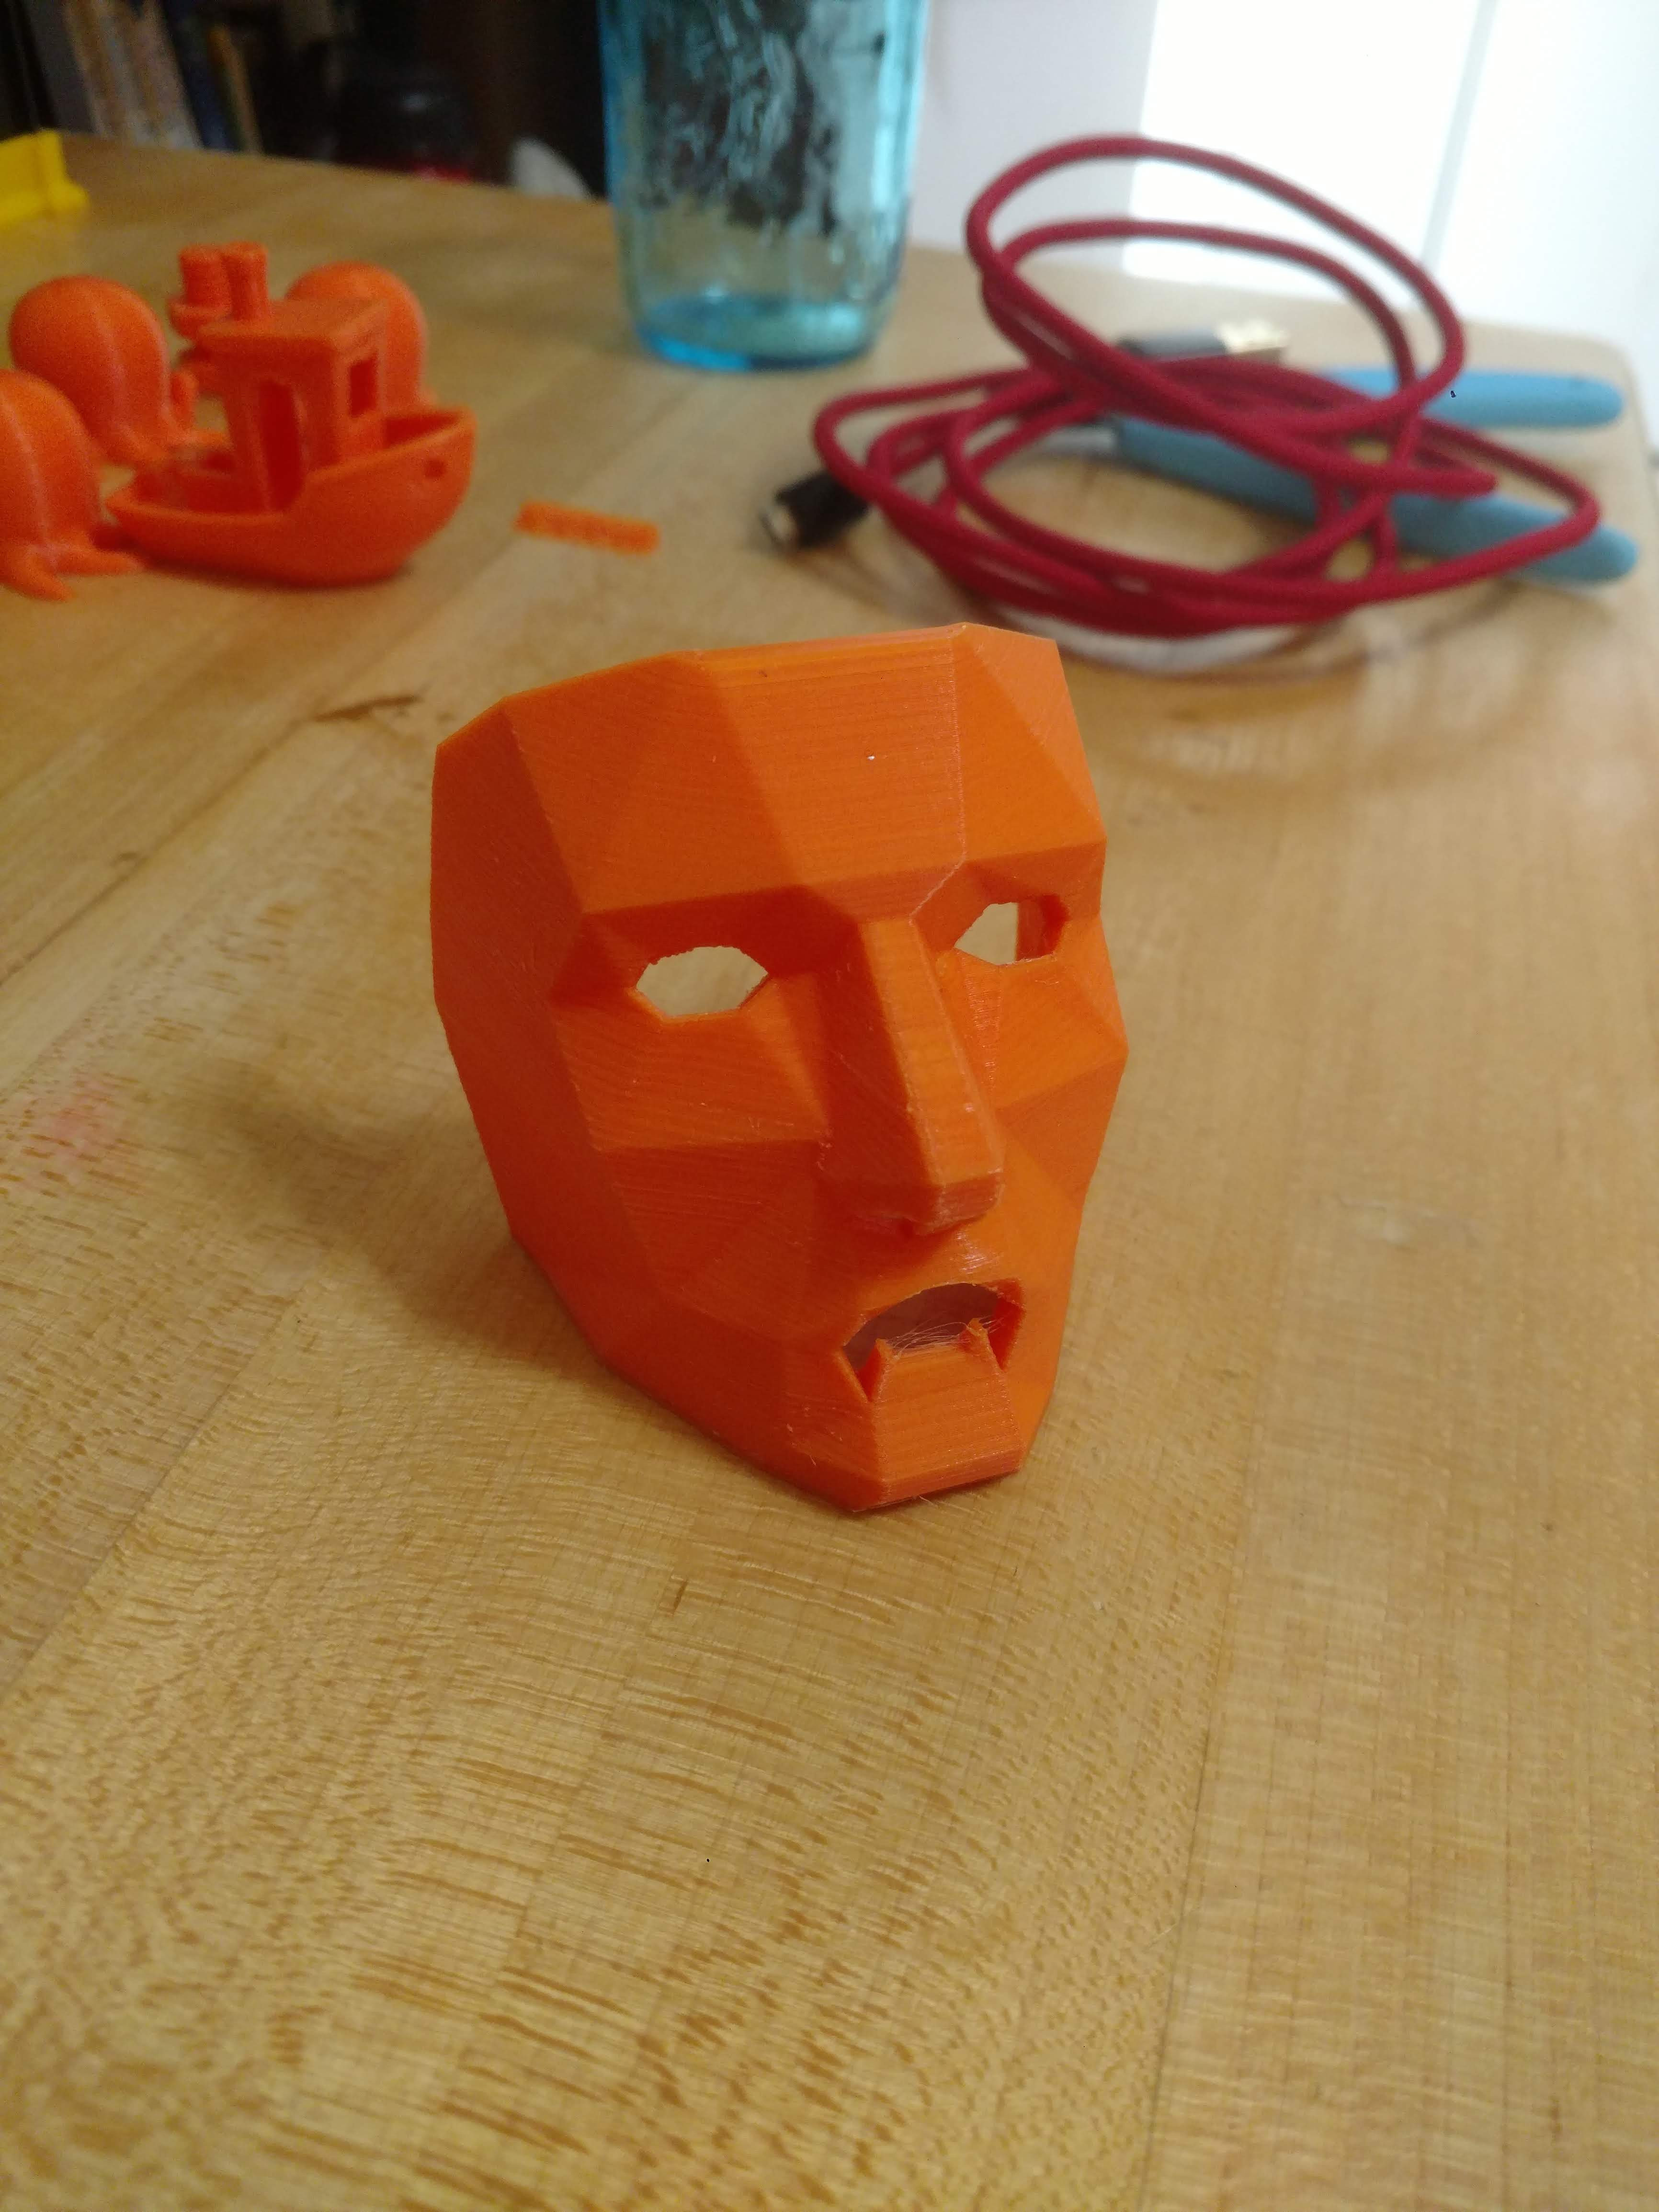
A 3D printed mask from the iNSTONE Desktop DIY, described as vaguely spooky, representing the initial successful, albeit imperfect, output from this ultra-affordable 3D printer.
Burn-in Score: C
The Benchmark Test: Benchy on the Budget Printer
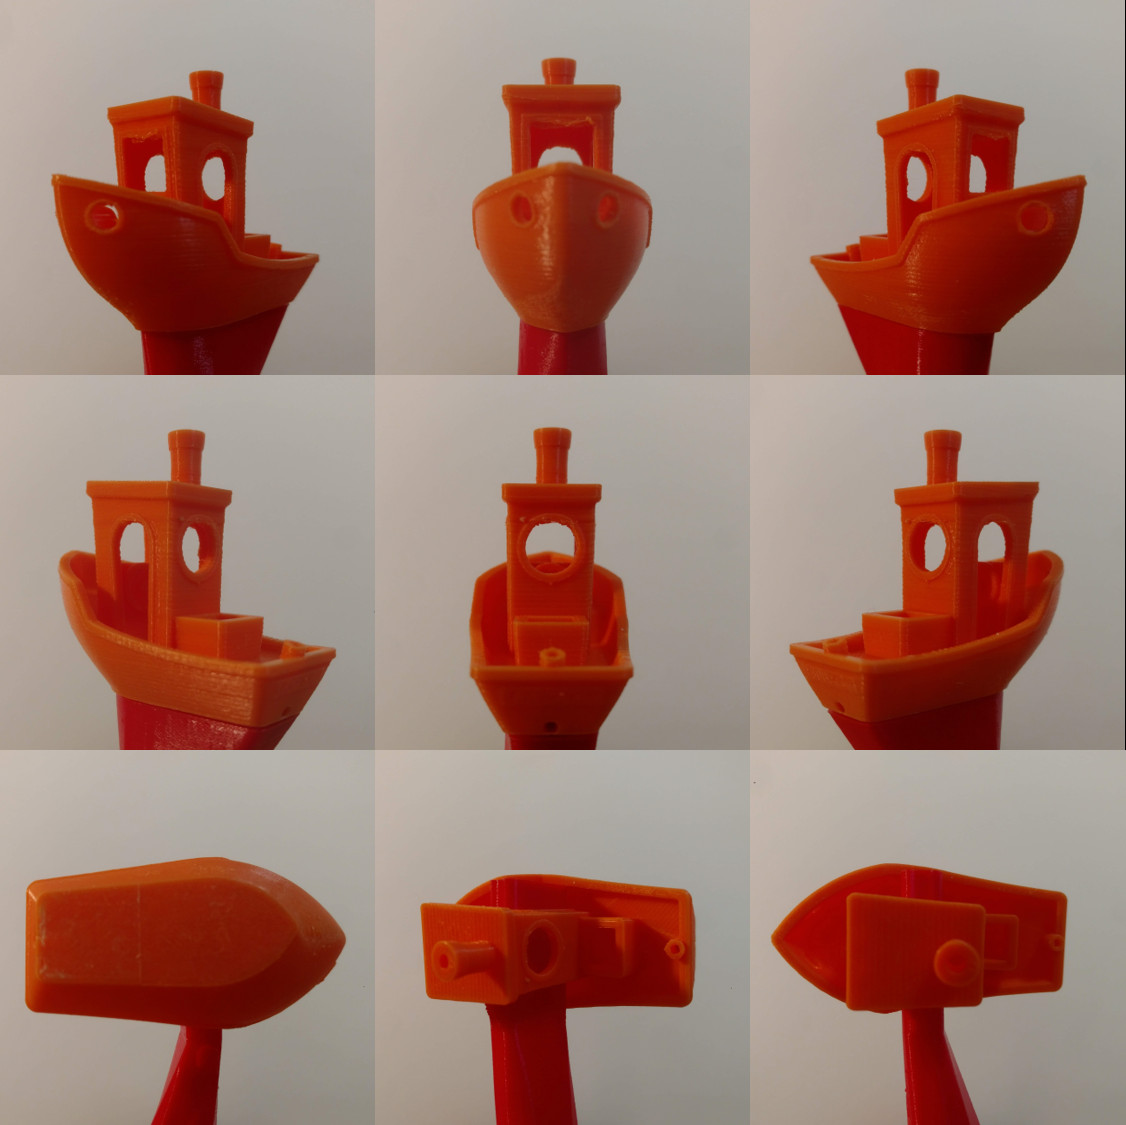
A 3D printed Benchy test model from the iNSTONE Desktop DIY, displaying noticeable wobble and extrusion issues, typical of prints from a very low-cost 3D printer.
Oh, Benchy, the ubiquitous 3D printing torture test, met its match with this cheapest printer. There’s no single catastrophic flaw in this Benchy print, but rather a pervasive wobble throughout. It did print, which is a basic success. However, over-extrusion and the unstable build plate mean the bottom layers are indistinct, showing some “elephant’s foot” effect. A significant vertical shift near the top indicates z-axis slippage (again, more on this to come). Nothing is truly awful, but everything is just slightly and consistently sloppy.
Benchmark Score: C
The Replication Test: Cute Octos and Consistency
The goal of the replication test isn’t just to produce three somewhat acceptable “Cute Octo” models, but to create three consistent Cute Octos. The lack of print cooling, the unstable build plate, and the absence of a heated bed resulted in each Octo warping and deforming in unique ways.
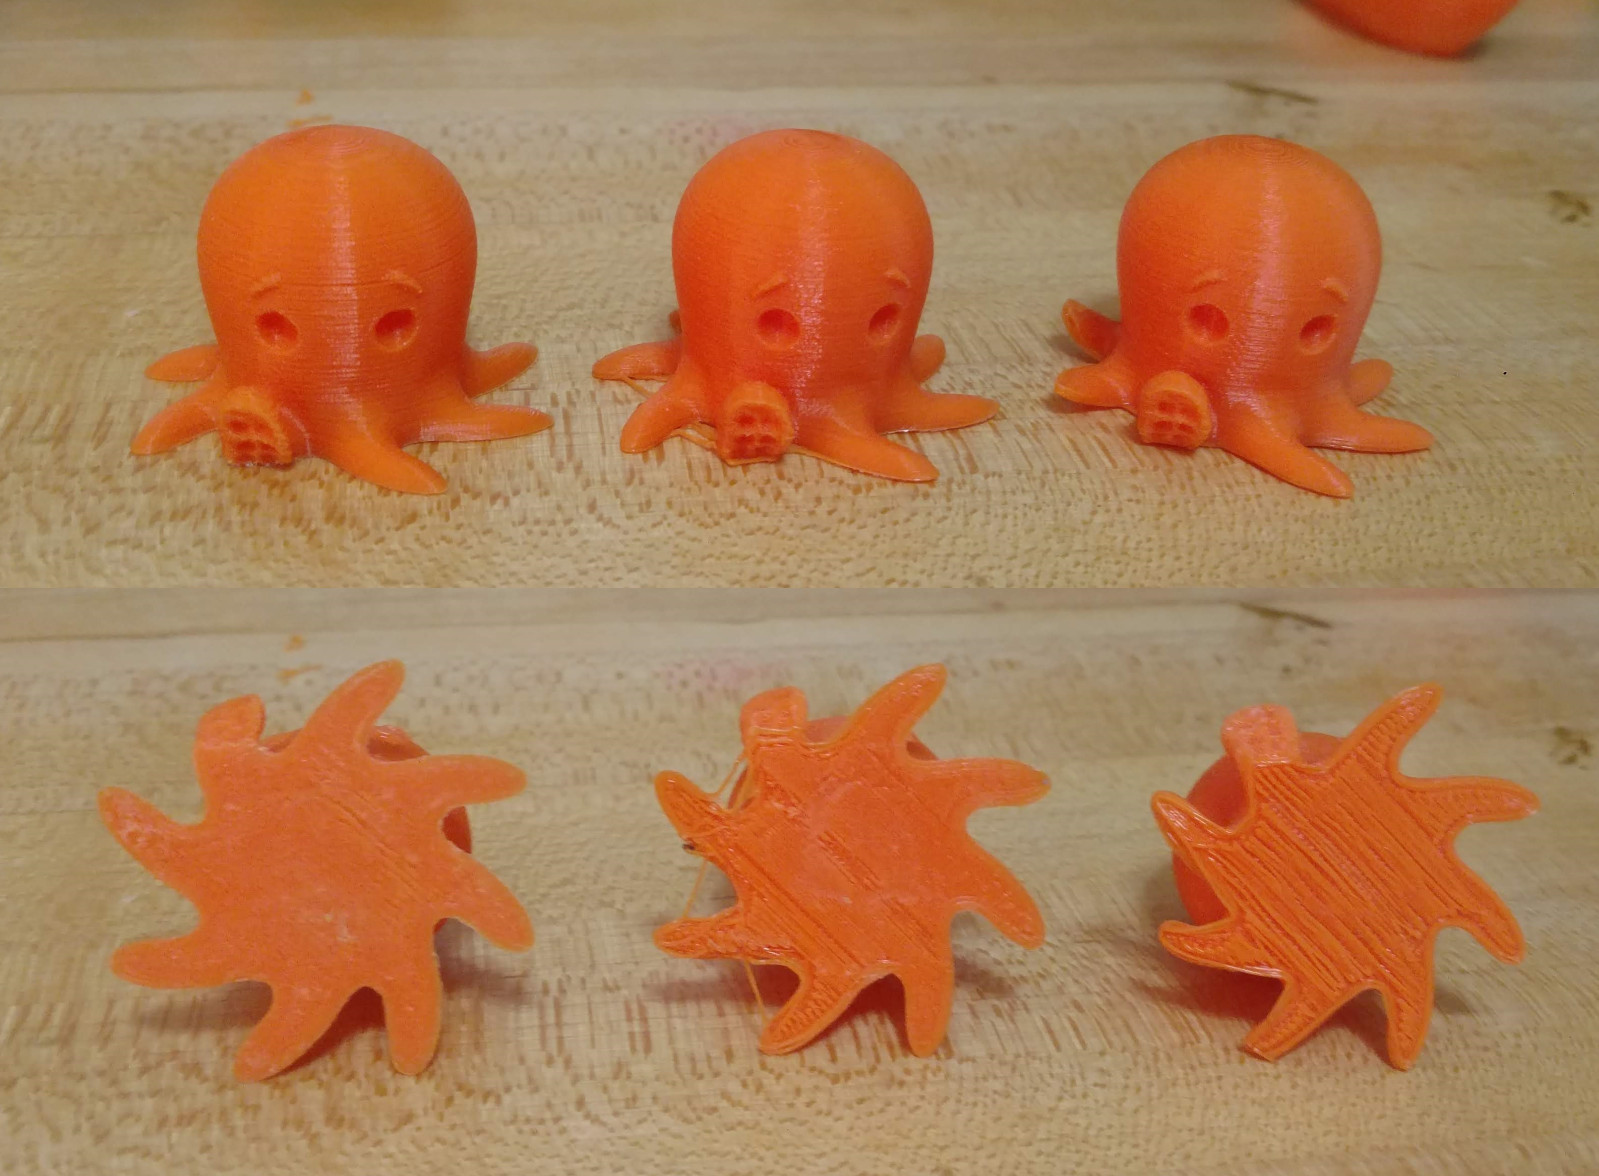
Three 3D printed “Cute Octo” models from the iNSTONE Desktop DIY, exhibiting significant inconsistencies and warping, highlighting the challenges of achieving repeatable results with a very basic 3D printer.
This test was definitively a failure.
Replication Score: F
The Functional Parts Test: Threads and Tolerance
When printing functional parts, especially those involving threads like screws, z-axis control is paramount. And this cheapest printer simply lacks it (you guessed it, more on that later). The printed threads were loose and imprecise. There was excessive play between the two parts, and they didn’t hold together securely. They technically “work,” but barely, and not in any way that would be practically useful.
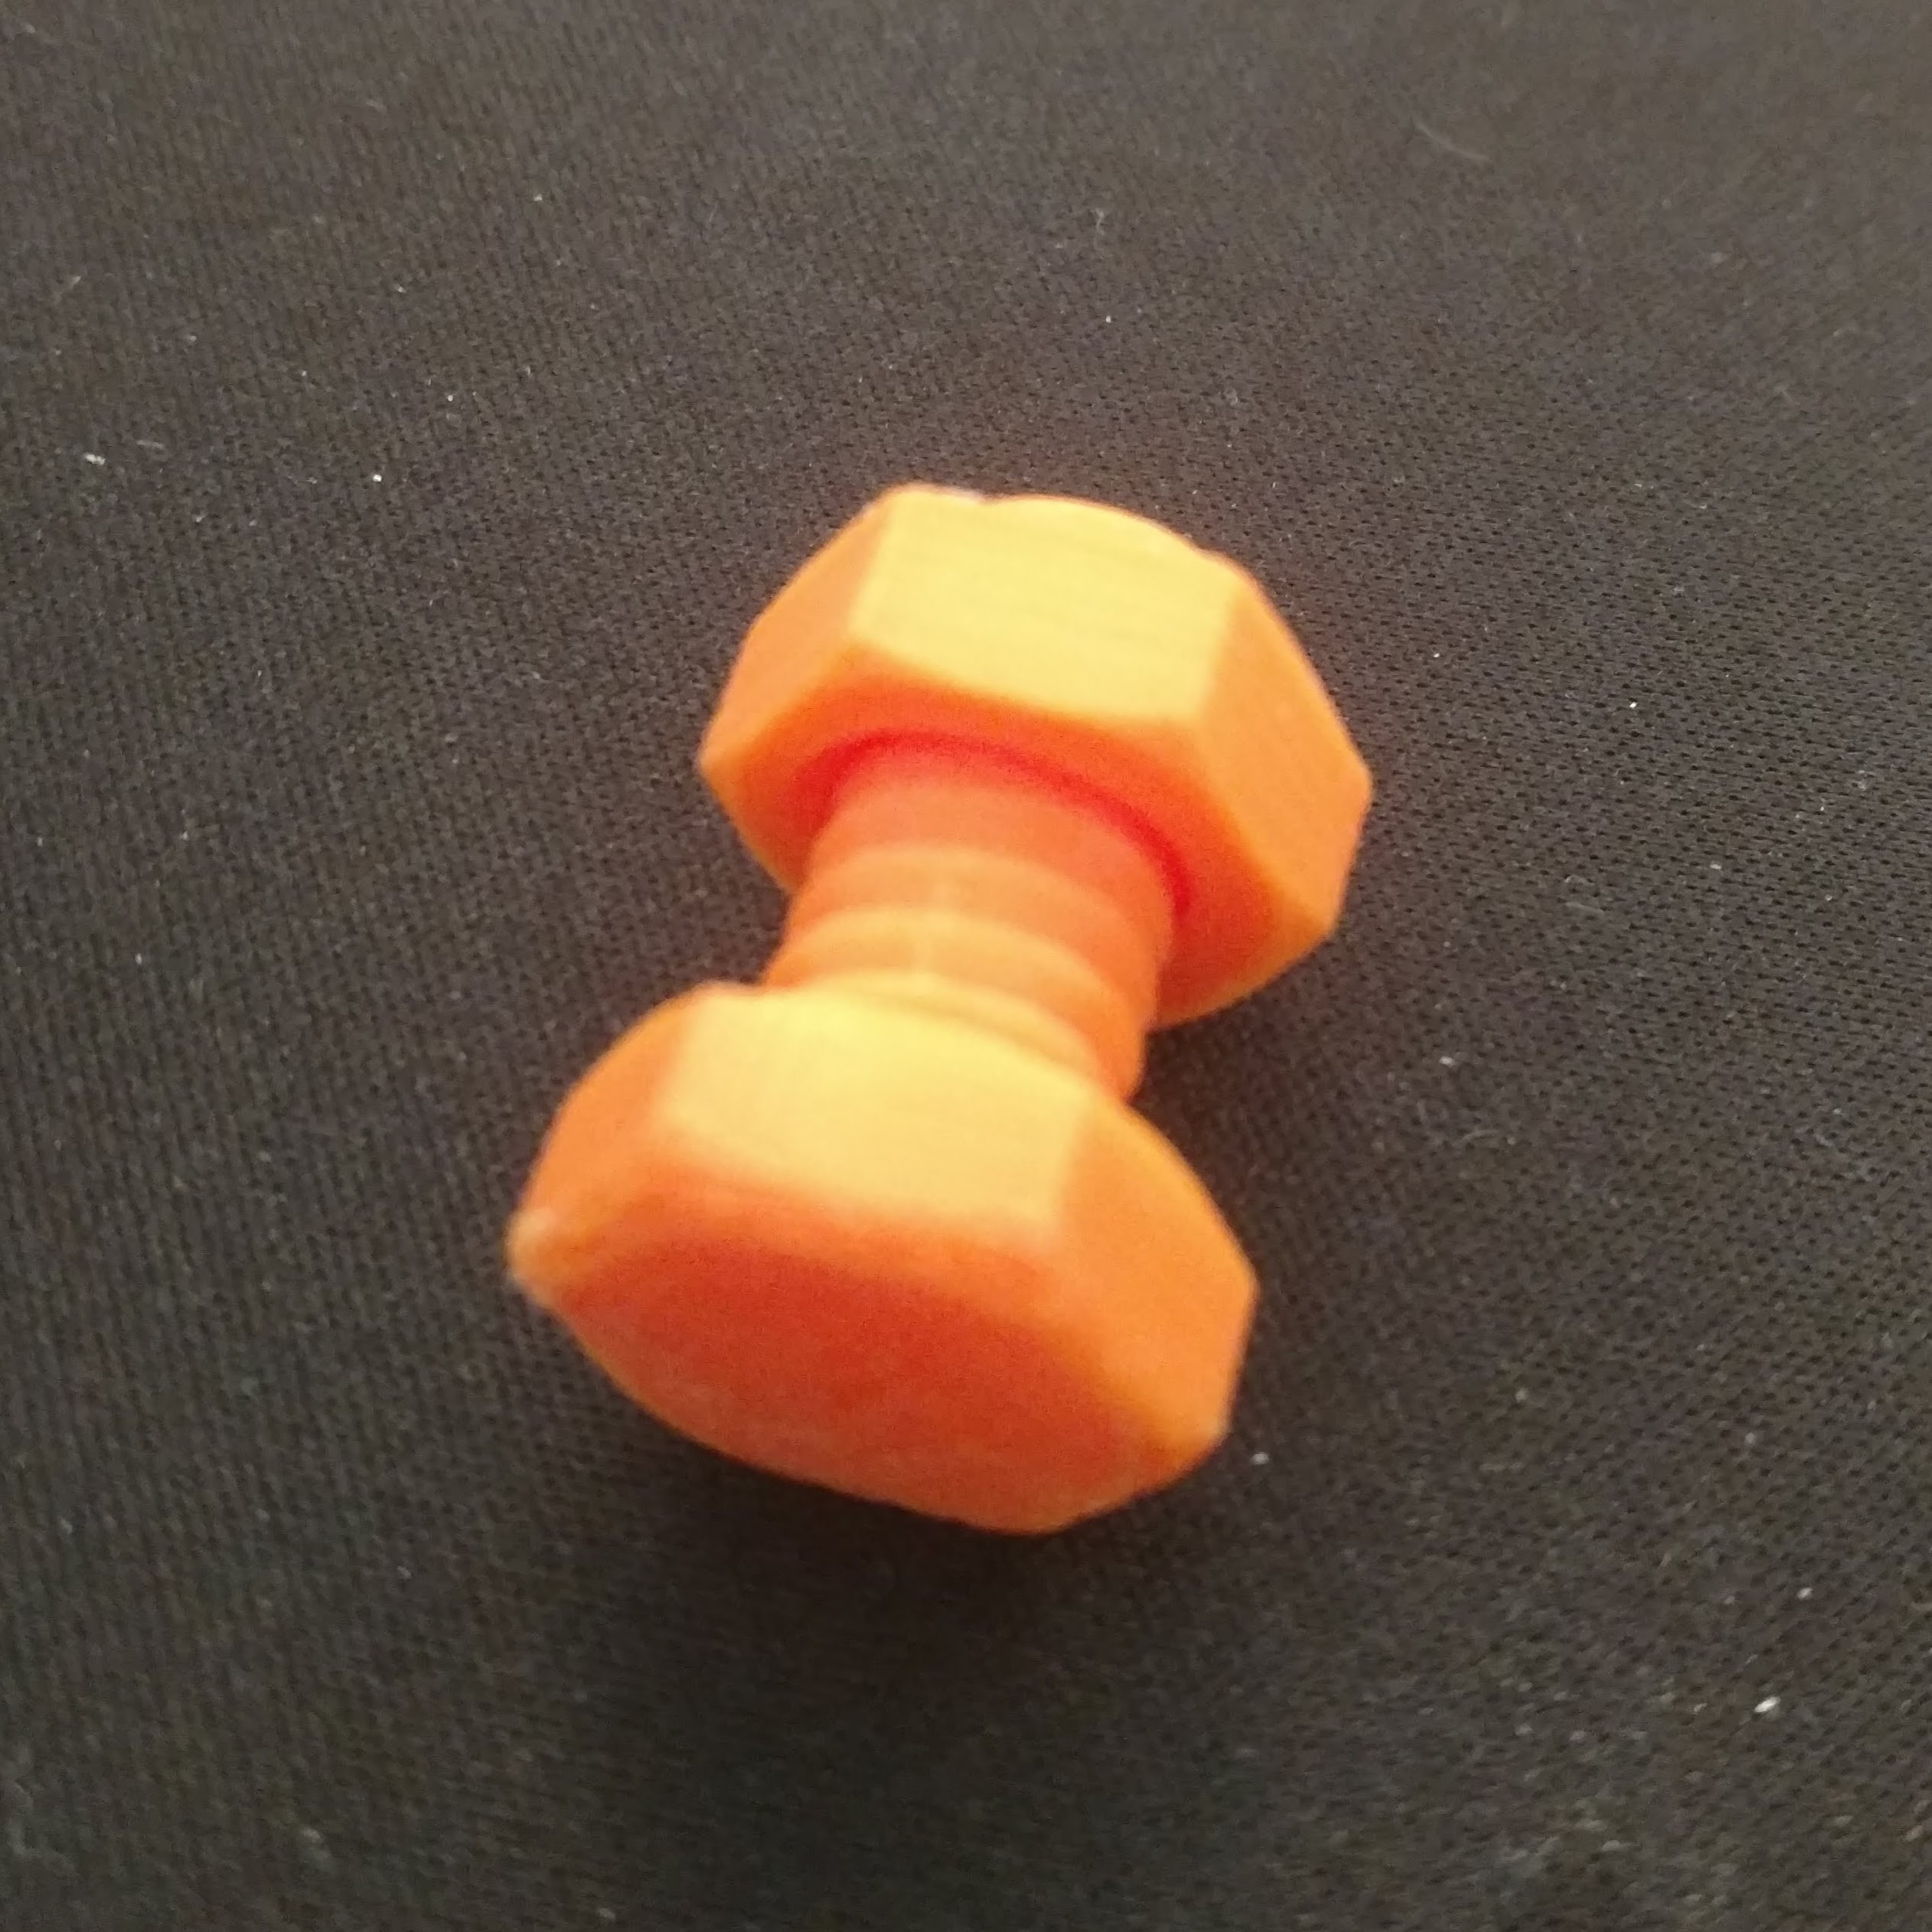
3D printed functional parts from the iNSTONE Desktop DIY, showing imprecise threads and loose tolerances, demonstrating the limitations of this printer for creating accurate mechanical components.
Functional Part Score: D
The Complex System Test: The Z-Axis Debacle
It’s time to directly address the z-axis. Previously, flexible couplers on the Anet A6 were considered a low point in 3D printer design. However, the iNSTONE Desktop DIY surpasses even that. This is how the z-axis is coupled to the motor:
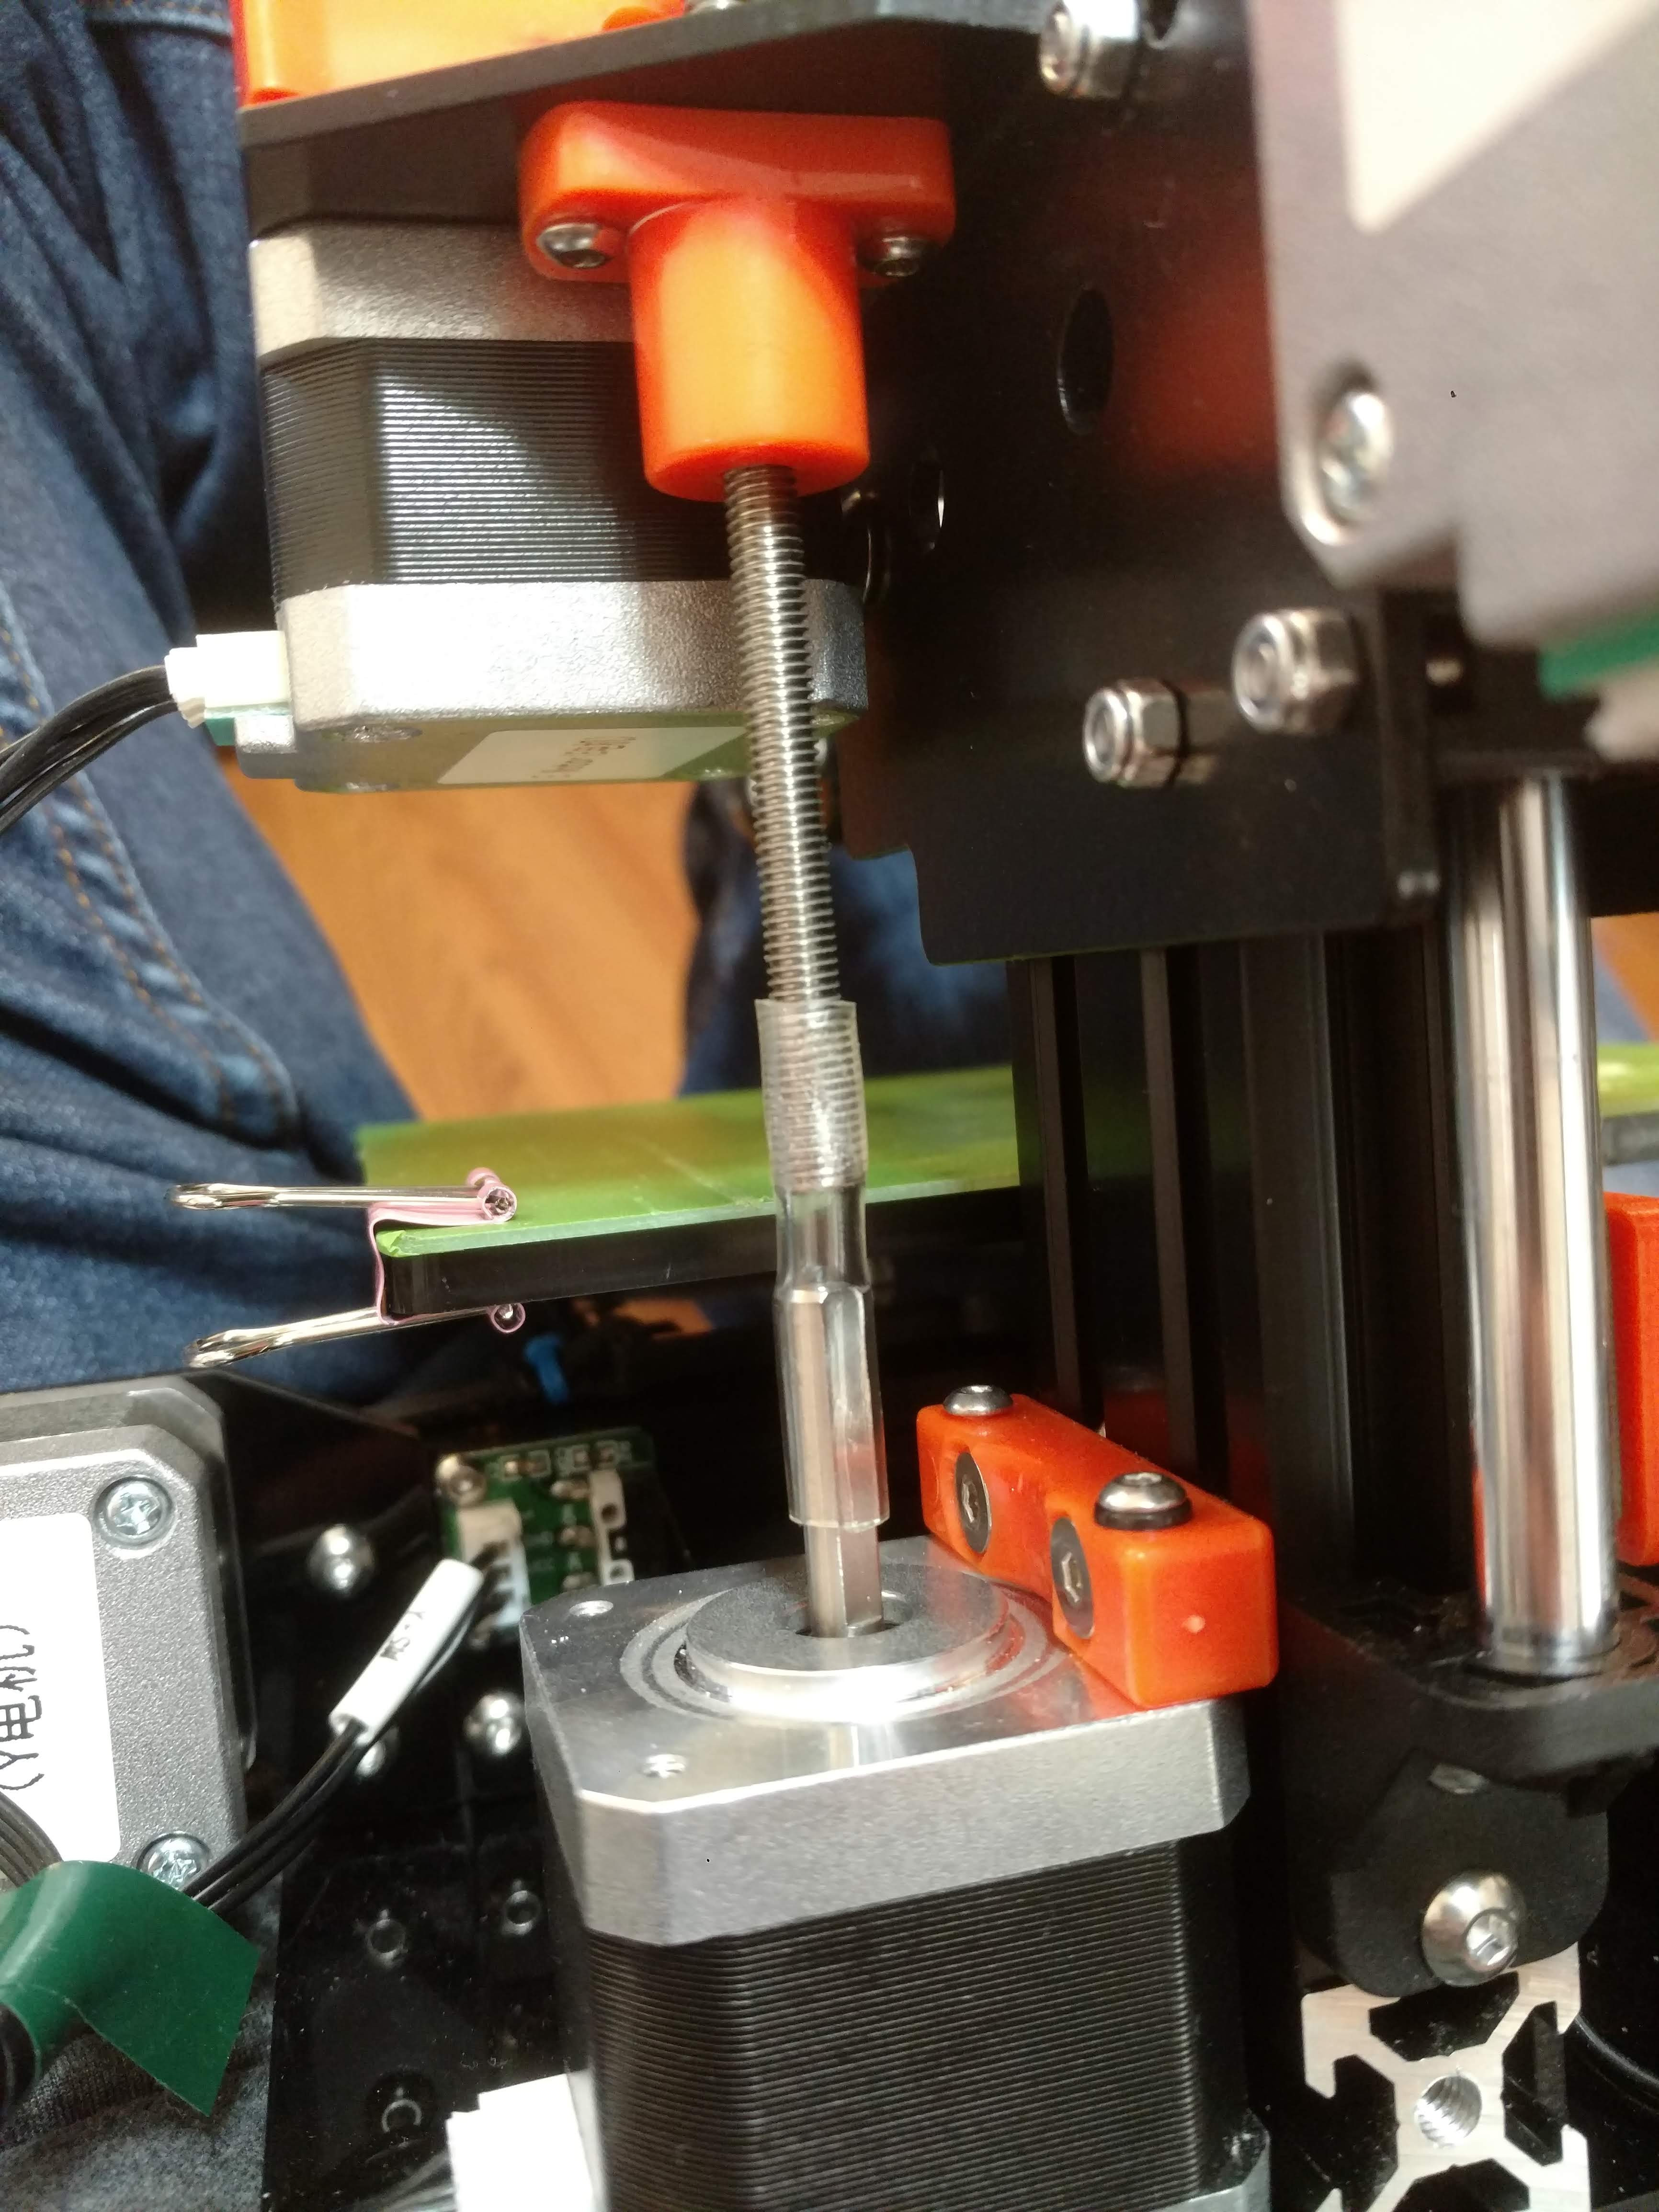
A close-up of the iNSTONE Desktop DIY’s Z-axis coupler, revealing the use of a simple PVC tubing piece held by friction, illustrating a major design flaw contributing to print quality issues.
Yes, it’s just a piece of PVC tubing held in place by friction. For a printer that initially impressed with its clever design elements, this is profoundly disappointing. This rudimentary coupler is the root cause of the lack of z-axis control, the gaps in vertical surfaces, and the severely compromised print quality when attempting higher resolutions like 200 microns, resulting in prints like this:
A 3D print from the iNSTONE Desktop DIY attempted at 200-micron resolution, exhibiting extreme layer inconsistencies and defects, directly attributable to the flawed Z-axis design.
Simply put, this machine lacks the precision needed for detailed prints.
At a coarser 100-micron resolution, printing a Niskin receiver (part of a water sampler) took 11 hours (compared to the 2-4 hour average on other tested printers). The resulting part was flimsy, the servo motor didn’t fit properly, and all components had excessive play. Remarkably, thanks to the brilliance of the Niskin3D design team, the water sampler still technically functioned, but felt incredibly fragile and unstable. An in-water test was deemed too risky due to its precarious nature.
View this post on Instagram Can you print a Niskin bottle with a $99 #3Dprinter? Yes. Should you? No. #3dprinting
A post shared by Andrew David Thaler (@drandrewthaler) on
Complex System Score: D
The Precision Instrument Test: Scale Inaccuracy
Can a $99 3D printer produce a precision scale suitable for a navigational instrument at a fine 50-micron resolution?
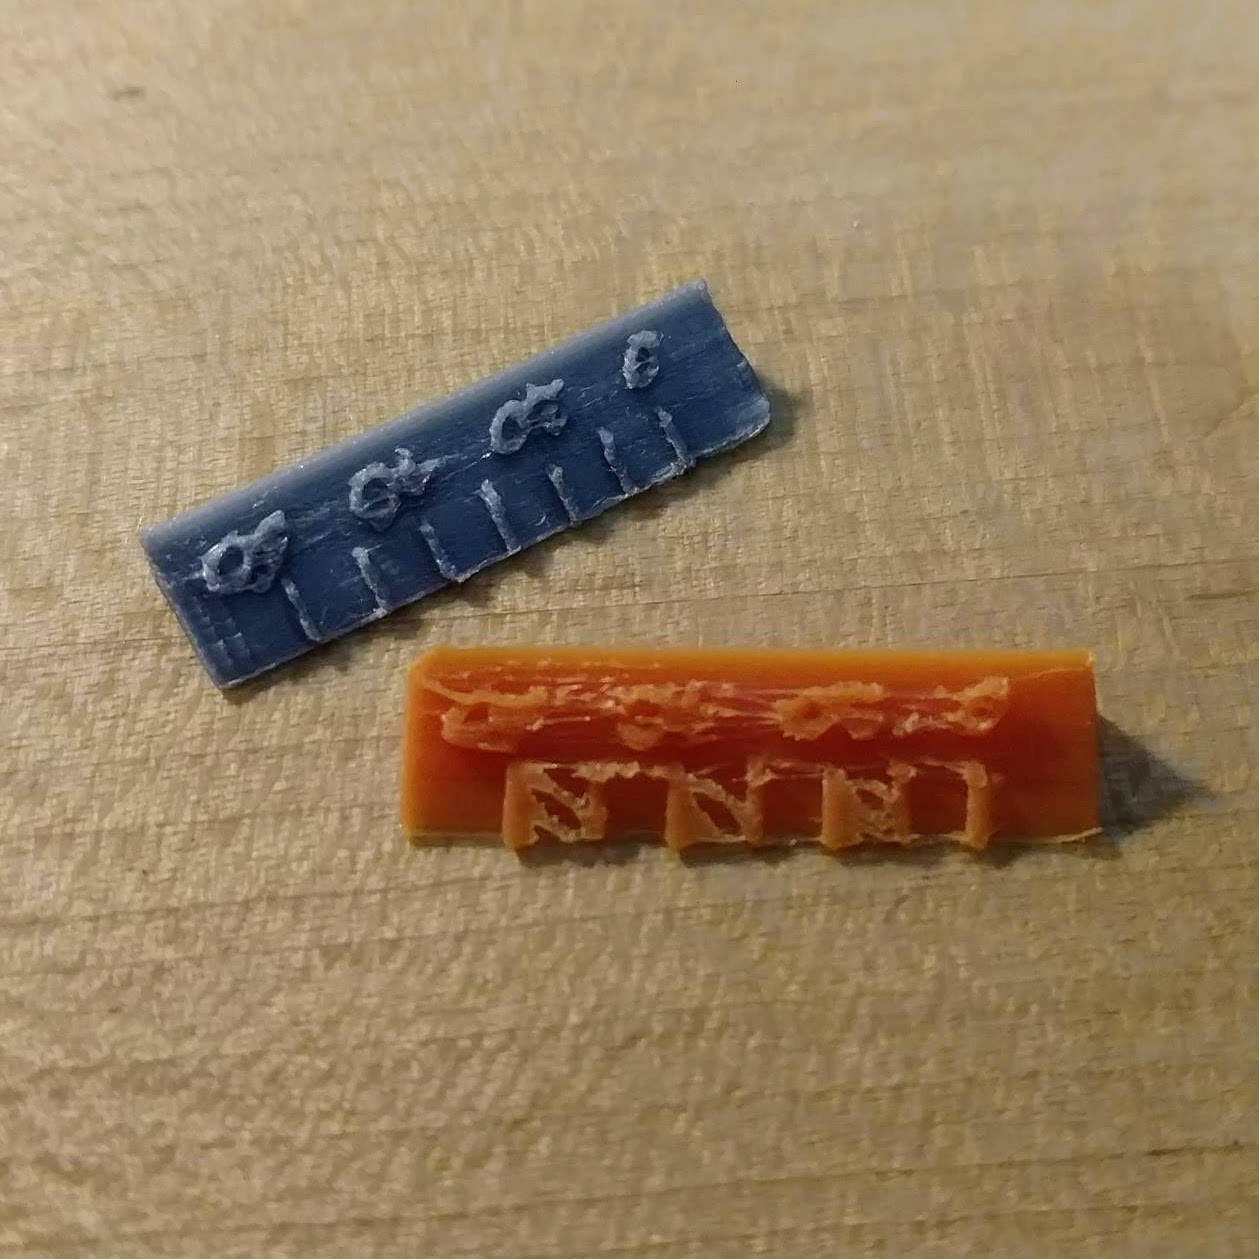
A comparison of precision scales printed by a Printrbot (silver) and the iNSTONE Desktop DIY (orange), clearly showing the iNSTONE’s inability to produce fine details and accuracy required for precision instruments.
No. It absolutely cannot.
Precision score: F
The Educator’s Test: Isopod Imperfectly Printed
Hope remained for the educator’s test. This was the final print of the review, printer settings were as optimized as possible, and the Isopod model was specifically designed to be easy to print even on basic, low-end printers.
A 3D printed Isopod model from the iNSTONE Desktop DIY, showing significant Z-wobble and loss of detail, demonstrating its limitations for educational purposes requiring model accuracy.
Unfortunately, z-axis wobble struck again. Vertical layers were inconsistent with large gaps, much of the intended detail was lost, the base was poorly formed, and warping was evident on the telson (tail section). You can vaguely identify it as an isopod, but that’s the extent of its representational accuracy.
Educator’s Score: D
The Tear-down: Examining the Cheapest Printer’s Build
Like the Anet A6, the iNSTONE printer’s components are largely exposed, simplifying the tear-down process. After weeks of intensive testing, there’s a deep familiarity with its internal workings. It’s genuinely not an exaggeration to say this is the best printer you could assemble for $99. It’s thoughtfully designed and reasonably well-manufactured given the extreme budget. The Bowden extruder shows some stress from filament movement, but otherwise, there are no obvious signs of wear, unusual friction, or major concerns.
It excels at being exactly what it is: a functional, incredibly cheap printer. The issue is that “what it is” is fundamentally limited in practical applications.
Note: The Burn In and Tear Down tests are somewhat redundant in these reviews. Kit printers receive extensive Burn In sections and briefer Tear Downs, while pre-built printers are reviewed in reverse. Overall, it balances out.
Tear-down Score: A
The Trash Test: Filament Waste
This printer generated significantly more waste filament than any other printer tested, and this figure doesn’t include the substantial amount of failed prints during the initial burn-in and calibration phase.
Total mass of waste filament: 27.71g
Reviewer’s Discretion: Improving the Ultra-Budget Printer
Many improvements could be made to this printer. Replacing the PVC tubing z-axis coupler with an all-metal (or even 3D-printed) version would drastically improve z-axis stability and print quality. Redesigning the build plate and adding a heated bed would also yield significant benefits. A cooling fan directed at the print area is also desperately needed.
However, these upgrades would fundamentally alter the spirit of this machine. The iNSTONE Desktop DIY is defined by being a $99 3D printer, not a $99 base model requiring a week of post-purchase modifications and extensive 3D printing expertise to become truly functional.
You don’t build a hundred-dollar 3D printer because it’s a practical necessity; you build it because you can. It’s an exercise in extreme engineering and pushing the boundaries of cheapest printer technology.
Final Assessment: Just Say No
Frankly, assigning a score to this printer feels inadequate. You simply should not buy it as a practical 3D printing solution.
Final Score: Stop. Don’t.
The rankings so far:
Only one printer remains in this budget 3D printer review series: the highly recommended $194 Creality Ender 3. Stay tuned for the final results and overall rankings!
Depending on the success of this project, future reviews may expand to include printers in the $200 to $400 price range. To support this ongoing effort, please consider using the Amazon Affiliate links in this post for purchases or sign up for Patreon to support Southern Fried Science.*