
These delightful thumbprint cookies, with their soft sugar cookie base and sweet jam filling, are a timeless treat perfect for holidays, gatherings, or simply a cozy day at home. Easy to make and endlessly customizable, this recipe will quickly become a favorite.
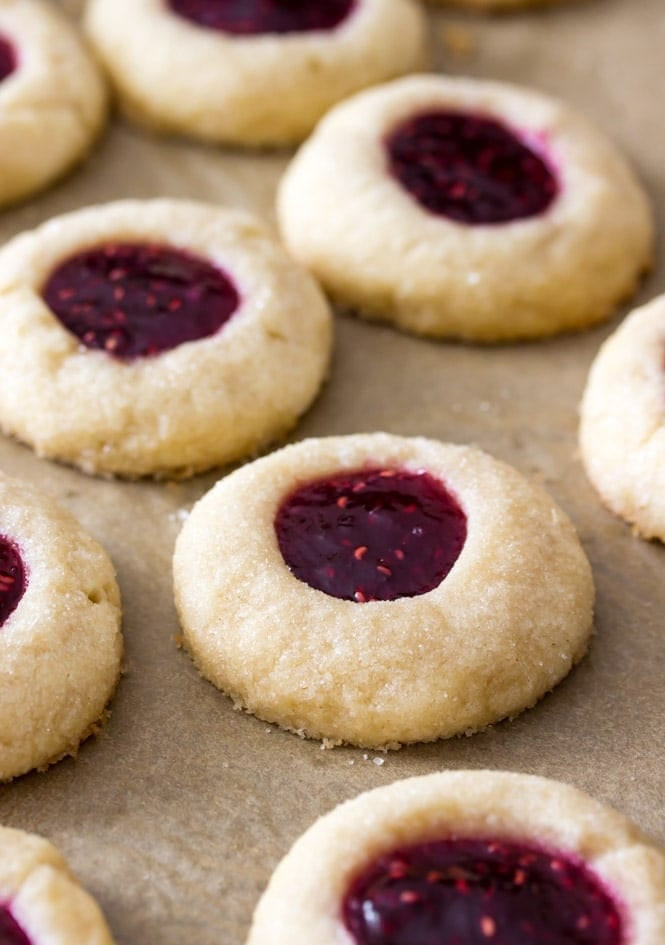
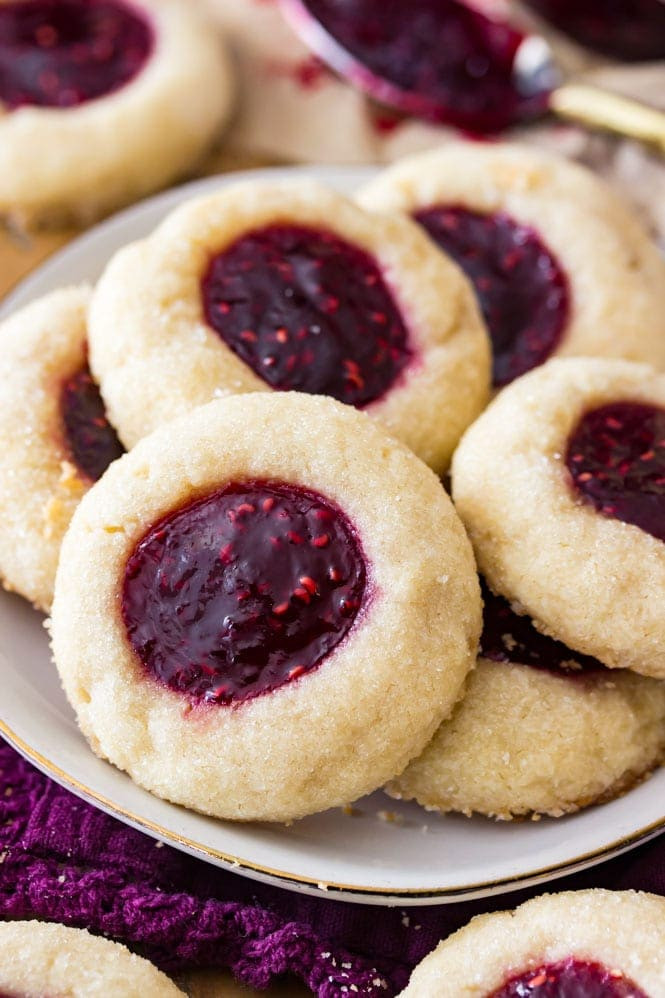 Thumbprint Cookies — rolled in sugar and filled with raspberry jam
There’s something truly special about the aroma of freshly baked cookies filling your kitchen, especially during the colder months. Imagine the scene: soft Christmas music playing, the warm glow of holiday lights, and a batch of these classic thumbprint cookies baking in the oven. It’s the perfect recipe for a joyful and delicious atmosphere. I recently baked these for my birthday gathering, and while my birthday cake was the main event, these thumbprint cookies were a delightful bite-sized addition that everyone adored. Even my daughter, who can be a picky eater, enjoyed them – albeit just the edges, as she’s not yet a fan of jam seeds!
Thumbprint cookies are incredibly simple to make, and the taste is simply irresistible. They boast a tender, sweet interior, a delicate sugared exterior, and a luscious jam center. Let’s dive into the steps for creating these perfect thumbprint cookies.
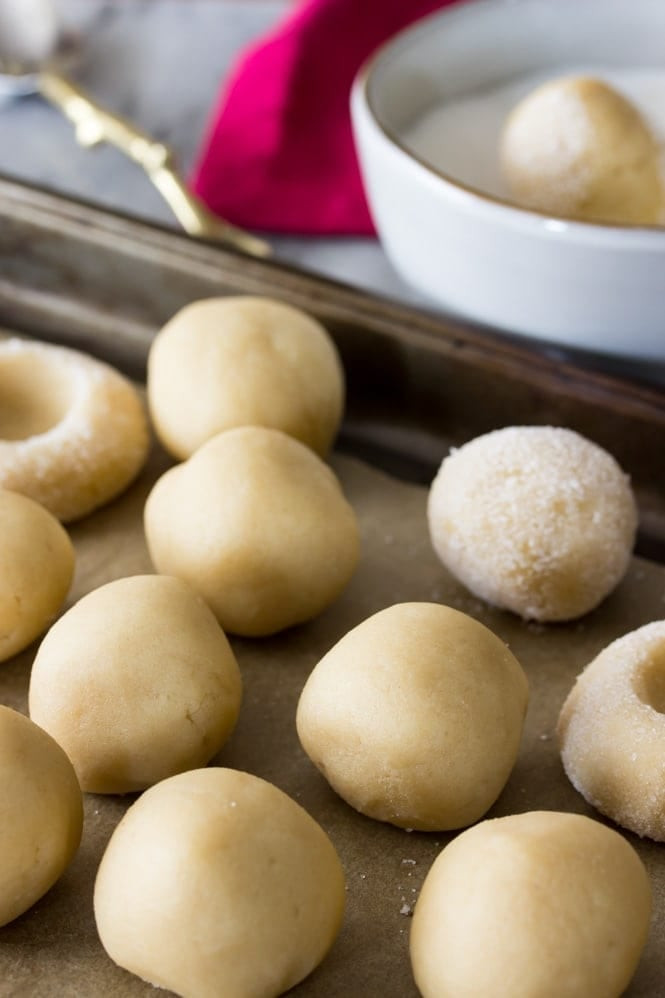 Thumbprint Cookie Dough Balls
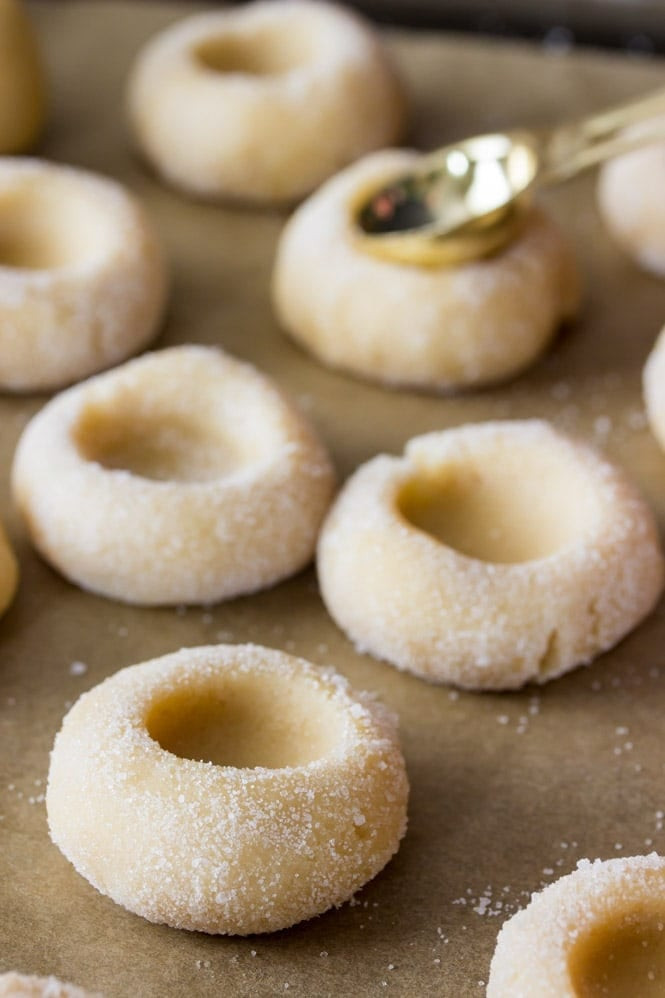 Indenting thumbprint cookies using a teaspoon
Expert Tips for Baking Thumbprint Cookies
To ensure your thumbprint cookies turn out perfectly every time, here are some key tips:
- Precise Measurements for Perfect Texture: For incredibly soft cookies that maintain their shape without spreading too thin, accurate ingredient measurements are essential. Using a kitchen scale to measure your ingredients, especially flour, is highly recommended. Over-measuring flour (which is common when using cups) can lead to dry, hard cookies, while under-measuring can cause excessive spreading. A kitchen scale ensures consistency and perfect results.
- Crack-Free Thumbprint Indentations: To avoid cracks when creating the thumbprint indentation, the key is in the dough and technique. This dough recipe is designed to be firm enough to roll immediately without chilling. Roll each cookie dough ball until it’s exceptionally smooth, free of any lines or cracks. After rolling in sugar (optional), gently use your thumb or the back of a teaspoon to slowly create the indent. If you notice any cracks starting to form, gently press the dough back together to smooth them out.
- Jam Filling Perfection: While some recipes add jam after baking, incorporating it before baking is highly recommended for thumbprint cookies. If your jam is too stiff to easily spoon into the cookie indents, simply microwave it briefly in a microwave-safe bowl for just a few seconds. You want to soften it slightly so it’s easier to stir and spoon, but not hot.
- Preventing Cookie Spreading: A fundamental rule for cookie baking, and especially important for thumbprint cookies, is to always use a cool cookie sheet. Never place cookie dough on a hot baking sheet. Ensure the cookie sheet has cooled completely between batches. Placing dough on a warm sheet will cause the butter to melt prematurely, leading to flat, spread-out cookies.
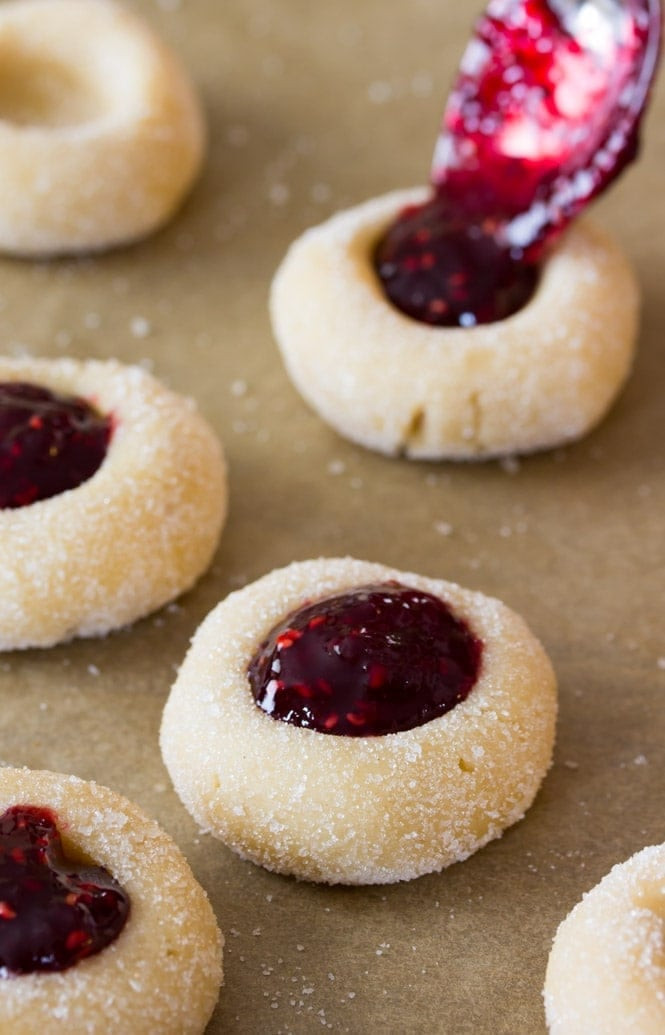 Classic thumbprint cookies being filled with raspberry preserves
For this recipe, I opted for raspberry preserves, and the slightly tart raspberry flavor beautifully complements the sweetness of the sugar cookie base. However, the beauty of thumbprint cookies lies in their versatility. You can use any jam or preserve flavor you love! Apricot and strawberry are also classic and popular choices. If you prefer a seedless filling, simply choose seedless jam varieties. While I personally enjoy the texture of raspberry seeds now, I understand that seedless options are preferred by many.
As mentioned earlier, adding the jam before baking is ideal. But, if you happen to forget, don’t worry! You can still add the filling after baking. Immediately after removing the cookies from the oven, gently re-indent the centers using a rounded teaspoon while the cookies are still soft. As the cookies cool, the jam will set and firm up, becoming perfectly nestled in the cookie. Even with the jam, these cookies hold their shape well enough to be stacked on a platter for serving.
 Thumbprint Cookies out of the oven
Enjoy making these delightful thumbprint cookies, and I’d love to hear about your favorite jam fillings!
If you are a thumbprint cookie enthusiast, be sure to explore these exciting variations: Bourbon-Infused Chocolate Thumbprint Cookies, Peanut Butter Fudge-Filled Chocolate Thumbprints, and Key Lime Pie Thumbprint Cookies!
Thumbprint Cookies Recipe
A straightforward recipe for classic thumbprint cookies, perfect for any baker.
4.94 from 1165 votes
Print Recipe Pin Recipe Rate Recipe Prevent your screen from going dark
Course: Dessert, Cookies
Cuisine: American
Prep Time: 20 minutes
Cook Time: 11 minutes
Chill Time: 30 minutes
Total Time: 1 hour 1 minute
Servings: 24 cookies
Calories: 165kcal
Author: Sam Merritt
Ingredients
- 1 cup (226g) unsalted butter, softened to room temperature
- ⅓ cup (70g) granulated sugar
- ⅓ cup (70g) light brown sugar, tightly packed
- 1 large egg yolk
- ¾ teaspoon vanilla extract
- 2 ¼ cups (280g) all-purpose flour
- 2 teaspoons cornstarch
- ½ teaspoon salt
- ½ cup granulated sugar, for rolling (optional)
- ⅓ cup (105g) jam or preserves, your choice of flavor (raspberry preserves recommended)
Instructions
- In a stand mixer bowl (or large bowl with hand mixer), cream the softened butter until smooth and creamy.
- Scrape down the bowl sides, add both granulated sugar and brown sugar. Beat on medium-high speed for 30-60 seconds until well combined and fluffy.
- Add the egg yolk and vanilla extract, and beat until fully incorporated.
- In a separate bowl, whisk together the all-purpose flour, cornstarch, and salt.
- With the mixer on low speed, gradually add the dry flour mixture to the wet ingredients, mixing until just combined. The dough will appear dry and crumbly initially; scrape the bowl sides and bottom as needed. If the mixer strains, finish combining the dough by hand.
- Scoop dough into 1 tablespoon-sized balls and roll each until very smooth and round, free of cracks or seams.
- If desired, roll each dough ball in granulated sugar. Place on a wax paper-lined plate or cookie sheet. Use your thumb or the rounded back of a teaspoon to gently press an indent into the center of each cookie dough ball. Repeat until all dough is used.
- Transfer the cookie dough to the freezer and chill for 30 minutes.
- Preheat oven to 375°F (190°C). Place jam or preserves in a small microwave-safe bowl and microwave for 5-10 seconds, until slightly softened and easy to stir (not hot).
- Spoon jam into each thumbprint indentation, filling to the brim.
- Arrange cookies at least 2 inches apart on a parchment paper-lined baking sheet.
- Bake at 375°F (190°C) for 11 minutes, or until the edges are just beginning to turn golden brown.
- Allow cookies to cool completely on the baking sheet before serving and enjoying.
Nutrition
Serving: 1 cookie | Calories: 165kcal | Carbohydrates: 22g | Protein: 1g | Fat: 8g | Saturated Fat: 5g | Trans Fat: 1g | Cholesterol: 28mg | Sodium: 53mg | Potassium: 24mg | Fiber: 1g | Sugar: 12g | Vitamin A: 247IU | Vitamin C: 1mg | Calcium: 9mg | Iron: 1mg
Nutritional information is an estimate from third-party calculations and may vary. Actual values depend on ingredient brands, measurement methods, and portion sizes.
Tried this recipe? Share your creations on Instagram! Mention @SugarSpun_Sam or tag #sugarspunrun!
This post contains affiliate links. Purchasing through these links supports the blog at no extra cost to you. See the disclosure policy for details.