Cricut machines are renowned for their cutting prowess, but did you know they can also cut around printed designs? This fantastic feature, known as ‘Print Then Cut,’ opens up a world of creative possibilities. Whether you’re dreaming of custom stickers, unique bookmarks, personalized invitations, or intricate labels, Cricut Print Then Cut is your gateway. Let’s dive into the most common questions and everything you need to know to master this incredible technique for your upcoming Cricut projects.
Which Cricut Machines Are Compatible with Print Then Cut?
Not all Cricut machines offer the Print Then Cut feature. If you’re looking to utilize this function, ensure you have one of the following compatible models:
- Cricut Maker 3
- Cricut Explore 3
- Cricut Maker
- Cricut Explore Air 2
- Cricut Explore Air
Understanding Cricut Print Then Cut: How Does It Work?
Print Then Cut is a specific operation type available within Cricut Design Space, Cricut’s design software. This feature allows you to seamlessly integrate your home printer with your Cricut cutting machine. The process is straightforward:
- Design in Design Space: Create your design in Design Space, selecting “Print Then Cut” as the operation type.
- Print Your Design: Send your design to your home inkjet printer to be printed onto your chosen material.
- Cut with Cricut: Place the printed sheet on your Cricut cutting mat and load it into your compatible Cricut machine. The machine uses a sensor to read the printed registration marks and precisely cut around your design.
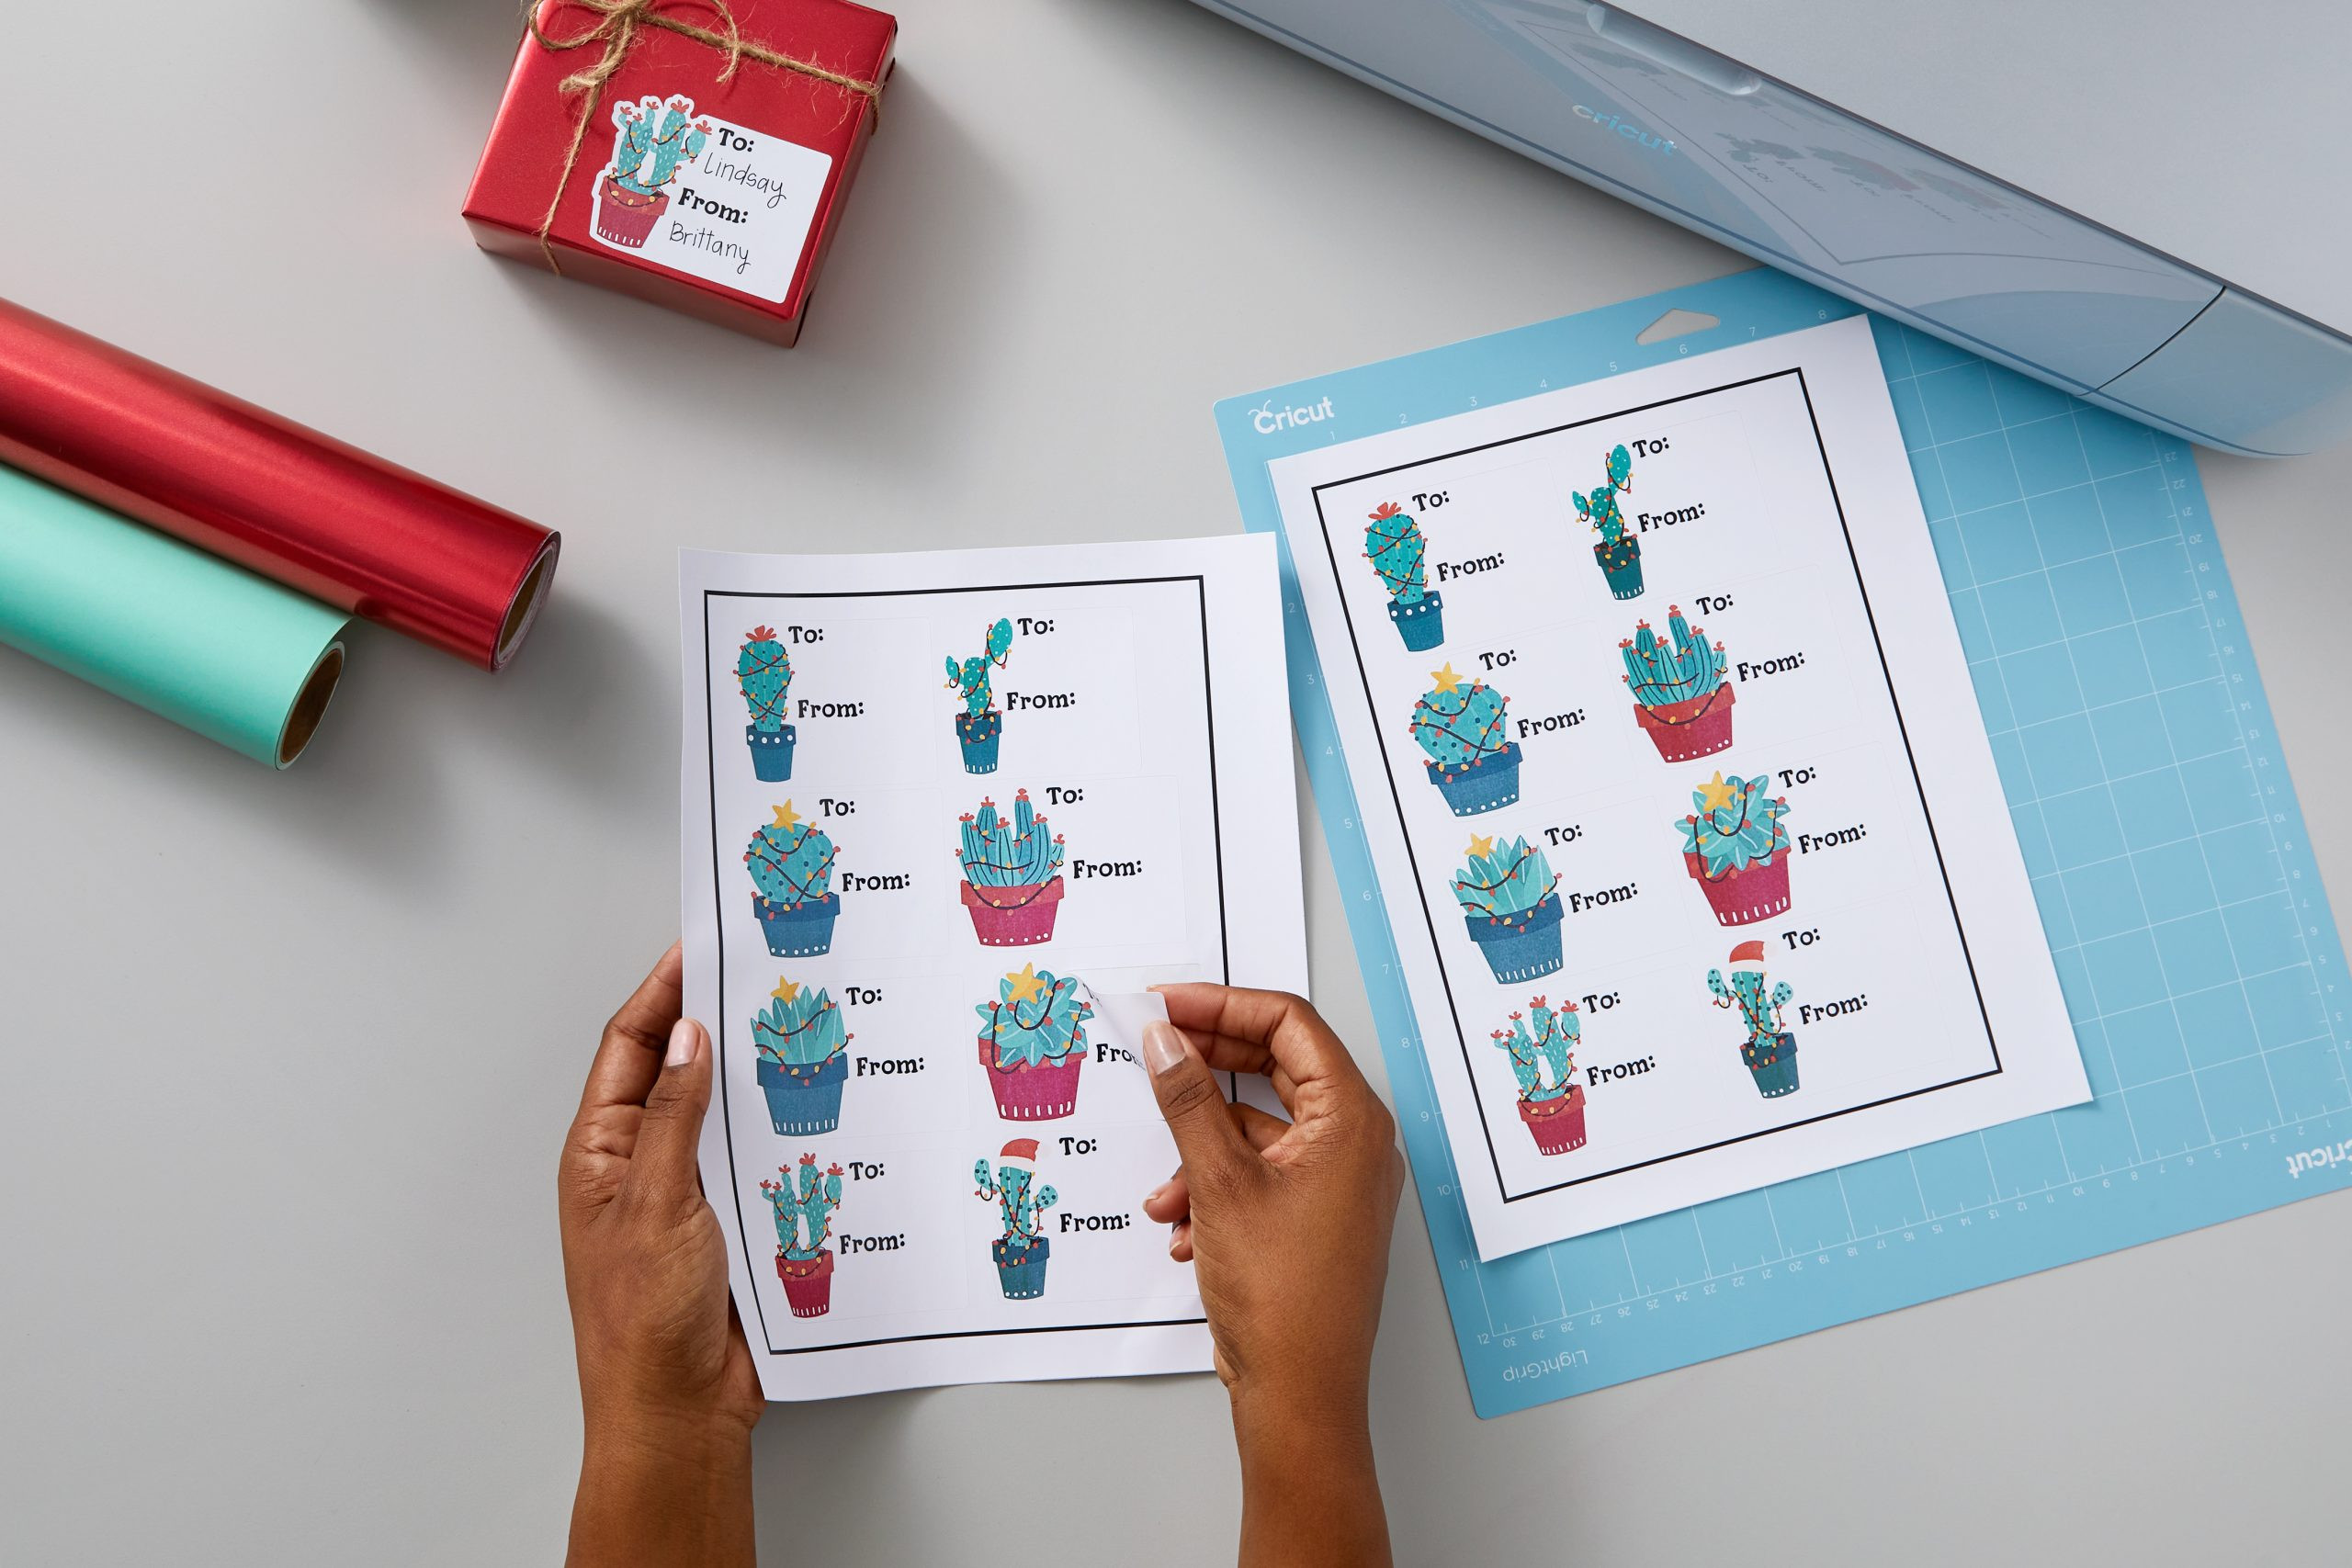
The advantages of using Print Then Cut are numerous. You gain the ability to create printed elements with accurate sizing, leverage Cricut’s extensive image and font library for print projects, and cut a wide variety of printable materials with precision. When you print your designs, you’ll notice black rectangular scanner bars printed around the edges of the page or boxing your images. These are registration marks. These crucial markings are read by the Cricut machine’s sensor, guiding it to accurately locate and cut your designs.
 Cricut Print then cut process with registration marks
Getting Started with Cricut Print Then Cut: Essential Supplies
To embark on your Print Then Cut journey, you’ll need to gather a few essential supplies:
- Compatible Cricut Machine: Ensure you have one of the Print Then Cut compatible machines listed earlier (Cricut Maker 3, Cricut Explore 3, Cricut Maker, Cricut Explore Air 2, or Cricut Explore Air).
- Home Inkjet Printer: An inkjet printer is crucial for Print Then Cut. While Cricut makers have various printer preferences, remember that laser printers are not compatible with this feature. Inkjet printers are essential for the sensor to read the registration marks correctly.
- Printable Materials: Select your desired material for printing. Excellent options include white cardstock for sturdy projects, printable sticker paper for creating stickers, printable vinyl for durable decals, and printable clear sticker paper for transparent stickers.
- Cricut Design Space: You’ll need access to Design Space software on a compatible device.
- LightGrip Cutting Mat: The LightGrip Cutting Mat (the blue mat) is recommended for most Print Then Cut materials, providing the ideal level of adhesion.
Device Compatibility for Cricut Print Then Cut with Design Space
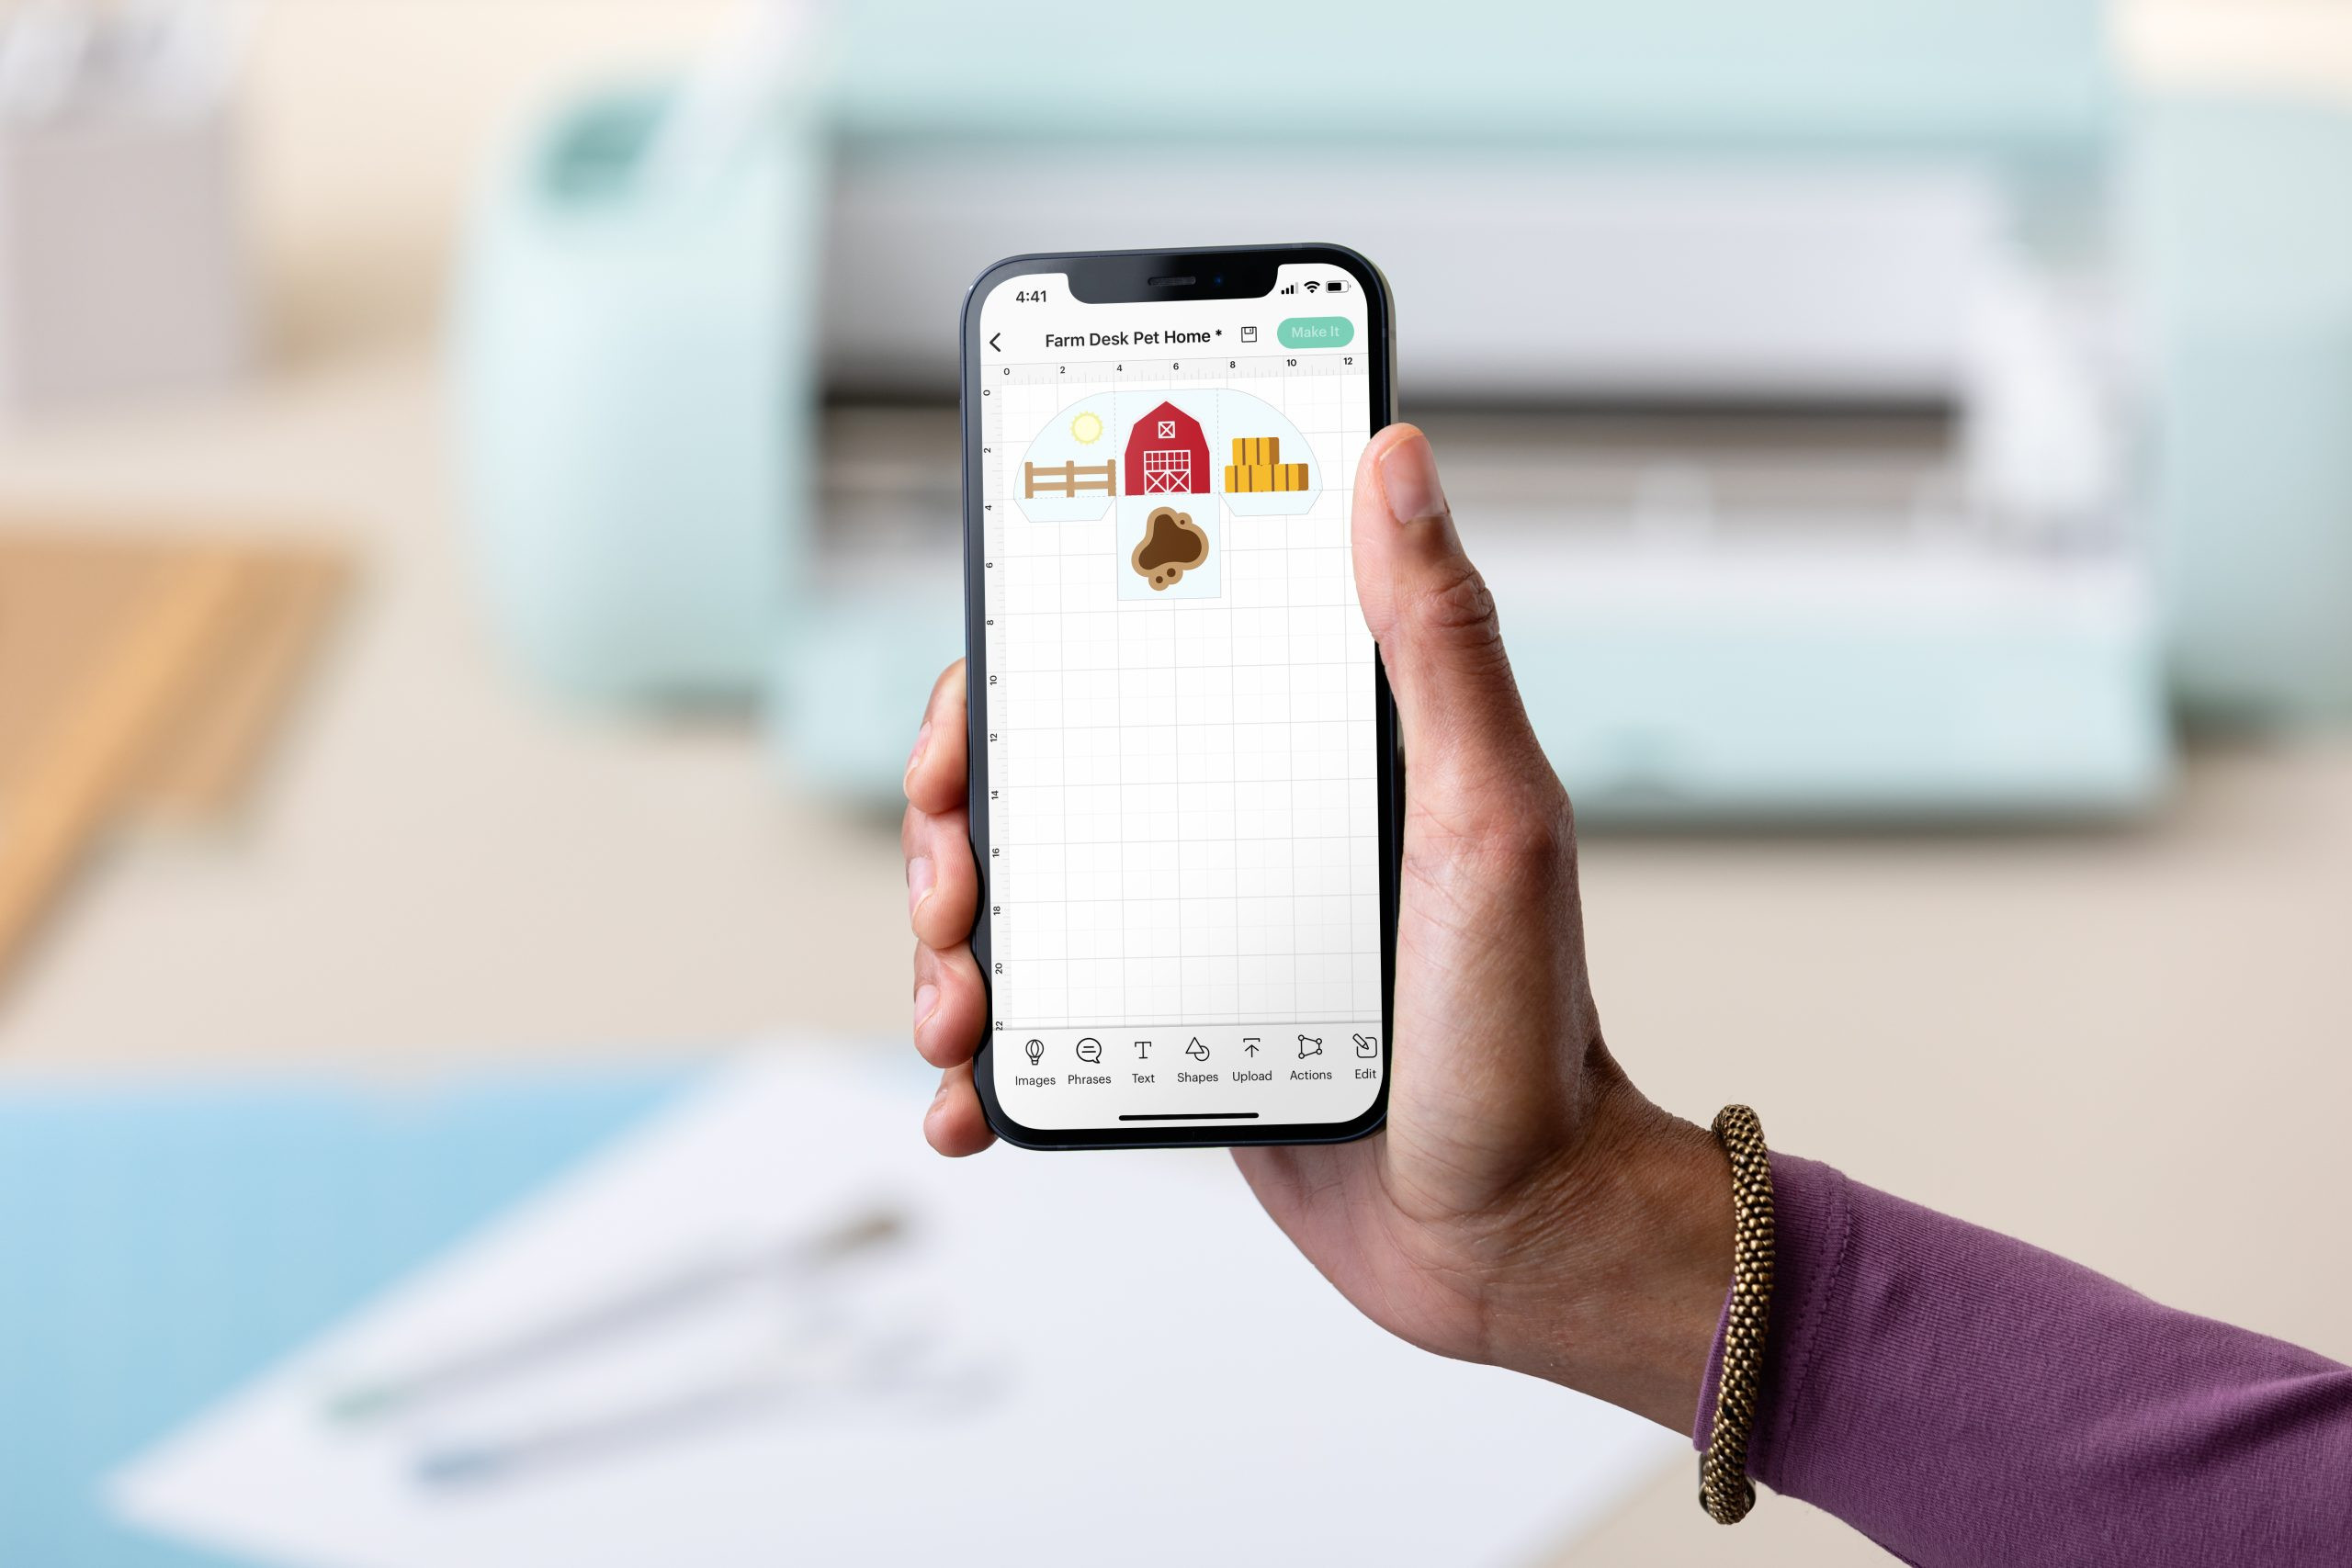
While Design Space offers broad compatibility, Print Then Cut functionality has some device limitations. Currently, full Print Then Cut support is not available on Android devices. You can design and save Print Then Cut projects using the Android app, but to print and cut, you must use Design Space on a Windows/Mac computer or an iOS device (iPhone or iPad). Ensure you are using a compatible device for the complete Print Then Cut workflow.
 Cricut Print then cut compatibility across devices
Finding Ready-to-Use Print Then Cut Images in Design Space
Design Space makes it easy to find images specifically designed for Print Then Cut. Here’s how:
- Start a New Project: Open Design Space and begin a new project canvas.
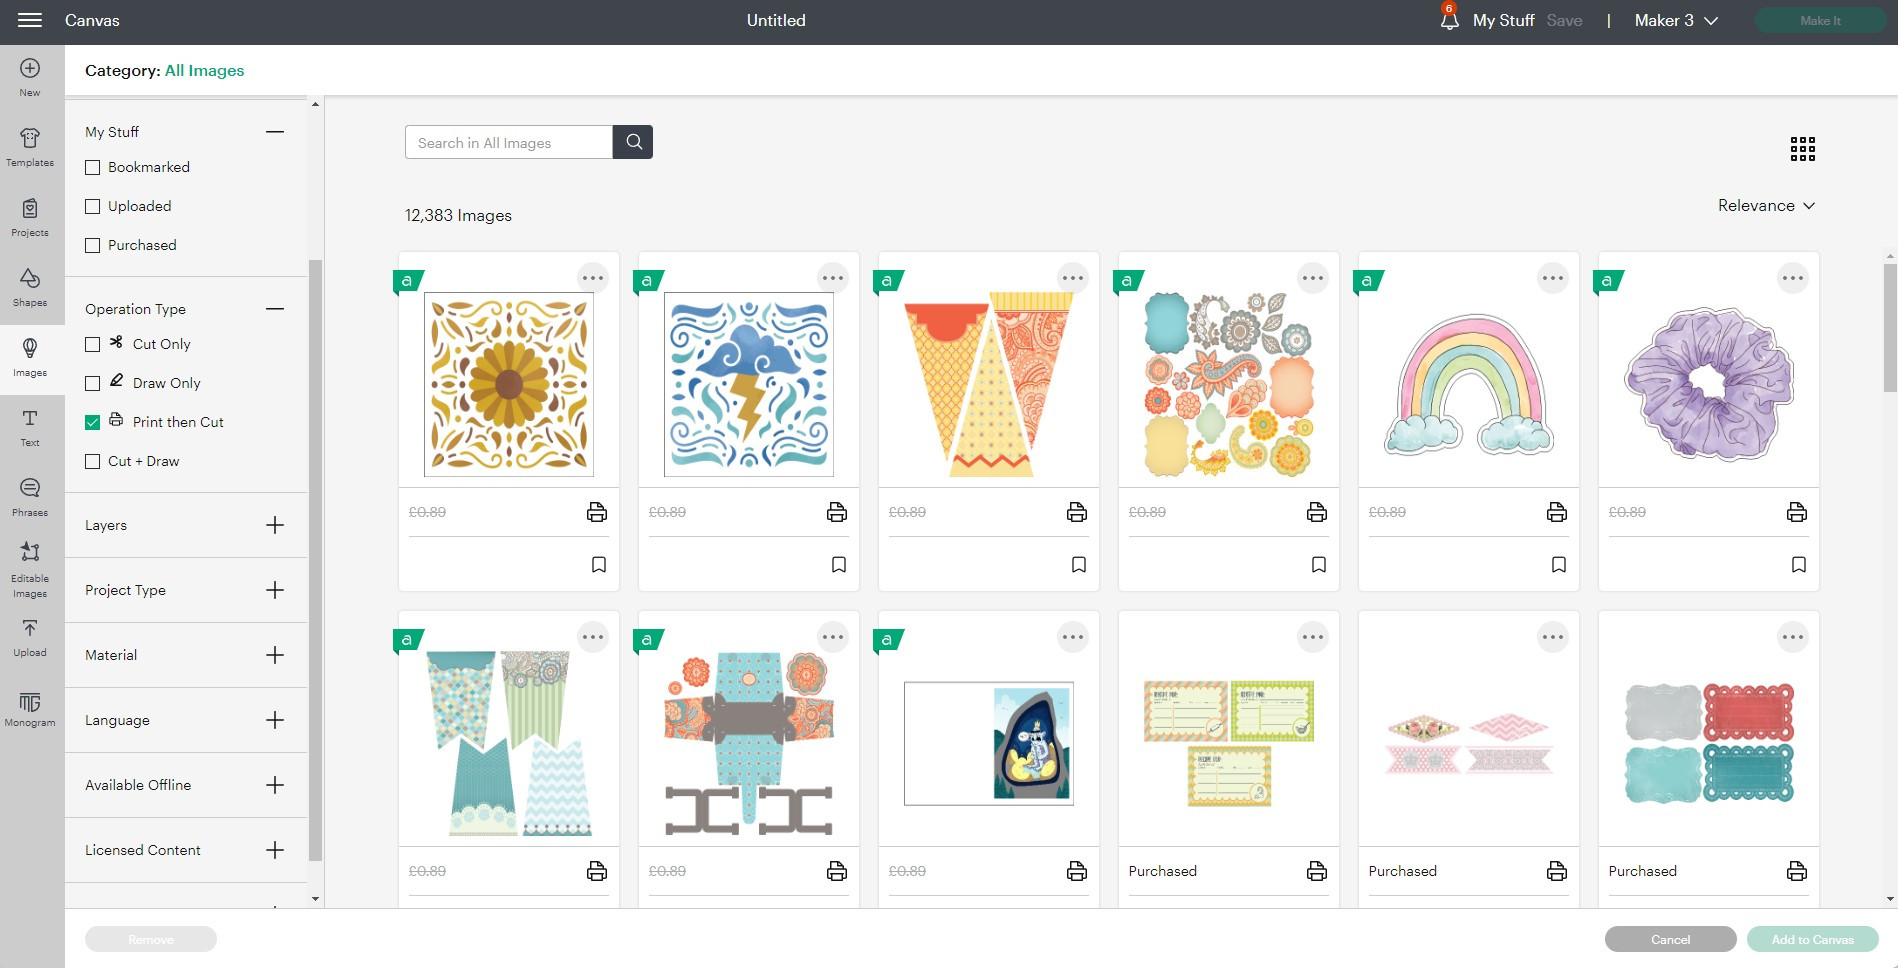
- Access the Image Library: Click on ‘Images’ in the design panel on the left-hand side of your canvas. This will take you to the Cricut Image Library.
- Filter by Operation Type: In the filter menu on the left side of the Image Library, locate ‘Operation Type’.
- Select ‘Print Then Cut’: Tick the ‘Print Then Cut’ option within the ‘Operation Type’ filter. This will instantly display all images in the library that are pre-designed and compatible with the Print Then Cut feature, saving you time and effort.
 Finding Print then cut images using Design Space filters
Creating Your Own Custom Print Then Cut Images in Design Space
Unleash your creativity and transform any cut image into a Print Then Cut design. Here’s how to create your own Print Then Cut images:
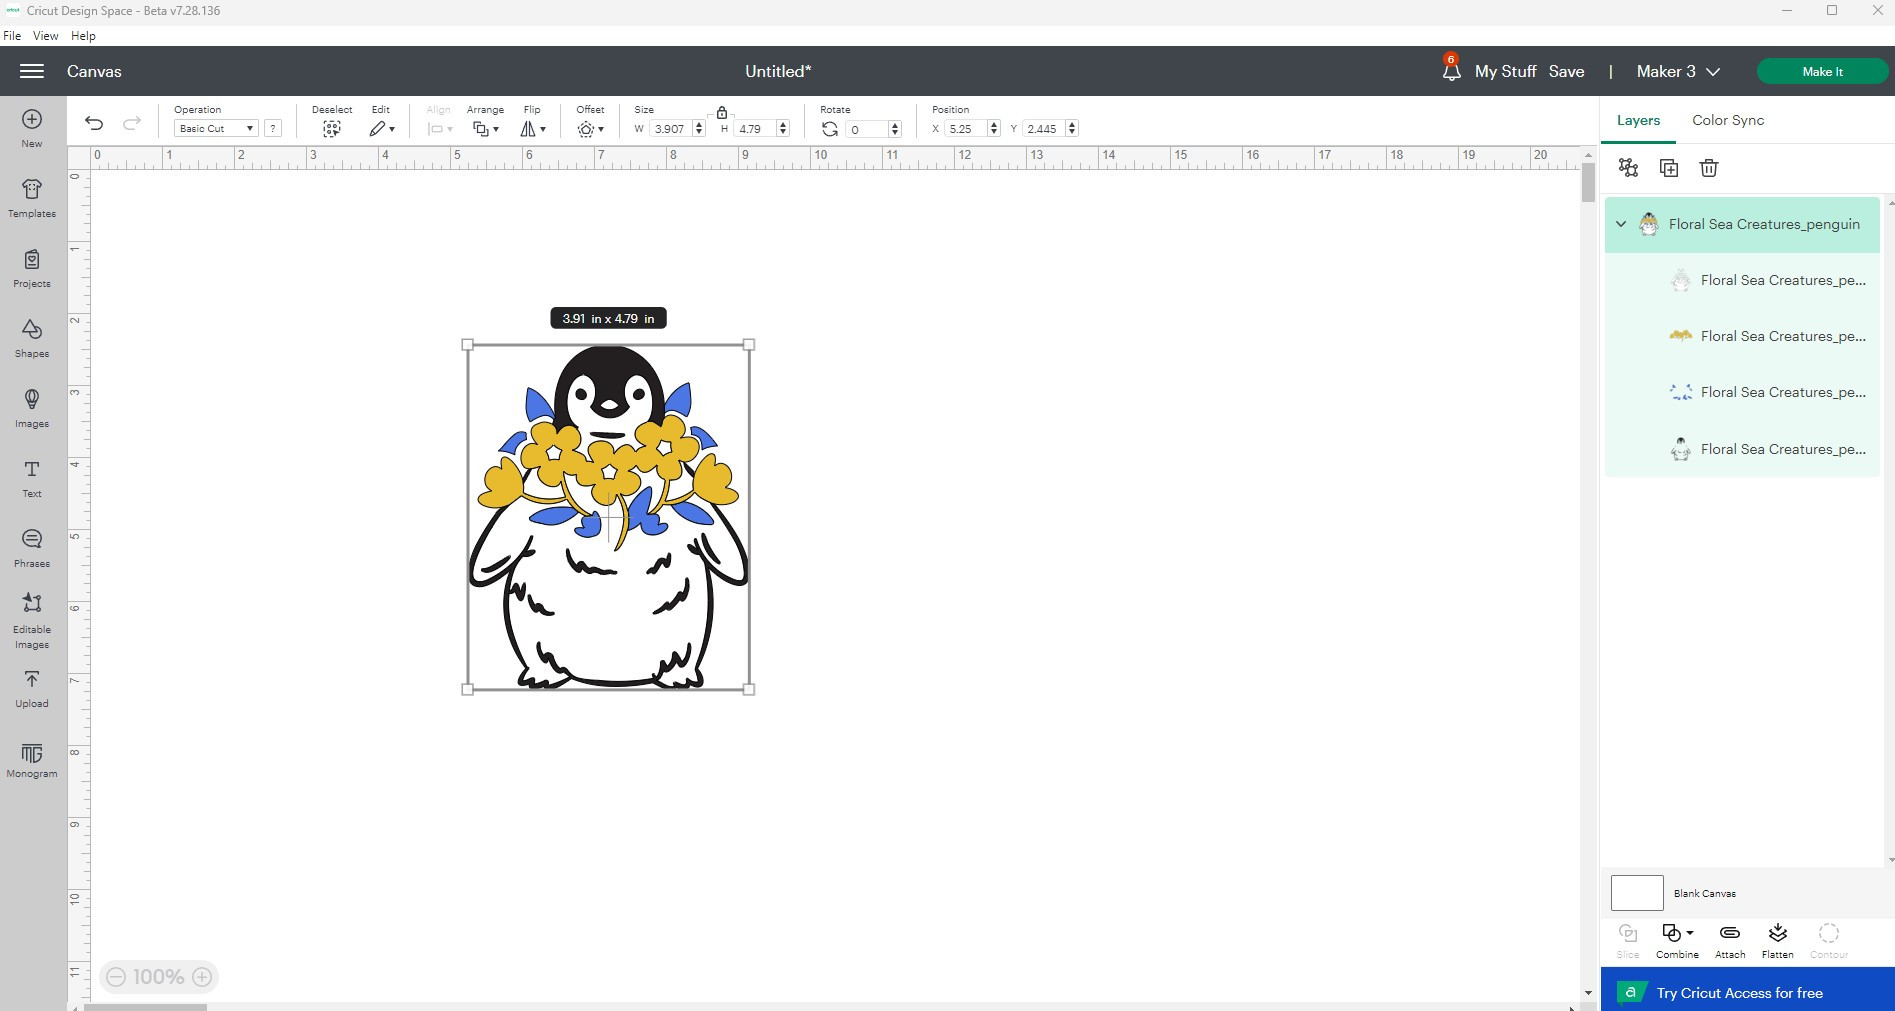
- Choose a Cut Image: Select any cut image from the Design Space library or upload your own SVG cut file and add it to your canvas.
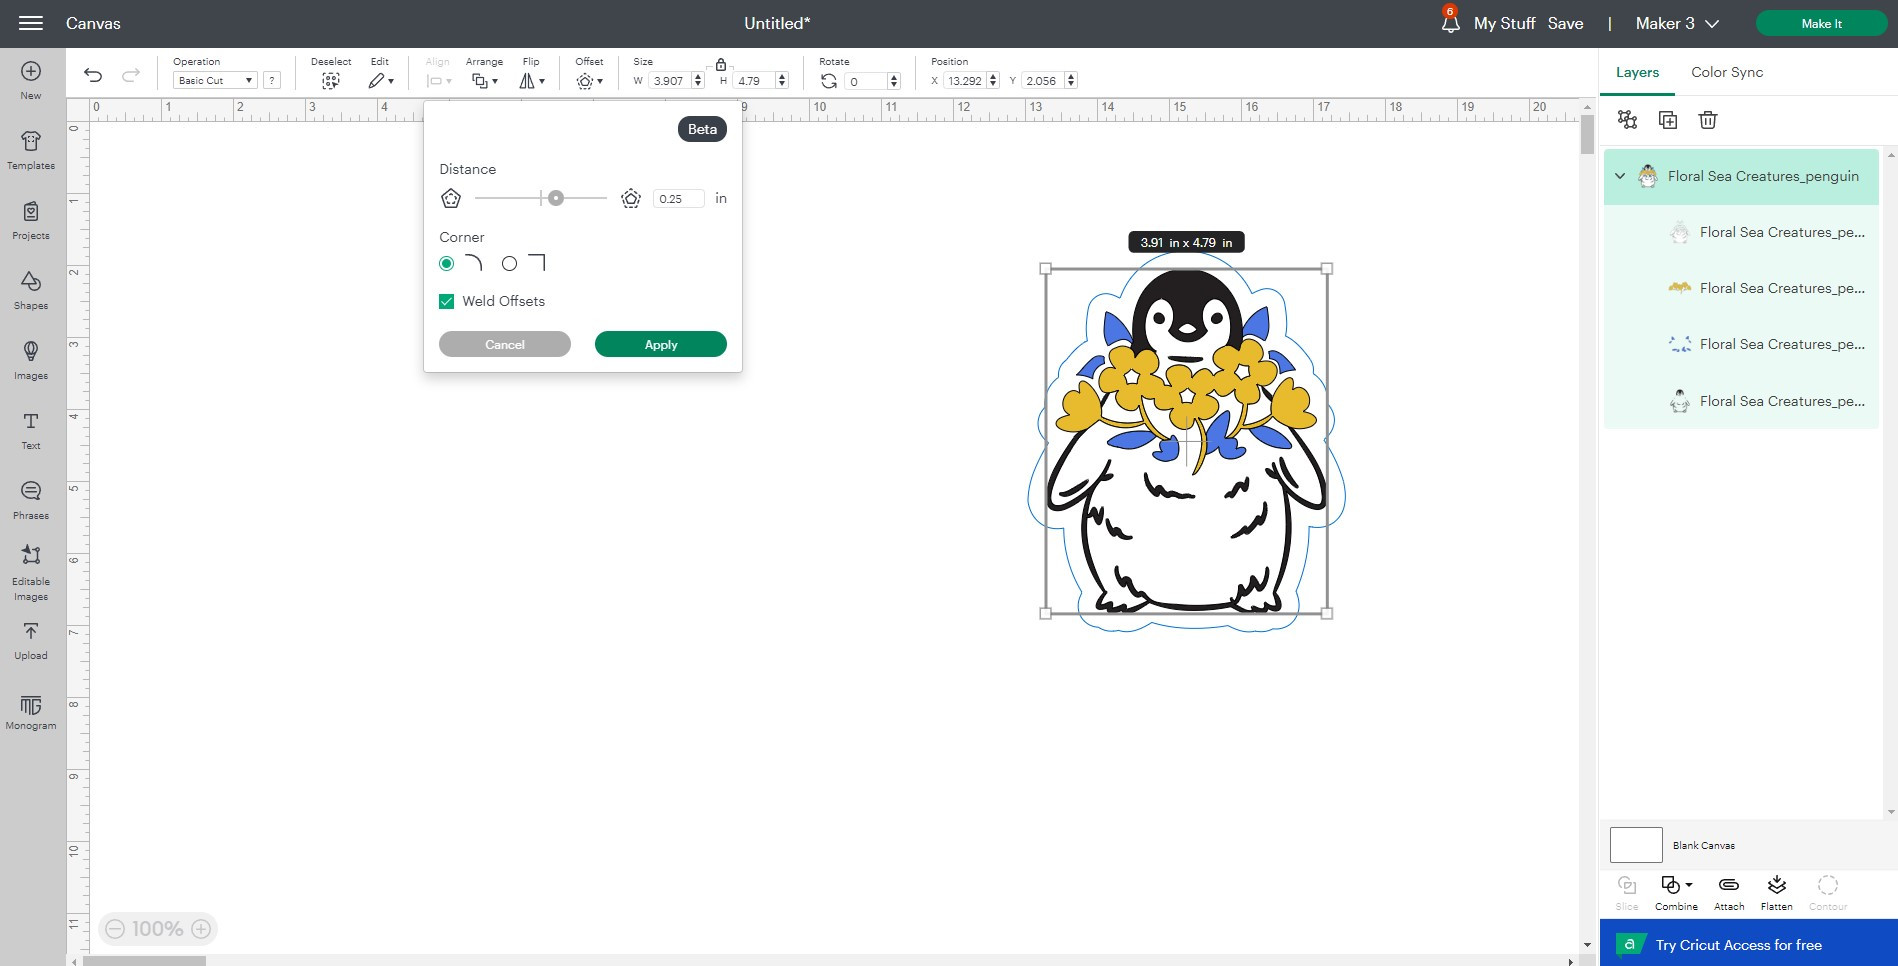
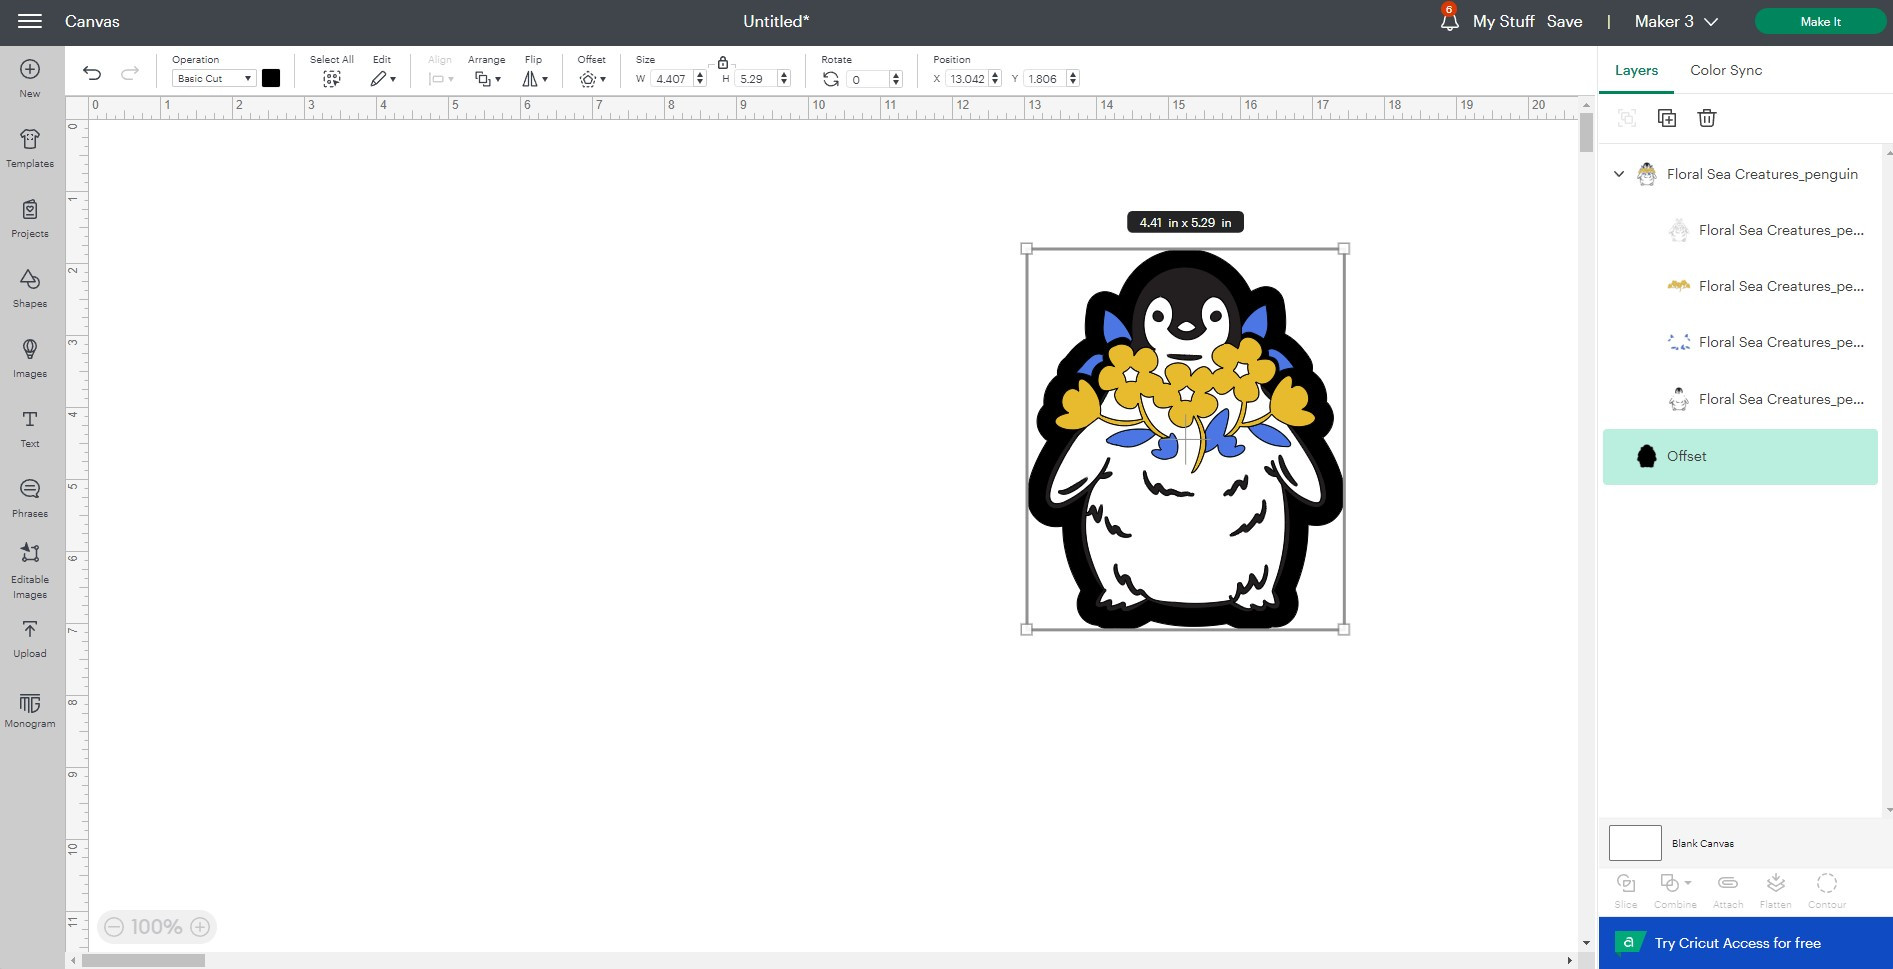
- Add an Offset Layer (If Needed): If your chosen image lacks a background layer, you’ll need to create one. Use the ‘Offset’ tool located in the edit bar at the top of your screen.
- Adjust Offset: Experiment with the ‘Distance’ setting in the Offset tool to adjust the size and shape of your background layer. You’ll see a blue preview outline showing the offset’s shape. Click ‘Apply’ once you are satisfied with the offset layer.
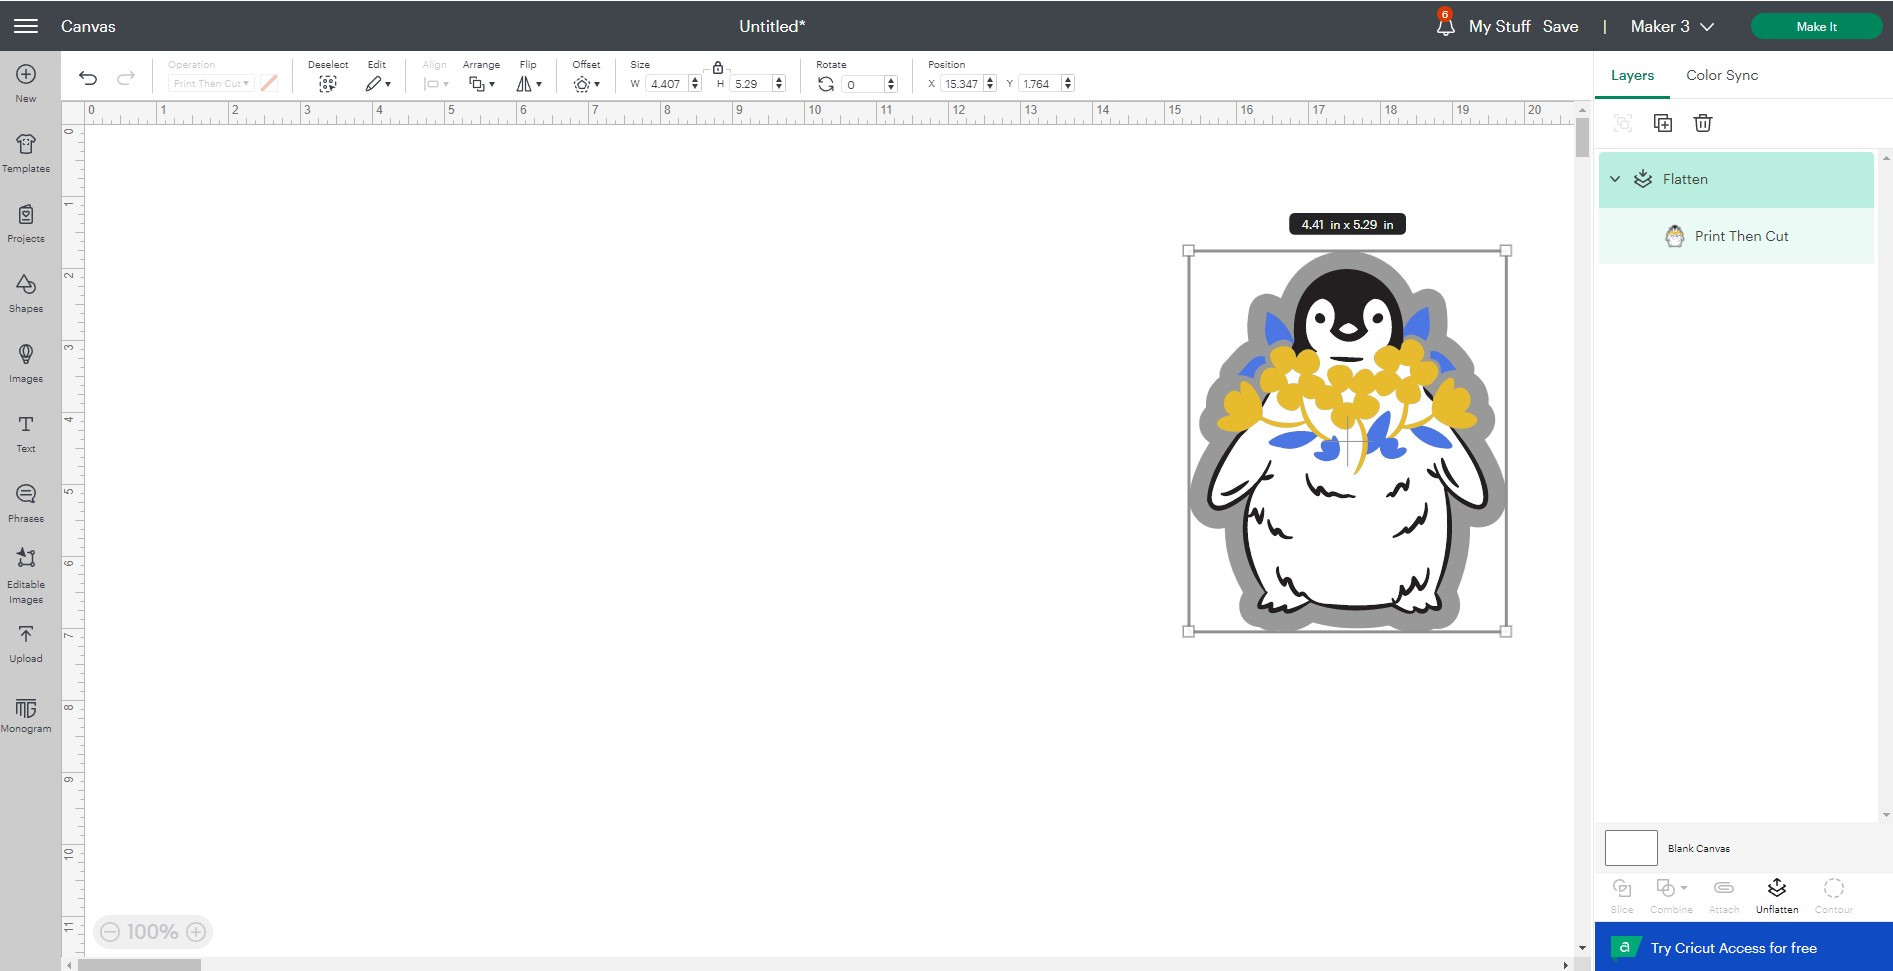
- Flatten Layers: Select all layers of your image, including the original cut image and the newly created offset layer. Then, click the ‘Flatten’ tool in the bottom right-hand corner of the Layers panel (or under the ‘Actions’ menu).
- Print Then Cut Layer: After flattening, you’ll see that all selected layers are merged into a single layer, now designated as a ‘Print Then Cut’ layer in the Layers panel. You can ‘Unflatten’ if you need to edit individual layers, but remember to flatten again before proceeding to ‘Make it’.
 Converting a cut image to print then cut using offset in Design Space
 Using the offset tool to create background for print then cut stickers
 Flattening layers for print then cut images in Design Space
 Example of creating a sticker using Print then Cut in Design Space
Adjusting Material Size for Print Then Cut Projects
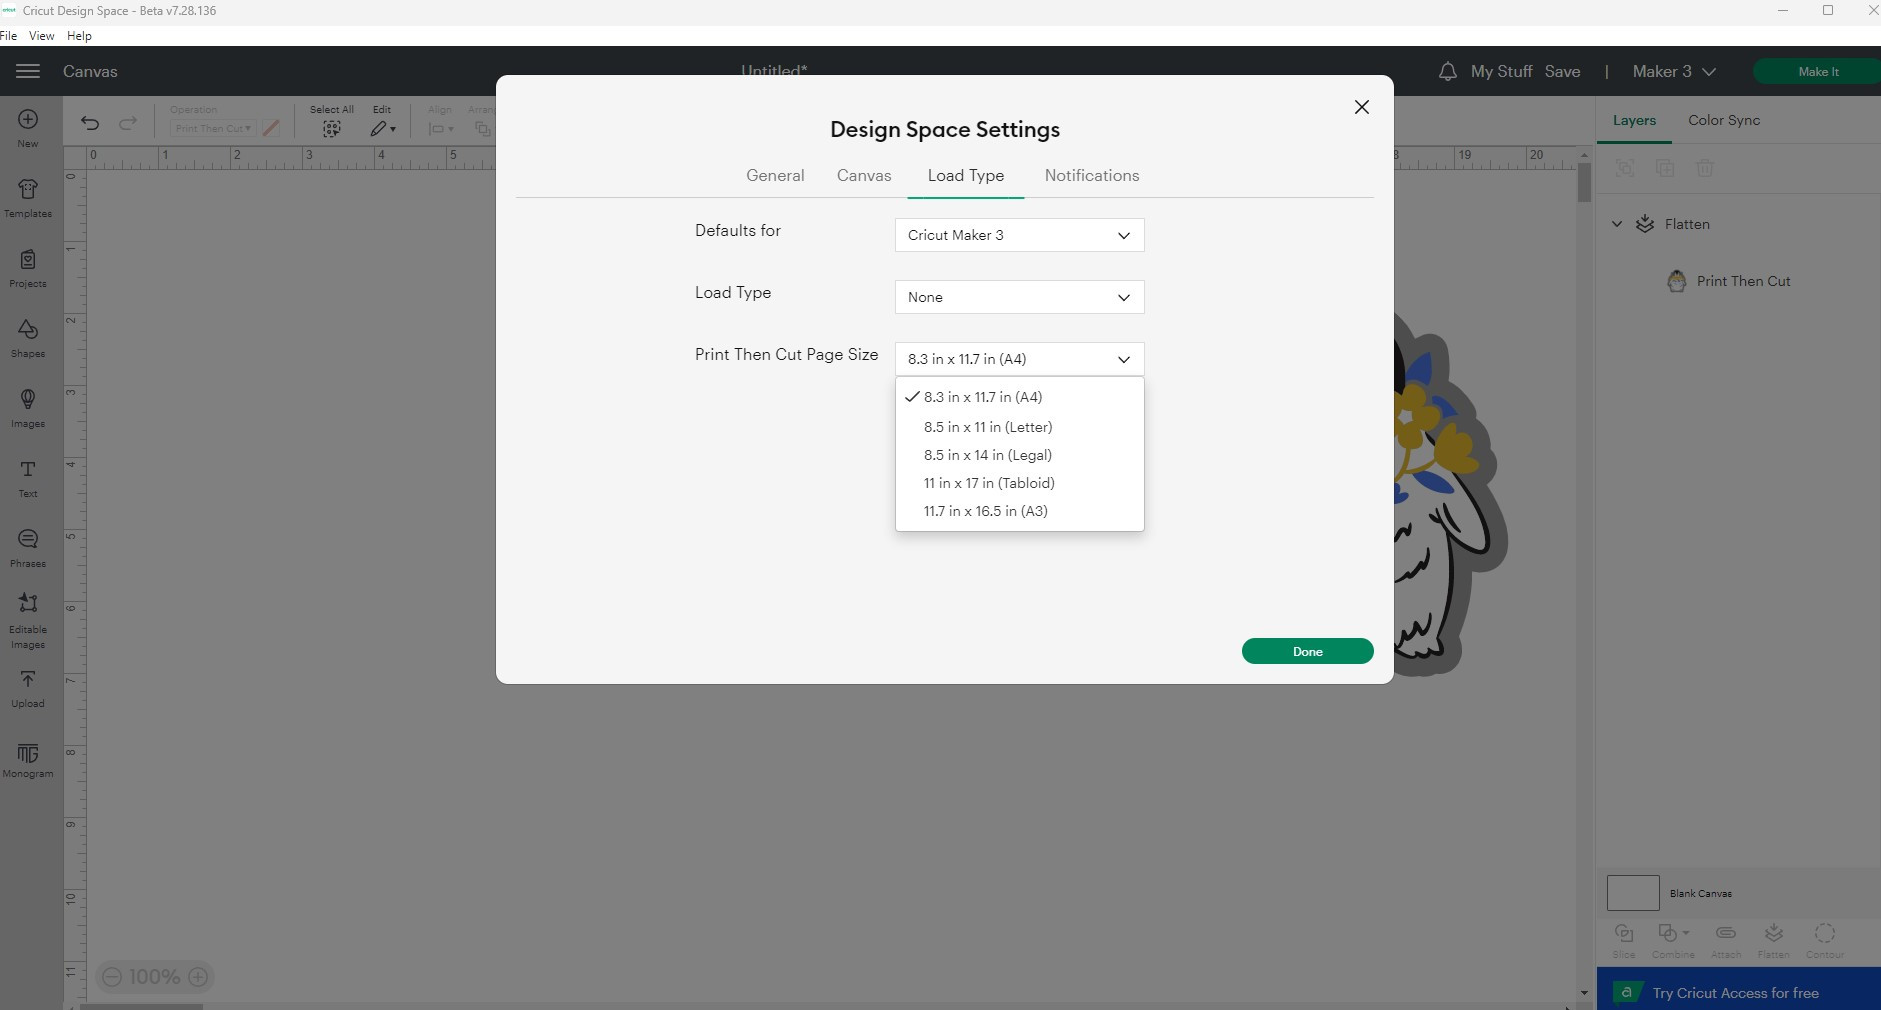
Cricut Print Then Cut now supports larger material sizes up to A3, offering greater design flexibility. It’s crucial to verify that the correct material size is selected in Design Space before printing. Here’s how to adjust your material size settings:
- Access Settings: In Design Space, navigate to the top left menu (three horizontal lines). Click on it to open the dropdown menu.
- Open Settings: Select ‘Settings’ from the dropdown options.
- Navigate to Load Type: In the Design Space settings window, click on ‘Load Type’ in the left-hand menu.
- Choose Print Then Cut Page Size: Locate the ‘Print Then Cut Page Size’ dropdown menu. Select your desired material size from the available options, ensuring it matches the material loaded in your printer.
 Changing Print then cut material size settings in Design Space
Why White Cardstock is Recommended for Print Then Cut (and Color Limitations)
For optimal Print Then Cut performance, especially with Cricut Explore and Explore 3 machines, using white materials is highly recommended. Reflective materials, colored materials, or patterned materials can interfere with the Cricut machine’s sensor’s ability to accurately read the registration marks.
While Cricut Maker and Cricut Maker 3 offer slightly more flexibility and can Print Then Cut on light to medium-colored papers, white materials provide the most reliable and consistent results across all compatible Cricut machines. Using white cardstock or white printable materials minimizes sensor interference and ensures precise cuts.
Troubleshooting Color Matching: Printed Item vs. Design Space
Color variations between your Design Space preview and your printed output can occur due to printer settings. To ensure accurate color reproduction, it’s essential to configure your printer settings correctly before printing your Print Then Cut designs.
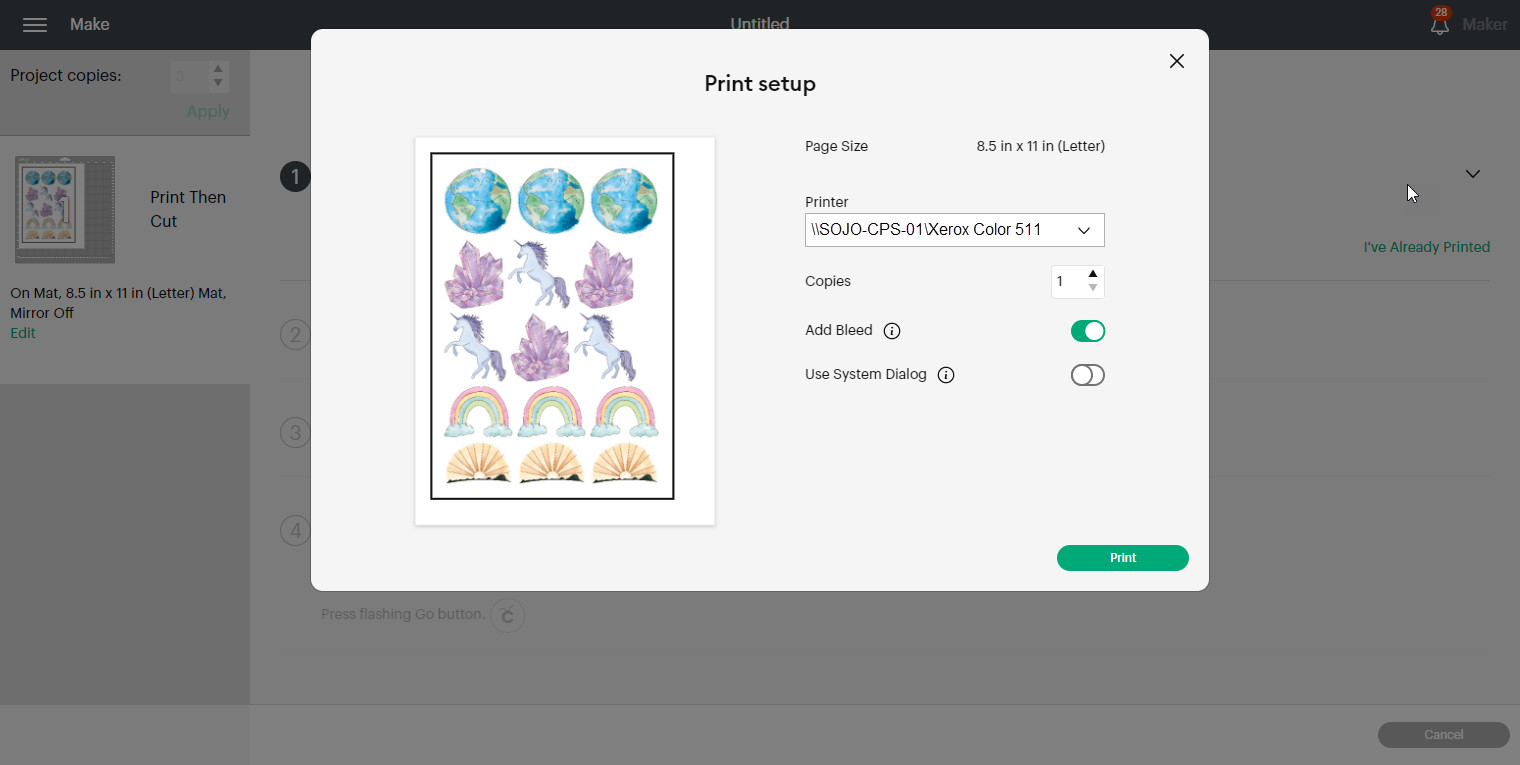
After the mat preview stage in Design Space, you’ll proceed to the ‘Send to Printer’ button. Click this button to access print options. Pay attention to these key settings:
- Bleed: The ‘Add Bleed’ option automatically extends the edges of your design slightly. This is useful for edge-to-edge color images, preventing white borders after cutting. Untick this option if you don’t require bleed for your design.
- Use System Dialogue: Always tick ‘Use System Dialogue’. This is crucial! Ticking this opens your printer’s native settings dialogue box after you click ‘Print’ in Design Space.
- Printer Settings: Within your printer’s system dialogue box, you can fine-tune settings like paper type, print quality, and color profiles. Ensure settings like ‘Fit to Page’ are unchecked, as this can distort the size of your printed images.
- Experiment and Test: To discover the ideal printer settings for different materials, experiment with various combinations of settings and document your results. Note down the settings that produce the best color accuracy and print quality for future projects.
 Accessing system dialogue for print settings in Cricut Design Space
Material Settings for Creating Sticker Sheets with Print Then Cut
Cricut materials are rigorously tested to guarantee optimal performance with Cricut machines. This extends to Print Then Cut projects, especially when creating sticker sheets. Cricut offers a range of printable sticker papers, including printable sticker paper, printable vinyl, and printable clear sticker paper.
These Cricut printable materials have pre-programmed material settings in Design Space. When selected, these settings ensure the correct cut pressure and depth for creating perfect sticker sheets with clean cuts and easy peeling. Always choose the corresponding Cricut material setting in Design Space for your chosen printable material.
The Importance of Calibrating Your Cricut Machine for Print Then Cut
Print Then Cut calibration is essential for achieving precise cuts around your printed designs. Calibration ensures that your Cricut machine accurately aligns the blade with the printed registration marks. Regular calibration is crucial for maintaining cut accuracy, especially after machine updates or if you notice cut misalignment.
Step-by-step calibration instructions are available for each compatible Cricut device. You can find detailed guides on the Cricut Help website here. Follow these instructions to calibrate your machine for optimal Print Then Cut results.
Share Your Cricut Print Then Cut Creations!
We are excited to see the incredible projects you create with Cricut Print Then Cut! Share your makes with the Cricut community on social media. Tag @cricut_uk on Instagram and TikTok to showcase your creativity.
You can also share your projects directly within Design Space by publishing them live. Learn how to publish and share your projects in Design Space here and inspire fellow Cricut users.