
Can Cricut Print Photos? Absolutely, Cricut machines can print photos using the “Print Then Cut” feature. This allows you to create custom stickers, decals, and personalized gifts with amazingprint.net. This guide delves into everything you need to know about printing photos with your Cricut, ensuring high-quality results and inspiring creative projects. Dive into the world of personalized photo crafts, explore the best materials, and master techniques to elevate your DIY projects.
1. What is Cricut Print Then Cut and How Does It Work?
The Cricut “Print Then Cut” feature is a powerful tool that allows you to print images from your home printer and then precisely cut them out using your Cricut machine. This function opens up a world of possibilities for creating custom stickers, decals, and intricate designs with ease.
Here’s a breakdown of how it works:
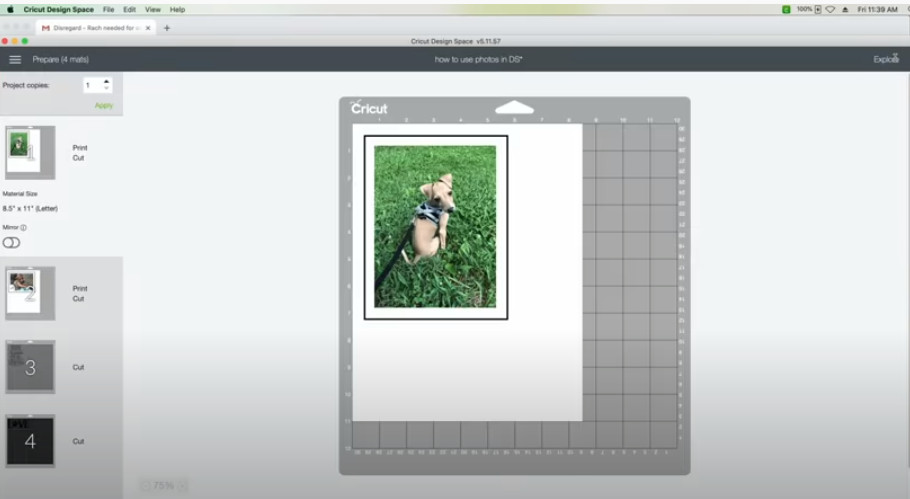
- Design in Cricut Design Space: Start by uploading your photo or design into Cricut Design Space.
- Print: Send your design to your home printer. The Cricut software adds a registration box around your image to help the Cricut machine accurately align its cuts.
- Cut: Place the printed sheet onto your Cricut cutting mat and load it into your Cricut machine. The machine uses its sensor to scan the registration box and then precisely cuts around your printed design.
2. What Types of Cricut Machines Support Print Then Cut for Photos?
Many Cricut machines support the “Print Then Cut” feature, but capabilities can vary. Here’s a rundown of compatible models:
- Cricut Maker Series: All Cricut Maker machines, including the original Maker, Maker 3, and Maker Go, support Print Then Cut.
- Cricut Explore Series: The Cricut Explore Air 2 and Explore 3 are also compatible with this feature.
- Cricut Joy: The Cricut Joy does not support Print Then Cut due to its smaller size and lack of sensor capabilities.
Ensure your machine is compatible to take full advantage of this versatile feature.
3. What Materials Are Best for Printing Photos with Cricut?
Choosing the right materials is crucial for achieving the best results when printing photos with your Cricut. Here are some top recommendations:
- Printable Vinyl: Ideal for stickers, decals, and labels. Printable vinyl is durable and water-resistant, making it perfect for a variety of projects.
- Printable Sticker Paper: A cost-effective option for creating custom stickers. It’s easy to use and provides good print quality.
- Printable Iron-On Transfer Paper: Use this for transferring photos onto fabrics, such as t-shirts, tote bags, and home decor items.
- Photo Paper: For high-quality photo prints that you want to cut out, photo paper provides the best color and detail.
4. How Do You Prepare Photos for Cricut Print Then Cut?
Preparing your photos correctly is essential for achieving crisp, clean cuts with your Cricut machine. Follow these steps to optimize your images:
- Image Resolution: Ensure your photos have a high resolution (at least 300 DPI) to prevent pixelation when printed.
- Editing: Use photo editing software to adjust brightness, contrast, and color balance for optimal print quality.
- File Format: Save your photos as JPG or PNG files. PNG is preferred for images with transparent backgrounds.
- Upload to Cricut Design Space: Upload your prepared photo into Cricut Design Space.
- Remove Background (Optional): If you want to cut out a specific shape, use the background remover tool in Cricut Design Space to isolate the subject of your photo.
5. What Printer Settings Should You Use for the Best Photo Quality with Cricut?
To achieve the best photo quality with your Cricut Print Then Cut projects, adjust your printer settings as follows:
- Paper Type: Select the appropriate paper type in your printer settings. For printable vinyl, choose “Glossy Photo Paper” or a similar option.
- Print Quality: Set the print quality to “Best” or “High” for optimal results.
- Color Settings: Ensure your printer is set to print in color and that the color settings are accurate.
- Use System Dialog: In Cricut Design Space, enable the “Use System Dialog” option to access your printer’s advanced settings.
 Click Use System Dialog
6. How to Calibrate Your Cricut Machine for Accurate Print Then Cut Results?
Calibration is key to ensuring your Cricut machine accurately cuts around your printed images. Here’s how to calibrate your Cricut:
- Access Calibration: In Cricut Design Space, go to the menu and select “Calibration.”
- Print Calibration Sheet: Follow the on-screen instructions to print the calibration sheet.
- Load Calibration Sheet: Place the printed sheet on your Cricut mat and load it into the machine.
- Follow Prompts: The Cricut machine will scan the sheet and prompt you to identify the cut line that is most accurate.
- Complete Calibration: Follow the remaining prompts to complete the calibration process.
7. What Are Common Issues with Cricut Print Then Cut and How to Troubleshoot Them?
Even with careful preparation, you may encounter issues with Cricut Print Then Cut. Here are some common problems and how to troubleshoot them:
- Issue: Inaccurate Cuts
- Solution: Recalibrate your Cricut machine. Ensure your mat is clean and not warped.
- Issue: Print Quality is Poor
- Solution: Adjust your printer settings to “Best” quality. Use high-resolution images.
- Issue: Cricut Not Recognizing Registration Marks
- Solution: Ensure the registration marks are clear and not smudged. Use good lighting. Clean the Cricut sensor with a soft, dry cloth.
- Issue: Material Jams
- Solution: Use the recommended material settings in Cricut Design Space. Make sure your material is properly adhered to the mat.
8. Can You Print Photos on Dark or Colored Paper with Cricut?
Printing photos on dark or colored paper with Cricut can be challenging, but here are some tips for better results:
- Use White Underlay: Print your photo onto white printable vinyl or sticker paper and then apply it to the dark or colored paper.
- Adjust Image: Increase the brightness and contrast of your photo to help it stand out against the darker background.
- Specialty Paper: Look for printable materials specifically designed for dark surfaces, which often have an opaque white layer.
9. What Are Some Creative Project Ideas Using Cricut Print Then Cut Photos?
The possibilities are endless when it comes to creative projects using Cricut Print Then Cut photos. Here are a few ideas to get you started:
- Custom Stickers: Create personalized stickers for planners, laptops, and water bottles.
- Photo Coasters: Transfer photos onto ceramic tiles to make unique coasters.
- Personalized T-Shirts: Print family photos or custom designs onto t-shirts using printable iron-on transfer paper.
- Photo Magnets: Make fun photo magnets for your refrigerator or as gifts.
- Custom Greeting Cards: Design personalized greeting cards with photos for special occasions.
10. How to Print and Cut Multiple Photos at Once with Cricut?
Printing and cutting multiple photos at once can save you time and effort. Here’s how to do it efficiently:
- Arrange Photos in Design Space: Upload all your photos into Cricut Design Space and arrange them on the canvas, leaving enough space between each image.
- Size Appropriately: Ensure all photos are sized correctly before printing.
- Print: Send the entire layout to your printer. Cricut Design Space will automatically add the registration box around all the images.
- Cut: Load the printed sheet onto your Cricut mat and let the machine cut out all the photos at once.
11. What Are the Limitations of Cricut Print Then Cut for Photos?
While Cricut Print Then Cut is versatile, there are some limitations to keep in mind:
- Print Size: The maximum print size is limited by the Cricut machine’s sensor capabilities.
- Color Accuracy: Color accuracy can vary depending on your printer and monitor settings.
- Material Compatibility: Not all materials are suitable for Print Then Cut. Always test your material before starting a large project.
- Complexity: Intricate designs may be challenging to cut accurately.
12. How Does Cricut Design Space Handle Photos for Print Then Cut?
Cricut Design Space offers several tools to help you work with photos for Print Then Cut:
- Upload Tool: Easily upload photos in various formats (JPG, PNG, etc.).
- Background Remover: Remove unwanted backgrounds from your photos.
- Basic Editing: Adjust brightness, contrast, and color.
- Slice Tool: Cut photos into custom shapes.
- Flatten Tool: Combine multiple layers into a single printable image.
13. How to Choose the Right Cricut Mat for Printing Photos?
Selecting the right Cricut mat is essential for ensuring your material stays in place during the cutting process. Here are some recommendations:
- StandardGrip Mat (Green): Ideal for most printable vinyl and sticker paper.
- LightGrip Mat (Blue): Suitable for delicate materials like thin photo paper.
- StrongGrip Mat (Purple): Use this for thicker materials that require extra adhesion.
14. What Are Some Tips for Making Photo Booth Props with Cricut?
Creating photo booth props with your Cricut is a fun and easy way to add personality to any event. Here are some tips:
- Design Variety: Create a variety of props, including speech bubbles, hats, glasses, and themed shapes.
- Use Sturdy Materials: Use cardstock or printable vinyl adhered to cardstock for durability.
- Attach to Sticks: Attach the props to wooden dowels or craft sticks for easy handling.
- Consider Themes: Tailor your props to match the theme of your event.
15. How to Preserve and Protect Your Cricut Print Then Cut Photos?
To ensure your Cricut Print Then Cut photos last longer, consider these preservation and protection tips:
- Laminate: Laminating your photos will protect them from moisture, scratches, and fading.
- UV Protection: Use UV-resistant sprays or coatings to prevent fading from sunlight.
- Storage: Store your photos in acid-free albums or containers to prevent discoloration and deterioration.
- Sealing Sprays: Apply a clear acrylic sealant to protect your projects from wear and tear.
16. Can You Use Third-Party Software to Enhance Photos for Cricut Print Then Cut?
Yes, using third-party software to enhance your photos can significantly improve the quality of your Cricut Print Then Cut projects. Here are some popular options:
- Adobe Photoshop: Professional-grade software for advanced photo editing.
- GIMP: A free, open-source alternative to Photoshop.
- Canva: User-friendly design software with powerful photo editing tools.
- PicMonkey: Online photo editor with a range of features for enhancing your images.
17. How to Make Personalized Gifts Using Cricut Print Then Cut Photos?
Creating personalized gifts with Cricut Print Then Cut photos is a thoughtful way to show someone you care. Here are some ideas:
- Custom Phone Cases: Create a unique phone case with a photo collage or personalized design.
- Photo Puzzles: Transfer a photo onto puzzle pieces for a fun and interactive gift.
- Personalized Mugs: Print a photo onto a mug for a custom coffee or tea cup.
- Photo Keychains: Make personalized keychains with photos of loved ones or pets.
18. What Are the Best Practices for Designing Photo Collages in Cricut Design Space?
Designing photo collages in Cricut Design Space is a great way to showcase multiple photos in one project. Here are some best practices:
- Layout Planning: Plan your collage layout before uploading your photos.
- Use Shapes: Use basic shapes in Cricut Design Space to create frames for your photos.
- Sizing and Alignment: Ensure all photos are sized correctly and aligned properly.
- Flatten Layers: Use the “Flatten” tool to combine all layers into a single printable image.
19. How to Create Professional-Looking Photo Decals with Cricut?
Creating professional-looking photo decals with Cricut requires attention to detail. Here are some tips:
- High-Quality Images: Use high-resolution photos for crisp, clear prints.
- Clean Cuts: Calibrate your Cricut machine and use sharp blades for clean cuts.
- Proper Application: Clean the surface before applying the decal and use a squeegee to remove air bubbles.
- Sealing: Seal the decal with a clear coat or laminate for added protection.
20. What Are the Latest Trends in Using Cricut Print Then Cut for Photo Crafts?
Staying up-to-date with the latest trends can inspire new and exciting Cricut Print Then Cut photo crafts. Here are some popular trends:
- Watercolor Effects: Add watercolor effects to your photos for a trendy, artistic look.
- Holographic Stickers: Use holographic printable vinyl to create eye-catching stickers.
- Layered Designs: Create layered photo designs for added depth and dimension.
- Personalized Planners: Customize your planner with photos and inspirational quotes.
21. How to Import and Use Photos from Social Media for Cricut Projects?
Importing and using photos from social media for Cricut projects is easy, but be mindful of image quality and permissions:
- Download Photos: Download your photos from social media platforms like Facebook, Instagram, or Pinterest.
- Check Resolution: Ensure the photos have a decent resolution for printing.
- Edit if Necessary: Edit the photos to enhance their quality.
- Upload to Cricut Design Space: Upload the photos to Cricut Design Space and use them in your projects.
22. Can You Print Photos on Fabric with Cricut?
Yes, you can print photos on fabric with Cricut using printable iron-on transfer paper. Here’s how:
- Print the Photo: Print your photo onto printable iron-on transfer paper, remembering to mirror the image.
- Cut the Design: Cut around the printed photo, leaving a small border.
- Prepare the Fabric: Iron the fabric to remove any wrinkles.
- Apply the Transfer: Place the transfer paper onto the fabric, printed side down.
- Iron: Use an iron or heat press to apply the transfer, following the manufacturer’s instructions.
- Peel off the Backing: Carefully peel off the backing paper to reveal the transferred photo.
23. How to Create Unique Party Decorations Using Cricut Print Then Cut Photos?
Creating unique party decorations with Cricut Print Then Cut photos is a fun way to personalize any celebration. Here are some ideas:
- Photo Banners: Create banners with photos of the guest of honor.
- Cupcake Toppers: Make cupcake toppers with personalized photos or designs.
- Table Centerpieces: Design table centerpieces with photo collages or themed images.
- Party Favors: Create personalized party favors with photos of the event.
24. How to Avoid Copyright Issues When Printing Photos with Cricut?
Avoiding copyright issues is crucial when printing photos with Cricut. Here’s how to ensure you’re using images legally:
- Use Your Own Photos: The safest option is to use photos that you have taken yourself.
- Creative Commons: Use photos licensed under Creative Commons, ensuring you follow the license terms.
- Public Domain: Use photos in the public domain, which are free for anyone to use.
- Purchase Licenses: Purchase licenses for photos from stock photo websites.
- Get Permission: Obtain written permission from the copyright holder before using any copyrighted photos.
25. What Are the Best Resources for Learning More About Cricut Print Then Cut for Photos?
There are numerous resources available for learning more about Cricut Print Then Cut for photos. Here are some of the best:
- Cricut’s Website: Cricut’s official website offers tutorials, tips, and project ideas.
- YouTube: Many crafters share their Cricut Print Then Cut tutorials on YouTube.
- Blogs: Craft blogs often feature detailed guides and inspiration for using Cricut Print Then Cut.
- Online Forums: Online forums and social media groups are great places to ask questions and share ideas with other Cricut users.
- Online Courses: Consider taking an online course for in-depth training on Cricut Print Then Cut techniques.
26. How to Use Cricut Print Then Cut to Make Personalized Scrapbook Embellishments?
Using Cricut Print Then Cut to create personalized scrapbook embellishments adds a special touch to your memories. Here’s how:
- Design Embellishments: Design your scrapbook embellishments in Cricut Design Space, incorporating photos, text, and decorative elements.
- Print and Cut: Print your designs using the Print Then Cut feature and cut them out with your Cricut machine.
- Adhere to Scrapbook Pages: Use adhesive to attach the embellishments to your scrapbook pages.
- Add Finishing Touches: Add other embellishments like ribbons, stickers, and handwritten notes to complete your scrapbook layout.
27. What are the Advantages of Using a Cricut for Printing and Cutting Photos Compared to Other Methods?
Using a Cricut for printing and cutting photos offers several advantages over other methods:
- Precision Cutting: Cricut machines provide precise and accurate cuts, ensuring professional-looking results.
- Custom Shapes and Sizes: You can easily cut photos into custom shapes and sizes, allowing for creative freedom.
- Versatility: Cricut machines can cut a wide range of materials, including printable vinyl, sticker paper, and iron-on transfer paper.
- Ease of Use: Cricut Design Space is user-friendly and offers a variety of tools for designing and preparing your photos.
- Time-Saving: The Print Then Cut feature saves time compared to manual cutting methods.
28. How Do Updates to Cricut Design Space Affect Print Then Cut for Photos?
Updates to Cricut Design Space can introduce new features, improvements, and bug fixes that affect the Print Then Cut function for photos. Here’s what to consider:
- New Features: Keep an eye out for new features that enhance the Print Then Cut experience, such as improved calibration tools or enhanced image editing capabilities.
- Bug Fixes: Updates often include bug fixes that address common issues with Print Then Cut, such as inaccurate cuts or recognition of registration marks.
- Compatibility: Ensure your Cricut machine and software are compatible with the latest updates.
- Learning Curve: Be prepared for a slight learning curve when new features are introduced.
- Stay Informed: Stay informed about updates by following Cricut’s announcements and online communities.
29. How to Use the Cricut “Contour” Feature with Print Then Cut Photos?
The Cricut “Contour” feature is particularly helpful when working with Print Then Cut photos as it allows you to hide or remove specific cut lines within a design. Here’s how to use it effectively:
- Upload Your Photo: Start by uploading your photo into Cricut Design Space.
- Insert a Shape: Insert a shape from the shapes panel that you want to use as a contour.
- Select Both Layers: Select both the photo and the shape.
- Slice: Use the slice tool to slice the shape out of the photo. This will leave you with a photo that is the shape you selected.
- Flatten: Flatten the image. Flattening is very important when using print then cut. Flattening turns all of the layers into one printable image. The registration marks will print around the image, and your Cricut will know where to cut.
By following these steps, you can effectively use the Contour feature to customize your Print Then Cut photos.
30. How to Choose Between Printable Vinyl and Printable HTV (Heat Transfer Vinyl) for Photo Projects?
Choosing between printable vinyl and printable HTV depends on the surface you’re applying your photo to. Here’s a comparison to help you decide:
- Printable Vinyl:
- Best For: Hard, smooth surfaces like laptops, water bottles, and phone cases.
- Application: Applied like a sticker; no heat required.
- Durability: Durable and water-resistant.
- Finish: Available in matte and glossy finishes.
- Printable HTV (Heat Transfer Vinyl):
- Best For: Fabrics like t-shirts, tote bags, and pillows.
- Application: Requires heat to transfer the image onto the fabric.
- Durability: Adheres well to fabric and can withstand washing.
- Finish: Available in various finishes, including matte and glitter.
Here’s a quick reference table:
| Feature | Printable Vinyl | Printable HTV |
|---|---|---|
| Best For | Hard, smooth surfaces | Fabrics |
| Application | Sticker | Heat transfer |
| Heat Required | No | Yes |
| Durability | Water-resistant | Washable |
| Available Finishes | Matte, Glossy | Various (Matte, Glitter, etc.) |
31. How to Create Photo Puzzles Using Cricut Print Then Cut?
Creating photo puzzles using Cricut Print Then Cut is a fun and personalized activity. Here’s a step-by-step guide:
- Prepare Your Photo: Choose a high-resolution photo and edit it to your liking.
- Upload to Cricut Design Space: Upload your photo into Cricut Design Space.
- Create Puzzle Template: Search for a puzzle template in Cricut Design Space or create your own using basic shapes.
- Overlay Photo on Template: Place the photo over the puzzle template, ensuring it covers the entire design.
- Flatten the Image: Use the “Flatten” tool to merge the photo and puzzle template into a single printable image.
- Print Then Cut: Print the flattened image using the Print Then Cut feature.
- Cut the Puzzle: Load the printed sheet onto your Cricut mat and cut out the puzzle pieces.
- Assemble the Puzzle: Remove the puzzle pieces from the mat and assemble your personalized photo puzzle.
32. How to Design Personalized Photo Bookmarks with Cricut Print Then Cut?
Designing personalized photo bookmarks with Cricut Print Then Cut is a simple and thoughtful project. Here’s how to create them:
- Choose Your Photos: Select high-resolution photos that you want to use for your bookmarks.
- Design in Cricut Design Space: Open Cricut Design Space and create a bookmark template using basic shapes (rectangles or rounded rectangles work well).
- Insert Photos: Insert your photos into the bookmark template, resizing and arranging them as desired.
- Add Text and Embellishments: Add text, such as names, quotes, or dates, and embellishments like decorative borders or icons.
- Flatten the Design: Use the “Flatten” tool to combine all elements into a single printable image.
- Print Then Cut: Print the flattened design using the Print Then Cut feature.
- Cut the Bookmarks: Load the printed sheet onto your Cricut mat and cut out the bookmarks.
- Laminate (Optional): Laminate the bookmarks for added durability and protection.
- Add Tassels or Ribbons (Optional): Punch a hole at the top of each bookmark and attach a tassel or ribbon for a finishing touch.
33. What are the Best Fonts to Use When Adding Text to Photos in Cricut Design Space?
Choosing the right font can significantly enhance the look of your photo projects. Here are some of the best fonts to use when adding text to photos in Cricut Design Space:
- Sans-Serif Fonts:
- Arial: A classic and versatile font that works well for various projects.
- Helvetica: A clean and modern font that is easy to read.
- Open Sans: A friendly and legible font that is great for body text.
- Serif Fonts:
- Times New Roman: A traditional and formal font that adds a touch of elegance.
- Georgia: A classic serif font that is easy to read on screen.
- Lora: A well-balanced serif font with a contemporary feel.
- Script Fonts:
- Brush Script MT: A casual and flowing script font that adds a personal touch.
- Pacifico: A fun and whimsical script font that is great for informal projects.
- Lobster: A bold and eye-catching script font that is perfect for headlines.
- Display Fonts:
- Bebas Neue: A tall and narrow sans-serif font that is perfect for headlines.
- Oswald: A condensed sans-serif font that is great for titles and headings.
- Montserrat: A modern and geometric font that is versatile and stylish.
34. How Can Amazingprint.net Help with Your Cricut Photo Printing Needs?
While Cricut is excellent for DIY photo projects, amazingprint.net offers professional-quality printing services that can elevate your creations to the next level. Here’s how we can help:
- High-Quality Prints: We use state-of-the-art printers and premium materials to ensure your photos are printed with exceptional clarity, color accuracy, and detail.
- Wide Range of Materials: Choose from a variety of materials, including photo paper, cardstock, vinyl, and fabric, to suit your specific project needs.
- Custom Sizes and Finishes: We offer custom sizes and finishes to perfectly match your design requirements.
- Professional Assistance: Our team of printing experts can provide guidance and support to help you achieve the best possible results.
- Convenient Online Ordering: Easily upload your photos and place your order online from the comfort of your home or office.
Here are some specific ways amazingprint.net can assist with your Cricut photo printing projects:
- Large Format Printing: Need to print large photos for banners, posters, or wall decor? We offer large format printing services to bring your vision to life.
- Specialty Printing: Looking for unique printing options like metallic inks or textured finishes? We can help you create truly one-of-a-kind projects.
- Bulk Printing: Planning a large event or need to print multiple copies of your photos? We offer competitive pricing for bulk printing orders.
By partnering with amazingprint.net, you can focus on the creative aspects of your Cricut projects while we handle the printing with precision and expertise.
Call to Action:
Ready to take your Cricut photo printing projects to the next level? Visit amazingprint.net today to explore our wide range of printing services and discover how we can help you create stunning, professional-quality results. Contact us at +1 (650) 253-0000 or visit our location at 1600 Amphitheatre Parkway, Mountain View, CA 94043, United States. Let’s bring your creative vision to life with amazingprint.net.
FAQ: Cricut Print Then Cut Photos
- Can all Cricut machines do Print Then Cut?
No, only the Cricut Maker and Explore series support the Print Then Cut feature. The Cricut Joy does not have this capability. - What kind of printer do I need for Cricut Print Then Cut?
You can use any standard inkjet or laser printer that is compatible with your computer and can print on the materials you want to use. - Why is my Cricut not cutting accurately around my printed image?
This can be due to calibration issues. Recalibrate your Cricut machine in Cricut Design Space. Also, ensure your mat is clean and your lighting is good. - What is the maximum image size for Print Then Cut?
The maximum printable area is 6.75 x 9.25 inches, but this can vary slightly depending on your machine model and software version. - Can I use Print Then Cut with my iPad or mobile device?
Yes, you can use Print Then Cut with the Cricut Design Space app on your iPad or mobile device, as long as your device is compatible with your printer and Cricut machine. - What type of paper works best for Print Then Cut?
Printable vinyl and sticker paper work best for most projects, but you can also use photo paper or cardstock depending on your needs. - How do I remove the background from a photo in Cricut Design Space?
Use the Background Remover tool in Cricut Design Space to easily remove unwanted backgrounds from your photos. - Can I print and cut multiple images at once?
Yes, you can arrange multiple images on your canvas in Cricut Design Space and print and cut them all at once. - Why are my Print Then Cut colors not accurate?
Color accuracy can vary depending on your printer settings and monitor calibration. Adjust your printer settings to “Best” quality and ensure your monitor is calibrated correctly. - How do I prevent my Print Then Cut images from fading?
To prevent fading, laminate your images or use a UV-resistant spray or coating to protect them from sunlight.
Conclusion
Mastering the Cricut Print Then Cut feature opens up a world of creative possibilities for personalized photo projects. From custom stickers to unique home decor, the ability to print and cut photos with precision allows you to bring your imagination to life. Remember to choose the right materials, optimize your printer settings, and calibrate your Cricut machine for the best results. And when you need professional-quality printing, amazingprint.net is here to help you elevate your creations to the next level.