
Using an HP printer with a Mac is generally straightforward, allowing you to produce high-quality prints for both personal and professional use. At amazingprint.net, we aim to provide you with the solutions needed to make this integration seamless. Ensuring optimal compatibility, performance, and access to the latest printing technology, discover printing innovations tailored to your needs like never before for your digital and physical assets.
1. Understanding HP Printer and Mac Compatibility
Yes, you can definitely use an HP printer with a Mac. Most HP printers are designed to be compatible with macOS, ensuring a seamless printing experience.
HP has long supported Mac users, designing their printers to work well with macOS. This compatibility extends to a wide range of models, from basic home printers to advanced office solutions. You can expect essential features like printing, scanning, and copying to work effortlessly. For more advanced functionalities, such as specific color profiles or custom settings, it’s a good idea to ensure you have the latest drivers and software installed. Regular updates from both Apple and HP ensure ongoing compatibility and optimal performance.
1.1. Key Considerations for Mac and HP Printer Compatibility
Before setting up your HP printer with your Mac, there are a few key factors to consider to ensure a smooth and efficient printing experience:
- Operating System Compatibility: Always check that your HP printer is compatible with your version of macOS. Visit HP’s support website and look for drivers and software that match your specific macOS version.
- Connection Type: HP printers typically connect via USB or Wi-Fi. Wi-Fi offers convenience and flexibility, while USB provides a direct and stable connection.
- Driver Availability: Ensure that HP provides the necessary drivers for your printer model. While many printers work with generic drivers, installing the manufacturer’s drivers ensures access to all features and settings.
- AirPrint Support: Printers that support Apple’s AirPrint technology are particularly easy to set up, as they don’t require additional drivers. This feature allows you to print directly from your Mac without installing extra software.
- Software Updates: Keep both your macOS and HP printer software up to date. Updates often include performance improvements and bug fixes that enhance compatibility and functionality.
1.2. How to Identify Compatible HP Printers for Your Mac
Identifying compatible HP printers for your Mac involves a few simple steps to ensure a seamless setup and optimal performance.
-
Check HP’s Official Website: The most reliable way to verify compatibility is by visiting the HP support website. Enter your printer model number and check the “Supported Operating Systems” list to confirm macOS compatibility.
-
Review Product Specifications: When purchasing a new HP printer, carefully review the product specifications. Look for explicit mentions of macOS support or the AirPrint logo, indicating native compatibility.
-
Use Apple’s AirPrint List: Apple provides a list of AirPrint-compatible printers on their support website. AirPrint enables driverless printing from your Mac, simplifying the setup process.
-
Read User Reviews and Forums: Check online user reviews and forums for insights from other Mac users. Their experiences can provide valuable information regarding compatibility and performance.
-
Consult with Retailers: If you’re unsure, consult with retailers or HP representatives. They can offer personalized recommendations based on your specific needs and macOS version.
By following these steps, you can confidently choose an HP printer that works seamlessly with your Mac, ensuring a hassle-free printing experience.
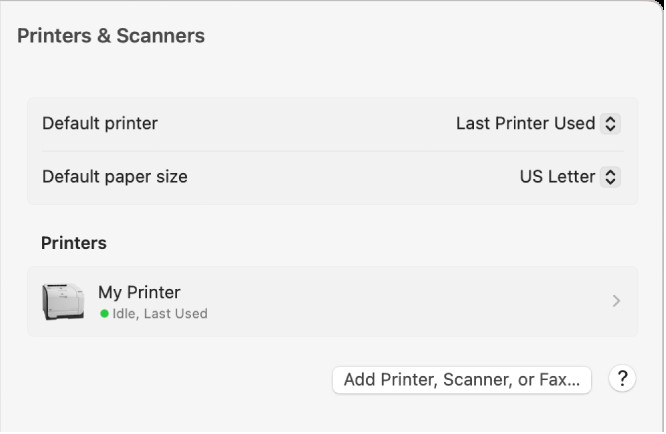 HP Printer and Scanner List on Mac
Alt: The Printers & Scanners dialog showing options for setting up a printer and a printers list with an Add Printer, Scanner, or Fax button.
2. Setting Up Your HP Printer on a Mac
Setting up your HP printer on a Mac is a straightforward process, whether you’re using a USB or Wi-Fi connection. Follow these detailed steps to ensure a smooth setup:
2.1. Connecting via USB
-
Unpack Your Printer: Remove all packaging materials and connect the power cord to your HP printer and a power outlet. Turn on the printer.
-
Connect the USB Cable: Plug the USB cable into the printer and then into a USB port on your Mac.
-
Install Drivers (If Necessary): macOS usually detects the printer automatically and installs the necessary drivers. If not, visit HP’s support website, download the latest drivers for your model, and follow the installation instructions.
-
Add the Printer: Go to “System Preferences” > “Printers & Scanners.” Click the “+” button to add a new printer.
-
Select Your Printer: Your HP printer should appear in the list. Select it and click “Add.”
-
Test the Connection: Print a test page to ensure everything is working correctly.
2.2. Connecting via Wi-Fi
-
Prepare Your Printer: Follow the instructions in the printer’s manual to connect it to your Wi-Fi network. This usually involves using the printer’s control panel to select your network and enter the password.
-
Add the Printer: On your Mac, go to “System Preferences” > “Printers & Scanners.” Click the “+” button to add a new printer.
-
Select Your Printer: Your HP printer should appear in the list. Select it and click “Add.” If your printer doesn’t show up, make sure both your Mac and printer are on the same Wi-Fi network.
-
Install Drivers (If Necessary): If prompted, download and install any necessary drivers from HP’s support website.
-
Test the Connection: Print a test page to confirm the setup.
2.3. Using AirPrint for Wireless Connection
AirPrint simplifies wireless printing from your Mac without the need for drivers. Here’s how to use it:
-
Ensure AirPrint Compatibility: Verify that your HP printer supports AirPrint by checking the product specifications or HP’s website.
-
Connect to Wi-Fi: Make sure both your HP printer and Mac are connected to the same Wi-Fi network.
-
Add the Printer: Go to “System Preferences” > “Printers & Scanners.” Click the “+” button to add a new printer.
-
Select Your Printer: Your HP printer should automatically appear in the list. Select it and ensure that “AirPrint” is selected in the “Use” dropdown menu.
-
Add the Printer: Click “Add” to complete the setup.
-
Test the Connection: Print a test page to ensure everything is working as expected.
2.4. Troubleshooting Connection Issues
If you encounter issues while setting up your HP printer, here are some troubleshooting steps:
- Check Wi-Fi Connection: Ensure both your Mac and printer are connected to the same Wi-Fi network. Restart your router if necessary.
- Update Drivers: Make sure you have the latest drivers installed. Visit HP’s support website and download the appropriate drivers for your printer model and macOS version.
- Restart Devices: Restart both your Mac and printer. This can often resolve temporary connectivity issues.
- Check Printer Status: Ensure your printer is turned on, has paper, and is not displaying any error messages.
- Run HP Print and Scan Doctor: HP provides a diagnostic tool called “Print and Scan Doctor” that can automatically identify and fix common printing issues. Download it from HP’s website.
- Firewall Settings: Check your Mac’s firewall settings to ensure they are not blocking communication with the printer.
- Contact Support: If all else fails, contact HP’s customer support for assistance.
By following these steps and troubleshooting tips, you can successfully set up your HP printer on your Mac and enjoy seamless printing.
3. Installing HP Printer Drivers on Mac
Installing the correct HP printer drivers on your Mac is essential for optimal performance and access to all printer features. Here’s a detailed guide on how to install and manage HP printer drivers:
3.1. Finding the Right Drivers for Your HP Printer Model
-
Visit HP’s Official Website: The most reliable way to find the correct drivers is by visiting HP’s support website (support.hp.com).
-
Enter Your Printer Model: Type your printer model number into the search bar and navigate to the “Drivers” or “Software and Drivers” section.
-
Select Your Operating System: Choose your specific version of macOS from the list of supported operating systems.
-
Download the Recommended Drivers: Download the recommended drivers or software package for your printer. HP usually provides a full software suite or a basic driver option.
-
Check Driver Details: Before downloading, review the driver details to ensure it is compatible with your printer model and macOS version.
3.2. Step-by-Step Installation Guide
-
Download the Driver Package: Once you’ve located the correct drivers, download the software package to your Mac.
-
Open the Downloaded File: Double-click the downloaded file (usually a .dmg file) to open it.
-
Run the Installer: Inside the .dmg file, you’ll find an installer package (.pkg). Double-click the installer package to begin the installation process.
-
Follow the On-Screen Instructions: Follow the on-screen instructions provided by the installer. You may need to agree to the terms and conditions and enter your administrator password.
-
Add the Printer: After the installation is complete, go to “System Preferences” > “Printers & Scanners.” Click the “+” button to add a new printer.
-
Select Your Printer: Your HP printer should appear in the list. Select it and click “Add.”
-
Test the Connection: Print a test page to ensure everything is working correctly.
3.3. Updating and Managing Printer Drivers
-
Check for Updates Regularly: Periodically check HP’s support website for updated drivers. HP often releases updates to improve performance, fix bugs, and add new features.
-
Use HP Smart App: The HP Smart app can help you manage your printer and keep your drivers up to date. Download it from the Mac App Store.
-
Remove Old Drivers: Before installing new drivers, it’s a good idea to remove any old or outdated drivers. To do this, go to “System Preferences” > “Printers & Scanners,” select the printer, and click the “-” button to remove it. Then, follow the steps above to install the new drivers.
3.4. Common Driver Installation Issues and Solutions
- Incompatible Drivers: Ensure that you are downloading drivers that are specifically designed for your printer model and macOS version.
- Installation Errors: If you encounter errors during installation, try restarting your Mac and running the installer again.
- Printer Not Detected: If your printer is not detected, make sure it is turned on and connected to your Mac via USB or Wi-Fi. Also, check that your Mac and printer are on the same Wi-Fi network.
- Conflicting Software: Remove any other printer software or drivers that may be conflicting with the HP drivers.
- Firewall Issues: Check your Mac’s firewall settings to ensure they are not blocking communication with the printer.
- Contact HP Support: If you are still having trouble, contact HP’s customer support for assistance.
By following these steps and troubleshooting tips, you can successfully install and manage HP printer drivers on your Mac, ensuring optimal printing performance and access to all printer features.
4. Wireless Printing with HP Printers on Mac
Wireless printing with HP printers on a Mac offers convenience and flexibility, allowing you to print from anywhere within your Wi-Fi network. Here’s a comprehensive guide on setting up and troubleshooting wireless printing:
4.1. Connecting Your HP Printer to Wi-Fi
-
Check Printer Compatibility: Ensure that your HP printer supports Wi-Fi connectivity. Most modern HP printers come with built-in Wi-Fi capabilities.
-
Use the Printer’s Control Panel:
- For printers with a touchscreen: Navigate to the “Setup,” “Network,” or “Wireless” menu.
- For printers without a touchscreen: Press the “Wireless” button or navigate through the printer’s menu using the arrow keys.
-
Select Your Wi-Fi Network: Choose your Wi-Fi network from the list of available networks and enter the password.
-
Connect via USB (If Necessary): Some printers may require a temporary USB connection to configure Wi-Fi settings. Follow the on-screen instructions to connect the printer to your Mac via USB and use the HP software to set up the Wi-Fi connection.
-
Confirm the Connection: Once connected, the printer should display a confirmation message or a Wi-Fi icon on the control panel.
4.2. Adding a Wireless HP Printer to Your Mac
-
Go to System Preferences: On your Mac, go to “System Preferences” > “Printers & Scanners.”
-
Add a New Printer: Click the “+” button to add a new printer.
-
Select Your Printer: Your HP printer should appear in the list of available printers. If it doesn’t, make sure both your Mac and printer are on the same Wi-Fi network.
-
Choose the Driver: Select your printer and ensure that the correct driver is selected in the “Use” dropdown menu. If your printer supports AirPrint, you can choose the “AirPrint” option for driverless printing.
-
Add the Printer: Click “Add” to complete the setup.
-
Test the Connection: Print a test page to ensure everything is working correctly.
4.3. Printing from Your Mac Wirelessly
-
Open the Document: Open the document or file you want to print on your Mac.
-
Go to Print: Click “File” > “Print” or press “Command + P.”
-
Select Your Printer: Choose your HP printer from the list of available printers.
-
Adjust Settings: Adjust the print settings as needed, such as the number of copies, paper size, and print quality.
-
Print: Click “Print” to send the job to your HP printer.
4.4. Troubleshooting Wireless Printing Issues
- Check Wi-Fi Connection: Ensure both your Mac and printer are connected to the same Wi-Fi network.
- Restart Devices: Restart both your Mac and printer. This can often resolve temporary connectivity issues.
- Update Drivers: Make sure you have the latest drivers installed. Visit HP’s support website and download the appropriate drivers for your printer model and macOS version.
- Check Printer Status: Ensure your printer is turned on, has paper, and is not displaying any error messages.
- Run HP Print and Scan Doctor: HP provides a diagnostic tool called “Print and Scan Doctor” that can automatically identify and fix common printing issues. Download it from HP’s website.
- Firewall Settings: Check your Mac’s firewall settings to ensure they are not blocking communication with the printer.
- Router Issues: Restart your router and ensure it is broadcasting the Wi-Fi network correctly.
- Printer Offline: If your printer is showing as offline, try turning it off and on again. Also, check the printer’s settings to ensure it is not in offline mode.
- Contact Support: If all else fails, contact HP’s customer support for assistance.
By following these steps and troubleshooting tips, you can successfully set up and use wireless printing with your HP printer on your Mac, enjoying the convenience and flexibility of wireless printing.
5. AirPrint: Printing Without Drivers on Mac
AirPrint is Apple’s technology that allows you to print wirelessly from your Mac without the need to install drivers. Here’s a detailed guide on using AirPrint with your HP printer:
5.1. What is AirPrint and How Does it Work?
AirPrint is a feature built into macOS and iOS that enables wireless printing to compatible printers over a Wi-Fi network. It eliminates the need to download and install printer-specific drivers, simplifying the printing process. AirPrint printers can be automatically detected by your Mac, making setup quick and easy.
5.2. Checking if Your HP Printer Supports AirPrint
-
Review Product Specifications: Check the product specifications of your HP printer on HP’s website or in the product manual. Look for the AirPrint logo or mention of AirPrint support.
-
Apple’s AirPrint List: Visit Apple’s support website for a list of AirPrint-compatible printers.
-
HP Support Website: Search for your printer model on HP’s support website and look for information about AirPrint compatibility.
-
Test the Connection: If you’re unsure, try adding your printer to your Mac. If it appears in the list of available printers with “AirPrint” as the selected driver, it likely supports AirPrint.
5.3. Setting Up AirPrint on Your Mac
-
Connect to Wi-Fi: Ensure that both your HP printer and Mac are connected to the same Wi-Fi network.
-
Add the Printer: Go to “System Preferences” > “Printers & Scanners.” Click the “+” button to add a new printer.
-
Select Your Printer: Your HP printer should automatically appear in the list of available printers.
-
Choose AirPrint Driver: Select your printer and ensure that “AirPrint” is selected in the “Use” dropdown menu.
-
Add the Printer: Click “Add” to complete the setup.
-
Test the Connection: Print a test page to ensure everything is working correctly.
5.4. Printing with AirPrint
-
Open the Document: Open the document or file you want to print on your Mac.
-
Go to Print: Click “File” > “Print” or press “Command + P.”
-
Select Your Printer: Choose your HP printer from the list of available printers.
-
Adjust Settings: Adjust the print settings as needed, such as the number of copies, paper size, and print quality.
-
Print: Click “Print” to send the job to your HP printer.
5.5. Troubleshooting AirPrint Issues
- Check Wi-Fi Connection: Ensure both your Mac and printer are connected to the same Wi-Fi network.
- Restart Devices: Restart both your Mac and printer. This can often resolve temporary connectivity issues.
- Update Firmware: Make sure your HP printer has the latest firmware installed. Check HP’s support website for updates.
- Check Printer Status: Ensure your printer is turned on, has paper, and is not displaying any error messages.
- Router Issues: Restart your router and ensure it is broadcasting the Wi-Fi network correctly.
- Printer Offline: If your printer is showing as offline, try turning it off and on again. Also, check the printer’s settings to ensure it is not in offline mode.
- AirPrint Not Showing: If AirPrint is not showing as an option, try removing the printer and adding it again.
- Contact Support: If all else fails, contact HP’s customer support for assistance.
By following these steps and troubleshooting tips, you can successfully set up and use AirPrint with your HP printer on your Mac, enjoying the convenience of driverless printing.
6. HP Smart App for Mac: A Comprehensive Guide
The HP Smart app for Mac is a versatile tool that allows you to manage and control your HP printer directly from your computer. It provides features such as printing, scanning, checking ink levels, and troubleshooting. Here’s a comprehensive guide on using the HP Smart app:
6.1. Installing the HP Smart App on Your Mac
-
Download the App: Download the HP Smart app from the Mac App Store.
-
Open the Downloaded File: Double-click the downloaded file to open it.
-
Follow the On-Screen Instructions: Follow the on-screen instructions to install the app on your Mac.
-
Launch the App: Once installed, launch the HP Smart app from your Applications folder.
6.2. Adding Your HP Printer to the App
-
Open the HP Smart App: Launch the HP Smart app on your Mac.
-
Add a New Printer: If you haven’t added a printer before, the app will automatically search for available printers on your network. If not, click the “+” button or the “Add Printer” option.
-
Select Your Printer: Your HP printer should appear in the list of available printers. Select it and click “Add.”
-
Connect to Wi-Fi: If prompted, follow the on-screen instructions to connect your printer to your Wi-Fi network.
-
Complete the Setup: Once connected, the app will complete the setup process and add your printer to the app.
6.3. Key Features of the HP Smart App
- Printing: Print documents, photos, and web pages directly from the app.
- Scanning: Scan documents and photos using your HP printer and save them to your Mac or cloud storage.
- Copying: Make copies of documents and photos using your HP printer.
- Ink Levels: Check the ink levels of your HP printer to ensure you don’t run out of ink unexpectedly.
- Troubleshooting: Access troubleshooting tools and resources to fix common printing issues.
- Printer Settings: Adjust printer settings, such as paper size, print quality, and duplex printing.
- HP Instant Ink: Manage your HP Instant Ink subscription and order ink cartridges when needed.
- Mobile Printing: Print from your iPhone or iPad using the HP Smart app.
6.4. Using the HP Smart App for Printing
-
Open the Document: Open the document or file you want to print on your Mac.
-
Go to Print: Click “File” > “Print” or press “Command + P.”
-
Select HP Smart Printer: Choose your HP printer from the list of available printers.
-
Adjust Settings: Adjust the print settings as needed, such as the number of copies, paper size, and print quality.
-
Print: Click “Print” to send the job to your HP printer.
6.5. Using the HP Smart App for Scanning
-
Open the HP Smart App: Launch the HP Smart app on your Mac.
-
Select Scan: Click the “Scan” tile on the app’s home screen.
-
Adjust Settings: Adjust the scan settings as needed, such as the scan resolution, color mode, and file format.
-
Load the Document: Load the document or photo you want to scan into your HP printer’s scanner.
-
Scan: Click the “Scan” button to start the scanning process.
-
Save the Scan: Once the scan is complete, you can save the scanned document or photo to your Mac or cloud storage.
6.6. Troubleshooting Issues with the HP Smart App
- App Not Opening: If the HP Smart app is not opening, try restarting your Mac and launching the app again.
- Printer Not Detected: If your printer is not detected, make sure it is turned on and connected to your Mac via USB or Wi-Fi. Also, check that your Mac and printer are on the same Wi-Fi network.
- Connection Issues: If you are experiencing connection issues, try restarting your router and printer.
- Update the App: Make sure you have the latest version of the HP Smart app installed. Check the Mac App Store for updates.
- Contact Support: If you are still having trouble, contact HP’s customer support for assistance.
By following these steps and troubleshooting tips, you can successfully use the HP Smart app to manage and control your HP printer on your Mac, making printing and scanning tasks easier and more efficient.
7. Advanced Printing Features and Settings on Mac
macOS offers a range of advanced printing features and settings that can enhance your printing experience. Here’s a detailed guide on how to access and utilize these features with your HP printer:
7.1. Accessing Advanced Print Settings
-
Open the Document: Open the document or file you want to print on your Mac.
-
Go to Print: Click “File” > “Print” or press “Command + P.”
-
Show Details: In the print dialog box, click the “Show Details” button to access advanced print settings.
7.2. Key Advanced Print Settings
- Paper Size: Choose the correct paper size for your print job, such as Letter, Legal, or A4.
- Orientation: Select the orientation of your print job, such as Portrait or Landscape.
- Paper Type: Choose the appropriate paper type, such as Plain Paper, Photo Paper, or Glossy Paper.
- Print Quality: Adjust the print quality, such as Draft, Normal, or Best.
- Color Options: Choose the color mode, such as Black & White, Color, or Grayscale.
- Layout: Adjust the layout settings, such as the number of pages per sheet and the print order.
- Two-Sided Printing (Duplex): Enable two-sided printing to print on both sides of the paper automatically.
- Margins: Adjust the margins of your print job.
- Scaling: Scale your print job to fit the paper size.
- Watermarks: Add watermarks to your print job.
- Color Matching: Adjust the color matching settings to ensure accurate color reproduction.
- Paper Handling: Adjust the paper handling settings, such as the paper source and the destination tray.
7.3. Setting Up Two-Sided Printing (Duplex)
-
Open the Document: Open the document or file you want to print on your Mac.
-
Go to Print: Click “File” > “Print” or press “Command + P.”
-
Show Details: In the print dialog box, click the “Show Details” button to access advanced print settings.
-
Select Two-Sided Printing: Look for the “Two-Sided” or “Duplex” option in the print settings. It may be located under the “Layout” or “Paper Handling” section.
-
Choose Binding Option: Select the binding option, such as “Long Edge Binding” or “Short Edge Binding.”
-
Print: Click “Print” to send the job to your HP printer.
7.4. Creating and Using Print Presets
-
Adjust Print Settings: Adjust the print settings to your desired configuration.
-
Save as Preset: In the print dialog box, click the “Presets” dropdown menu and select “Save Current Settings as Preset.”
-
Name the Preset: Enter a name for your preset and click “OK.”
-
Use the Preset: To use the preset, open the print dialog box, click the “Presets” dropdown menu, and select your preset.
7.5. Color Management and Calibration
-
Access Color Management Settings: Go to “System Preferences” > “Displays” > “Color.”
-
Calibrate Your Display: Calibrate your display to ensure accurate color reproduction.
-
Choose Color Profile: In the print dialog box, select the appropriate color profile for your printer and paper type.
-
Adjust Color Settings: Adjust the color settings as needed to fine-tune the color reproduction.
7.6. Troubleshooting Advanced Printing Issues
- Incorrect Paper Size: Ensure that you have selected the correct paper size in the print settings.
- Poor Print Quality: Adjust the print quality settings to improve the print quality.
- Color Issues: Adjust the color settings and color profile to ensure accurate color reproduction.
- Two-Sided Printing Problems: Ensure that your printer supports two-sided printing and that you have selected the correct binding option.
- Contact Support: If you are still having trouble, contact HP’s customer support for assistance.
By following these steps and troubleshooting tips, you can successfully utilize the advanced printing features and settings on your Mac with your HP printer, enhancing your printing experience and achieving optimal results.
8. Maintaining Your HP Printer for Optimal Performance on Mac
Maintaining your HP printer is crucial for ensuring optimal performance and longevity, especially when used with a Mac. Here’s a detailed guide on how to keep your HP printer in top condition:
8.1. Regular Cleaning and Maintenance
-
Clean the Exterior: Regularly clean the exterior of your HP printer with a soft, dry cloth to remove dust and debris.
-
Clean the Printhead: Clean the printhead regularly to prevent clogs and ensure optimal print quality. Use the printer’s built-in cleaning function or manually clean the printhead with a lint-free cloth and distilled water.
-
Clean the Paper Path: Clean the paper path to prevent paper jams and ensure smooth paper feeding. Use a paper path cleaning kit or manually clean the rollers with a lint-free cloth and distilled water.
-
Update Firmware: Keep your HP printer’s firmware up to date to ensure optimal performance and compatibility with your Mac. Check HP’s support website for firmware updates.
8.2. Checking and Replacing Ink Cartridges
-
Check Ink Levels: Regularly check the ink levels of your HP printer using the HP Smart app or the printer’s control panel.
-
Replace Ink Cartridges: Replace empty or low ink cartridges with genuine HP ink cartridges to ensure optimal print quality and prevent damage to the printer.
-
Store Ink Cartridges: Store ink cartridges in a cool, dry place away from direct sunlight to prevent them from drying out.
8.3. Preventing and Clearing Paper Jams
-
Use the Correct Paper Type: Use the correct paper type for your HP printer to prevent paper jams.
-
Load Paper Correctly: Load paper correctly into the paper tray to prevent misfeeds and paper jams.
-
Clear Paper Jams: If a paper jam occurs, follow the printer’s instructions to clear the jam. Be careful not to tear the paper or damage the printer.
8.4. Software and Driver Updates
-
Check for Updates Regularly: Check HP’s support website regularly for software and driver updates.
-
Install Updates: Install updates to ensure optimal performance and compatibility with your Mac.
-
Use HP Smart App: Use the HP Smart app to manage your printer and keep your software and drivers up to date.
8.5. Optimizing Printer Settings for Mac
-
Choose the Correct Paper Type: Choose the correct paper type in the print settings to ensure optimal print quality.
-
Adjust Print Quality: Adjust the print quality settings to balance print quality and ink usage.
-
Enable Two-Sided Printing: Enable two-sided printing to save paper.
-
Use Print Presets: Create and use print presets to quickly access your favorite print settings.
8.6. Troubleshooting Common Printer Issues
- Poor Print Quality: Clean the printhead, check ink levels, and adjust print quality settings.
- Paper Jams: Use the correct paper type, load paper correctly, and clear paper jams carefully.
- Connection Issues: Check the Wi-Fi connection, restart devices, and update drivers.
- Printer Offline: Check the printer status, restart the printer, and check the network connection.
- Contact Support: If you are still having trouble, contact HP’s customer support for assistance.
By following these steps and troubleshooting tips, you can successfully maintain your HP printer for optimal performance on your Mac, ensuring high-quality prints and a long lifespan for your printer.
9. Common Issues and Solutions When Using HP Printers with Mac
Using HP printers with Macs is generally straightforward, but occasional issues can arise. Here’s a guide to help you troubleshoot common problems and find solutions:
9.1. Printer Not Recognized by Mac
-
Check the Connection: Ensure that the printer is properly connected to your Mac via USB or Wi-Fi.
-
Restart Devices: Restart both your Mac and printer.
-
Verify Wi-Fi Connection: If using Wi-Fi, ensure that both your Mac and printer are connected to the same network.
-
Update Drivers: Make sure you have the latest drivers installed. Visit HP’s support website and download the appropriate drivers for your printer model and macOS version.
-
Add Printer Manually: Go to “System Preferences” > “Printers & Scanners,” click the “+” button, and add the printer manually.
9.2. Printing Blank Pages
-
Check Ink Levels: Ensure that the ink cartridges are not empty or low.
-
Clean the Printhead: Clean the printhead using the printer’s built-in cleaning function or manually clean the printhead with a lint-free cloth and distilled water.
-
Check Paper Type: Ensure that you are using the correct paper type for your print job.
-
Update Drivers: Make sure you have the latest drivers installed.
9.3. Poor Print Quality
-
Adjust Print Quality Settings: Adjust the print quality settings in the print dialog box.
-
Check Ink Levels: Ensure that the ink cartridges are not empty or low.
-
Clean the Printhead: Clean the printhead using the printer’s built-in cleaning function or manually clean the printhead with a lint-free cloth and distilled water.
-
Check Paper Type: Ensure that you are using the correct paper type for your print job.
-
Align Printhead: Align the printhead using the printer’s built-in alignment function.
9.4. Paper Jams
-
Turn Off the Printer: Turn off the printer and unplug it from the power outlet.
-
Remove Paper: Carefully remove any loose paper from the input and output trays.
-
Open Access Doors: Open the access doors and remove any jammed paper. Be careful not to tear the paper or damage the printer.
-
Reload Paper: Reload the paper correctly into the paper tray.
-
Turn On the Printer: Turn on the printer and try printing again.
9.5. Wireless Printing Issues
-
Check Wi-Fi Connection: Ensure that both your Mac and printer are connected to the same Wi-Fi network.
-
Restart Devices: Restart both your Mac and printer.
-
Update Drivers: Make sure you have the latest drivers installed.
-
Check Printer Status: Ensure that the printer is not in offline mode.
-
Reset the Printer: Reset the printer to its factory settings.
9.6. Driver Installation Problems
-
Download the Correct Drivers: Ensure that you are downloading the correct drivers for your printer model and macOS version.
-
Remove Old Drivers: Remove any old or outdated drivers before installing the new drivers.
-
Restart Your Mac: Restart your Mac after installing the drivers.
-
Run the Installer as Administrator: Run the installer as an administrator.
9.7. Contacting HP Support
If you are unable to resolve the issue, contact HP support for assistance. Provide them with the printer model number, macOS version, and a description of the problem.
By following these steps and troubleshooting tips, you can resolve common issues when using HP printers with your Mac and ensure a smooth printing experience.
10. Exploring Alternatives to HP Printers for Mac Users
While HP printers are a popular choice for Mac users, there are several alternative brands and models that offer excellent compatibility, features, and performance. Here’s a look at some alternatives to consider:
10.1. Canon Printers
Canon printers are well-regarded for their high-quality prints, reliability, and user-friendly software. They offer a wide range of models, from basic inkjet printers to advanced all-in-one devices.
- Pros: Excellent print quality, user-friendly software, reliable performance.
- Cons: Some models can be expensive, ink cartridges may be costly.
- Recommended Models: Canon PIXMA series, Canon imageCLASS series.
10.2. Epson Printers
Epson printers are