
Heat transfer printing is a fantastic way to personalize apparel, accessories, and more, and this guide from amazingprint.net will walk you through every step of the process. By understanding the different types of heat transfer materials, proper application techniques, and helpful tips, you can achieve professional-looking results every time. Let’s dive into heat transfer techniques, garment decoration, and the best methods for heat transfer projects.
1. Understanding Heat Transfer Basics
What is Heat Transfer Printing?
Heat transfer printing is a process where designs are printed onto special transfer paper and then applied to a material, typically fabric, using heat and pressure. This method allows for detailed and vibrant designs to be transferred onto various surfaces. The key to a successful heat transfer lies in understanding the different types of transfer paper, the equipment needed, and the specific techniques for each material.
How Does Heat Transfer Work?
The process involves printing a design onto heat transfer paper using either an inkjet or laser printer. Once printed, the design is placed onto the fabric or item you want to personalize. A heat source, such as a heat press or even a household iron, is then applied. The heat causes the design to transfer from the paper to the material, creating a permanent bond. According to research from the Printing Industries of America (PIA), heat transfer is increasingly popular due to its versatility and cost-effectiveness for small to medium-sized print runs.
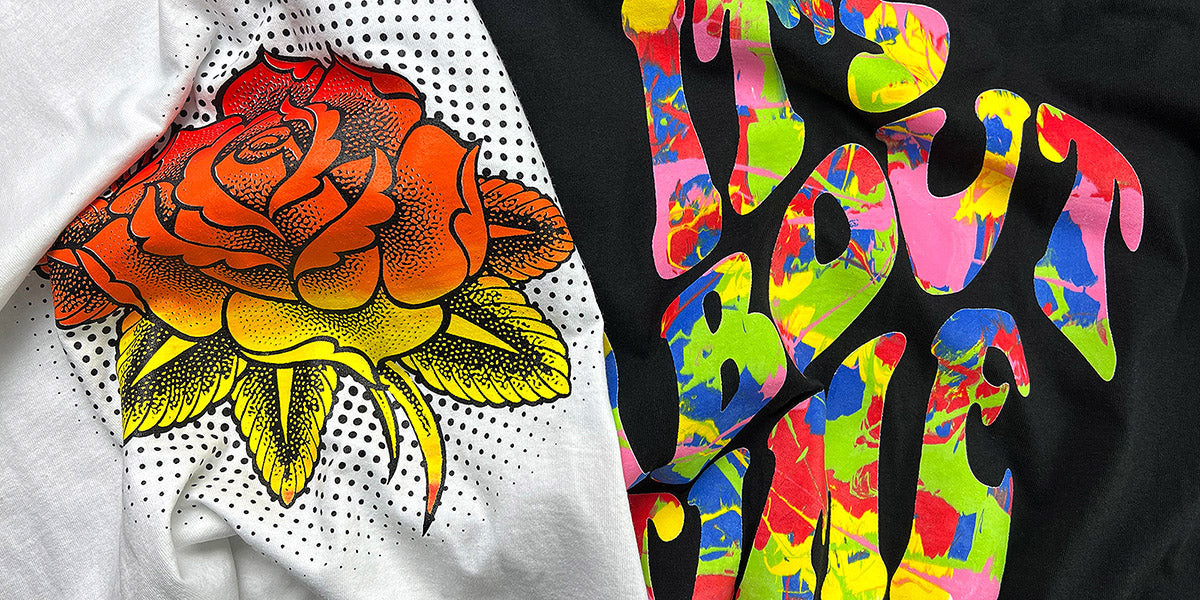 heat transfer paper print examples
What are the Basic Steps for Heat Transfer?
The basic steps for heat transfer are straightforward, but attention to detail is essential:
- Print the Design: Print your design onto heat transfer paper using the appropriate printer (inkjet or laser).
- Prepare the Design: Cut out the design if necessary, especially for designs with intricate shapes.
- Position the Design: Place the printed transfer paper onto the material in the desired location.
- Apply Heat and Pressure: Use a heat press or iron to apply the correct amount of heat and pressure, following the manufacturer’s instructions.
- Peel Away the Paper: Carefully peel away the transfer paper backing to reveal the transferred design.
Each type of heat transfer paper has unique characteristics and requires specific techniques. Let’s explore the different types of heat transfer paper in more detail.
2. Exploring Different Types of Heat Transfer Paper
What are the Main Types of Heat Transfer Paper?
Heat transfer papers are designed for different applications and printer technologies. Using the right paper for your project is essential for achieving the best results. The four main types are:
- Inkjet Transfer Paper
- Laser Transfer Paper
- Sublimation Transfer Paper
- DTF (Direct-To-Film) Transfer Paper
Let’s take a closer look at each type to understand their unique features and how they work.
How Does Inkjet Transfer Paper Work?
Inkjet transfer paper is designed for use with inkjet printers. It features a specialized coating that absorbs liquid-based ink. The ink adheres to the emulsion layer, and when heat and pressure are applied, the emulsion releases the ink and bonds it to the fabric.
There are two main variants of inkjet transfer paper:
- For Light Fabrics: This type is transparent and works best on white or light-colored fabrics.
- For Dark Fabrics: This type includes an opaque layer to prevent the fabric color from showing through the design.
How Does Laser Transfer Paper Work?
Laser transfer paper is designed for use with laser printers, which use toner instead of liquid ink. The toner is fused onto the paper’s surface using heat within the printer. This creates the design on a heat-resistant coating.
When heat is applied with a heat press, the coating melts and bonds the toner to the fabric. Similar to inkjet transfer paper, there are variants for light and dark fabrics. The dark fabric version includes a white layer to ensure color vibrancy.
How Does Sublimation Transfer Paper Work?
Sublimation transfer paper is used in dye-sublimation printing, which employs heat-sensitive inks. When heated, these inks transform directly from a solid to a gas, bypassing the liquid stage. The gaseous dye permeates the polymer fibers of the substrate, permanently dyeing them.
This method is primarily used on polyester fabrics or polymer-coated items. Sublimation printing results in vibrant, long-lasting designs that won’t crack or peel. According to a study by the Specialty Graphic Imaging Association (SGIA), sublimation printing is growing due to its ability to produce high-quality, durable images.
How Does DTF (Direct-To-Film) Transfer Paper Work?
DTF, or Direct-to-Film printing, is a newer technology that utilizes a unique film-based transfer process. In this method, a layer of adhesive powder is applied over the printed design on a PET film. When heat is applied, the adhesive layer activates and transfers the printed design directly to the fabric.
DTF transfers allow for full-color prints without the need for weeding, making it a versatile option compatible with various fabric colors and types. This method is known for its high-quality results and ease of use.
 DTF front side and back side
Comparing Different Transfer Papers: Which Should You Choose?
To help you choose the right transfer paper for your project, here’s a comparison table:
| Type of Paper | Printer Type | Fabric Type | Best For | Pros | Cons |
|---|---|---|---|---|---|
| Inkjet | Inkjet | Light & Dark Cotton | Detailed designs on cotton fabrics | Affordable, easy to use, suitable for small projects | Requires weeding, can be less durable, may require special inks |
| Laser | Laser | Light & Dark Cotton | Durable designs on cotton fabrics | Durable, vibrant colors, good for detailed designs | Requires weeding, can be more expensive than inkjet transfers |
| Sublimation | Sublimation | Polyester | Vibrant, long-lasting designs on polyester fabrics and polymer-coated items | High-quality, durable, no weeding required, soft to the touch | Limited to polyester fabrics and polymer-coated items, requires specialized inks |
| DTF | DTF | Various | Full-color designs on a variety of fabrics, including cotton, polyester, and blends | High-quality, durable, no weeding required, versatile, can be used on various materials | Requires specialized equipment and inks, can be more expensive upfront |
Understanding the differences between these transfer papers will help you select the best option for your specific needs.
3. Choosing the Right Equipment for Heat Transfer
What Tools Can You Use for Heat Transfer?
Achieving successful heat transfers requires the right tools. The most common tools include:
- Heat Press
- Cricut EasyPress
- Home Iron
Each tool offers different levels of control and is suitable for various project sizes.
How Does a Heat Press Work?
A heat press is a professional-grade tool designed for applying heat and pressure evenly. It consists of two heated plates that press together, transferring the design onto the material.
Heat presses are ideal for:
- Achieving consistent and professional results
- Handling large-scale projects
- Working with a variety of materials
The ability to precisely control temperature, pressure, and time makes heat presses a favorite among professionals.
Alt text: A clamshell heat press machine, ideal for professional heat transfer applications.
What are the Benefits of Using a Cricut EasyPress?
The Cricut EasyPress combines the convenience of an iron with the precision of a heat press. It features a uniformly heated plate that applies even pressure, ensuring consistent results.
The Cricut EasyPress is perfect for:
- Hobbyists and small businesses
- Smaller projects
- Users who need portability and ease of use
Its compact design and user-friendly interface make it an excellent choice for those new to heat transfer.
Alt text: The Cricut EasyPress, a portable and user-friendly option for heat transfer projects.
Can You Use a Home Iron for Heat Transfer?
A home iron can be used for heat transfer, but it requires more patience and technique. It’s essential to apply even pressure and consistently move the iron over the design.
When using a home iron:
- Avoid using steam
- Apply firm, even pressure
- Move the iron continuously to distribute heat evenly
While a home iron can yield satisfactory results, it may not provide the same level of consistency and durability as a heat press or Cricut EasyPress.
Alt text: A standard home iron being used for a heat transfer application.
Comparing Heat Transfer Tools: Which is Right for You?
Here’s a comparison table to help you decide which tool is best for your needs:
| Tool | Best For | Pros | Cons |
|---|---|---|---|
| Heat Press | Professional results, large-scale projects, various materials | Consistent heat and pressure, durable results, precise control | Higher cost, requires more space, steeper learning curve |
| Cricut EasyPress | Hobbyists, small businesses, smaller projects, portability | Easy to use, portable, consistent heat and pressure | Less precise control than a heat press, may not be suitable for very large projects |
| Home Iron | Beginners, budget-friendly options, simple designs | Affordable, readily available | Inconsistent heat and pressure, requires more technique, may not produce the most durable results |
Choosing the right tool depends on your budget, project size, and desired level of precision.
4. Step-by-Step Guide: How to Use Different Types of Transfer Paper
How to Use Inkjet or Laser Transfer Paper on Light Fabrics
Using Inkjet or Laser Transfer Paper on light-colored fabrics can produce vibrant designs. Here are the steps to follow:
- Mirror the Design: Mirror your design before printing. This ensures it appears correctly when transferred.
- Print on the Film Side: Ensure you’re printing on the correct side of the transfer paper.
- Cut the Design: Cut out your design, leaving a small border to prevent any unprinted areas from transferring.
- Apply Heat: Place the design on the fabric and apply heat using a heat press or iron, following the manufacturer’s instructions for temperature, pressure, and time.
- Cool Peel: Allow the transfer to cool completely before peeling off the backing paper.
- Cure the Design: Apply heat again to set the design into the fabric for added durability.
How to Use Inkjet or Laser Transfer Paper on Dark Fabrics
When using Inkjet or Laser Transfer Paper on dark fabrics, remember these key steps:
- No Mirroring Required: Do not mirror your design. Print it as is.
- White Underbase: These papers have a white underbase to ensure your design remains vibrant against the dark background.
- Weed the Design: Remove any unprinted areas from the transfer paper.
- Apply Heat: Place the design on the fabric and apply heat, peeling off the backing paper before pressing.
- Warm Peel: Peel off the transfer while it’s still warm.
How to Use Sublimation Transfer Paper
Sublimation Transfer Paper requires specific conditions to work effectively:
- Use Sublimation Ink: You must use sublimation ink with this type of paper.
- Specific Fabric Types: Use polyester or polyester blend fabrics.
- No Need for Mirroring: You do not need to mirror your design.
- No Weeding Necessary: There’s no need for weeding.
- Heat Press Application: Use a heat press for high, even heat.
How to Use DTF Transfers
DTF (Direct-to-Film) transfers are becoming increasingly popular due to their versatility and quality. Here’s how to use them:
- Ink and Powder Process: DTF transfers use special DTF ink and adhesive powder.
- No Weeding Required: DTF transfers do not require weeding.
- Compatible with Various Materials: They can be applied to cotton, polyester, and blends.
- Heat Press Application: Use a heat press for best results, but DTF is more forgiving to pressure inconsistencies.
- Warm Peel: Peel off the transfer while it’s still warm, or allow it to cool.
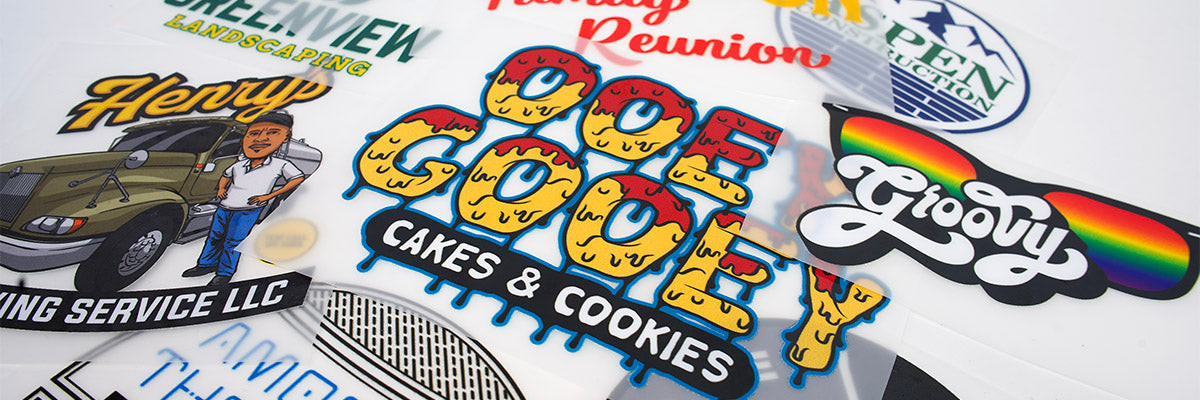 DTF transfer examples
5. Essential Tips and Tricks for Heat Transfer Success
Top Tips for Flawless Heat Transfers
To ensure your heat transfer projects are a success, keep these tips in mind:
- Start with a High-Quality Design: Use high-resolution images with the correct file size and color format.
- Optimize Printer Software Settings: Adjust settings for the type of transfer paper and design.
- Pre-heat Your Equipment: Pre-heat your heat press, Cricut EasyPress, or home iron for even heat distribution.
- Choose the Right Fabric/Materials: Opt for heat-resistant materials like cotton, polyester, and blends.
- Follow Manufacturer’s Instructions: Adhere to temperature, pressure, and time guidelines.
- Pre-press Your Fabric: Remove moisture and wrinkles before applying your design.
- Ensure Optimal Color and Resolution: Avoid over-saturating ink to prevent bleeding.
- Test Before You Print: Run a test print on regular paper to check print quality and color accuracy.
- Use a Cutting Machine for Precision: For white heat transfer paper, use a cutting machine to cut right up to the edges of your image.
- Raise the Print Area: Use a Print Perfect Pad for printing over buttons, seams, or pockets.
- Peel Correctly: Follow the specific peel requirements of different transfers.
- Handle and Store Carefully: Let printed transfer paper dry completely before handling and store it in a cool, dry place.
How to Troubleshoot Common Heat Transfer Issues
Even with careful preparation, issues can arise. Here’s how to troubleshoot common problems:
- Paper Jams or Misfeeds: Ensure the paper is loaded correctly and is the correct type for your printer.
- Ink Smudging or Poor Print Quality: Use high-quality inks and correct printer settings.
- Transfer Not Adhering Properly: Check heat press settings and ensure the garment is free of lint and wrinkles.
- Fading or Cracking After Washing: Wait at least 24 hours before washing, turn the garment inside out, and use correct heat press settings.
- Inconsistent Color in the Final Result: Use the correct color profile on your printer and high-quality inks.
- Transfer Paper is Challenging to Peel: Adjust the temperature before peeling.
- Wrinkled or Misaligned Design: Ensure the garment and transfer are flat and secure before applying heat.
- Scorching or Discoloration of the Garment: Lower your heat press temperature and use a heat transfer cover sheet.
6. Frequently Asked Questions About Heat Transfer Printing
Can I Use Heat Transfer Paper on Any Fabric?
Most heat transfer papers work best on cotton or cotton-blend fabrics. However, certain types may also suit materials like leather, nylon, or synthetic blends. DTF transfer will work on just about any material. Always check the transfer paper’s compatibility with your chosen fabric.
Do I Need to Mirror My Design Before Printing on Heat Transfer Paper?
For light-colored heat transfer papers, yes. The design must be mirrored before printing as it’s placed face-down on the fabric. However, the design is not usually mirrored for dark-colored transfer papers since the paper is placed face-up on the material.
How Long Should I Heat Press My Design onto the Fabric?
The time varies depending on the type of heat transfer paper, the fabric you are using, and the heat press method. However, typically, it ranges from 10 to 30 seconds. Always follow the manufacturer’s instructions for the best results.
Do I Need to Pre-Wash My Fabric Before Using Heat Transfer Paper?
Pre-washing the fabric can help remove residual sizing or chemicals that might interfere with the transfer’s adhesion. It’s not always necessary, but it can improve the durability of your design.
Can I Use an Iron Instead of a Heat Press When Using Heat Transfer Paper?
An iron can be used, but it may not provide consistent or professional-looking results as a heat press. Heat presses provide even heat distribution and pressure, essential for a quality transfer. However, with careful technique, you can still achieve good results with an iron, especially for simple designs.
7. Call to Action: Explore More with Amazingprint.net
Ready to take your heat transfer skills to the next level? Visit amazingprint.net for more in-depth guides, product reviews, and creative inspiration. Whether you’re a small business owner, a marketing professional, or a DIY enthusiast, you’ll find valuable resources to elevate your printing projects.
At amazingprint.net, we understand the challenges our clients face. Are you struggling with choosing the right printing method or finding a reliable printing service? We offer detailed information on various printing types, material selection advice, and design tips to help you create stunning prints.
Discover the possibilities at amazingprint.net today!
Address: 1600 Amphitheatre Parkway, Mountain View, CA 94043, United States.
Phone: +1 (650) 253-0000.
Website: amazingprint.net.
Alt text: An icon representing expertise in heat transfer techniques.