
Creating and printing envelopes in Word is straightforward, especially with amazingprint.net’s assistance. By following these steps, you can create professional-looking envelopes right from your computer. Let’s explore how to make personalized envelopes in Word, discuss envelope printing services, and find unique envelope design ideas to enhance your mailings.
1. Understanding the Basics: Why Create Envelopes in Word?
Creating envelopes in Word offers numerous benefits, from personalization to cost-effectiveness.
1.1. Personalization and Branding
Customizing envelopes in Word allows you to add a personal touch or reinforce your brand identity. According to a study by the Direct Marketing Association, personalized mailings have a 29% higher open rate than generic ones. This level of personalization can significantly enhance your marketing efforts and leave a lasting impression on recipients.
- Adding Logos: Incorporate your company logo to boost brand recognition.
- Custom Fonts: Use specific fonts that match your brand’s style.
- Color Schemes: Apply color schemes consistent with your brand guidelines.
1.2. Cost-Effectiveness
Printing envelopes at home or in the office using Word can be more cost-effective than ordering custom-printed envelopes, especially for small to medium-sized businesses. Research from the U.S. Small Business Administration highlights that reducing overhead costs is crucial for maintaining profitability, and in-house envelope printing can contribute to this.
- No Minimum Orders: Print only the number of envelopes you need.
- Reduced Lead Times: Avoid waiting for external printing services.
- Material Savings: Use standard paper and ink, minimizing waste.
1.3. Convenience and Control
Creating envelopes in Word gives you complete control over the design and printing process. This is particularly useful for businesses that need to make frequent changes or updates to their mailing materials. According to a survey by the American Management Association, businesses that have greater control over their internal processes are more agile and responsive to market changes.
- Instant Updates: Quickly modify addresses or designs as needed.
- On-Demand Printing: Print envelopes whenever you need them.
- Design Flexibility: Experiment with various layouts and elements.
2. Step-by-Step Guide: How to Create an Envelope in Word
Here’s a detailed guide on creating and printing envelopes in Microsoft Word, ensuring a seamless process from start to finish.
2.1. Open Microsoft Word and Access the Mailings Tab
Start by opening Microsoft Word on your computer. Once the program is open, locate and click on the “Mailings” tab in the ribbon at the top of the screen. This tab is your gateway to creating and printing envelopes.
2.2. Click on the “Envelopes” Button
In the Mailings tab, find the “Create” group and click on the “Envelopes” button. Clicking this button opens the “Envelopes and Labels” dialog box, which is your primary interface for designing your envelope.
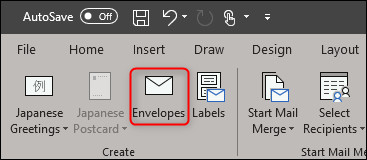 Envelopes button in Word's Mailing tab, highlighting the access point for creating customized envelopes
2.3. Enter the Delivery and Return Addresses
In the “Envelopes and Labels” dialog box, you’ll see two main sections: “Delivery Address” and “Return Address.”
- Delivery Address: This is where you’ll enter the address of the recipient. Type the recipient’s name, street address, city, state, and ZIP code into the “Delivery Address” box.
- Return Address: Enter your name and address in the “Return Address” box. If you don’t want to include a return address, check the “Omit” box.
2.4. Customize Envelope Options
To customize your envelope further, click the “Options” button in the “Envelopes and Labels” dialog box. This will open the “Envelope Options” window, where you can adjust various settings such as envelope size, font, and printing options.
2.5. Choose the Envelope Size
In the “Envelope Options” window, go to the “Envelope Options” tab. Here, you can select the appropriate envelope size from the “Envelope Size” dropdown menu. Common envelope sizes include:
- Size 10: 4.125 x 9.5 inches (standard business envelope)
- C5: 6.375 x 9 inches (commonly used for A5 paper)
- DL: 4.33 x 8.66 inches (fits A4 paper folded into thirds)
Choose the size that best fits your needs.
2.6. Select Font Styles
To customize the font for the delivery or return address, click the “Font” button under the respective item. This opens a new window where you can select the font type, size, color, and style. Choose a font that is legible and matches your branding.
2.7. Adjust Printing Options
The “Printing Options” tab in the “Envelope Options” window is crucial for ensuring that your envelope prints correctly. Here, you can specify how the envelope should be fed into your printer.
- Feed Method: Select the appropriate feed method from the available options. The correct feed method depends on your printer model and how it handles envelopes.
- Preview: The preview image in this tab shows you how the envelope will be oriented when it’s fed into the printer.
2.8. Add to Document or Print
After customizing your envelope, you have two options:
- Add to Document: Click the “Add to Document” button to insert the envelope design into your Word document. This allows you to create a complete document with both the letter and the envelope.
- Print: Click the “Print” button to print the envelope directly. Make sure your envelopes are loaded into the printer’s envelope tray before printing.
 Envelope options in Word, showing size and font customizations for professional envelope creation
2.9. Save Your Settings
If you plan to print envelopes frequently, save your settings as a template. This saves time and ensures consistency in your envelope designs.
3. Advanced Techniques: Enhancing Your Envelope Design
Beyond the basic steps, several advanced techniques can elevate your envelope design.
3.1. Using Graphics and Images
Adding graphics or images to your envelopes can make them more visually appealing and professional. Ensure that the images are high-resolution and relevant to your brand or the purpose of the mailing.
- Logos: Place your company logo in a prominent position.
- Background Images: Use subtle background images to add texture.
- Watermarks: Apply watermarks for a sophisticated touch.
3.2. Utilizing WordArt for Creative Text
WordArt allows you to create stylized text effects for your addresses and other envelope elements. Experiment with different WordArt styles to make your envelopes stand out.
- Shadows and Reflections: Add depth to your text with shadows and reflections.
- 3D Effects: Use 3D effects to make your text more dynamic.
- Gradients: Apply gradient fills to create eye-catching text.
3.3. Importing Custom Designs
If you have a custom envelope design created in another program, you can import it into Word. This allows you to use more advanced design tools while still taking advantage of Word’s printing capabilities.
- Vector Graphics: Import vector graphics for sharp, scalable designs.
- High-Resolution Images: Use high-resolution images to maintain quality.
- PDF Integration: Insert PDF designs directly into your Word document.
4. Troubleshooting Common Printing Issues
Printing envelopes can sometimes present challenges. Here are some common issues and how to resolve them.
4.1. Misaligned Printing
If your printer is misaligning the text on the envelope, adjust the printing settings in the “Printing Options” tab.
- Manual Adjustments: Fine-tune the horizontal and vertical alignment.
- Printer Calibration: Calibrate your printer to ensure accurate printing.
- Test Prints: Perform test prints on plain paper to verify alignment.
4.2. Paper Jams
Paper jams are a common issue when printing envelopes. To prevent this, use high-quality envelopes and ensure they are properly loaded into the printer tray.
- Envelope Quality: Use envelopes designed for laser or inkjet printers.
- Proper Loading: Load the envelopes according to your printer’s instructions.
- Tray Adjustments: Adjust the paper tray guides to fit the envelope size.
4.3. Ink Smudging
Ink smudging can occur if the ink is not drying properly on the envelope. To avoid this, use the correct type of ink for your printer and allow the envelopes to dry completely before handling them.
- Ink Compatibility: Use ink cartridges recommended for your printer model.
- Drying Time: Allow sufficient drying time before stacking or mailing.
- Print Settings: Adjust the print settings to use less ink.
5. Exploring Envelope Printing Services: When to Outsource
While creating envelopes in Word is convenient, there are times when outsourcing to professional printing services is more appropriate.
5.1. High-Volume Printing Needs
If you need to print a large number of envelopes, professional printing services can handle the volume more efficiently and cost-effectively. According to a report by the Printing Industries of America (PIA), commercial printers offer economies of scale that are difficult to achieve in-house.
- Bulk Discounts: Benefit from discounted rates for large orders.
- High-Speed Printing: Take advantage of high-speed printing equipment.
- Automated Processes: Utilize automated processes for faster turnaround.
5.2. Complex Design Requirements
For complex or intricate designs, professional printing services have the expertise and equipment to deliver high-quality results. This is particularly important for businesses that require visually stunning envelopes to make a strong impression.
- Specialty Inks: Use specialty inks such as metallic or UV coatings.
- Custom Finishes: Apply custom finishes like embossing or foil stamping.
- Advanced Techniques: Employ advanced printing techniques for unique effects.
5.3. Need for Specialized Materials
If you require envelopes made from specialized materials, such as recycled paper or textured stock, professional printing services can source and print on these materials.
- Wide Range of Materials: Choose from a wide range of paper types and textures.
- Sustainable Options: Opt for eco-friendly and sustainable materials.
- Custom Sourcing: Source unique materials that meet your specific needs.
6. Creative Envelope Design Ideas to Inspire You
Need some inspiration? Here are some creative envelope design ideas to help you stand out.
6.1. Minimalist Designs
Minimalist designs are clean, simple, and effective. They focus on essential elements and use white space to create a sophisticated look.
- Simple Typography: Use clean, modern fonts.
- Limited Color Palette: Stick to a few complementary colors.
- Strategic Placement: Place elements strategically for maximum impact.
6.2. Bold and Vibrant Designs
Bold and vibrant designs are eye-catching and energetic. They use bright colors and striking graphics to grab attention.
- Bright Colors: Incorporate bold, saturated colors.
- Geometric Patterns: Use geometric patterns for a modern look.
- Large Graphics: Feature large, impactful graphics.
6.3. Themed Envelopes
Themed envelopes are perfect for special occasions or marketing campaigns. They incorporate elements that reflect the theme of the event or promotion.
- Holiday Themes: Design envelopes with holiday-specific elements.
- Event Themes: Match the envelope design to the event theme.
- Promotional Themes: Use themes that promote your products or services.
7. Optimizing Your Mailings for Impact
To ensure your mailings have the greatest impact, consider these optimization tips.
7.1. Address Verification
Verify all addresses to ensure accurate delivery and reduce the risk of returned mail. According to the United States Postal Service (USPS), address verification can significantly improve delivery rates.
- USPS Address Validation: Use the USPS address validation tool.
- Address Correction Software: Implement address correction software.
- Regular Updates: Keep your address database updated.
7.2. Using Clear and Legible Fonts
Choose fonts that are easy to read and ensure that the text size is appropriate for the envelope size.
- Sans-Serif Fonts: Use sans-serif fonts for better legibility.
- Appropriate Font Size: Choose a font size that is easy to read from a distance.
- Contrast: Ensure sufficient contrast between the text and the background.
7.3. Strategic Use of Color
Use color strategically to highlight important information and create visual appeal.
- Brand Colors: Incorporate your brand colors to reinforce brand identity.
- Highlighting: Use color to highlight key information, such as the return address.
- Contrast: Ensure sufficient contrast between the text and the background color.
8. Legal Considerations: Ensuring Compliance
When creating and printing envelopes, it’s important to be aware of legal considerations to ensure compliance with postal regulations.
8.1. USPS Regulations
The USPS has specific regulations regarding envelope size, shape, and addressing. Adhering to these regulations is crucial for ensuring that your mail is delivered without issues.
- Size and Shape: Ensure your envelopes meet the USPS size and shape requirements.
- Addressing Guidelines: Follow the USPS addressing guidelines for proper formatting.
- Postage Requirements: Use the correct postage for your mail class and weight.
8.2. Privacy Laws
Be mindful of privacy laws when printing addresses on envelopes. Avoid including sensitive information that could compromise the recipient’s privacy.
- Data Protection: Implement data protection measures to safeguard personal information.
- Address Confidentiality: Avoid including unnecessary information on the envelope.
- Compliance: Ensure compliance with privacy regulations, such as GDPR.
8.3. Copyright Laws
When using images or graphics on your envelopes, ensure that you have the necessary rights and permissions to use them.
- Image Licensing: Obtain proper licenses for any images you use.
- Copyright Protection: Respect copyright laws and avoid using copyrighted material without permission.
- Original Content: Create original content whenever possible.
9. The Future of Envelope Printing: Trends and Innovations
The envelope printing industry is constantly evolving, with new trends and innovations emerging regularly.
9.1. Digital Printing Technologies
Digital printing technologies are transforming the envelope printing process, offering greater flexibility, customization, and efficiency.
- Variable Data Printing: Use variable data printing to personalize each envelope.
- On-Demand Printing: Print envelopes on-demand, reducing waste and inventory costs.
- High-Quality Output: Achieve high-quality print results with digital printing.
9.2. Sustainable Printing Practices
Sustainable printing practices are becoming increasingly important as businesses look to reduce their environmental impact.
- Recycled Paper: Use recycled paper for your envelopes.
- Eco-Friendly Inks: Opt for eco-friendly inks that are free of harmful chemicals.
- Waste Reduction: Implement waste reduction strategies to minimize your environmental footprint.
9.3. Integration with Marketing Automation
Integrating envelope printing with marketing automation systems can streamline your mailing campaigns and improve their effectiveness.
- Automated Mailings: Automate the process of creating and sending envelopes.
- Personalized Campaigns: Personalize your mailings based on customer data.
- Tracking and Analytics: Track the performance of your mailing campaigns with analytics tools.
10. Enhancing Your Printing Knowledge with amazingprint.net
For more in-depth information and expert advice on all things printing, visit amazingprint.net. Whether you’re looking for tips on creating the perfect envelope or exploring the latest printing technologies, amazingprint.net has you covered.
10.1. Comprehensive Guides and Tutorials
Access a wide range of guides and tutorials on various printing topics.
10.2. Expert Advice and Insights
Get expert advice and insights from industry professionals.
10.3. Community Forum
Join a community of printing enthusiasts to share ideas and ask questions.
By following these guidelines, you can confidently create and print envelopes in Word that meet your specific needs and make a lasting impression. For more information and resources, visit amazingprint.net, where you’ll find everything you need to enhance your printing projects. Don’t hesitate to contact us at Address: 1600 Amphitheatre Parkway, Mountain View, CA 94043, United States. Phone: +1 (650) 253-0000. Website: amazingprint.net.
Frequently Asked Questions (FAQ)
1. Can I use any type of printer to print envelopes in Word?
Most inkjet and laser printers can print envelopes, but it’s essential to check your printer’s manual for specific instructions and supported envelope sizes. Using the correct settings and paper type will help prevent paper jams and ensure quality printing.
2. How do I ensure the return address is printed correctly on the envelope?
In the “Envelopes and Labels” dialog box, enter your return address in the “Return Address” section. If you want to omit the return address, check the “Omit” box. Make sure the font size and style are legible and comply with USPS guidelines.
3. What is the best envelope size to use for business correspondence?
The standard envelope size for business correspondence in the United States is Size 10 (4.125 x 9.5 inches). This size is suitable for standard letter-sized documents folded into thirds.
4. How can I add a logo to my envelope design in Word?
To add a logo, insert the image into the envelope layout in Word. Go to the “Insert” tab, click “Pictures,” and select your logo file. Resize and position the logo as needed. Ensure the image is high-resolution for the best printing quality.
5. What should I do if my printer keeps jamming when printing envelopes?
Paper jams can occur due to several reasons. First, ensure you are using high-quality envelopes designed for your printer type. Load the envelopes correctly into the printer tray, adjusting the paper guides to fit snugly. Clean your printer regularly to remove any dust or debris that may cause jams.
6. Can I save my customized envelope design as a template in Word?
Yes, you can save your customized envelope design as a template. After creating your design, go to “File,” then “Save As,” and choose “Word Template (*.dotx)” as the file type. This allows you to reuse the design for future mailings.
7. How do I print multiple envelopes with different addresses?
To print multiple envelopes with different addresses, use the mail merge feature in Word. Create a data source (e.g., an Excel spreadsheet) with the recipient addresses. In Word, go to the “Mailings” tab, start the mail merge process, and link your data source. Insert the address fields into your envelope layout and print the envelopes.
8. What are some tips for creating eco-friendly envelopes?
To create eco-friendly envelopes, use recycled paper, eco-friendly inks, and minimalist designs to reduce waste. Consider using envelopes without windows and encourage recipients to recycle the envelopes after use.
9. How do I handle printing envelopes with special finishes, like embossing or foil stamping?
Printing envelopes with special finishes like embossing or foil stamping typically requires professional printing services. These services have the specialized equipment and expertise to apply these finishes correctly. Contact amazingprint.net for assistance with these advanced printing needs.
10. What resources are available on amazingprint.net for envelope printing?
amazingprint.net offers comprehensive guides, expert advice, and a community forum where you can find tips, tutorials, and support for envelope printing. Visit the website to explore the available resources and enhance your printing knowledge.