
Infill in 3D printing refers to the internal structure of a 3D printed object, and it’s a crucial element that impacts the part’s strength, weight, and print time; at amazingprint.net, we help you understand and optimize infill to achieve the perfect balance of these factors for your project. By understanding infill density, infill pattern and 3D printing materials you will achieve printing success and optimal printing solutions, along with cost-effectiveness in 3D printing applications.
1. What Is Infill in 3D Printing?
Infill is the internal structure of a 3D-printed part, designed to provide support and influence its physical properties. Just as steelwork supports the underside of a bridge, infill provides internal support, influencing a part’s strength, structure, and weight.
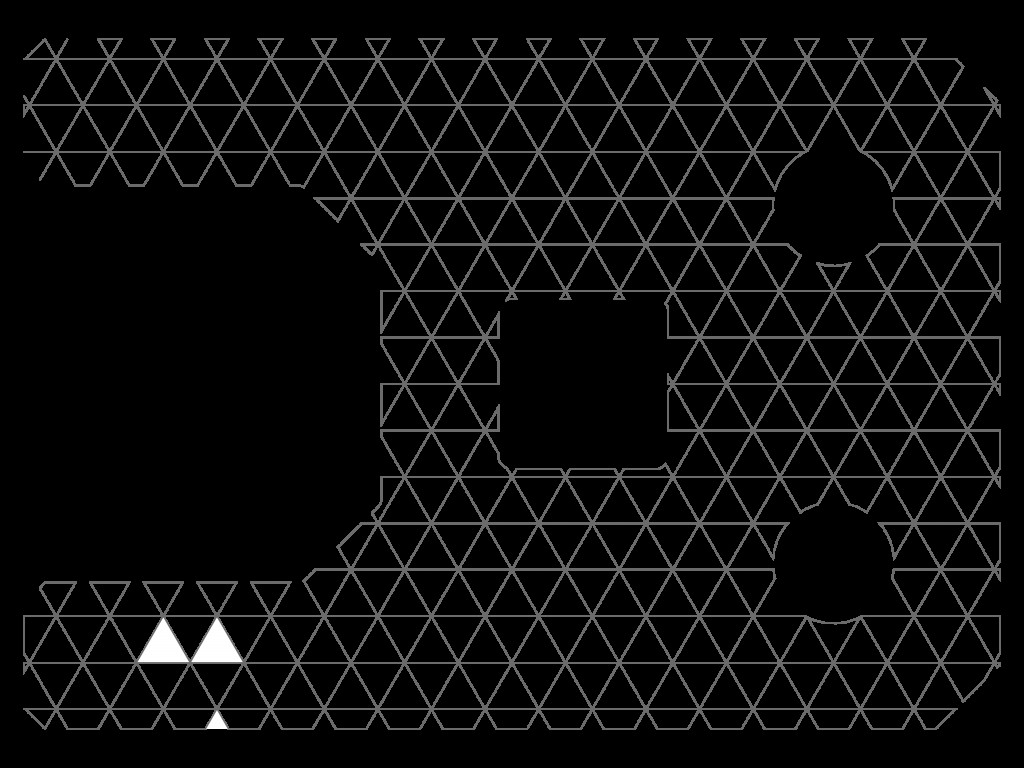 Infill example
Infill is essential in most 3D printing projects, allowing customization based on design specifications. Aside from the selection of printing material, infill significantly influences the strength, structure, and weight of a part. By adjusting the infill density and pattern, you can fine-tune these properties to meet specific application needs.
1.1 Why Is Infill Important?
Infill is important because it allows you to save on printing material, while ensuring that the structure is stable. Think of infill as the skeleton of your 3D printed part; it provides the necessary support to maintain the shape and integrity of the object, especially for complex designs with overhangs or intricate details.
1.2 What Are the Benefits of Using Infill?
Here’s how infill enhances 3D printed objects:
- Strength: Infill adds structural integrity, making parts more durable.
- Weight: Adjusting infill density lets you control the part’s weight.
- Material Usage: Optimized infill reduces material waste, cutting costs.
- Print Time: Lower infill settings can speed up the printing process.
- Cost Effectiveness: By optimizing infill, you can save both time and material, leading to more cost-effective 3D printing.
2. Key Factors of Infill: Density and Pattern
The two primary parameters that define infill are density and pattern. These settings are crucial for tailoring the physical properties of your 3D printed parts.
2.1 Infill Density: How Much Is Enough?
Infill density refers to the amount of material filling the interior of a 3D printed part, measured as a percentage. A density of 0% means the part is hollow, while 100% indicates a solid object.
- Lower Density (0-15%): Ideal for decorative items where strength isn’t critical.
- Medium Density (15-50%): Suitable for general-purpose prints needing some durability.
- High Density (50-100%): Recommended for functional parts requiring maximum strength and rigidity.
Infill density is also affected by factors like weight, strength, material consumption, and buoyancy. The higher the infill density, the stronger and heavier the part will be, and the more material will be used.
2.2 Infill Pattern: Choosing the Right Structure
The infill pattern is the geometrical arrangement of the material inside the 3D printed object. Different patterns offer varying levels of strength, rigidity, and flexibility.
Here are some common infill patterns:
- Lines: Simple and fast, providing directional strength.
- Grids: Offers increased strength and stiffness compared to lines.
- Triangles: Provides strength in two dimensions on the XY plane.
- Honeycomb: Offers a good balance of strength and weight.
- Cubic: Provides strength in three dimensions with stacked, tilted cubes.
- Gyroid: Advanced pattern offering isotropic strength and efficient material use.
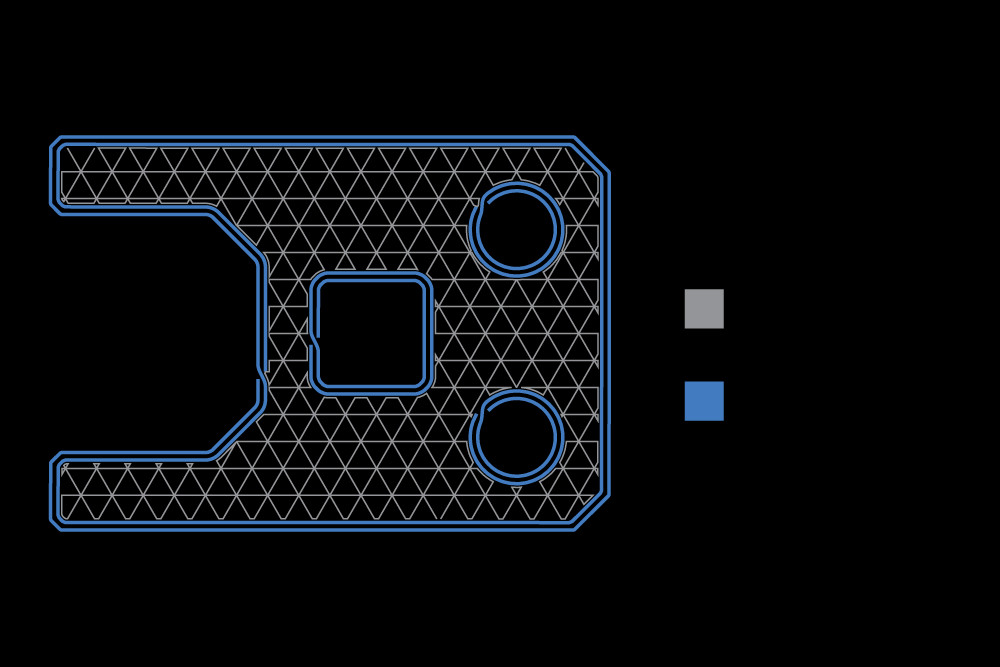 Infill explainer
3. Common Infill Patterns in Detail
Choosing the right infill pattern can significantly affect the performance of your 3D-printed part. Each pattern has unique characteristics that make it suitable for different applications.
3.1 Lines
- Description: Lines are the simplest infill pattern, consisting of straight lines printed in one direction.
- Pros: Fast printing, minimal material usage.
- Cons: Limited strength, anisotropic properties.
- Best For: Quick prototypes, decorative items.
3.2 Grid
- Description: Grid patterns involve lines intersecting at right angles to form a grid.
- Pros: Increased strength and stiffness compared to lines.
- Cons: Can use more material than lines, longer print times.
- Best For: General-purpose prints needing moderate strength.
3.3 Triangles
- Description: Triangles create a network of triangular shapes within the part.
- Pros: Good strength in the XY plane.
- Cons: Limited strength in the Z-axis.
- Best For: Parts needing strength in two dimensions.
3.4 Honeycomb
- Description: Honeycomb patterns consist of hexagonal cells, similar to a bee’s honeycomb.
- Pros: Excellent balance of strength and weight, isotropic properties.
- Cons: Can be slower to print than simpler patterns.
- Best For: Parts requiring a combination of strength and lightweight design.
3.5 Cubic
- Description: Cubic patterns use stacked cubes tilted at 45 degrees to provide strength in three dimensions.
- Pros: High strength in all directions.
- Cons: Can be material-intensive and time-consuming to print.
- Best For: Functional parts needing high durability.
3.6 Gyroid
- Description: Gyroid patterns are complex, continuous, and curved surfaces that offer isotropic strength.
- Pros: Excellent strength-to-weight ratio, efficient material usage.
- Cons: Requires advanced slicing software, longer print times.
- Best For: High-performance parts, such as medical implants or aerospace components.
4. When Is Infill Necessary in 3D Printing?
Infill is often essential for creating structurally sound 3D-printed parts, especially for complex shapes. While it’s possible to print without infill, it’s generally not recommended for most applications.
4.1 Supporting Overhangs and Complex Geometries
Infill supports overhangs and complex geometries in 3D printing by providing a foundation for the upper layers. Without infill, these features would likely collapse or warp.
4.2 Balancing Material Usage and Print Time
You can balance material usage and print time by adjusting the infill density and pattern. Lower infill settings save material and reduce print time but may compromise strength.
4.3 When Can You Print Without Infill?
Printing without infill is suitable for simple shapes that don’t require much support. However, it’s essential to consider the trade-offs in terms of strength and durability.
5. How to Optimize Infill for Different 3D Printing Materials
The optimal infill settings can vary depending on the material used for 3D printing. Different materials have different strength and flexibility characteristics, which can impact the choice of infill density and pattern.
5.1 PLA (Polylactic Acid)
- Description: PLA is a widely used thermoplastic known for its ease of printing and eco-friendly properties.
- Recommended Infill: Grid or triangle patterns with 15-25% density for general use, 50-75% for stronger parts.
- Considerations: PLA is relatively brittle, so higher infill densities may be needed for functional parts.
5.2 ABS (Acrylonitrile Butadiene Styrene)
- Description: ABS is a strong and heat-resistant thermoplastic commonly used in engineering applications.
- Recommended Infill: Honeycomb or cubic patterns with 20-30% density for general use, 60-80% for stronger parts.
- Considerations: ABS is prone to warping, so proper bed adhesion and enclosure are necessary.
5.3 PETG (Polyethylene Terephthalate Glycol-Modified)
- Description: PETG is a durable and flexible thermoplastic with good chemical resistance.
- Recommended Infill: Gyroid or adaptive patterns with 15-25% density for general use, 50-75% for stronger parts.
- Considerations: PETG can be stringy, so retraction settings may need adjustment.
5.4 Nylon
- Description: Nylon is a high-strength and wear-resistant thermoplastic ideal for functional parts.
- Recommended Infill: Cubic or adaptive patterns with 30-40% density for general use, 70-90% for stronger parts.
- Considerations: Nylon is hygroscopic and absorbs moisture, so drying before printing is crucial.
5.5 TPU (Thermoplastic Polyurethane)
- Description: TPU is a flexible and elastic thermoplastic suitable for creating flexible parts.
- Recommended Infill: Concentric or gyroid patterns with 10-20% density for flexible parts, 40-60% for semi-rigid parts.
- Considerations: TPU can be challenging to print, so slow printing speeds and proper tension are necessary.
6. Advanced Infill Techniques
Beyond the basic settings, several advanced techniques can optimize infill for specific applications.
6.1 Adaptive Infill
Adaptive infill varies the infill density throughout the part, increasing it in areas needing more strength and reducing it in less critical regions. This technique optimizes material usage and print time.
6.2 Variable Infill
Variable infill allows you to change the infill pattern and density at different heights of the print. This technique is useful for creating parts with specific strength requirements in certain areas.
6.3 Combining Infill Patterns
Combining different infill patterns can create unique properties in your 3D printed parts. For example, you can use a honeycomb pattern for overall strength and a gyroid pattern for specific areas needing high durability.
7. How Infill Impacts Printing Time and Cost
Infill significantly impacts both the printing time and cost of 3D printed parts. Understanding how these factors are affected can help you optimize your printing process.
7.1 Reducing Printing Time
To reduce printing time, consider the following strategies:
- Lower Infill Density: Lowering the infill density can significantly reduce print time, especially for large parts.
- Simple Infill Patterns: Simple patterns like lines or grids print faster than complex patterns like gyroid or honeycomb.
- Optimized Print Speed: Adjusting the print speed based on the material and infill settings can also reduce print time.
7.2 Minimizing Material Usage
To minimize material usage, consider these techniques:
- Adaptive Infill: Using adaptive infill can reduce material usage by optimizing the infill density based on the part’s geometry.
- Hollow Sections: Hollowing out non-critical sections of the part can save significant material.
- Efficient Infill Patterns: Choosing efficient patterns like gyroid or honeycomb can provide adequate strength while minimizing material usage.
7.3 Balancing Speed and Quality
Balancing speed and quality requires careful consideration of the infill settings and printing parameters. Here are some tips:
- Experimentation: Experiment with different infill settings to find the optimal balance for your specific application.
- Material Properties: Understand the properties of the material you’re using and adjust the infill settings accordingly.
- Software Tools: Use software tools to simulate the structural behavior of the part and optimize the infill settings.
8. Troubleshooting Common Infill Issues
Even with careful planning, you may encounter issues with infill during 3D printing. Here are some common problems and how to solve them:
8.1 Weak Infill
- Problem: The infill is not strong enough, causing the part to break or deform.
- Solutions: Increase the infill density, use a stronger infill pattern, or switch to a more durable material.
8.2 Infill Gaps
- Problem: There are gaps between the infill lines, resulting in a weaker structure.
- Solutions: Increase the infill overlap, adjust the extrusion multiplier, or calibrate the printer.
8.3 Infill Not Adhering to Walls
- Problem: The infill is not properly bonding to the walls of the part.
- Solutions: Increase the infill speed, adjust the temperature settings, or improve bed adhesion.
8.4 Infill Showing Through Walls
- Problem: The infill pattern is visible through the walls of the part.
- Solutions: Increase the wall thickness, reduce the infill density, or adjust the infill pattern.
9. Real-World Applications of Infill Optimization
Infill optimization is essential in various real-world applications, from aerospace to medical implants.
9.1 Aerospace Components
In aerospace, weight is a critical factor. Optimizing infill allows engineers to create lightweight yet strong components, such as brackets and housings, reducing fuel consumption and improving performance.
9.2 Medical Implants
Medical implants require precise control over strength and biocompatibility. Infill optimization allows for the creation of custom implants with tailored mechanical properties and porous structures that promote tissue growth.
9.3 Consumer Products
In consumer products, infill optimization is used to balance cost, weight, and durability. For example, toy manufacturers use infill to create lightweight yet durable toys that are safe for children.
9.4 Automotive Parts
In the automotive industry, infill optimization is used to create lightweight and strong parts, such as interior components and structural elements, improving fuel efficiency and performance.
10. The Future of Infill in 3D Printing
The future of infill in 3D printing is exciting, with ongoing research and development leading to new techniques and technologies.
10.1 AI-Powered Infill Optimization
AI-powered infill optimization uses machine learning algorithms to automatically optimize infill settings based on the part’s geometry, material properties, and application requirements.
10.2 Multi-Material Infill
Multi-material infill involves using different materials for the infill and the outer shell of the part, allowing for the creation of parts with tailored mechanical and thermal properties.
10.3 4D Printing Infill
4D printing infill involves using shape-memory materials for the infill, allowing the part to change shape or function over time in response to external stimuli.
FAQ: Understanding Infill in 3D Printing
What is the purpose of infill in 3D printing?
The purpose of infill is to provide internal support to a 3D-printed part, influencing its strength, weight, and print time.
How does infill density affect the strength of a 3D-printed part?
Infill density directly affects the strength; higher density generally results in a stronger part.
What are the most common infill patterns?
The most common infill patterns include lines, grids, triangles, honeycomb, cubic, and gyroid.
Can I print a part without infill?
Yes, but it is only recommended for simple shapes that don’t require much support.
How do I choose the right infill pattern for my project?
Consider the strength, weight, and application requirements of your part when choosing an infill pattern.
How does infill affect the printing time?
Higher infill densities and more complex patterns increase printing time.
What is adaptive infill?
Adaptive infill varies the infill density throughout the part, increasing it in areas needing more strength and reducing it in less critical regions.
How can I minimize material usage in 3D printing?
Use adaptive infill, hollow out non-critical sections, and choose efficient infill patterns.
What are some common infill issues and how can I fix them?
Common issues include weak infill, infill gaps, and infill not adhering to walls. Solutions include adjusting infill settings, calibrating the printer, and improving bed adhesion.
What is the future of infill in 3D printing?
The future includes AI-powered optimization, multi-material infill, and 4D printing infill.
Understanding infill is crucial for optimizing your 3D printing projects. Whether you’re aiming for strength, weight reduction, or faster print times, mastering infill settings can make a significant difference.
Ready to explore the world of 3D printing and optimize your infill for amazing results? Visit amazingprint.net for more insights, tutorials, and resources to help you master 3D printing and bring your ideas to life. Contact us at Address: 1600 Amphitheatre Parkway, Mountain View, CA 94043, United States. Phone: +1 (650) 253-0000. Let’s create something amazing together!