Are you looking for a way to be more efficient with your printing in Google Docs? Printing double-sided, also known as duplex printing, is an excellent solution for saving paper, reducing costs, and creating more concise documents. While Google Docs may not immediately make this feature obvious, it’s indeed available and can be easily accessed once you know where to look.
Many users find themselves confused when trying to print on both sides of the paper in Google Docs. The print interface isn’t always straightforward, and clear instructions can be hard to come by. This article will guide you through the process of printing double-sided in Google Docs, ensuring you can take advantage of this useful feature and optimize your printing workflow.
Why Choose Double Sided Printing in Google Docs?
Opting for double-sided printing in Google Docs offers numerous advantages, making it a worthwhile practice for both personal and professional use.
Firstly, cost reduction is a significant benefit. By utilizing both sides of each sheet, you effectively halve your paper consumption. This translates directly to lower spending on paper supplies, which can accumulate substantially over time, especially in offices or for frequent printing needs.
Secondly, there’s a considerable environmental advantage. Double-sided printing significantly cuts down on paper usage, contributing to forest conservation and reducing waste. It’s a simple yet impactful step towards a more sustainable and eco-friendly approach to document handling.
Beyond the financial and environmental perks, double-sided printing also contributes to document efficiency. Printed documents become less bulky and easier to manage. For reports, presentations, or even drafts, double-sided printing creates a more professional and streamlined final product. It also reduces storage space needed for hard copies.
Step-by-Step Guide: How to Print Double Sided from Google Docs
The process to enable double-sided printing in Google Docs is relatively simple once you understand where to find the setting. Here’s a step-by-step guide to help you navigate the print menu:
Step 1: Open Your Document and Access Print Settings
Begin by opening the document you wish to print in Google Docs. Once your document is ready, navigate to the “File” menu located in the top left corner of the Google Docs interface. Scroll down and select “Print”. Alternatively, you can use the keyboard shortcut Ctrl + P (or Cmd + P on macOS) to directly open the print dialog box.
Step 2: Explore ‘More settings’
The initial print preview window in Google Docs offers basic settings such as destination printer, pages, and copies. To access advanced options, including double-sided printing, you need to click on ‘More settings’. This expands the print menu to reveal additional customization options.
Step 3: Locate the Double-Sided Printing Option
Within the ‘More settings’ section, look for a dropdown menu or a checkbox labeled ‘Double-sided’ or ‘Two-sided’. The exact wording may slightly vary depending on your printer and operating system. This option is usually found under further expandable options or within the ‘Paper’ or ‘Layout’ settings.
It’s important to note that the double-sided printing option is dependent on your printer’s capabilities. If your printer does not support automatic duplex printing, this option may not appear in the Google Docs print settings.
Step 4: Select Your Double-Sided Printing Preference
If the ‘Double-sided’ option is available, click on it to activate duplex printing. You may have further options to choose from, such as printing on the ‘Long edge’ or ‘Short edge’.
- Long-edge binding is typically used for standard documents, books, or reports where you flip pages like a traditional book.
- Short-edge binding is suitable for calendars or documents where you flip pages upwards, like a notepad.
Choose the binding option that best suits your document’s intended format.
Step 5: Print Your Document
After selecting the double-sided printing option and your preferred binding, review your print settings to ensure everything is configured correctly. Once you are satisfied, click the ‘Print’ button to send your document to the printer.
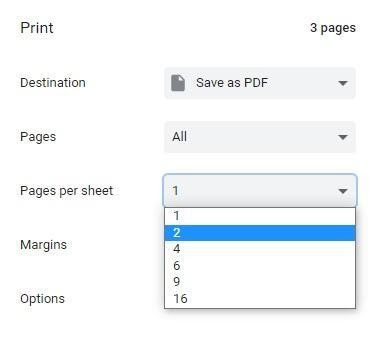 print menu
Troubleshooting: Double-Sided Printing Option Not Visible?
If you’ve followed the steps above and cannot find the double-sided printing option in your Google Docs print settings, here are a few potential reasons and solutions:
- Printer Capability: The most common reason is that your printer does not support automatic duplex printing. Check your printer’s specifications or manual to confirm if it has this capability. If it doesn’t, you may need to manually print double-sided (see below).
- Printer Driver Issues: Outdated or incorrect printer drivers can sometimes cause features to not be recognized by your computer and applications. Ensure you have the latest drivers installed for your printer. You can usually download these from the printer manufacturer’s website.
- Manual Duplex Printing (If Necessary): If your printer doesn’t automatically support double-sided printing, Google Docs might still allow for manual duplex printing. In this case, after the first side prints, you will receive a prompt to re-insert the pages into the printer to print the second side. Follow the on-screen instructions carefully to ensure the pages are inserted correctly. The setting for manual duplex might be located in the same ‘More settings’ area, possibly under ‘Two-sided printing’ options as ‘Print on both sides – Manually’.
Conclusion
Printing double-sided in Google Docs is a straightforward process that can significantly benefit you by saving resources and enhancing document efficiency. While the option may not be immediately apparent, following these steps will enable you to easily access and utilize duplex printing. By ensuring your printer is capable and correctly configured, you can seamlessly print on both sides of the paper, contributing to a more economical and environmentally conscious printing practice.