
Experiencing frustrating streaks, faded prints, or missing colors when using your HP printer? The culprit might be a clogged Printer Head. Like any precision instrument, the printer head, responsible for delivering ink onto the page, can suffer from blockages over time. Dried ink and dust particles can accumulate in its delicate nozzles, leading to common print quality problems. Fortunately, cleaning your printer head is often a straightforward solution that can save you money by extending the life of your ink cartridges and postponing costly replacements. This guide will delve into how HP printer heads function and provide you with effective methods to keep them clean and ensure optimal printing performance.
Understanding the Printer Head
The printer head is a critical component within your inkjet printer. Its primary function is to transfer ink precisely onto paper, forming the text and images you intend to print. It achieves this by ejecting minuscule droplets of ink through a series of extremely fine nozzles. When these nozzles become obstructed, even partially, it directly impacts print quality, resulting in the faint, streaky, or spotty output you might be encountering. One of the main reasons for printer head clogs is infrequent printer use. If your printer sits idle for extended periods, particularly weeks at a time, the ink within the nozzles can dry out, increasing the likelihood of clogs and potentially necessitating cartridge replacement. Regularly cleaning the printer head can significantly prolong the usability of your ink cartridges and help you avoid premature replacements.
Exploring Different Types of HP Printer Heads
HP printer designs incorporate two main types of printheads, each impacting how you manage and maintain your printer: printheads integrated into the ink cartridge and printheads built directly into the printer itself. Understanding which type your printer utilizes is crucial for effective cleaning and maintenance.
Integrated Printheads: Part of the Ink Cartridge
Ink cartridges that include a built-in printhead are known as integrated cartridges. In this design, the nozzle plate, which is the actual printer head, is an integral part of the cartridge itself. This means every time you replace an integrated ink cartridge, you are also replacing the printhead. This system offers a significant advantage: if you experience persistent print quality issues with a particular cartridge, simply installing a new cartridge effectively replaces the printhead, often resolving the problem immediately. HP typically uses integrated print cartridges for black and tri-color ink configurations, commonly found in more budget-friendly Deskjet and ENVY printer models, such as the Deskjet 1112 or the ENVY 7855.
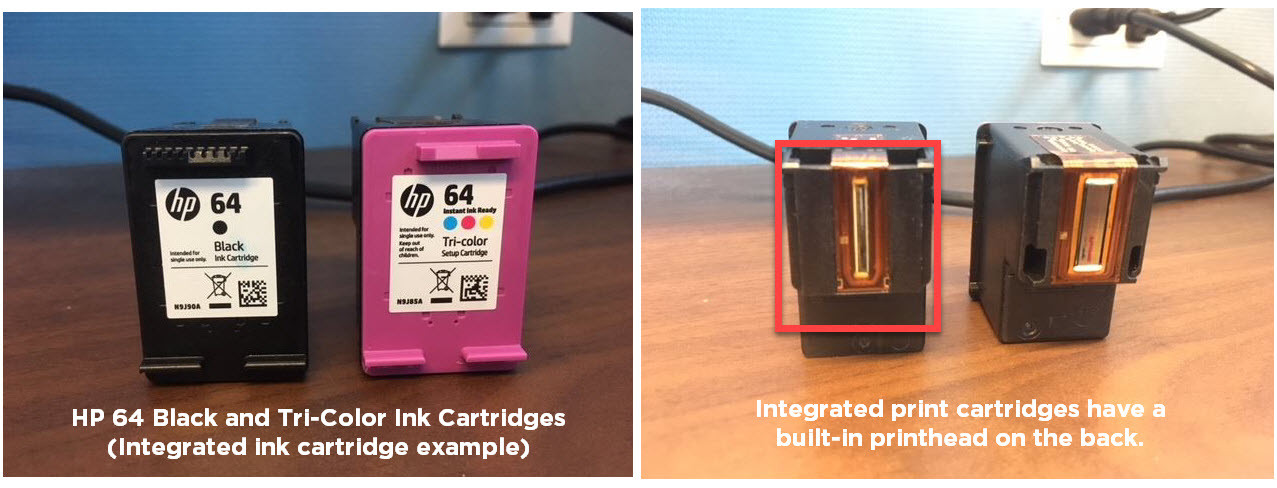 HP 64 ink cartridge with integrated printhead
Examples of integrated ink cartridge series include: HP 61, HP 62, HP 63, HP 64, HP 65, and HP 67 series. These series are recognizable for their combined ink and printhead design, simplifying maintenance for users.
Separate Printheads: Built into the Printer
In contrast, some HP printers feature printheads that are built into the printer as a separate component. These printers utilize individual ink cartridges that install into the printer’s built-in printhead to produce prints. With this type, the printhead is a more permanent part of the printer hardware and is designed to last for the printer’s lifespan, though eventual replacement may be necessary after extended use. However, replacing a built-in printhead can be costly, often exceeding $100, and sourcing the correct replacement part can sometimes be challenging. In many cases, due to the cost and effort involved, it becomes more economical to purchase a new printer rather than replacing the printhead.
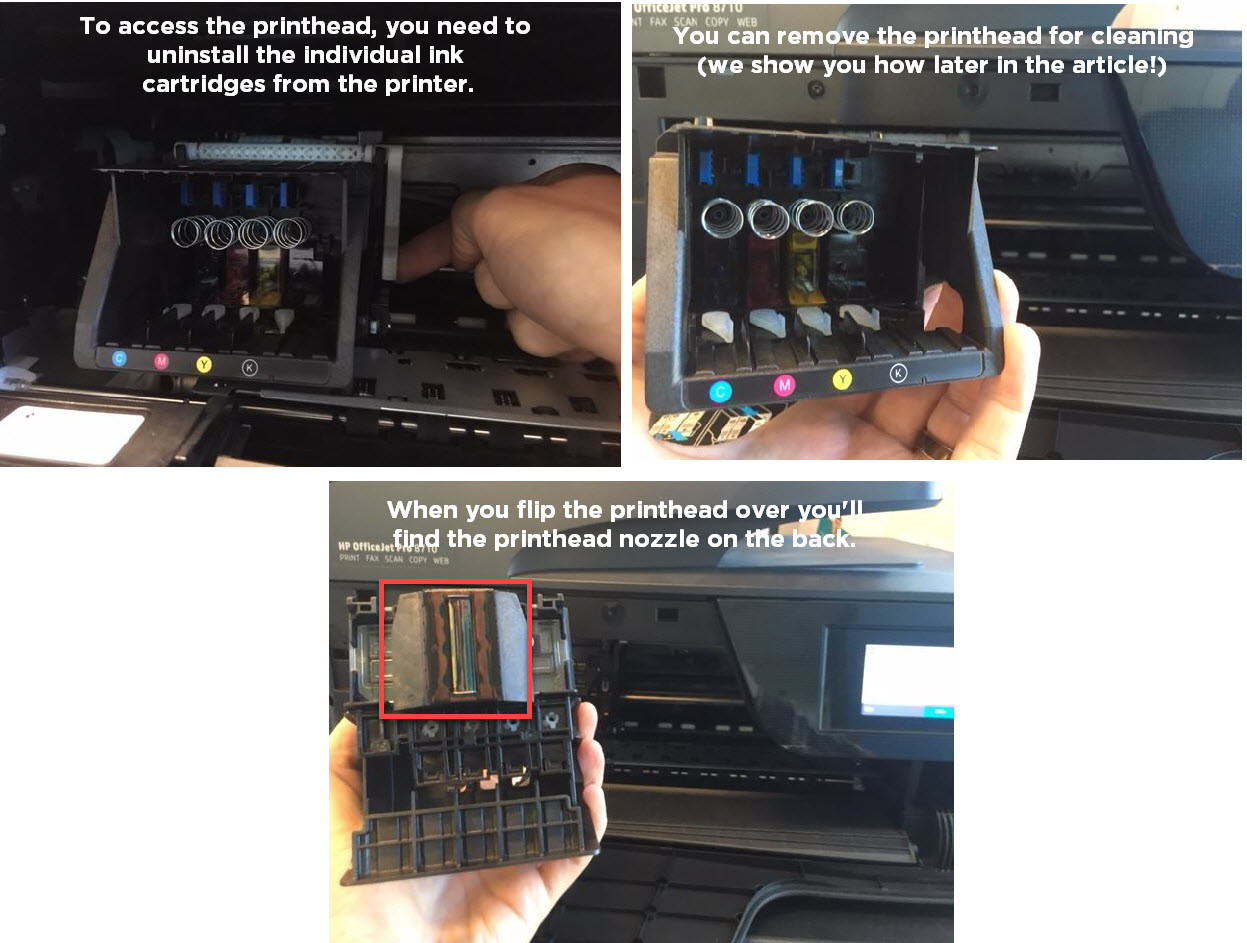 HP printer with a removed separate printhead
Examples of individual ink cartridge series designed for printers with separate printheads: HP 902, HP 952, HP 910, and HP 962 series. These cartridges are designed to work with the printer’s internal printhead system.
Utilizing Automatic Printhead Cleaning
The easiest initial step to address print quality issues is to use your HP printer’s built-in automatic cleaning function. This feature is standard across all HP printer models and is designed to clear minor clogs. You can typically access the cleaning function through your printer’s control panel display menu, usually located within a “printer maintenance” or “tools” section. Consult your printer’s manual for precise instructions specific to your model, as menu names and locations can vary slightly.
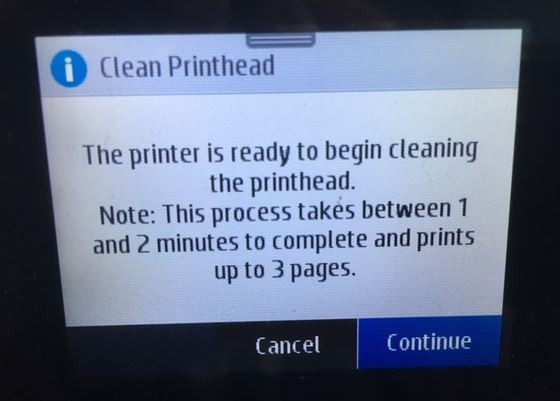 HP printer control panel showing the printhead cleaning option
Automatic printhead cleaning cycles usually take just a minute or two to complete. It’s important to note that these cleaning cycles consume a small amount of ink to flush through the nozzles and clear any blockages. Once the cleaning cycle finishes, print a test page to evaluate the improvement in print quality. If the test page looks satisfactory, you can resume normal printing. If you still notice print quality issues, such as faint colors or streaks, you may need to repeat the printhead cleaning process 2-4 more times. However, avoid running the cleaning function excessively, as each cycle uses ink and can deplete your cartridges more quickly. If automatic cleaning doesn’t restore print quality after a few attempts, proceed to the manual cleaning methods outlined below.
Manual Printhead Cleaning Techniques
Before proceeding with manual cleaning, it’s crucial to determine whether your HP printer uses integrated printheads (built into the ink cartridges) or separate printheads (built into the printer). The manual cleaning method will differ depending on the printhead type.
Manually Cleaning Separate Printheads (Printer-Based)
Cleaning a separate printhead that is built into your printer requires a more hands-on approach. The following steps are specifically for HP printers with removable printheads, such as the HP OfficeJet 8710, and can also be applied to other printer brands with similar printhead designs.
Required Supplies:
- A plastic container
- Two dry paper towels
- A lint-free cloth
- Filtered or distilled hot water
Step-by-Step Guide:
- Prepare the Soaking Container: Fold a dry paper towel into quarters and place it at the bottom of the plastic container.
- Add Hot Water: Pour approximately two inches of hot (but not boiling) filtered or distilled water into the container, ensuring the paper towel is fully submerged.
- Access the Printhead: Open your printer and carefully remove all ink cartridges from their carriage.
- Set Aside Cartridges: Place the removed ink cartridges upright on a separate paper towel to prevent ink leakage.
- Release the Printhead Latch: Locate and lift the gray latch situated behind the cartridge carriage. This latch secures the printhead in place.
- Remove the Printhead: Gently pull the printhead upwards and out of the printer.
- Initial Cleaning: Dampen the lint-free cloth with hot water and carefully wipe away any excess ink from the printhead nozzle area.
- Soak the Printhead: Place the printhead in the plastic container, nozzle-side down, onto the submerged paper towel. Ensure the nozzles are immersed in the water. Be careful not to touch the nozzles directly as they are delicate and can be damaged.
- Soaking Time: Allow the printhead to soak in the hot water for about ten minutes.
- Dry the Printhead: Remove the printhead from the water bath and place it nozzle-side up on a fresh, dry paper towel to air dry for approximately fifteen minutes.
- Reassemble and Clean: Reinstall the printhead back into the printer, ensuring the latch is securely fastened. Then, reinstall the ink cartridges. Run the automatic printhead cleaning function on your printer once more to prime the printhead.
Cleaning Integrated Printheads (Cartridge-Based)
If your HP printer uses ink cartridges with integrated printheads, you can utilize the “paper towel method,” a simpler approach to manually address print quality issues.
Required Supplies:
- A warm, damp paper towel or coffee filter
- A dry paper towel
Step-by-Step Guide:
- Blotting: Take a warm, damp paper towel or coffee filter and gently blot the printhead (nozzle area) of the cartridge facing down onto the damp paper towel. This action helps to dissolve and remove dried ink from the nozzle surface.
- Wicking: Immediately after blotting, hold the cartridge with the printhead facing down against a dry paper towel for 2-3 minutes. The dry paper towel will wick away excess ink and moisture from the printhead. Important: Do not wipe the printhead, as this can potentially cause damage to the delicate nozzles.
- Reinstall and Test: Reinstall the cleaned cartridge back into your printer and attempt to print again. If print quality remains poor after this process, it may indicate that the ink cartridge is depleted or damaged, and replacement may be necessary.
By following these cleaning procedures, you should be equipped to maintain your HP printer head and ensure consistent print quality. If, after attempting these cleaning methods, you continue to experience print quality problems, it might indicate a more significant issue, possibly requiring printhead replacement. For printers using integrated cartridges, this means replacing the entire cartridge. For printers with separate printheads, replacing the printhead component itself can be an option, though as mentioned earlier, the cost can be considerable. Often, for users of printers with separate printheads, purchasing a new printer becomes a more practical and cost-effective solution than investing in a printhead replacement. If you have further questions about cleaning your HP printer head, feel free to leave a comment below.