Printing On Fabric at home can open up a world of creative possibilities, from personalized gifts to unique home décor and custom clothing. If you’ve ever wondered how to transfer your digital designs onto fabric without expensive equipment, you’re in the right place. This guide will walk you through a surprisingly easy and economical technique: the freezer paper method. Using just your home inkjet printer and some readily available freezer paper, you can achieve professional-looking prints on various fabrics. Let’s dive into this simple yet effective DIY fabric printing method.
This method is perfect for beginners and experienced crafters alike because it requires minimal supplies and straightforward steps. The secret lies in freezer paper, a kitchen staple known for wrapping food for freezing. Its unique properties make it an ideal carrier for fabric through your inkjet printer. The shiny side of the freezer paper temporarily adheres to the fabric when ironed, creating a stable sheet that your printer can easily handle.
Before we get started, let’s gather our supplies. You’ll be amazed at how little you need to begin your fabric printing journey.
Supplies You’ll Need for Printing on Fabric:
- Freezer Paper: The star of our method! Look for it in the food storage aisle of your local grocery store. It comes in rolls and has a shiny side and a dull side.
- Fabric: Choose natural fabrics like cotton, linen, or canvas for best ink absorption. Canvas drop cloth is an excellent, budget-friendly option that works wonderfully for printing.
- Iron: A standard household iron will do the trick to bond the freezer paper to the fabric.
- Scissors or Rotary Cutter: For precise trimming of fabric and freezer paper.
- Inkjet Printer: Your home inkjet printer is all you need. For projects requiring washability, consider using pigment-based inks, which are generally more water-resistant than dye-based inks.
- Printer Cardstock (Optional): Useful as a template for cutting the freezer paper and fabric to the correct size.
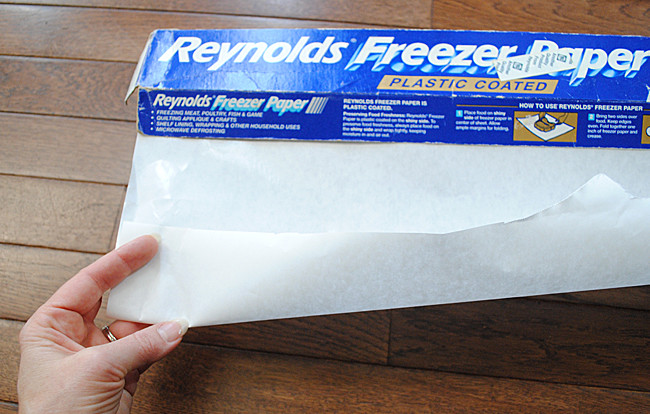 Image showing freezer paper, fabric, iron, scissors, and printer as supplies for fabric printing.
Now that you have everything ready, let’s move on to the step-by-step process of printing your designs onto fabric.
Step-by-Step Guide to Printing on Fabric with Freezer Paper:
Step 1: Prepare Your Fabric and Freezer Paper
Begin by ironing your fabric to remove any wrinkles. This ensures a smooth surface for printing and better adhesion of the freezer paper. Cut a piece of freezer paper slightly larger than a standard 8.5″ x 11″ printer paper. Place the fabric on your ironing board and position the freezer paper on top, shiny side down against the fabric.
 Image demonstrating ironing freezer paper onto fabric for fabric printing preparation.
Iron the freezer paper onto the fabric using a medium heat setting. The shiny side of the freezer paper has a coating that will temporarily bond to the fabric when heated. Ensure the freezer paper is firmly attached to the fabric, paying special attention to the edges.
Step 2: Trim to Printer Paper Size
For smooth feeding through your printer, it’s crucial to trim the fabric and freezer paper to the exact size of standard printer paper (8.5″ x 11″ or A4, depending on your printer). Using scissors or a rotary cutter, carefully trim the fabric and freezer paper together. A piece of cardstock can serve as a helpful template to ensure precise dimensions.
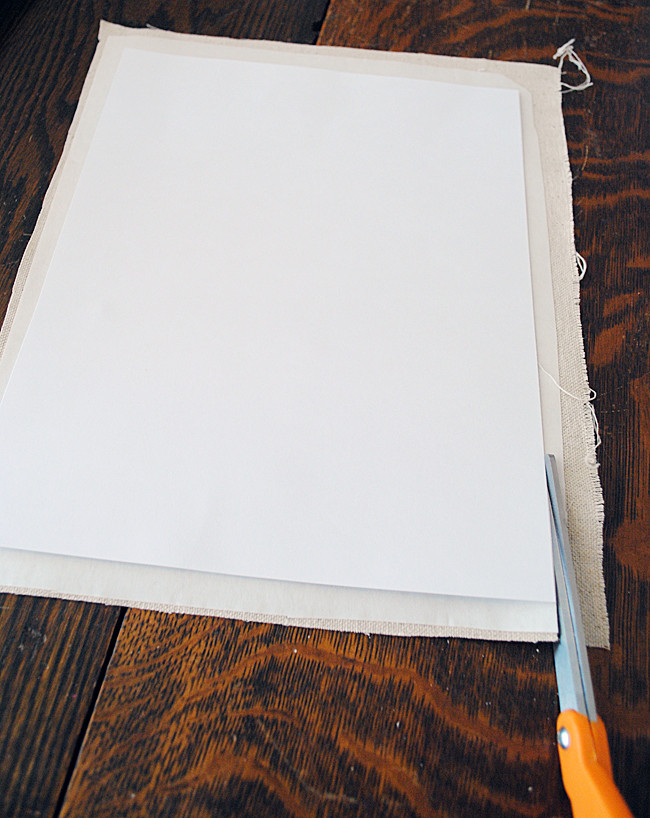 Image showing trimming fabric and freezer paper to printer paper size for fabric printing.
Important Tip: Ensure there are no frayed edges or fabric overhang beyond the freezer paper. Loose threads or uneven edges can cause paper jams and damage your printer. The freezer paper should extend slightly beyond the fabric edge to prevent fabric from directly contacting printer rollers.
Step 3: Load into Your Inkjet Printer
Place the fabric-covered freezer paper into your printer’s paper tray. Make sure to load it correctly so that the ink will print on the fabric side. This usually means placing the fabric side face-down for most standard printers, but always check your printer manual for specific instructions on manual feed or specialty paper loading.
 Image showing fabric loaded into inkjet printer for fabric printing process.
Step 4: Adjust Printer Settings for Optimal Fabric Printing
Before printing, adjust your printer settings to ensure the best possible print quality on fabric. Access your printer preferences through the print dialog box. Select “Best Photo” or “High Quality” print settings to maximize ink coverage and image clarity. You might also consider selecting a paper type setting that is heavier, such as “Glossy Photo Paper” or “Heavy Paper,” as this can help the printer feed the slightly thicker fabric and freezer paper combination.
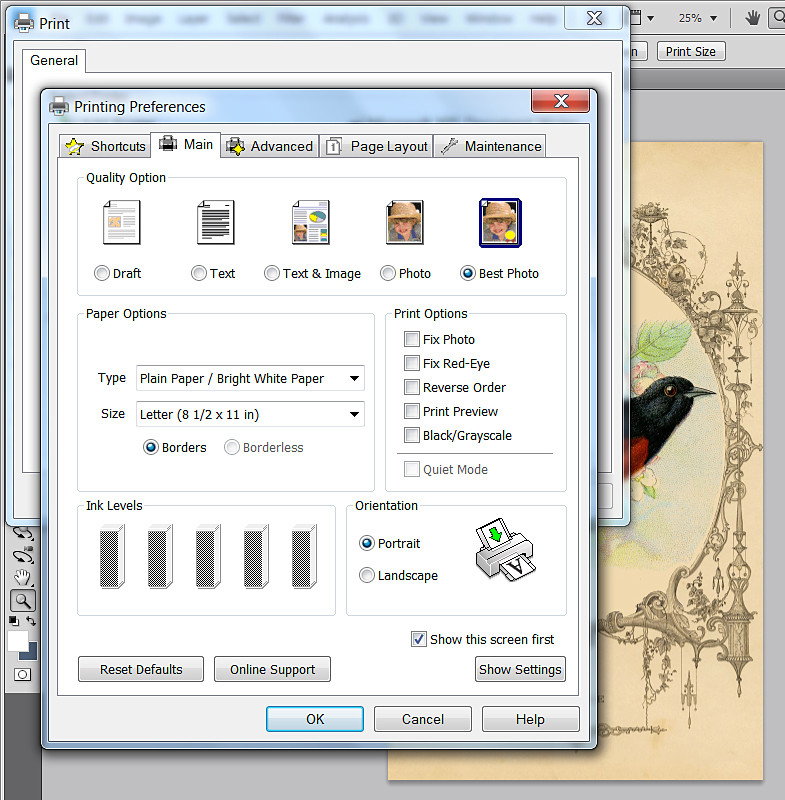 Screenshot of printer settings dialog box, highlighting quality settings for fabric printing.
Step 5: Print Your Design
Send your design to print. It’s advisable to stay close to the printer during the printing process, especially for the first few attempts. Gently guide the fabric sheet if needed as it feeds through the printer. Some printers might hesitate to recognize the freezer paper-backed fabric initially. If it doesn’t feed correctly on the first try, simply re-insert the sheet.
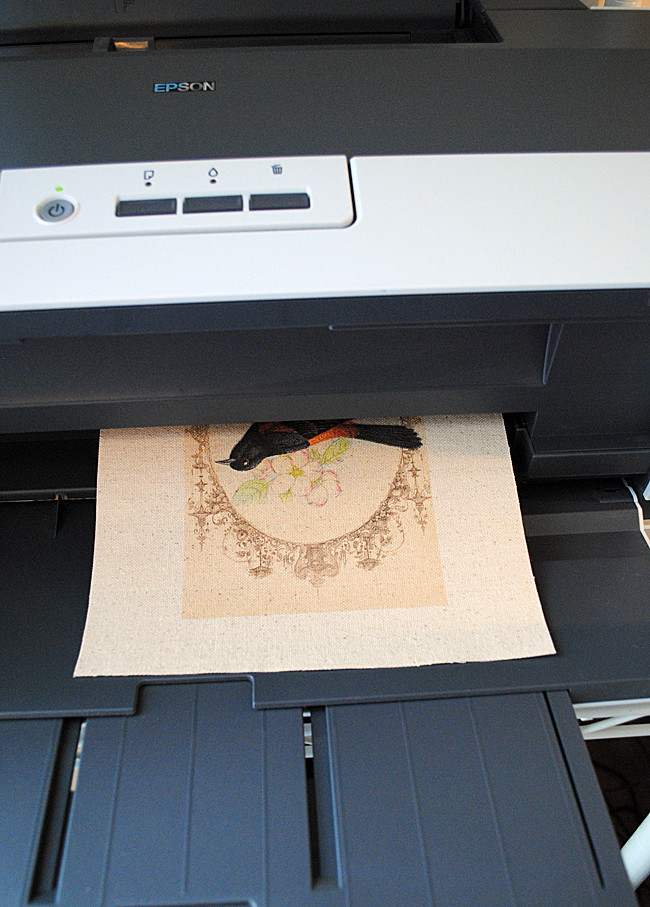 Image showing printed fabric emerging from inkjet printer, showcasing DIY fabric printing.
Step 6: Reveal Your Printed Fabric
Once printing is complete, carefully peel off the freezer paper from the fabric. You’ll be left with your design beautifully printed on the fabric. The freezer paper can sometimes be reused up to a few times, so you can save it for future projects if desired.
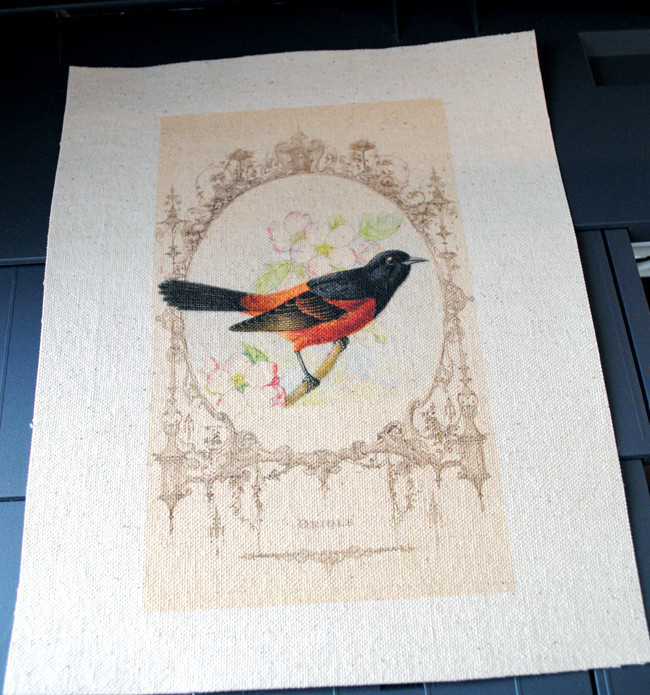 Image showing freezer paper being peeled off printed fabric, revealing the design.
Setting the Ink for Washability (Optional but Recommended):
If you intend to wash your printed fabric, it’s important to set the ink to prevent bleeding or fading. While pigment inks are more water-resistant, setting the ink is still a good practice, especially if you are unsure of your ink type or want to ensure maximum washability. A common method is to use a vinegar solution. You can find detailed tutorials online for setting inkjet ink on fabric using vinegar or heat setting techniques.
Creative Project Ideas for Printed Fabrics:
The possibilities with printed fabrics are endless! Here are just a few ideas to get your creativity flowing:
- Custom Tea Towels and Kitchen Linens: Print your own designs, monograms, or vintage graphics on cotton fabric to create personalized kitchen accessories.
- Unique Throw Pillows: Design and print fabric for throw pillows to add a personal touch to your home décor.
- Personalized Tote Bags: Create custom tote bags with unique patterns, quotes, or images.
- Fabric Labels and Patches: Print small designs on fabric to make custom labels for handmade items or fun patches for clothing.
- Quilting and Sewing Projects: Incorporate printed fabric squares into quilts, patchwork projects, and other sewing crafts.
 Collage of project ideas using printed fabric, such as tea towels, tote bags, and pillows.
Conclusion: Unleash Your Creativity with Fabric Printing
Printing on fabric using the freezer paper method is a fantastic way to personalize projects and bring your creative visions to life. It’s an accessible, budget-friendly technique that yields impressive results with just a few simple steps. So gather your supplies, choose your favorite designs, and start exploring the exciting world of DIY fabric printing today! Experiment with different fabrics and designs to discover the full potential of this fun and rewarding craft.