Whether you’re printing cherished family photos or crucial business documents, the impact of High Print Quality cannot be overstated. Crisp, vibrant prints leave a lasting positive impression. To ensure you always present your best work, we’ve compiled a straightforward guide to help you achieve high print quality prints every time.
Understanding Basic Printer Settings for High Quality Prints
Every printer is equipped with adjustable print quality settings, typically accessible through the “Printer Settings” or “Printer Properties” menu. You can usually find “Printer Properties” within the print dialog of applications like Word, as shown below:
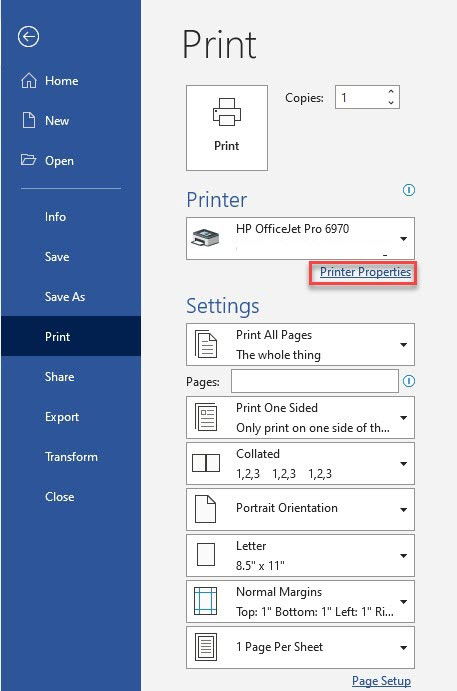
Alt text: Accessing Printer Properties menu in Word document to adjust print quality settings.
Within the printer settings menu, locate the “Print Quality” dropdown. While the specific names may vary across printer brands, the quality options generally fall into similar categories:
- Draft/Eco Mode: This setting prioritizes speed and ink conservation. It’s ideal for internal documents, quick drafts, or when ink levels are low and high print quality is not essential.
- Normal/Standard Quality: This is the default and most versatile setting, striking a balance between speed and quality. Suitable for everyday printing needs and documents where good print quality is desired.
- Best/High Quality: This option is designed to produce the highest print quality possible, utilizing more ink and slower printing speeds. It’s the perfect choice for photographs, presentations, or any document where visual impact and superior print quality are paramount.
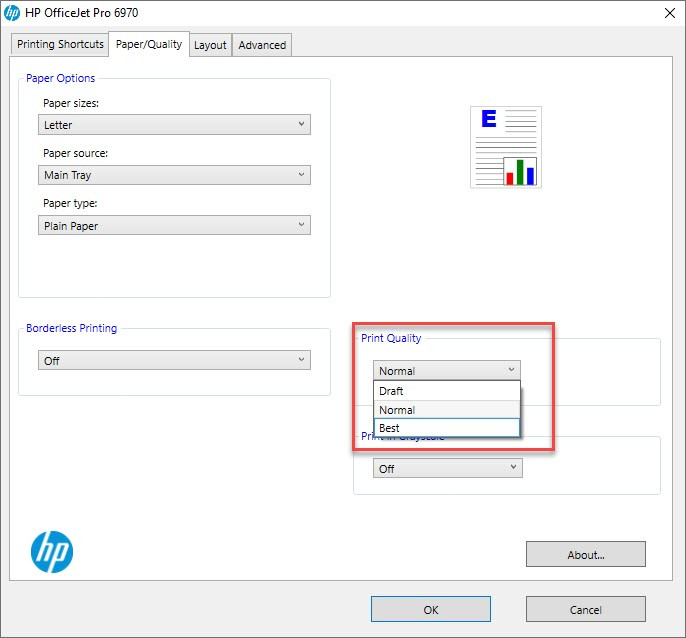
Alt text: HP printer settings menu showing different print quality options: Draft, Normal, and Best for selecting desired print output.
Selecting the Right Paper for Optimal Print Quality
Imagine handing a client a critical business proposal printed on flimsy paper with faded ink versus one printed on professional presentation paper with sharp, dark text. The difference in impact is significant. Achieving high print quality is heavily reliant on choosing the appropriate paper for each print job. While standard multi-purpose copy paper works for basic tasks, specialized paper can dramatically enhance your print results.
Inkjet paper is engineered to absorb liquid ink efficiently, often featuring a slightly thicker coating than regular copy paper. This absorption process leads to sharper images and more vibrant colors, contributing to enhanced print quality. Laser paper, on the other hand, is designed to withstand the heat of the fusing process, ensuring toner adheres properly for denser blacks and crisper text, thus improving laser print quality.
Beyond inkjet and laser paper, a variety of specialty papers exist, including photo paper for glossy, high-quality photo prints, presentation paper for professional documents, fine art paper for artistic reproductions, and cardstock for robust prints like business cards. Always consult your printer’s manual for compatible paper types to maximize print quality and avoid printer issues.
Ink and Toner Cartridges for High Quality Output
The printer cartridges you use are just as crucial as your paper choice in achieving high print quality. Standard inkjet printers utilize ink cartridges, well-suited for a range of printing tasks from text documents to colorful images. Laser printers employ toner cartridges, which excel at producing sharp text at high speeds. However, due to the nature of toner, color gradients may sometimes appear less nuanced compared to inkjet prints.
For users prioritizing high quality color prints, photo inkjet printers are the ideal choice. These specialized printers often incorporate additional ink cartridges to expand the color gamut and improve color accuracy. This results in superior color reproduction, essential for professional photography, art prints, and any project demanding precise and high fidelity print quality.
DPI and Its Impact on Print Quality
Dots per inch (DPI) is a fundamental concept in understanding print quality. DPI measures the density of ink dots within a one-inch square on the printed page. Essentially, the higher the DPI, the more detail and resolution your print will possess, as more ink dots contribute to forming the image. Inkjet printers typically offer DPI ranges from 300 to 720, while laser printers often range from 600 to 2400 DPI.
Selecting a print quality setting in your printer menu directly influences the DPI used for your print job:
- Draft Mode: Utilizes the lowest DPI, prioritizing ink saving over high print quality.
- Normal Mode: Employs a moderate DPI, suitable for balanced print quality in everyday use.
- Best Mode: Increases DPI for improved print quality and detail.
- Max DPI Enabled: Activates the printer’s maximum DPI capability for the highest possible print quality.
For standard text or business graphics, DPI is less of a concern as most printers are designed to handle these tasks effectively. However, for projects where exceptional print quality is paramount, such as professional photo prints, understanding DPI is crucial. Be mindful that printing at maximum DPI consumes significantly more ink, potentially leading to quicker cartridge depletion.
Windows 10 users can enable maximum DPI settings through these steps:
- Open the Windows search bar and type “printer settings,” then click “Manage” to access your printer settings.
- Select “Printing Preferences” and navigate to the “Advanced” tab.
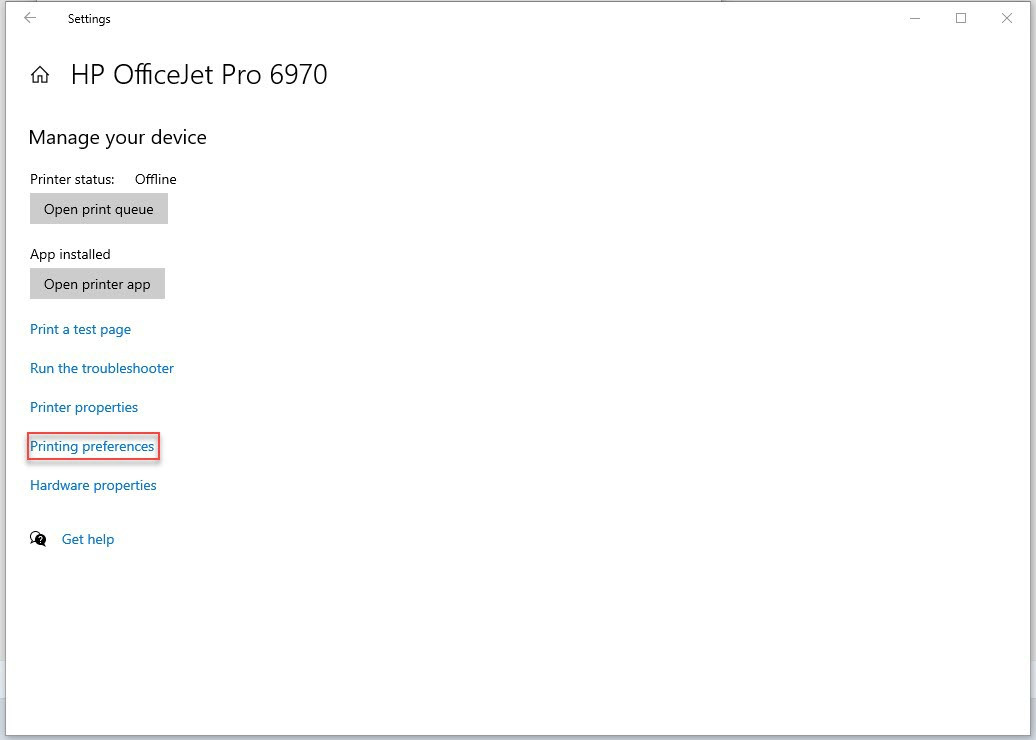
Alt text: Windows 10 printer preferences advanced tab showing options for print quality and DPI settings.
- Check the box labeled “Print in Max DPI” and click “OK” to apply the setting.
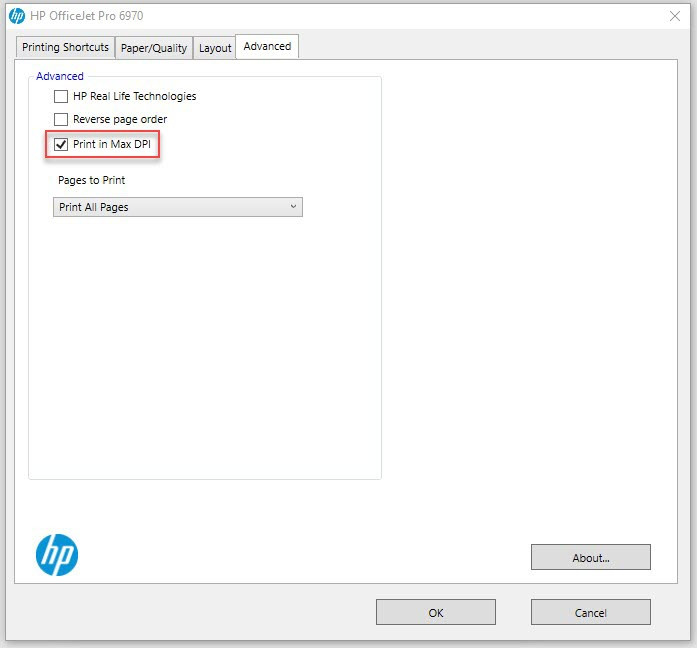
Alt text: Windows 10 print in Max DPI setting selected in advanced preferences for maximum print resolution.
Ensuring High Resolution Prints with Original Files
To consistently achieve high print quality, always print from the original file created in its native application. While using smaller file sizes or screenshots might seem convenient for quick edits, these alternatives compromise image resolution, resulting in inferior printouts. Printing the original, high-resolution file ensures you are leveraging the full potential of your printer for optimal print quality.
Elevate Your Prints to High Quality Today
By implementing these simple steps, you can effortlessly enhance your print results and consistently achieve high print quality for all your printing needs. Ready to reduce your printing expenses without sacrificing quality? Visit LDProducts.com today for compatible ink and toner solutions and experience high quality prints at affordable prices. Explore our blog for more valuable printing tips and resources!
| Cartridge Series |
|---|
| Thank you for reading! This article is brought to you by the ink experts at LD Products, your trusted source for compatible ink and toner. With over two decades of experience, we are dedicated to helping you save on printing costs while maintaining high print quality. Support our mission by visiting LDProducts.com for all your ink and toner requirements. We appreciate your support! |