
Want to bring your digital persona into the real world? With the power of 3D printing and readily available software, you can create a custom action figure. This guide will walk you through the process of merging a 3D scanned head with a free body model to craft your very own Action Figure 3d Print. Let’s dive into the steps to personalize your action figure project.
Finding Free 3D Models for Your Action Figure
The first step in creating your action figure 3d print is sourcing the necessary 3D models. For the body, a quick online search for “free 3d model human figure” will yield numerous resources. Two excellent websites to explore are Artist-3D (http://artist-3d.com/) and Archive 3D (http://archive3d.net/). These platforms offer a variety of free 3D models in formats suitable for our project.
For this tutorial, we’ll use a body model downloaded from one of these sources. The models are often in 3DS format, which is native to Autodesk’s 3D Studio. Don’t worry if you don’t have that software; we can use a handy tool called NetFabb to convert the 3DS file into a more universally compatible OBJ format. NetFabb is excellent for handling various 3D file formats and preparing them for 3D printing.
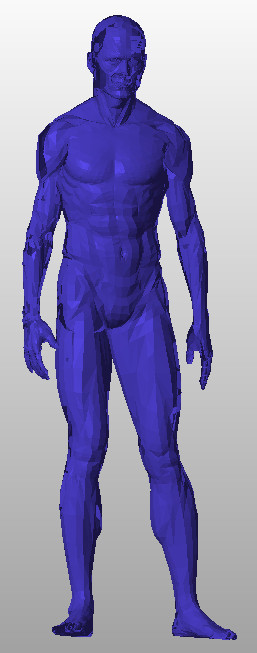 Free 3D human model selected from online library
Merging Head and Body in MeshMixer for Your 3D Print Action Figure
Once you have your body model in OBJ format and your 3D scanned head (presumably also in OBJ or a compatible format), the next step is to combine them. We will use MeshMixer, a free and powerful 3D modeling software from Autodesk, for this process.
Importing Models into MeshMixer
Open MeshMixer and import your 3D scanned head. When importing the body model, ensure you select Append instead of Replace. Appending adds the body model to the scene alongside your head, which is crucial for combining them.
Scaling the Head to Match the Body
Upon importing, you might notice a significant size difference between the head and body. Often, the head will appear much larger than the body. In our case, the head was disproportionately large. Initially, attempting to scale up the body using “Transform Faces” deformation might seem intuitive. However, complex models, especially those with separate elements like eyes and mouths, can make uniform scaling difficult. Therefore, it’s often more effective to scale down the head to match the body’s proportions.
Scaling the head down can be time-consuming and require patience. You’ll need to continuously rotate, pan, and zoom the viewport while transforming the head. The goal is to reduce the head’s size appropriately and position it close enough to the body to visualize the combined action figure effectively.
Removing the Stock Model’s Face
To ensure a seamless integration of your scanned head, it’s beneficial to remove the original face from the body model. Select the body model and use the lasso selection tool to carefully highlight the face area, from the forehead to the chin and cheek to cheek. Once the face is selected, use the Discard edit to remove it entirely.
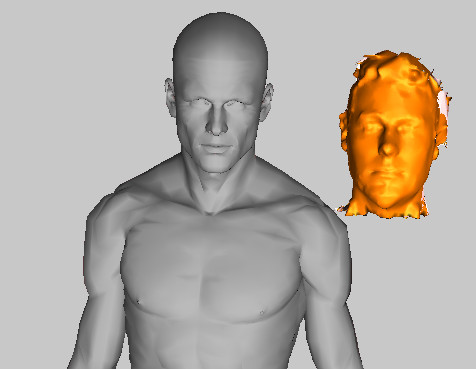 Body model with face lasso selected for removal in MeshMixer
While “Erase and Fill” might seem like an option to create a flat, featureless face, it can sometimes cause issues with models that have independently modeled features like eyes and mouths. Discarding the face creates a clean hole, preventing potential mesh conflicts and making it easier to attach your custom head. This step also preemptively addresses potential clipping issues, such as the body’s nose intersecting with your custom face.
Positioning Your Custom Head
Now, carefully position your scaled-down head onto the body model. Use MeshMixer’s transform tools (scale, rotate, and translate) to precisely align the head. The body’s ears can serve as useful guides for determining the correct depth and orientation of the head. Ensure the head isn’t tilted or misaligned. This step may require fine-tuning to achieve a natural and aesthetically pleasing fit.
Note: Occasionally, when moving the head, parts of it might seem to detach or stay behind. This can happen even when selecting all parts of the head. As long as the primary portion of the head is correctly positioned, these minor visual glitches usually don’t cause problems with the final 3D print.
Cleaning Up Intersections Between Head and Body
After positioning the head, you’ll likely notice areas where the body’s original geometry intersects with your head model, particularly around the jawline, forehead, and neck. To clean these up, select the body model and use the lasso tool to highlight any protruding sections. Then, use the Discard edit to remove these overlapping parts.
Similarly, you can refine your head model by discarding any parts that unnaturally protrude into the body, such as sections of the neck, ears, or hair. This cleanup process ensures a smoother, more integrated appearance for your action figure 3d print.
Combining the Models into One
Once you’re satisfied with the positioning and cleanup, it’s time to merge the separate head and body models into a single mesh. Select one of the models, then Shift+Click the other to select both. With both models highlighted (usually turning white in MeshMixer), navigate to Edit > Combine. This operation merges the two meshes into a single, unified 3D model, essential for 3D printing.
Smoothing and Refining the Merged Model
With the combined model, you can further refine the integration points. Focus on areas where the head and body meet, which often appear less smooth or slightly awkward, typically around the jaw, back of the head, and ears. Use the Erase and Fill tool with small brush sizes to gently smooth out these transitions. Avoid large brush strokes, as they can flatten details. The goal is to create a seamless and natural-looking connection between the head and body for your action figure 3d print.
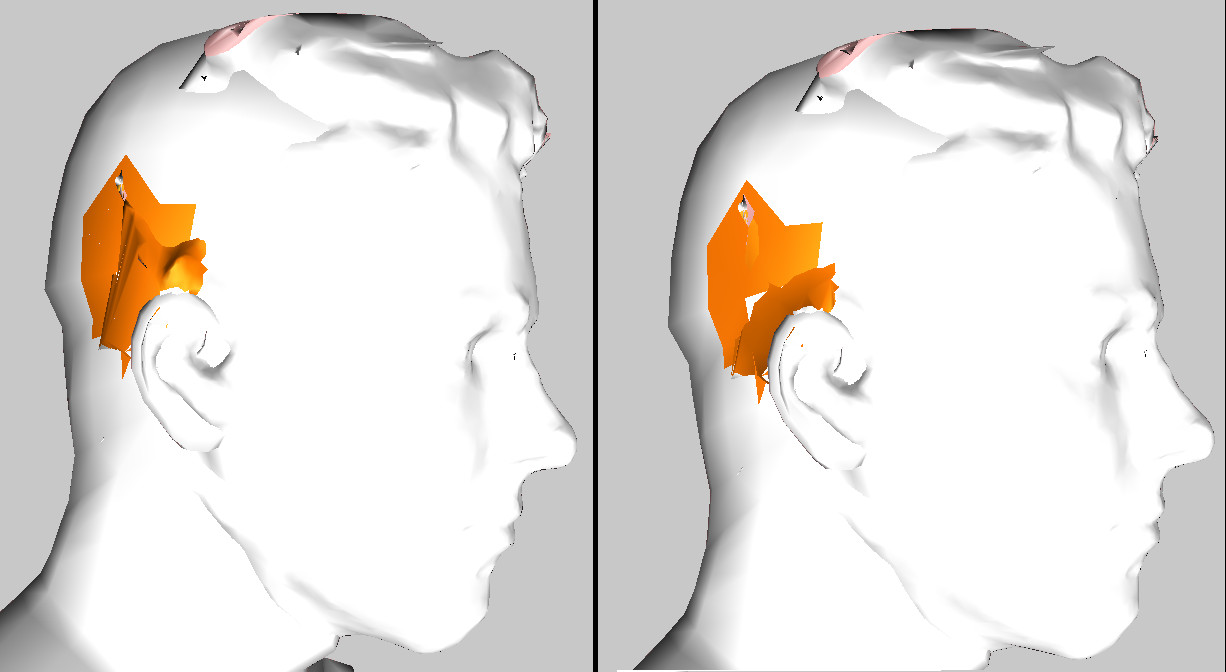 Smoothing the merged model around the neck area using Erase and Fill in MeshMixer
At this stage, feel free to experiment with MeshMixer’s sculpting tools. You could add details or modifications to personalize your action figure further, such as adding horns or other accessories. Once you’re happy with the model, export it in OBJ format by going to File > Export. While MeshMixer offers STL export, we’ll use OBJ first for the next step.
Repairing and Exporting as STL in NetFabb for 3D Printing
The final step in preparing your action figure 3d print model is to ensure it’s watertight and ready for slicing. Open NetFabb again and import the OBJ file you exported from MeshMixer. Run NetFabb’s repair function on the model. This crucial step checks for and automatically fixes any mesh errors, ensuring the model is manifold (watertight) and printable. You might need to toggle between “default” and “simple” repair options in NetFabb to achieve the best results.
After the repair process, export the model from NetFabb. This time, choose STL format. STL is the standard file format for 3D printing, and NetFabb’s repair process ensures your STL file is optimized for printing.
Congratulations! You’ve now successfully created a printable 3D model of your custom action figure. The next steps involve 3D printing your model and, if desired, painting it to bring your personalized action figure 3d print to life. Further guides can provide details on printing techniques and painting tips to complete your project.