In today’s fast-paced digital world, the ability to scan documents from a printer to your PC is more crucial than ever. Whether you’re managing important business files, digitizing family photos, or simply decluttering your physical space, understanding how to scan documents efficiently is a valuable skill. Scanning documents directly from your printer to your computer streamlines workflows, enhances organization, and saves precious time. This guide will walk you through various methods to achieve seamless scanning, ensuring you can digitize your documents with ease, regardless of your tech proficiency.
Scanning documents from your printer to your computer might initially seem complex, but it’s actually quite straightforward. The process becomes simple once you understand the different approaches available and the steps involved. Let’s explore the most effective ways to scan documents, catering to different printer types and computer setups.
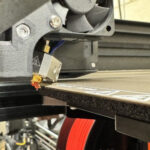
Scanning with a Dedicated Scanner Printer
For many users, an all-in-one printer with scanning capabilities is the most convenient tool for digitizing documents. These devices are designed to simplify the scanning process, often offering both USB and wireless connectivity options.
Scanning via USB Connection
Connecting your printer to your PC using a USB cable is a reliable and direct method for scanning. Here’s how to do it:
- Ensure Printer Connection: First, make sure your printer is properly connected to your computer via a USB cable and powered on.
- Access Printer Software: Typically, installing your printer drivers will also install scanning software on your PC. Look for the printer software in your Start Menu (Windows) or Applications folder (macOS). Alternatively, Windows users can use “Windows Scan” app, and Mac users can utilize “Image Capture”.
- Place Your Document: Open the scanner lid and place your document face-down on the scanner glass, aligning it with the indicated corner or guide.
- Initiate Scan: Open your scanning software. You should find options to select document type (e.g., document, photo), color mode (color, grayscale, black and white), resolution (DPI), and file format (PDF, JPG, etc.). Configure these settings based on your needs. For standard documents, a resolution of 300 DPI and PDF format are usually sufficient.
- Preview and Scan: Click the “Preview” button (if available) to see a preview scan of your document and adjust placement or settings if needed. Then, click “Scan” to start the final scan.
- Save Your Scan: Once the scan is complete, you will be prompted to save the file. Choose a location on your PC and rename the file appropriately.
Scanning via Wireless (Wi-Fi) Connection
Scanning wirelessly offers greater flexibility, allowing you to scan documents without physically connecting your printer to your PC.
- Set Up Wireless Connection: Ensure your printer is connected to the same Wi-Fi network as your computer. Refer to your printer’s manual for instructions on connecting to Wi-Fi. Many modern printers have a Wi-Fi setup wizard in their control panel.
- Install Printer Software: Install the printer’s software on your PC, ensuring you select the wireless connection option during setup.
- Access Scan Function: Similar to USB scanning, you can access the scan function through the printer’s software installed on your computer, “Windows Scan” app (Windows), or “Image Capture” (macOS).
- Place Document and Configure Settings: Place your document on the scanner bed and configure scan settings in the software as described in the USB scanning steps.
- Scan and Save: Initiate the scan from your computer. The scanned document will be wirelessly transmitted to your PC. Save the scanned file to your desired location.
Alt text: Scanning a document using a printer’s control panel, showing the user interface for selecting scan options.
Scanning Without a Dedicated Scanner Printer
If you don’t have an all-in-one printer with a built-in scanner, there are still effective ways to scan documents directly to your PC using alternative methods.
Utilizing Built-in Laptop Scanners (Windows & macOS)
While not all laptops have physical flatbed scanners, both Windows and macOS offer built-in software that can utilize external scanners or even import images from other devices as scans.
Windows Fax and Scan
Windows Fax and Scan is a utility included in Windows that supports scanning from connected scanners.
- Connect External Scanner (if applicable): If you are using an external scanner, connect it to your PC and ensure drivers are installed.
- Open Windows Fax and Scan: Search for “Windows Fax and Scan” in the Start Menu and open the application.
- New Scan: Click on “New Scan” in the top toolbar.
- Select Scanner and Configure: Choose your scanner from the dropdown menu if you have multiple scanners installed. Configure your scan settings such as color format, resolution, and file type.
- Preview and Scan: Click “Preview” to check document alignment and settings. Then, click “Scan” to begin the scanning process.
- Save Scanned Document: Once the scan is complete, you can save the document to your computer.
macOS Image Capture
Image Capture is a macOS application designed for transferring images from cameras and scanners, including initiating scans from connected scanners.
- Connect External Scanner (if applicable): Connect your scanner to your Mac and ensure it’s recognized.
- Open Image Capture: Open Image Capture from your Applications folder or by using Spotlight search (Command + Spacebar).
- Select Scanner: Choose your scanner from the Devices list on the left sidebar.
- Configure Scan Settings: Adjust settings such as scan mode, resolution, and where to save the scanned file.
- Show Details: Click “Show Details” for advanced options.
- Scan: Click “Scan” to start scanning your document. The scanned image will be saved to the specified location on your Mac.
Alt text: Scanning documents using a mobile scanning application on a smartphone, demonstrating the ease of mobile scanning.
Leveraging Mobile Scanning Apps
For a scanner-free and highly portable solution, mobile scanning apps are incredibly useful. These apps use your smartphone’s camera to capture images of documents and convert them into scanned documents.
- Install a Scanning App: Download and install a reputable scanning app from your app store. Popular options include Adobe Scan, CamScanner, and Microsoft Lens.
- Open the App and Position Document: Launch the app and position your document on a flat, well-lit surface. The app usually automatically detects the document edges.
- Capture Scan: Follow the app’s instructions to capture the scan. Most apps automatically enhance the image, correct perspective, and allow for cropping.
- Review and Edit: Review the scanned image. You can usually edit the scan within the app, adjusting brightness, contrast, and cropping.
- Save and Share: Save the scan as a PDF or JPG file. Many apps offer direct integration with cloud storage services like Google Drive or Dropbox, making it easy to save and access your scanned documents on your PC. You can also share the scanned document via email or other methods to access it on your computer.
Conclusion
Scanning documents from your printer to your PC is a straightforward process that significantly enhances document management and organization. Whether you’re using a dedicated scanner printer, a built-in laptop scanner utility, or a mobile scanning app, the ability to digitize documents efficiently is at your fingertips. By following these steps, you can easily convert your paper documents into digital files, streamlining your workflow and contributing to a more organized digital life. Embrace these methods to simplify your document handling and take full advantage of the convenience of digital document management. Happy scanning!