Sublimation Printing is a fantastic and versatile crafting method that allows you to create brilliantly colored, personalized items. From custom t-shirts and unique mugs to eye-catching tumblers and personalized home décor, the possibilities are vast. If you’re familiar with Cricut Infusible Ink, you’ve already touched upon the basics of sublimation, as Infusible Ink is a type of sublimation. This guide will delve deeper into sublimation, teaching you how to print your own custom sublimation transfers. Imagine creating bespoke items for your home, personalized gifts for family, or even launching a small business selling sought-after, custom sublimation products. You might be wondering: “How does sublimation printing actually work? What can I create with it? What materials can I use? And how do I even begin?” This ultimate beginner’s guide to dye sublimation will answer all your questions and get you started!
Understanding Dye Sublimation: How Does It Work?
So, what is sublimation printing, and what makes it so special?
In crafting, sublimation specifically refers to dye sublimation, a digital printing technique that produces high-quality, full-color designs for transferring onto various objects. Think of it as a process that infuses ink into the material, rather than just printing on the surface. Here’s an example of a vibrant t-shirt created using dye sublimation:
It’s called sublimation because it involves a change of state. The process heats specialized ink, transforming it into a gas. This gaseous ink then penetrates the surface of a compatible object before cooling and reverting to a solid state, effectively embedding a permanent design.
Sublimation printing relies on special sublimation ink and sublimation printers to create transfers. The process begins with printing your design using a sublimation printer – loaded with sublimation ink and special transfer paper. Heat and pressure are then applied to transfer the ink, permanently bonding it to a substrate with a polyester coating or made entirely of polyester, such as polyester t-shirts or coated ceramic mugs.
Once cooled, the sublimation design becomes an integral part of the object’s surface. It’s embedded within, meaning it won’t crack, peel, fade, or wash away, ensuring durability and longevity. Consider these examples: a polyester-coated mousepad and a coated ceramic mug, both featuring vibrant sublimation designs.
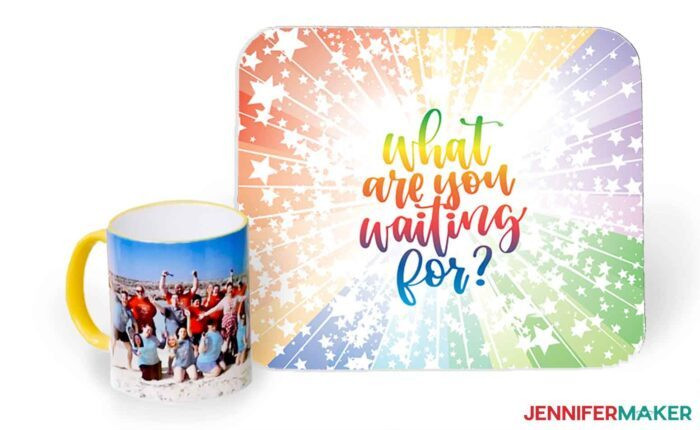 Colorful coffee mug and mousepad made with the dye sublimation technique at home
The longevity of sublimation printing is remarkable; the design lasts as long as the item itself. It’s seamless to the touch – you can’t feel the design because it becomes one with the material.
Dye sublimation allows for the creation of stunning, full-color designs with continuous tones and exceptional vibrancy, making it ideal for detailed images and photographic prints.
Exploring Sublimation Printing Applications: What Can You Sublimate On?
The versatility of dye sublimation printing is impressive. You can transfer vibrant, full-color designs onto a wide array of items. Essentially, sublimation printing works beautifully on anything made of polyester or coated with polyester.
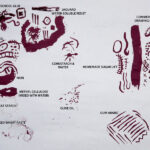
This opens up a world of possibilities. Yes, you can sublimate polyester t-shirts, tote bags, aprons, garden flags, and pillowcases. But the scope extends far beyond textiles to include items with a polyester coating. The market offers a vast selection of sublimation blanks, including ceramic mugs, stainless steel tumblers, mouse pads, puzzles, coasters, oven mitts, and countless other products. Even materials like wood and MDF can be sublimated when prepared with a special coating. If you have an item in mind, chances are there’s a way to sublimate it! Everything pictured below has been sublimated – showcasing the diverse applications.
Examples of Sublimated Items:
Understanding Sublimation Ink: The Transparency Factor
It’s true that sublimation ink is transparent. This characteristic is crucial to consider, as the base color of your object significantly impacts the final result. Looking at the sublimated items in the photo below, you’ll notice most are light-colored. Transparent ink shows best on white or light-colored surfaces. On dark objects, the transparency of sublimation ink becomes apparent – as seen here on a black shirt, where the design is virtually invisible.
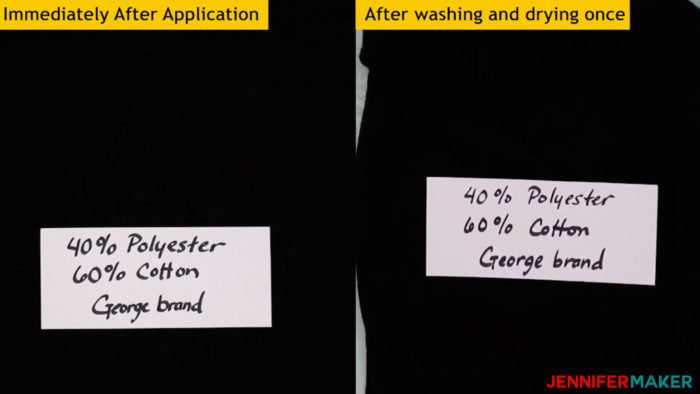 Cricut Infusible Ink on a White T-Shirt made of 40% Polyester Black Shirt
However, you can still sublimate onto colored objects, such as this green shirt. The key is ensuring your design is darker than the surface. Black, for instance, works well even on medium-colored surfaces.
For cotton or dark shirts, a workaround exists. You can sublimate your design onto a compatible material – like white glitter iron-on vinyl or white flocked vinyl – and then apply that vinyl to your shirt. The result, as shown, can be quite effective.
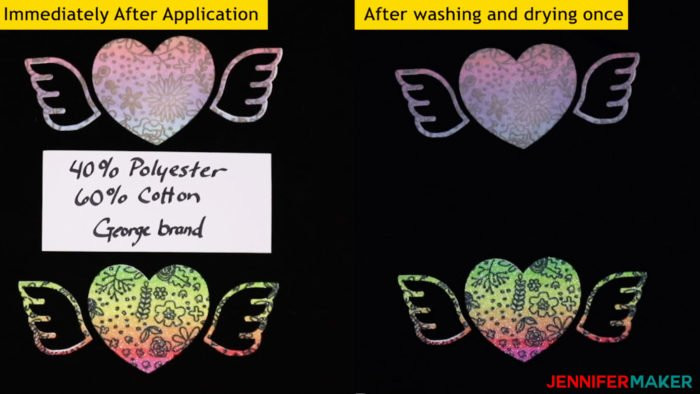 Cricut Infusible Ink on a White T-Shirt made of 40% Polyester Black Shirt with White Glitter Iron On Vinyl HTV
Sublimation Printing vs. Iron-On Vinyl: Key Differences
A common question arises: how does sublimation printing differ from iron-on vinyl? Iron-on vinyl, or heat transfer vinyl (HTV), is a thin, PVC sheet with heat-activated adhesive. Unlike sublimation, vinyl can adhere to almost any material and color. However, it sits on the surface, whereas sublimation ink infuses into the material. You can feel the edges of vinyl, but sublimation is seamless.
Vinyl is also prone to cracking and peeling over time, a problem sublimation avoids. Weeding vinyl designs is necessary, a step skipped in sublimation. Creating full-color designs with HTV requires complex layering, making the design stiff and less durable. Sublimation excels in full-color reproduction.
Sublimation printing allows for beautiful watercolor effects with blended colors and shades, difficult to achieve with vinyl.
Once set up, sublimation is a simpler process with more durable and professional results.
Sublimation Printing vs. Screen Printing: A Comparison
Screen printing applies ink to the surface, similar to vinyl, whereas sublimation printing integrates the design into the material. Sublimation can achieve intricate designs that are challenging with home screen printing. While screen printing is suitable for bulk orders and specific ink effects, sublimation is ideal for detailed, full-color, personalized items.
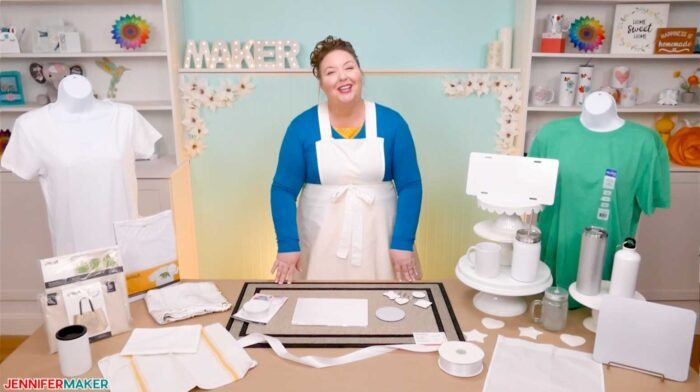
Getting Started with Sublimation Printing: Essential Equipment
Let’s explore the necessary equipment for dye sublimation printing, including budget-friendly and convenient alternatives.
Sublimation Printers: Your Inkjet Options
For sublimation printing, you need a specialized printer. Popular choices for home use include models from Sawgrass and Epson. Both brands produce excellent sublimation prints. The Sawgrass and Epson SureColor F170 are purpose-built sublimation printers. Alternatively, Epson EcoTank and Epson Workforce inkjet printers can be converted for sublimation. Each option has pros and cons regarding cost, convenience, and maintenance.
The Sawgrass and Epson EcoTank are often favored. EcoTank is cost-effective and convenient, while Sawgrass is known for user-friendliness and robust support. Most standard inkjet printers (excluding specific Epson models and a Canon model) are unsuitable for conversion due to their ink-heating mechanisms. It’s recommended to choose from the four mentioned models. The Epson EcoTank or Workforce typically offer the lowest initial cost. The EcoTank is generally preferred for its balance of price and ease of use, while Sawgrass is favored for simplicity and support. For in-depth comparisons, reviews, and setup guides on choosing a sublimation printer, visit jennifermaker.com/sublimationprinters.
Tip: Explore the Best Budget Sublimation Printer guide for comprehensive setup information!
Alongside a special printer, specialized ink is crucial.
Sublimation Ink: The Heart of the Process
Sublimation printing requires sublimation ink, not regular inkjet or pigment ink. Purpose-built printers come with their own sublimation ink, like Sawgrass and Epson SureColor. For converted inkjet printers, purchase separate sublimation ink, such as Hiipoo, Printer’s Jack, or Cosmos ink. Crucially, never use standard inkjet ink in a printer intended for sublimation. Autofill bottles, like Hiipoo sublimation ink, are convenient for EcoTank printers.
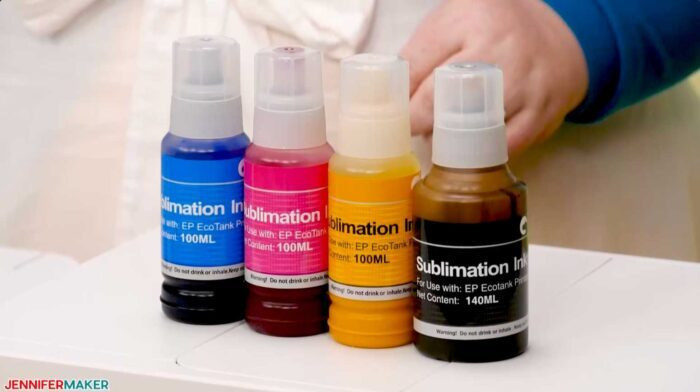 Hiipoo Sublimation Ink for Beginners
Consistency is key; sticking with one ink brand is advisable once you’ve chosen. Hiipoo ink has proven reliable, though many reputable brands exist. Autofill bottles are particularly user-friendly for EcoTank printers.
Beyond printer and ink, you need the right printing medium.
Sublimation Paper: Ensuring Vibrant Transfers
Using special sublimation paper yields the most vibrant sublimation prints. Brands like A-Sub and TruePix are popular choices. Sublimation paper is available in standard and large format sizes to accommodate various printer capabilities.
While laser copy paper is sometimes suggested, it can result in faded, less vibrant prints. Use it cautiously.
Even without a large format printer, large projects are achievable by taping smaller sheets of sublimation paper together.
After printing your design with sublimation ink on sublimation paper, heat is needed for transfer.
Sublimation Heat Presses: Applying the Heat
Various heat sources can transfer sublimation prints. Options range from an EasyPress to traditional heat presses to the Cricut Autopress. For uniquely shaped items, specialized presses like hat, mug, or tumbler presses are available. Convection ovens with silicone sleeves or bands can also be used for mugs and tumblers. Heat guns are sometimes used, though less effectively. Air fryers offer another option for mugs and tumblers.
Household irons are generally unsuitable as they don’t reach the necessary temperatures. Sublimation ink activates around 350°F (175°C), and most irons fall short.
Optimal sublimation temperatures are between 380°F and 400°F. Any heat source reaching 400°F is potentially viable for sublimation. The Autopress is favored for its ease of use, consistent pressure, and automatic opening feature, allowing for efficient workflow.
Sublimation Protection: Safeguarding Your Equipment
Protective materials are essential when using heat presses. White cardstock and uncoated butcher paper protect heat press pads and platens from ink blowout. Sublimation ink turns into vapor under high heat, which can transfer to unwanted surfaces if unprotected. Inexpensive white copy paper can serve as a substitute. Avoid Teflon sheets, as they can trap moisture. Also, steer clear of freezer paper, wax paper, or parchment paper.
Heat-resistant tape is useful for securing prints during pressing to prevent shifting. Pressing mats and heat-resistant gloves are also valuable accessories.
Finally, you need sublimation blanks to apply your designs to.
Sublimation Blanks: Your Canvas for Creativity
Sublimation blanks are surfaces designed to receive sublimation prints. They are either polyester-based or coated with a sublimation-receptive layer. These are sometimes referred to as “substrates.”
 A variety of sublimation blanks from t-shirts and bags to license plates, mugs, and tumblers
T-shirts are a popular choice, and any t-shirt with at least 65% polyester content works well. Cricut and Hanes “performance” shirts are excellent options. Polyester content is key. Sublimating on cotton results in faded, washed-out prints that largely disappear after washing. Workarounds for cotton exist, which will be discussed shortly.
Beyond t-shirts, sublimation blanks include polyester tote bags, pouches, garden flags, and items with polyester coatings like coasters and mousepads. Even 100% polyester doormats are suitable.
Dollar stores can also be surprising sources for sublimation blanks.
Laminated items are often sublimatable because the lamination coating is ink-receptive. For example, MDF wood items with a white paint and lamination layer can be sublimated.
Sublimation coatings extend possibilities to metal license plates, metal tumblers, ceramic mugs, and ceramic ornaments. Always remove protective films from these items before sublimating, as they are often coated to prevent transit scratches.
For items lacking a sublimation coating, a spray-on sublimation coating can be applied, enabling sublimation on materials like 100% cotton kitchen towels.
Another method for cotton or dark surfaces involves sublimating onto materials like white glitter HTV, white flock, glow-in-the-dark, or holographic vinyl, and then applying that transfer to the final item. EasySubli is a printable heat transfer vinyl designed for sublimation on cotton and dark fabrics, using lower transfer temperatures suitable for delicate items. Sublimation complements crafting with cutting machines, expanding creative potential.
The final essentials are designs and a computer.
Sublimation Designs and Design Software: Unleash Your Creativity
A computer (Mac or PC, laptop or desktop) and design software are needed to create your own sublimation designs. While iPads or tablets are possible, software options are more limited. Software like Photoshop and Illustrator are popular, but free or low-cost alternatives exist, including Inkscape, Gimp, Canva, Affinity Designer, Procreate, and Corel. Even free programs like Google Docs, Cricut Design Space, or Silhouette Studio basic edition can be used. Sawgrass printers include proprietary software. Pre-made sublimation designs are widely available online, including free options. Designs can be printed directly from programs like Notes, Google Docs, or Microsoft Word.
For optimized color vibrancy and accuracy, ICC printer profiles can be added. These profiles are specific to the ink and printer combination and are typically free. Setup guides for sublimation printers, including finding printer profiles, are available at jennifermaker.com/sublimationprinters.
Sublimation Printing: Is It Difficult to Learn?
Setting up for sublimation printing involves several components, which might seem daunting. There’s a learning curve, but it’s manageable with guidance. Remember three core principles: sublimation printer with sublimation ink, high-heat source, and sublimation-ready surface. These are the fundamentals. Each aspect can be explored in greater detail, but these basics are key – ink, heat, and surface.
For comprehensive setup assistance, the Sublimation Startup mini-course at jennifermaker.com/sublimationstartup offers step-by-step guidance on printer and ink selection, tool and blank options, and software usage for printing and pressing projects. Enroll now and learn at your own pace.
 Sublimation Startup: Get Set Up For Success in Sublimation with JenniferMaker
Join the dedicated sublimation crafting group at jennifermaker.com/sublimationgroup to connect with fellow enthusiasts, ask questions, share ideas, and find inspiration!
Common Questions About Dye Sublimation Printing
Q: Can a sublimation printer also be used for regular printing? No, sublimation printers (purpose-built or converted) are exclusively for sublimation ink. Switching a converted printer back to inkjet is complex and wasteful.
Q: What type of paper is required? Special sublimation paper is essential. TruePix (for Sawgrass) and A-Sub (for Epson) are recommended.
Q: Which type of ink should I use? Use only special sublimation ink. Sawgrass, Epson, Hiipoo, and Printers Jack inks are all reliable choices.
Q: What materials are suitable for sublimation prints? Any material with high polyester content or a sublimation coating. Refer to the item list provided earlier.
Q: How can I evaluate the vibrancy and color accuracy of my sublimation prints? Use the free subliflower design provided to assess color output.
Download Free Sublimation Designs and Color Test File
While this guide provides a comprehensive overview of sublimation printing, ongoing learning is encouraged. Stay tuned for more sublimation tutorials and feel free to ask questions in the Facebook group or tag #jennifermaker on social media.
Love,
 JenniferMaker.com
Explore further resources:
 Sublimation Supplies and Tools recommended by JenniferMaker](https://jennifermaker.com/sublimation-supplies/)