
The 3d Printer Benchy, affectionately known as the “Benchy boat,” is arguably the most recognized 3D model in the maker community. If you own a 3D printer, chances are you’ve already printed one. But is it just a cute little boat, or is there more to it? We’ll explore why the 3DBenchy is considered the ultimate calibration and benchmarking tool for your 3D printer and how to effectively use it to diagnose and improve your print quality.
Why the 3DBenchy is the Indispensable 3D Printer Test
Forget calibration cubes – the Benchy is a masterclass in efficient testing. This ingenious model achieves so much while using minimal material, making it far superior to single-purpose calibration prints. The beauty of the 3DBenchy lies in its comprehensive design. It doesn’t just assess one aspect of your printer’s performance; it challenges a multitude of parameters simultaneously.
One common misconception is that printing Benchies is wasteful. Let’s put that into perspective. A standard Benchy weighs roughly 13.5 grams. Printing it with PLA, a corn-derived plastic, results in approximately 60 grams of CO2 emissions, encompassing both material production and printer electricity usage. To illustrate how minimal this is, consider a quick acceleration in a gasoline car from 0 to 60 mph. This brief burst consumes about 80ml of gasoline, derived from fossil fuels, releasing around 250 grams of CO2. In essence, a few seconds of hard acceleration equates to the environmental impact of printing a 3DBenchy.
Furthermore, printing a Benchy is actually an act of preventing waste. By using this small test print to fine-tune your printer settings, you significantly reduce the risk of failed, larger prints due to unforeseen flaws. It’s a proactive approach that saves filament and frustration in the long run.
And let’s not forget, Benchies are more than just test pieces; they’re inherently decorative. They can populate your desk, serve as color swatches, or simply represent your 3D printing journey.
 3DBenchy bow section showing overhang
The true genius of the 3DBenchy as a test model is its ability to evaluate a wide spectrum of printer settings and their interconnected effects. When adjusting printer parameters, it’s easy to over-optimize for a single aspect. Most settings influence multiple print characteristics, creating a delicate balance. For example, increasing temperature (within reason) can boost part strength, but it might also introduce drooping bridges, stringing, and subpar top surfaces. Similarly, raising jerk and acceleration can smooth out ridges on curves but might also cause ringing and extruder control problems. Because the 3DBenchy incorporates diverse feature sizes, geometries, and intricate details, it inherently checks for unintended negative consequences across various printing aspects whenever you make adjustments.
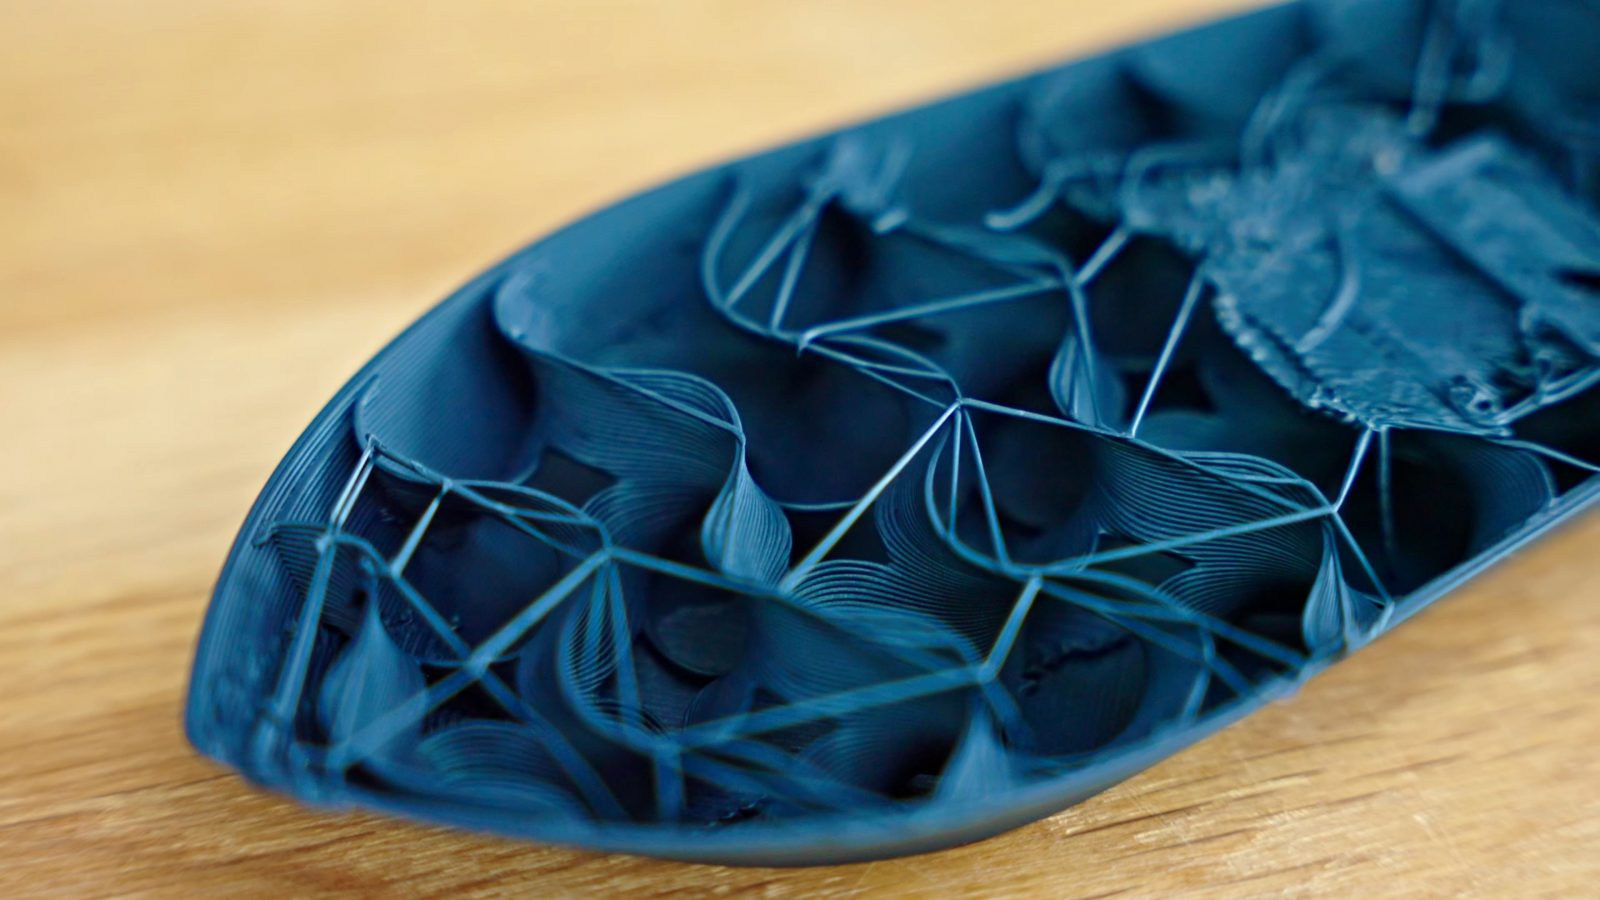
 3DBenchy hull section showing surface quality
The 3DBenchy is designed to be realistic. It avoids extreme challenges; there are no impossibly long bridges, details smaller than a standard nozzle, or excessively steep overhangs. This reflects the nature of typical 3D prints, which are often designed with 3D printing limitations in mind.
 3DBenchy chimney and deck area
However, the Benchy’s accessibility has also become a slight drawback as a “torture test.” When it was initially released, it served as a definitive benchmark, clearly distinguishing printer capabilities. Modern 3D printers have advanced significantly. Today, a commercially available printer should be able to produce a near-flawless 3DBenchy right out of the box. If a new printer struggles with this benchmark, it may indicate manufacturing shortcuts or even defects.
 3DBenchy overall view
Printing Your First 3D Benchy: Key Guidelines
Before diving into analyzing a printed Benchy, let’s establish the correct printing approach. Firstly, resist the urge to use specialized profiles or settings specifically for Benchy. Print it using your standard, everyday printing profile. If your default profile encounters issues with the 3DBenchy, these same issues will inevitably surface in other prints.
Secondly, maintain the Benchy’s original dimensions. Avoid scaling it up or down. While an enlarged Benchy printed with thick layers can be visually appealing, it loses its value as a benchmark.
 Large 3DBenchy example
Scaling alters the feature sizes, making some aspects easier and others harder to print, thus negating the ability to compare Benchies printed on different machines. The original Benchy size is intentionally small to ensure compatibility with virtually any 3D printer, a crucial aspect of its design.
 Standard size 3DBenchy
 Size comparison of Benchys
Decoding Your 3D Benchy: Essential Features to Evaluate
Let’s examine the key features of a 3DBenchy and what they reveal about your printer’s performance and slicer settings. We’ll begin with the most immediately noticeable issues.
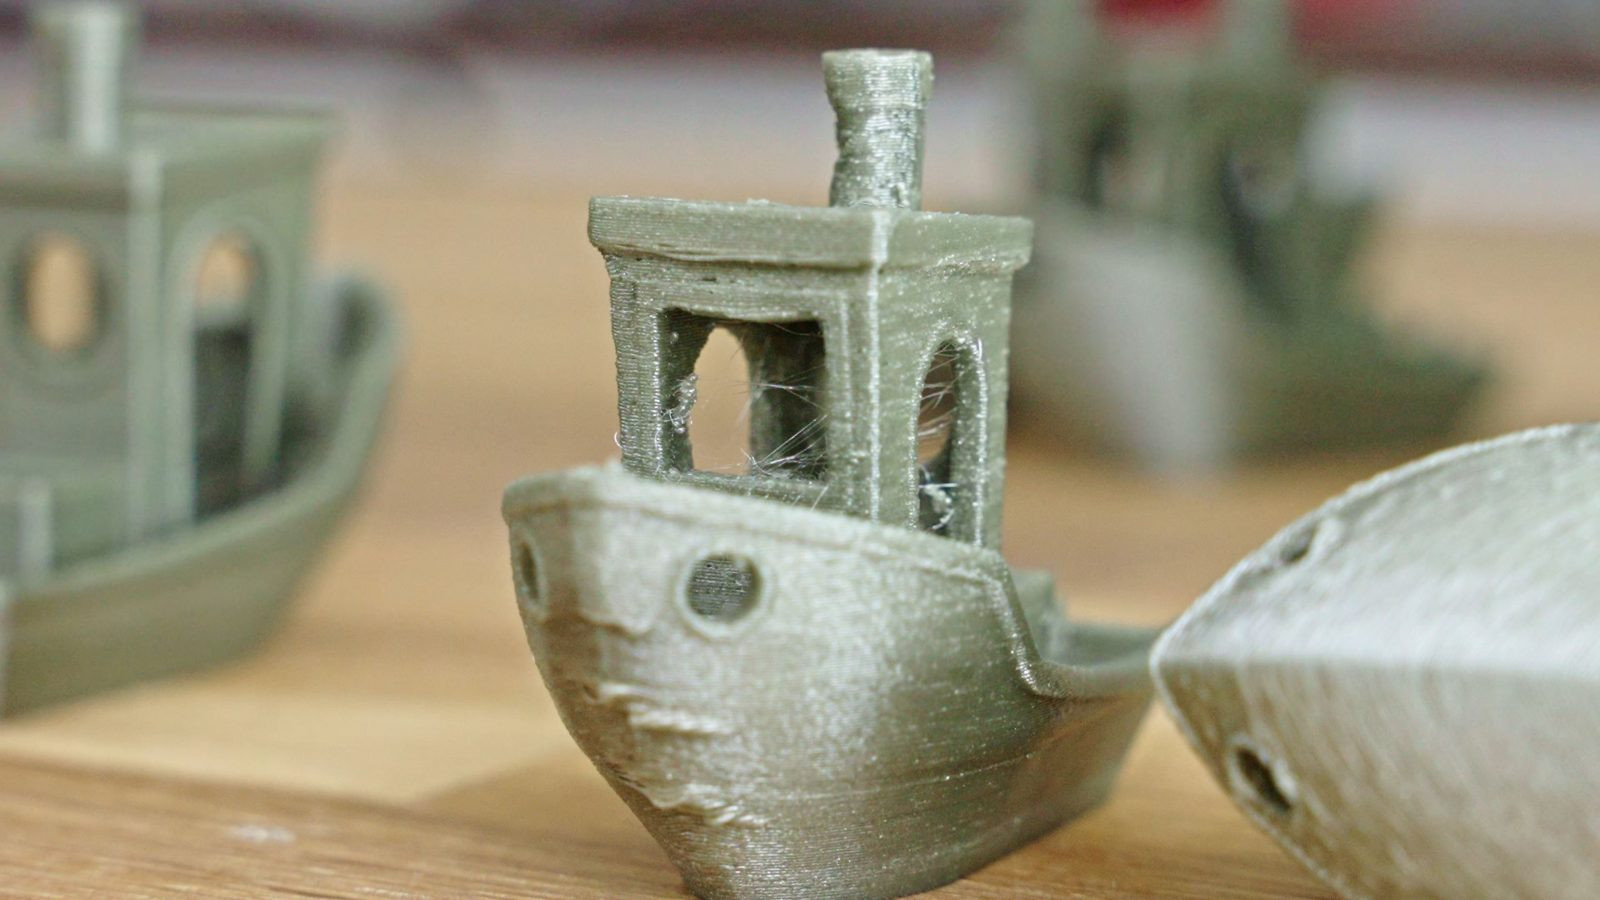
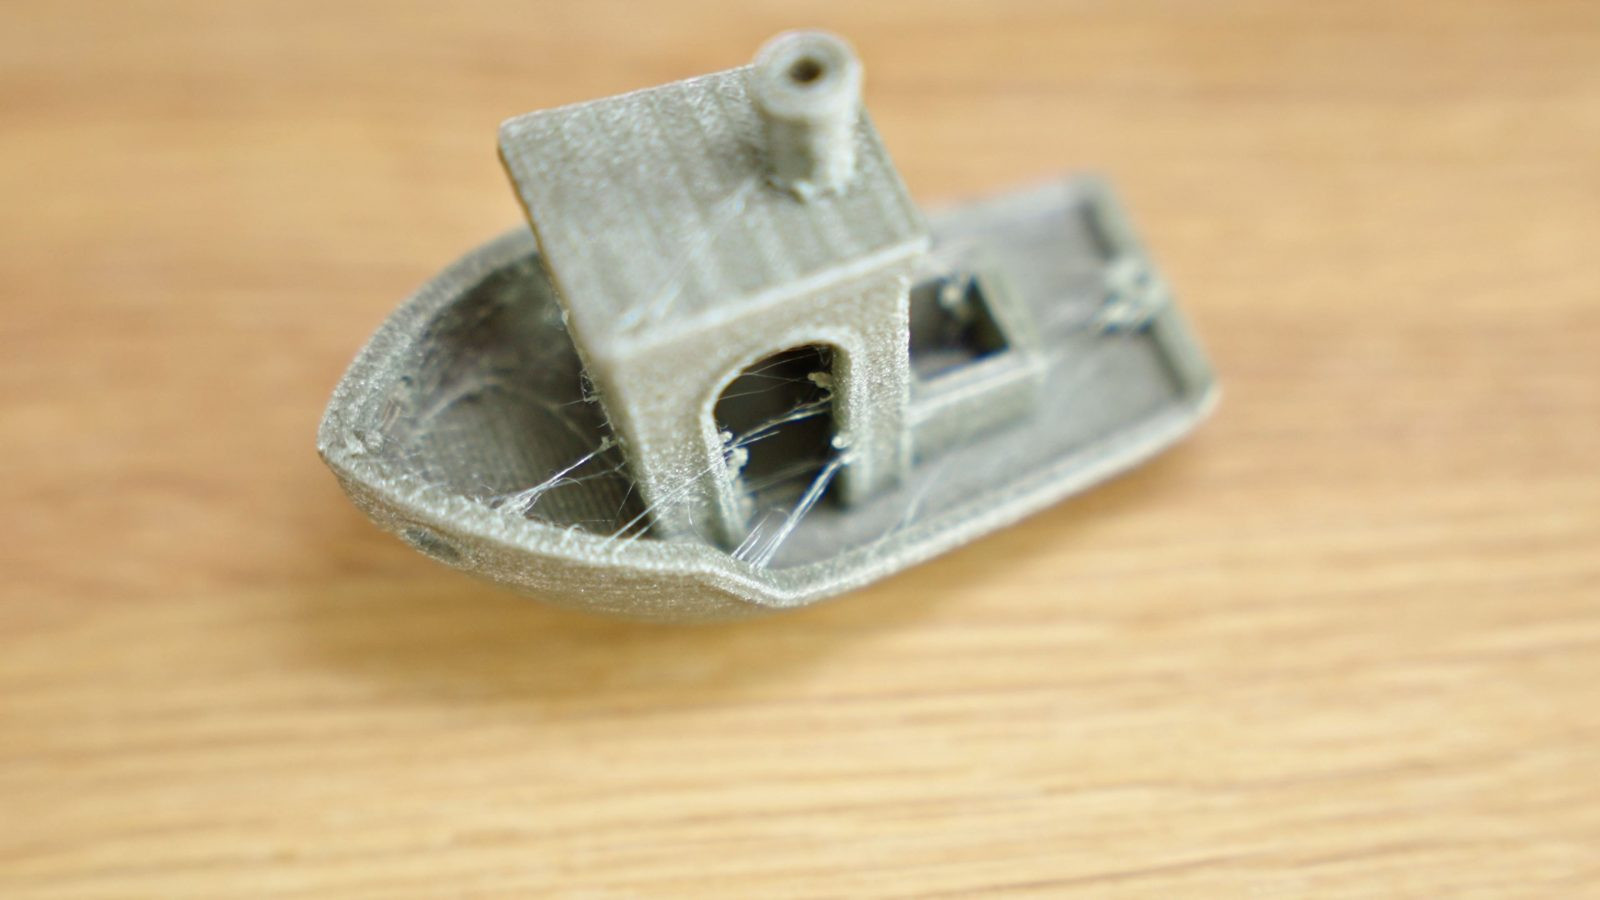
Address fundamental problems first. If your Benchy exhibits warping, excessive stringing, holes in the hull, or layer shifting, tackle these basic issues before moving to nuanced evaluations. A Benchy with significant flaws cannot accurately represent the finer aspects of print quality. Holes in the perimeter suggest extruder or hotend problems. Warping or bed detachment points to incorrect nozzle distance or inadequate bed adhesion. Excessive stringing often indicates moist filament or printing at excessively high temperatures. Once these primary issues are resolved, you can proceed to fine-tune your print profiles for optimal results.
Visual Cues: Bow, Surface, Backlash, and Corners
The first four aspects to assess are visually apparent and don’t require measuring tools. However, the 3DBenchy offers ample opportunities for precise measurements, potentially replacing calibration cubes entirely, which we’ll discuss later.
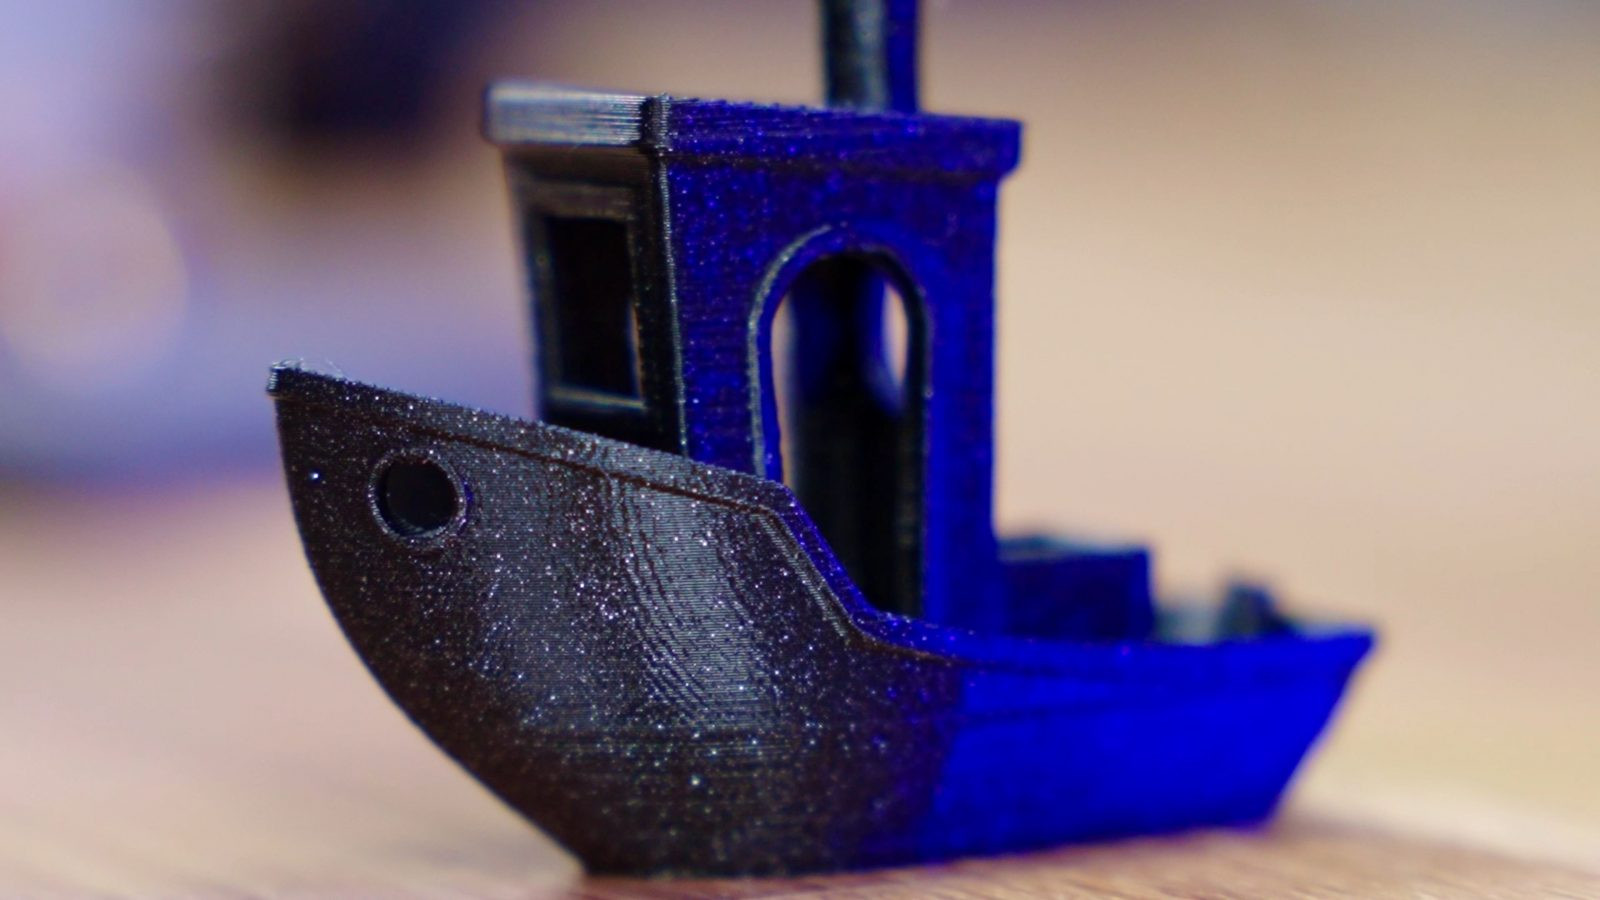
First, examine the bow. This section features a 40° overhang, presenting a moderate challenge. A well-printed Benchy should have a smooth, consistent bow.
If you notice a slight inward curve at the bottom of the bow, it often indicates that your bed temperature is too high. The lower layers haven’t sufficiently solidified to resist the pulling forces from subsequent layers.
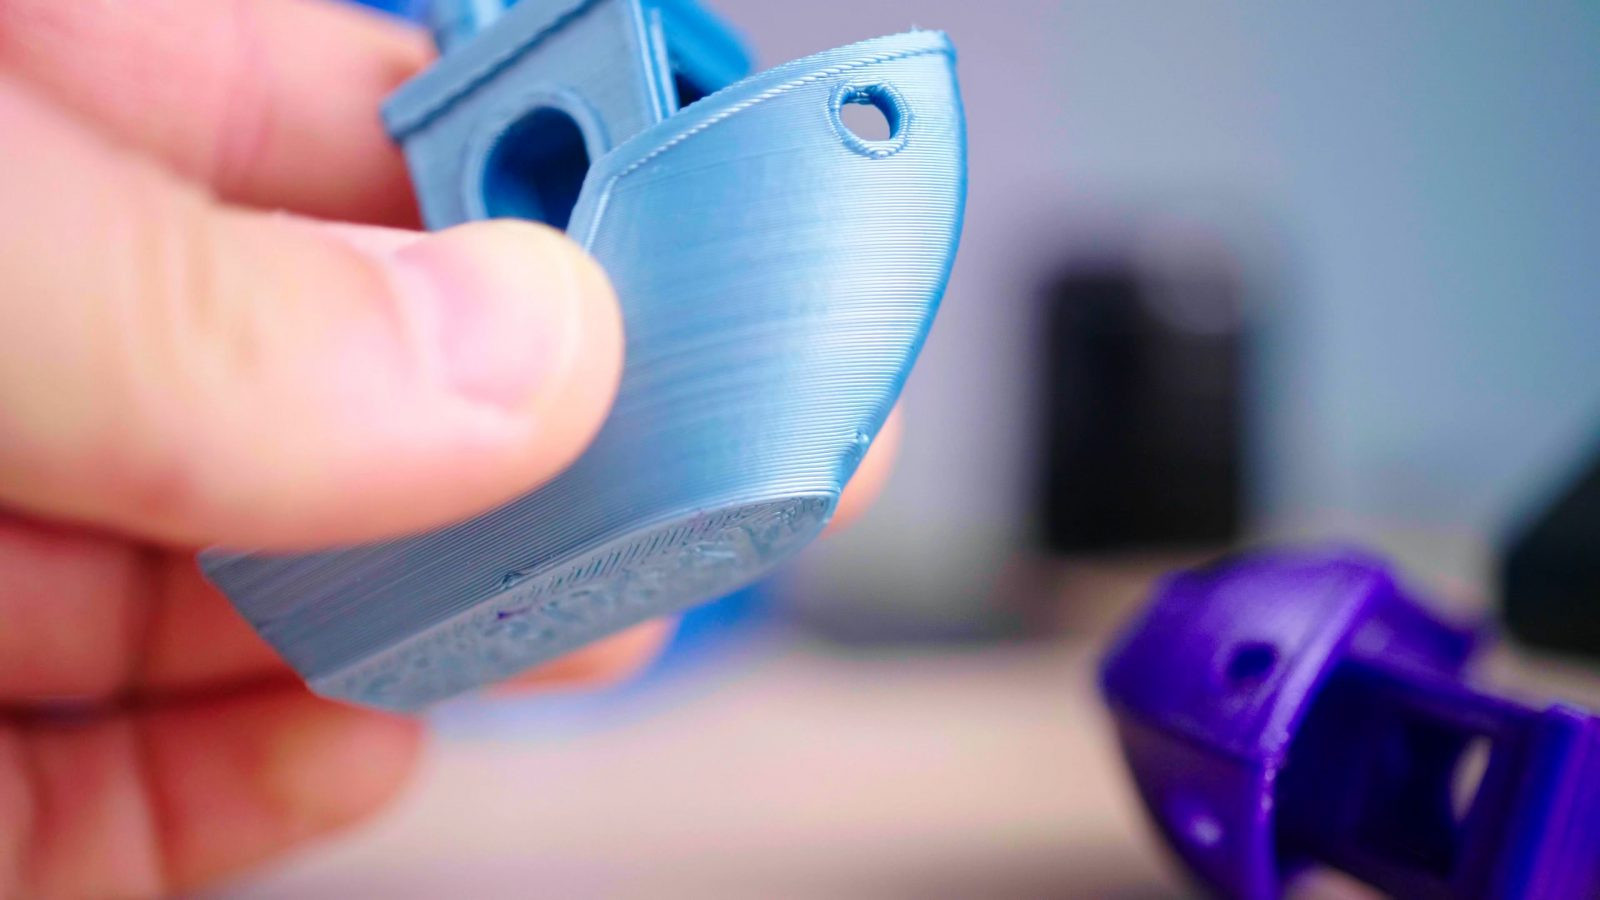 3DBenchy bow – bottom kick-in
More pronounced crimping higher up on the bow indicates more significant issues, likely stemming from printing at excessively high temperatures or insufficient/uneven part cooling fan performance. Another temperature-related indicator is the chimney. If it prints as a melted blob rather than crisp and sharp, it suggests temperatures are too high, cooling is inadequate, or the minimum layer time is too short.
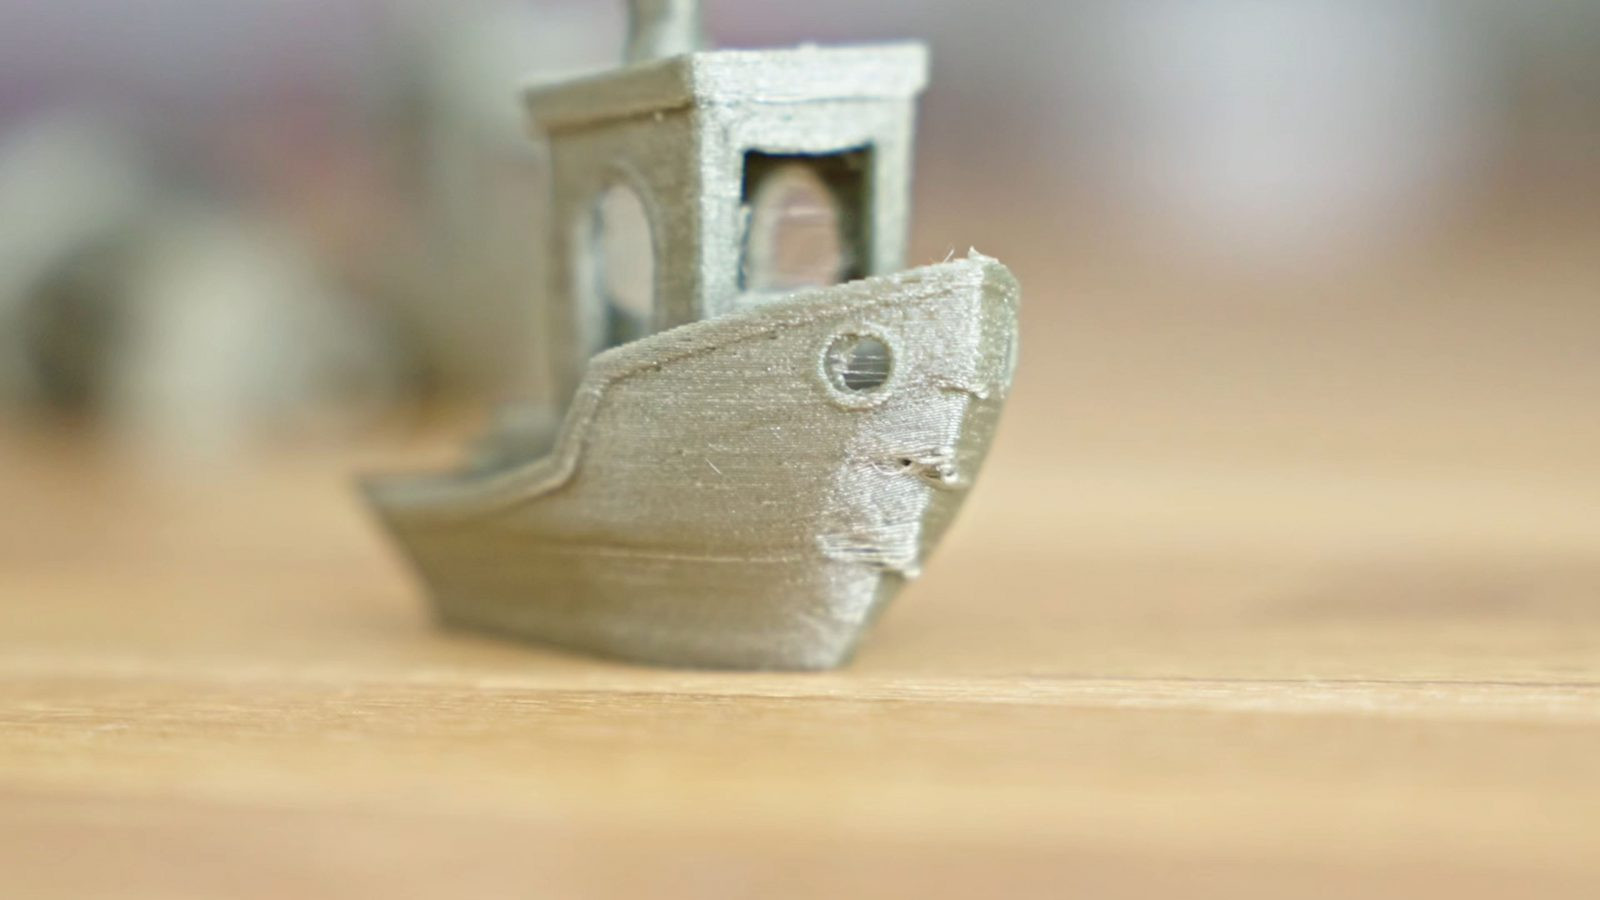 3DBenchy bow – crimping higher up
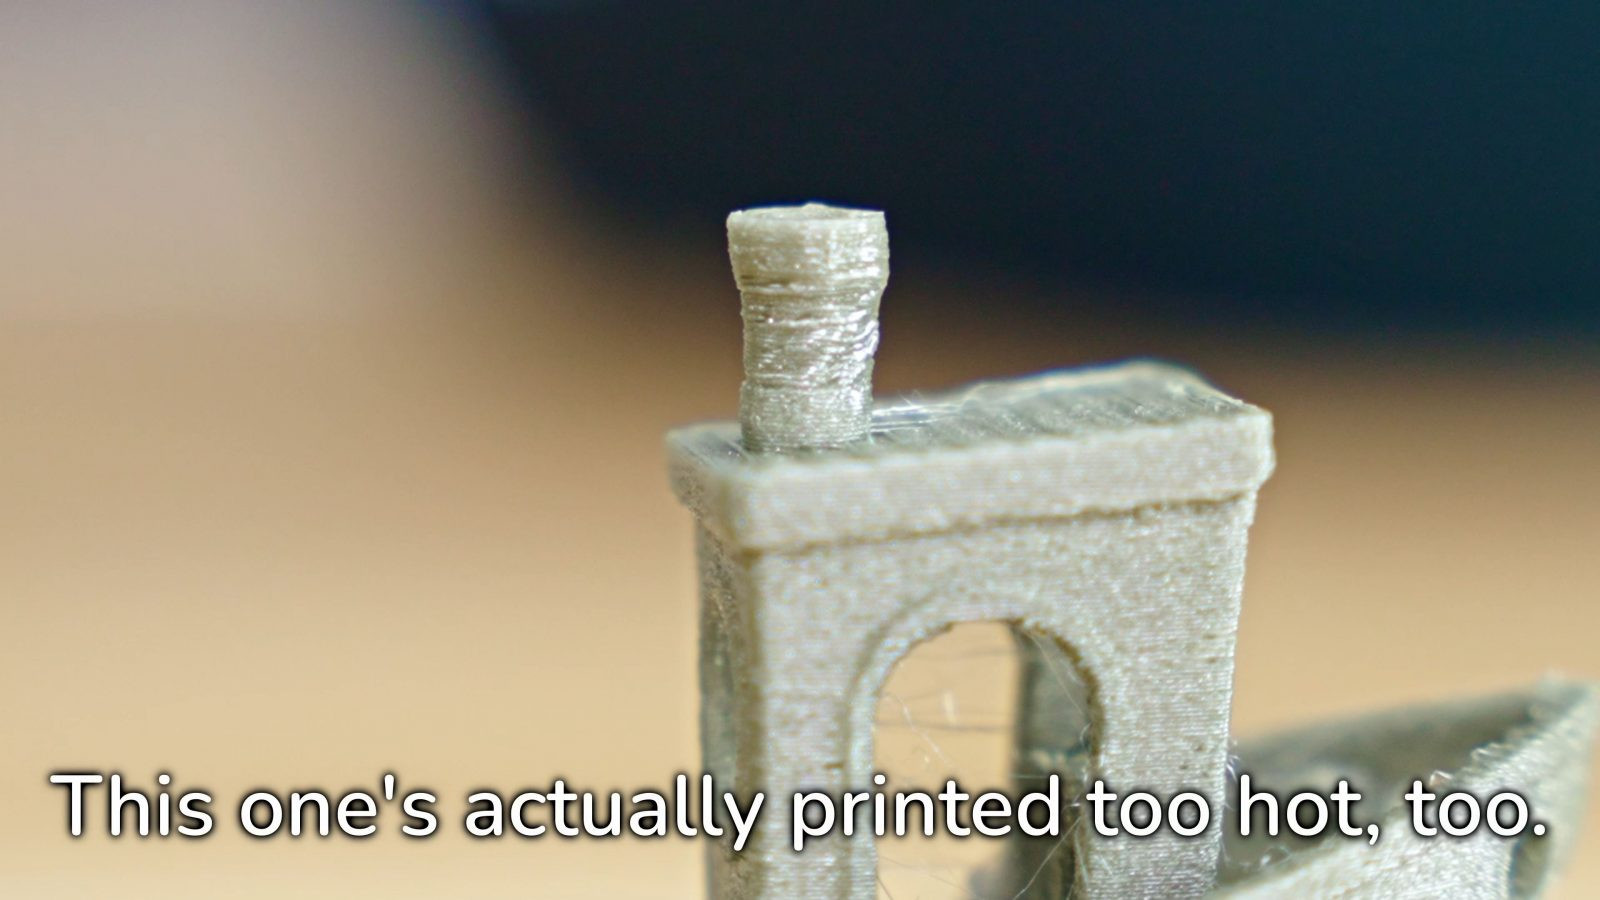 3DBenchy chimney – melted blob
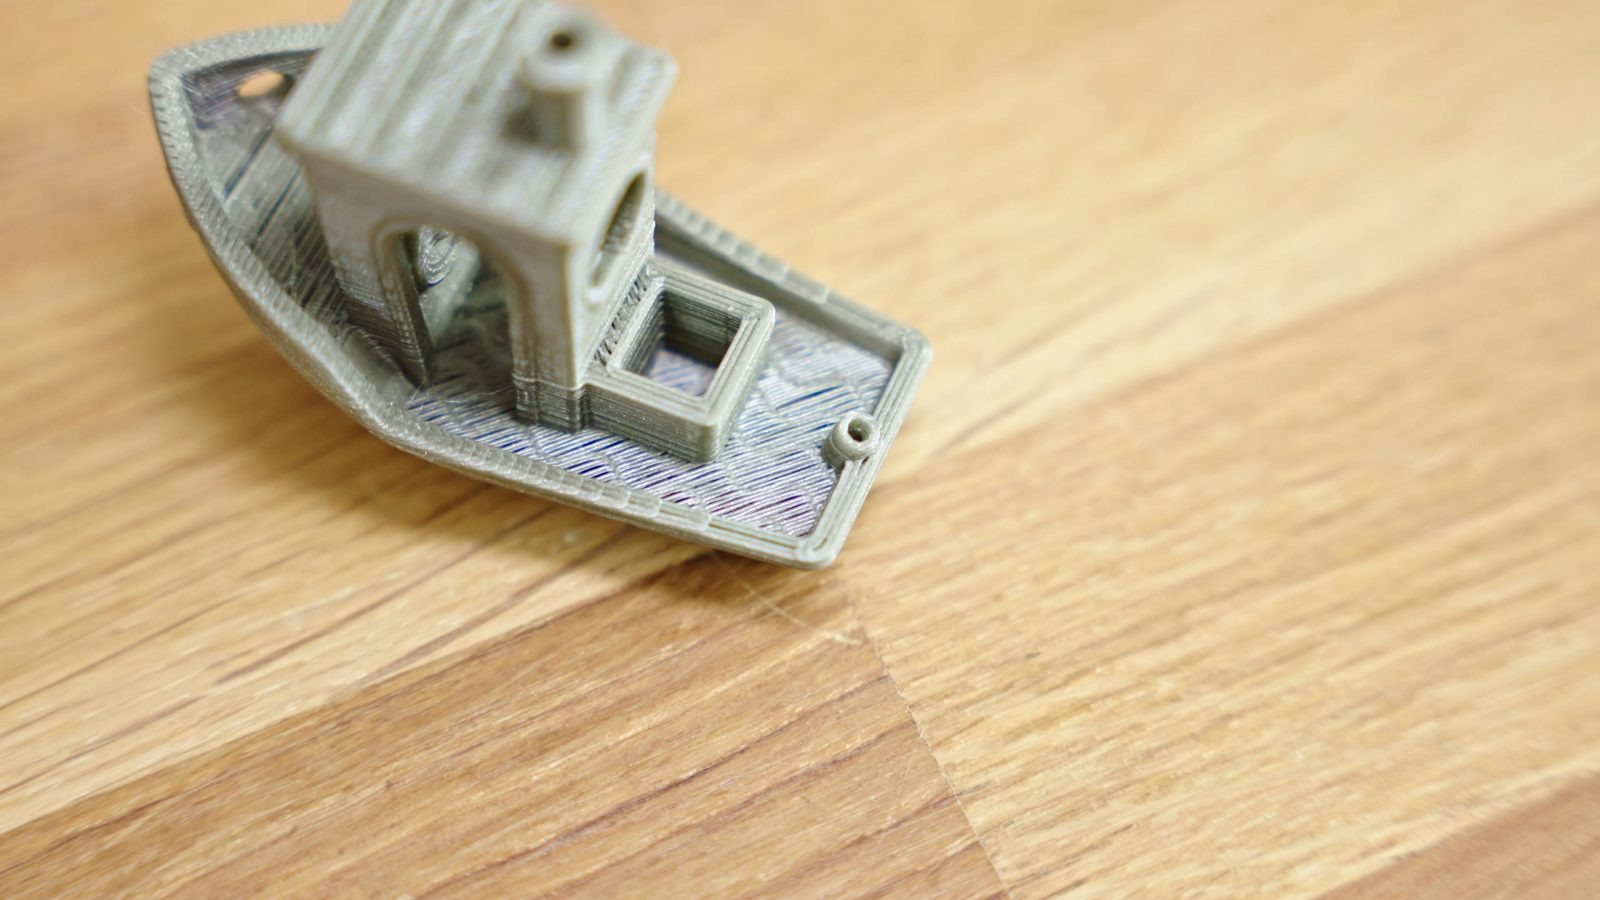
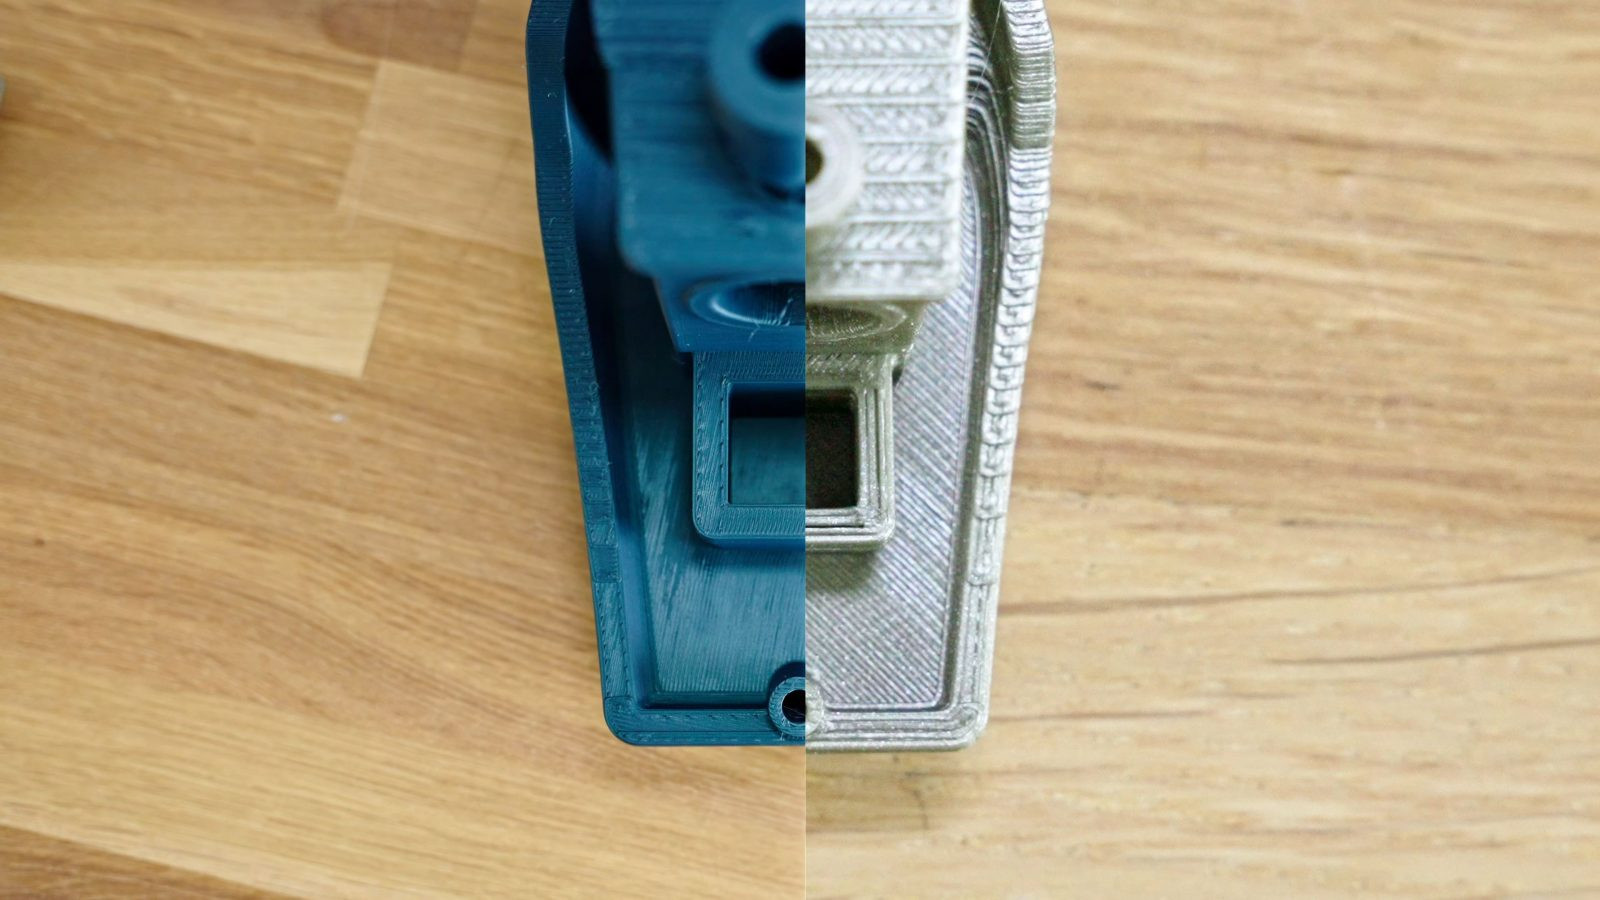
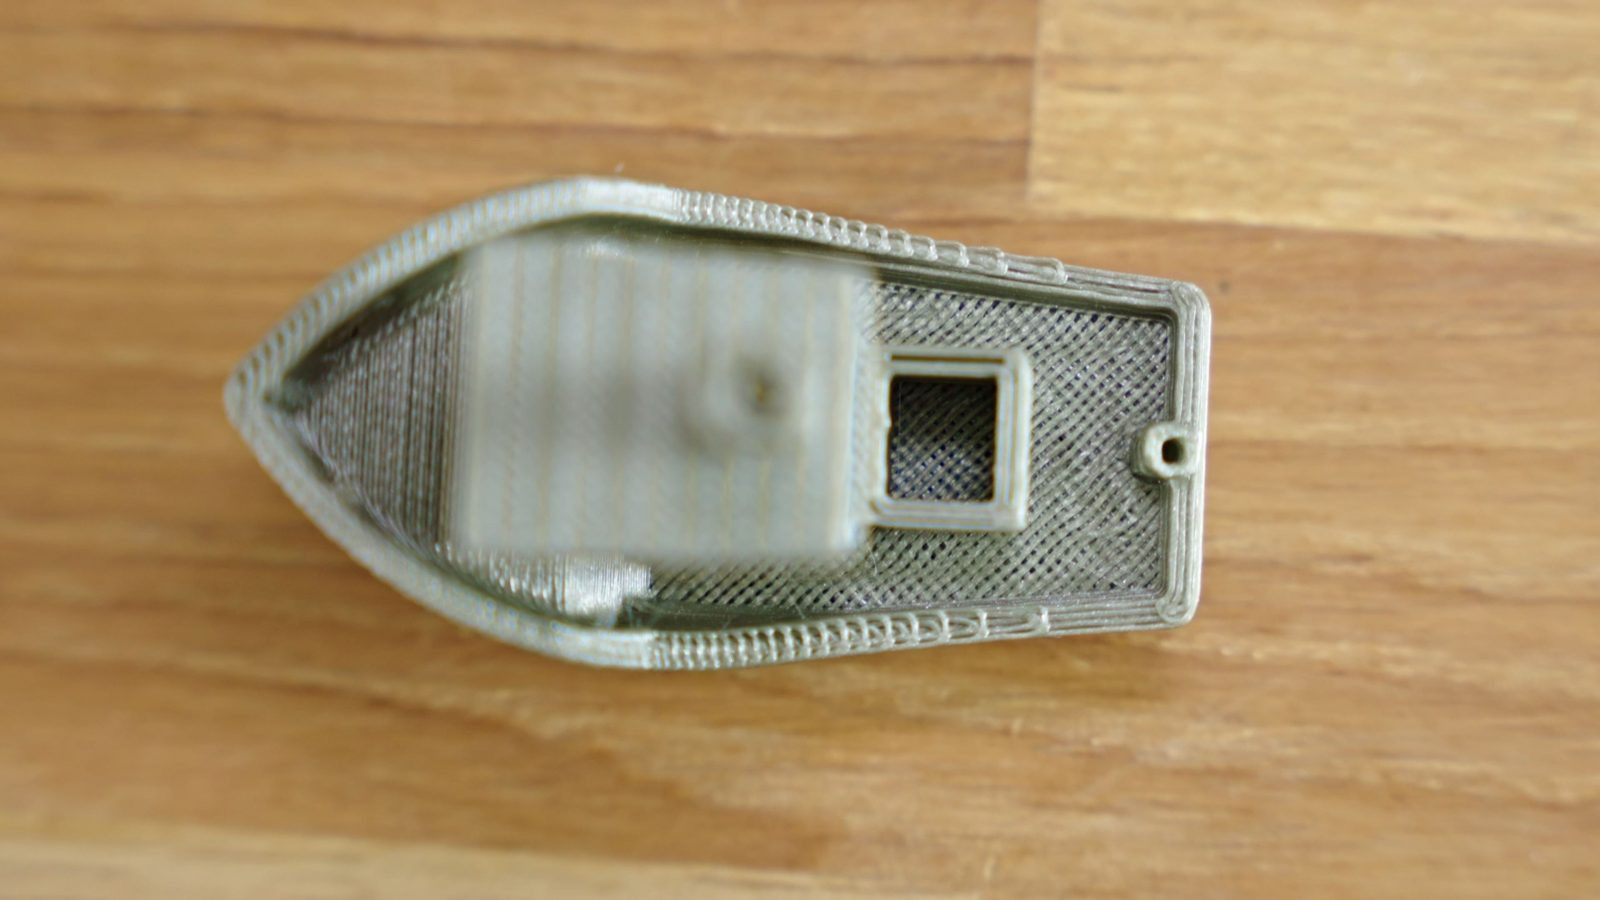
Second, assess the quality of the top surfaces, specifically the deck area. If you can see the infill pattern through the top layer, it suggests either too few top solid layers for your infill percentage (lower infill requires more top layers to bridge cleanly) or, again, printing at too high a temperature.
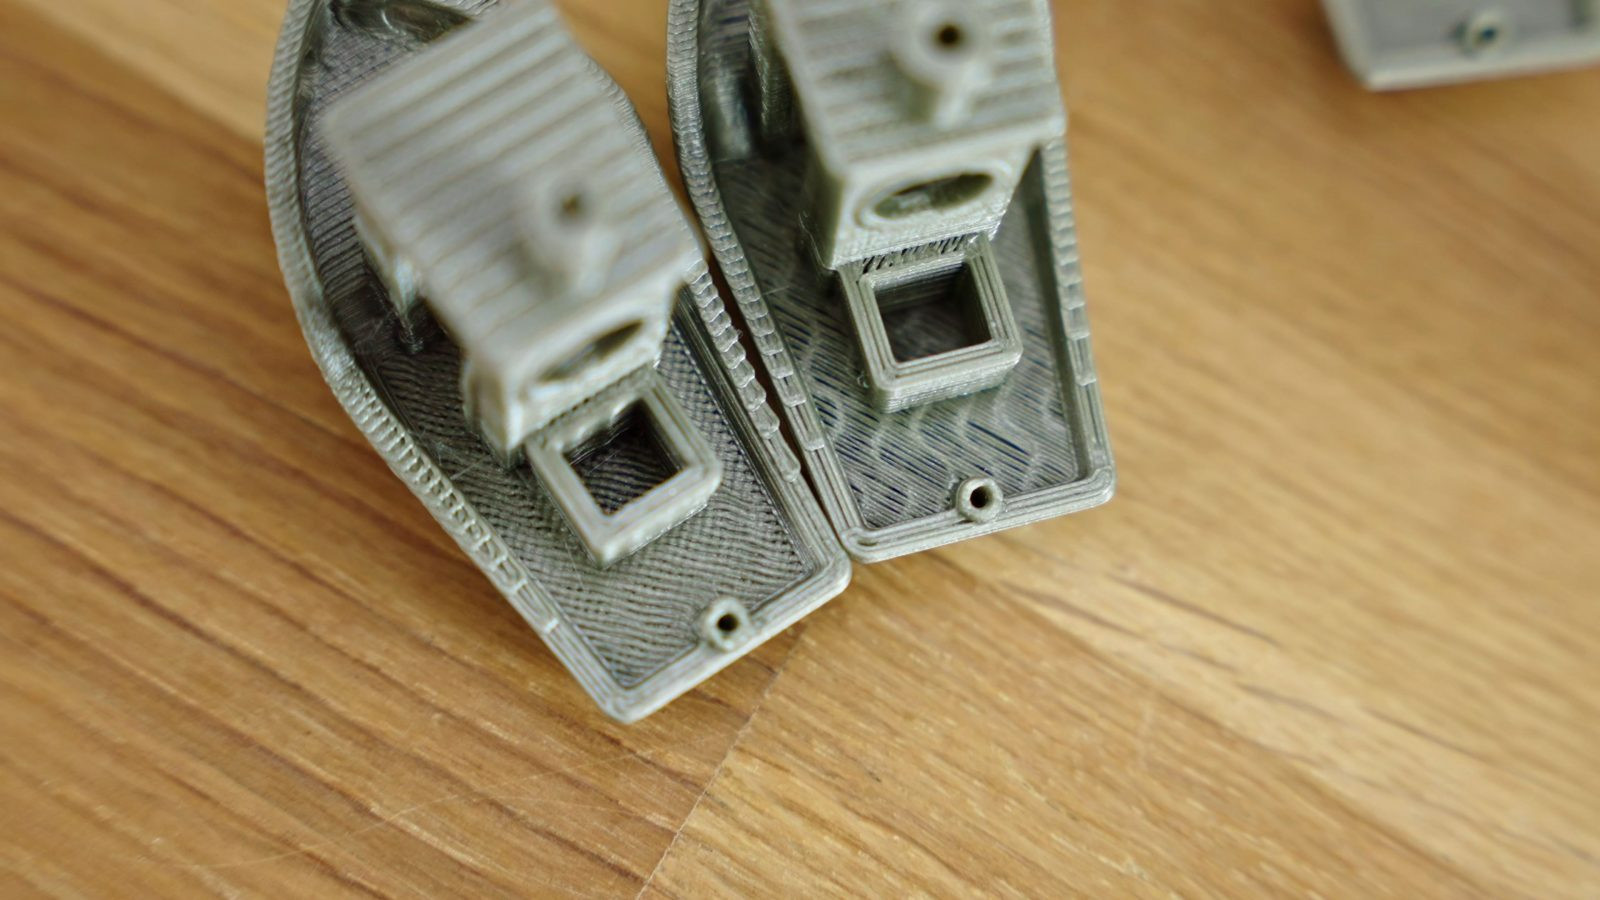 3DBenchy deck – infill showing through
When printing top surfaces over infill, the printer is effectively bridging short gaps. If the nozzle temperature is too high, the filament tends to sag or droop into these gaps as it’s printed.
 3DBenchy deck – drooping top surface
If the deck is well-bridged and flat but exhibits gaps between individual infill lines, it could indicate underextrusion. However, it also leads us to the third visual check:
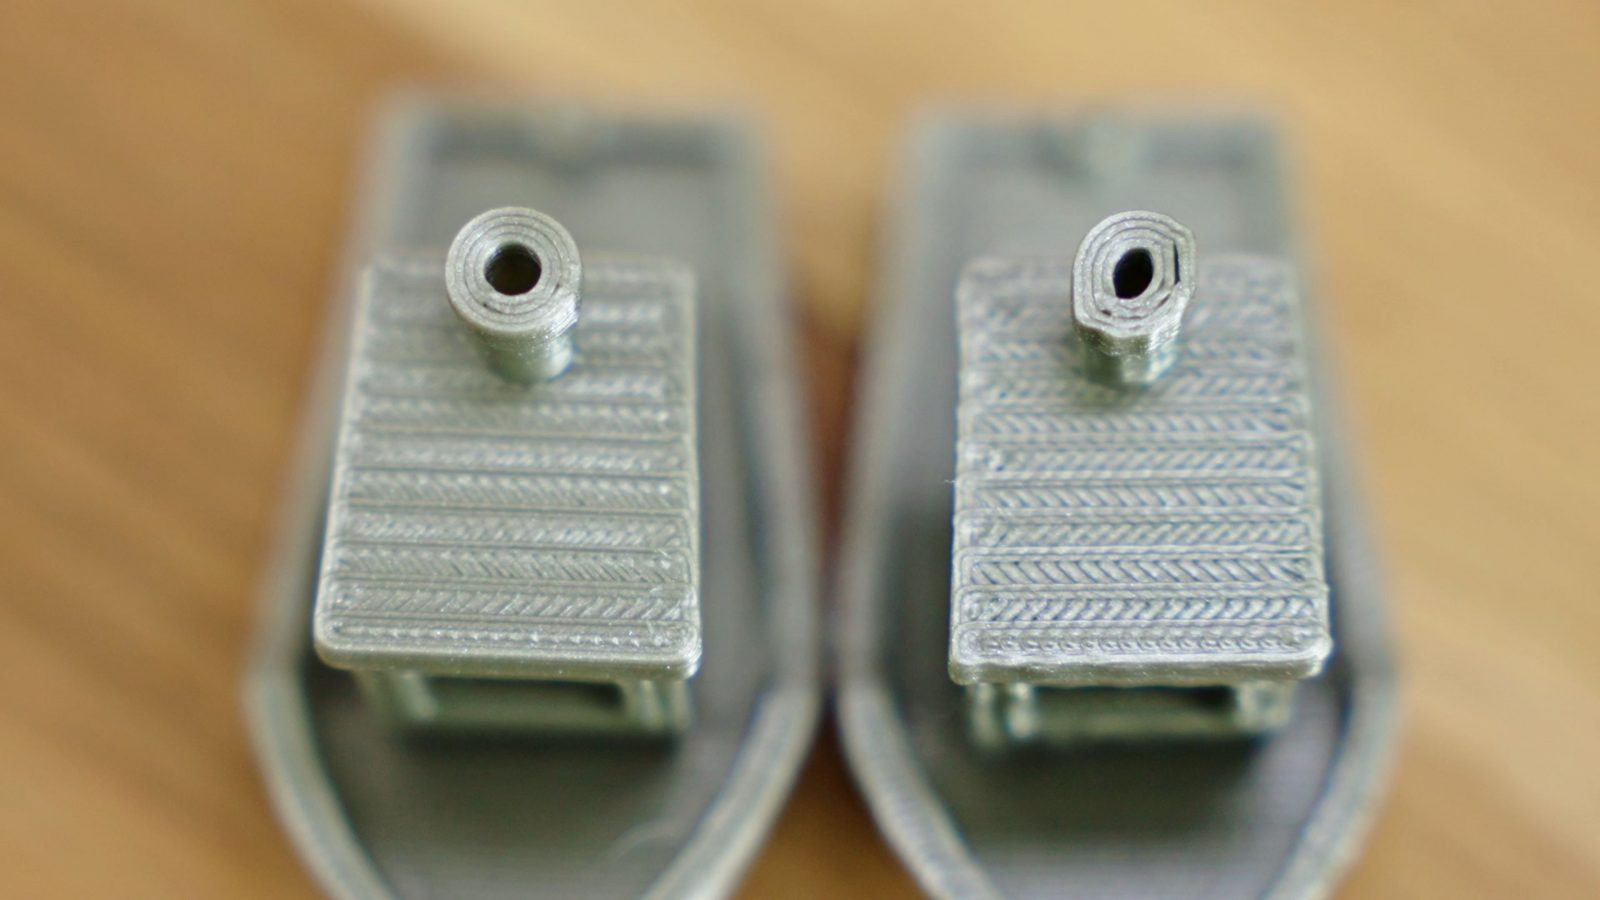
Third, examine backlash. Gaps in the top infill can be a sign of backlash. Other indicators include gaps between infill and perimeters, but the most prominent sign is often the chimney.
 3DBenchy chimney – deformed due to backlash
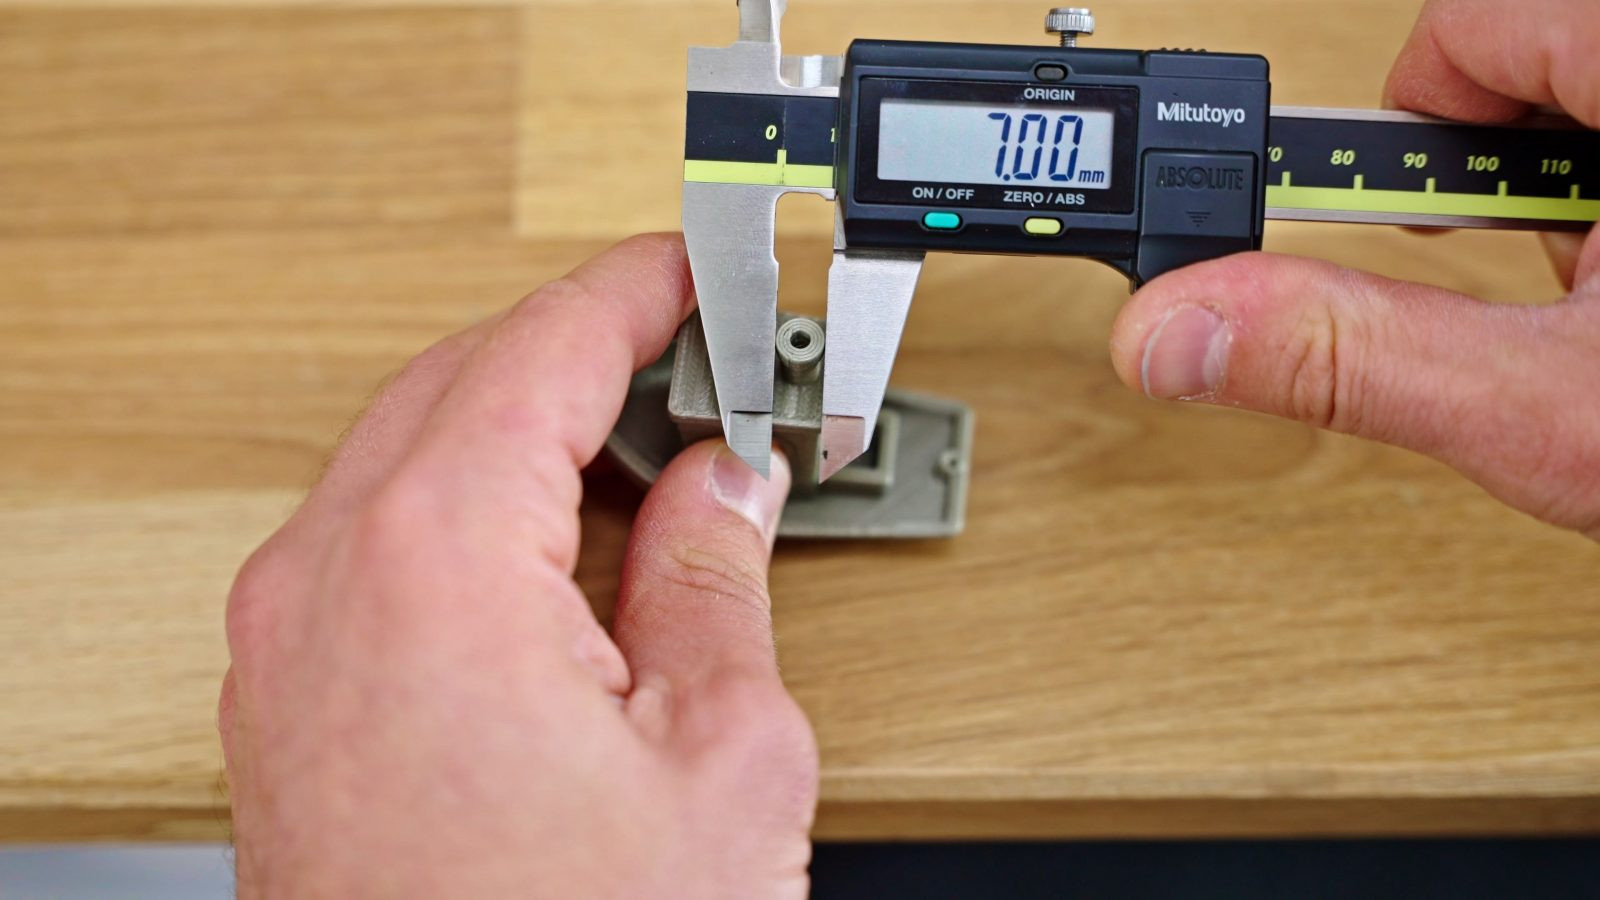
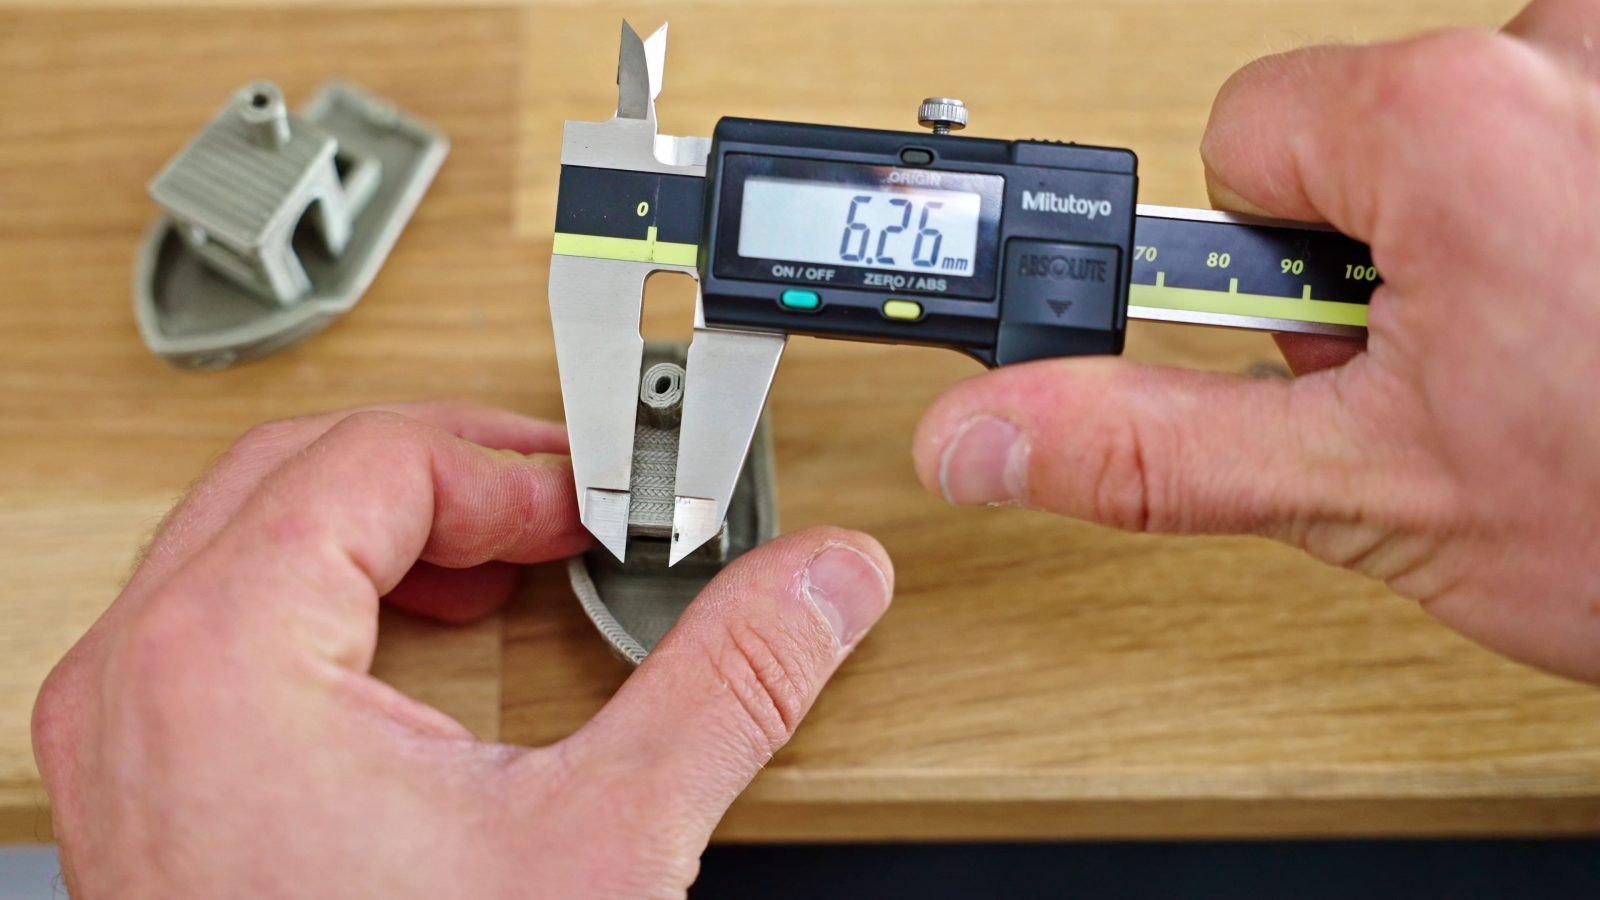
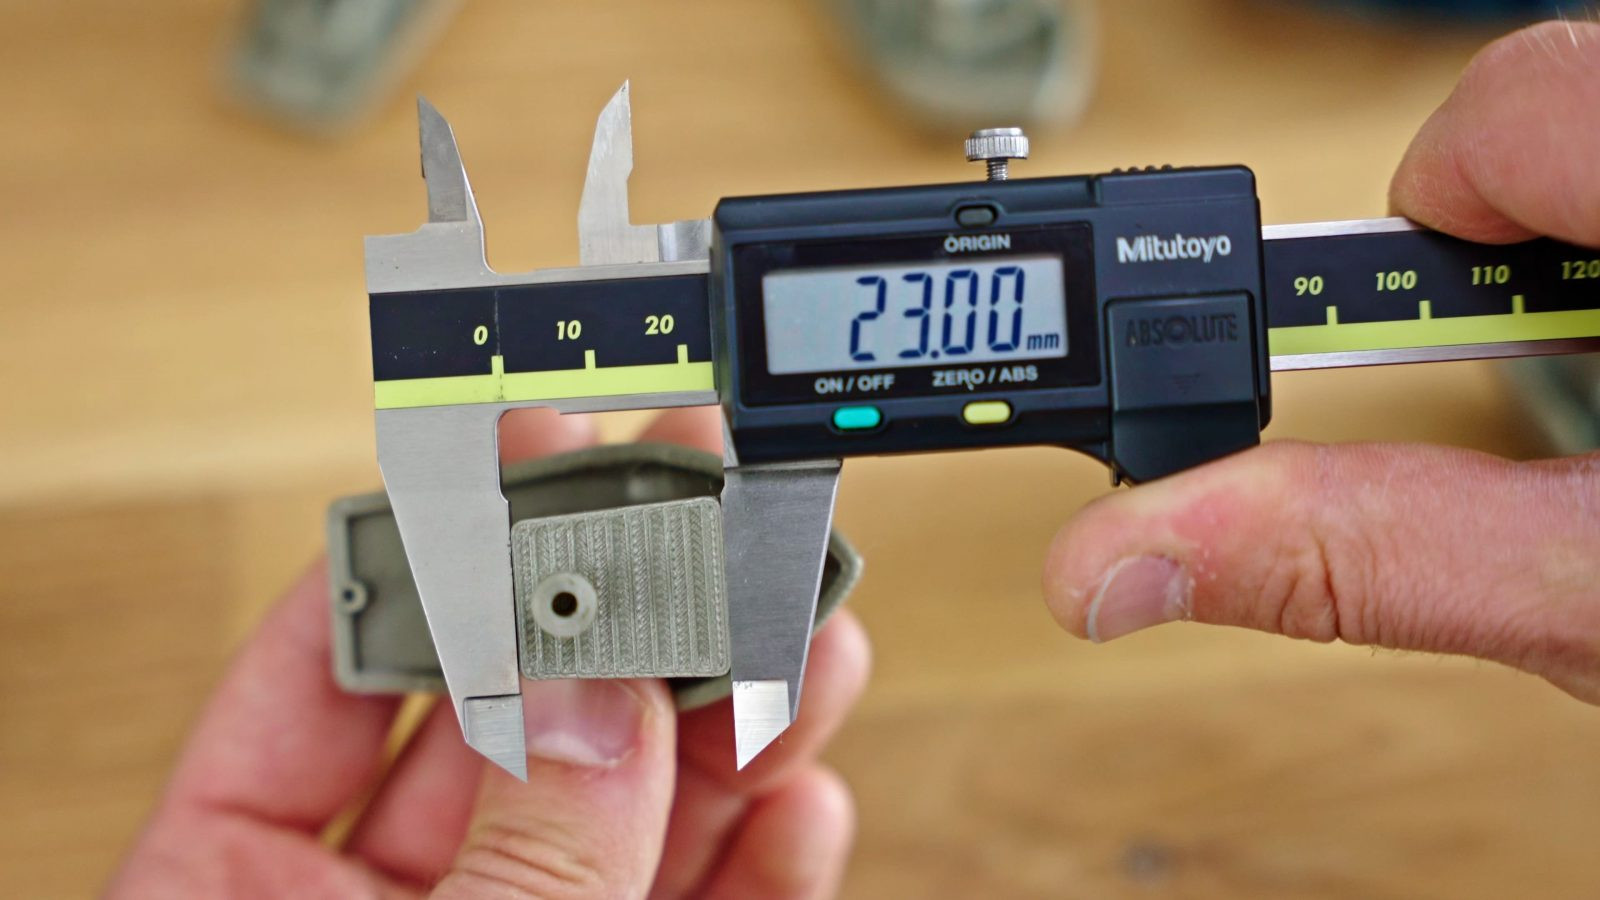
The chimney should be perfectly round. If backlash exists in one axis of your printer, the chimney will deform, becoming more oval or “coffee bean” shaped. The nominal diameter of the chimney top is 7mm. If one dimension is significantly shorter than the other, the corresponding axis likely has backlash.
 3DBenchy chimney – measuring oval shape
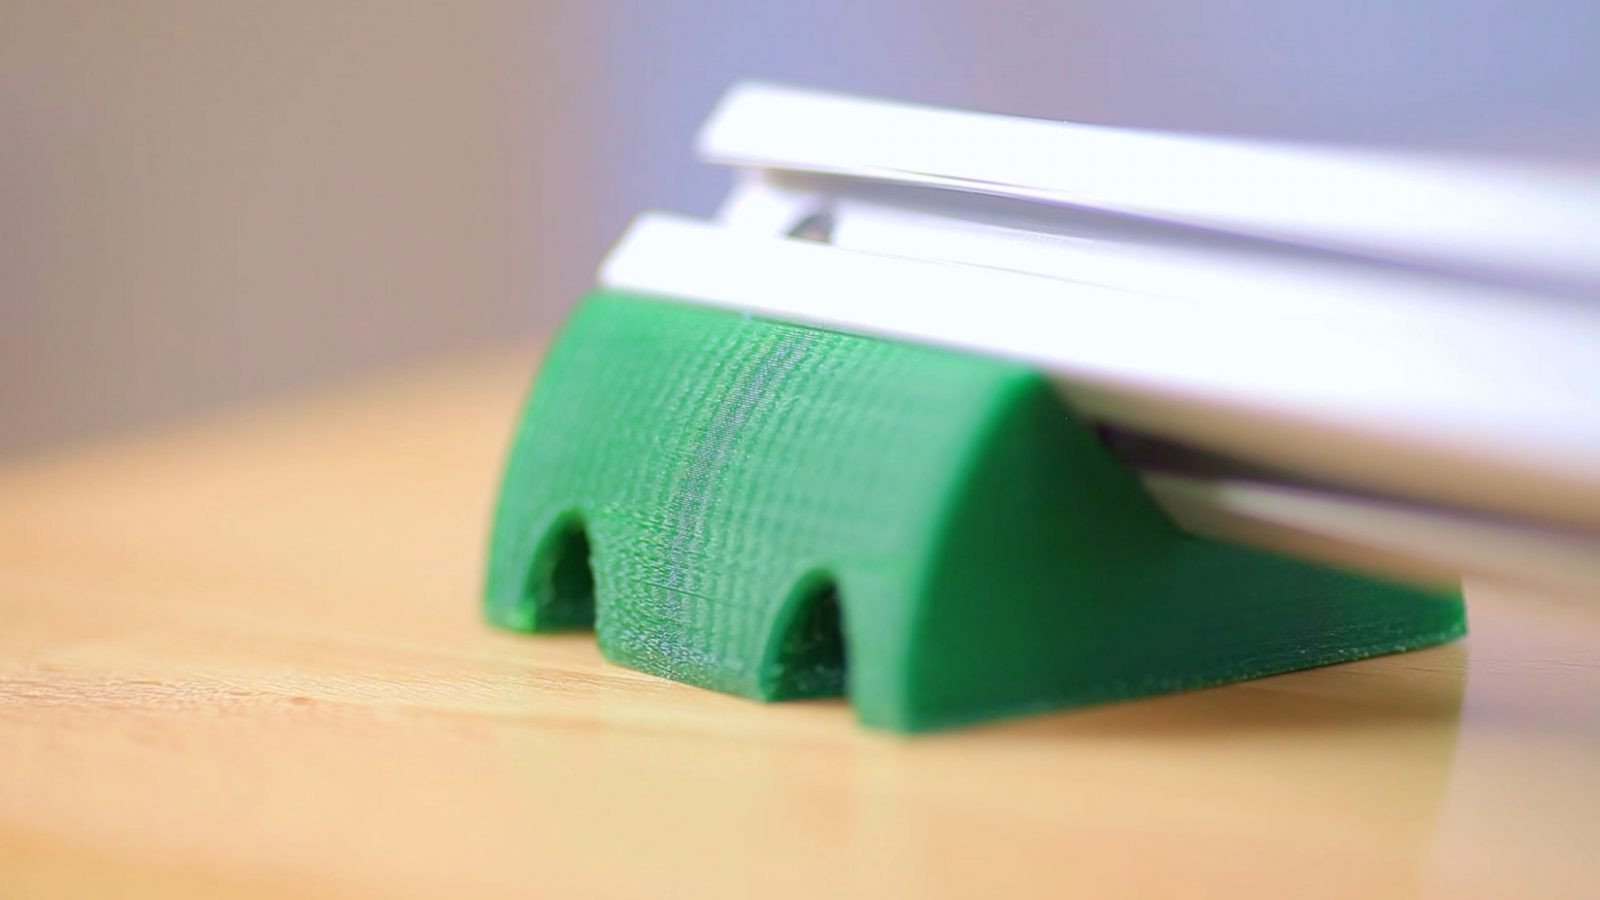
 Printer with loose belt causing backlash
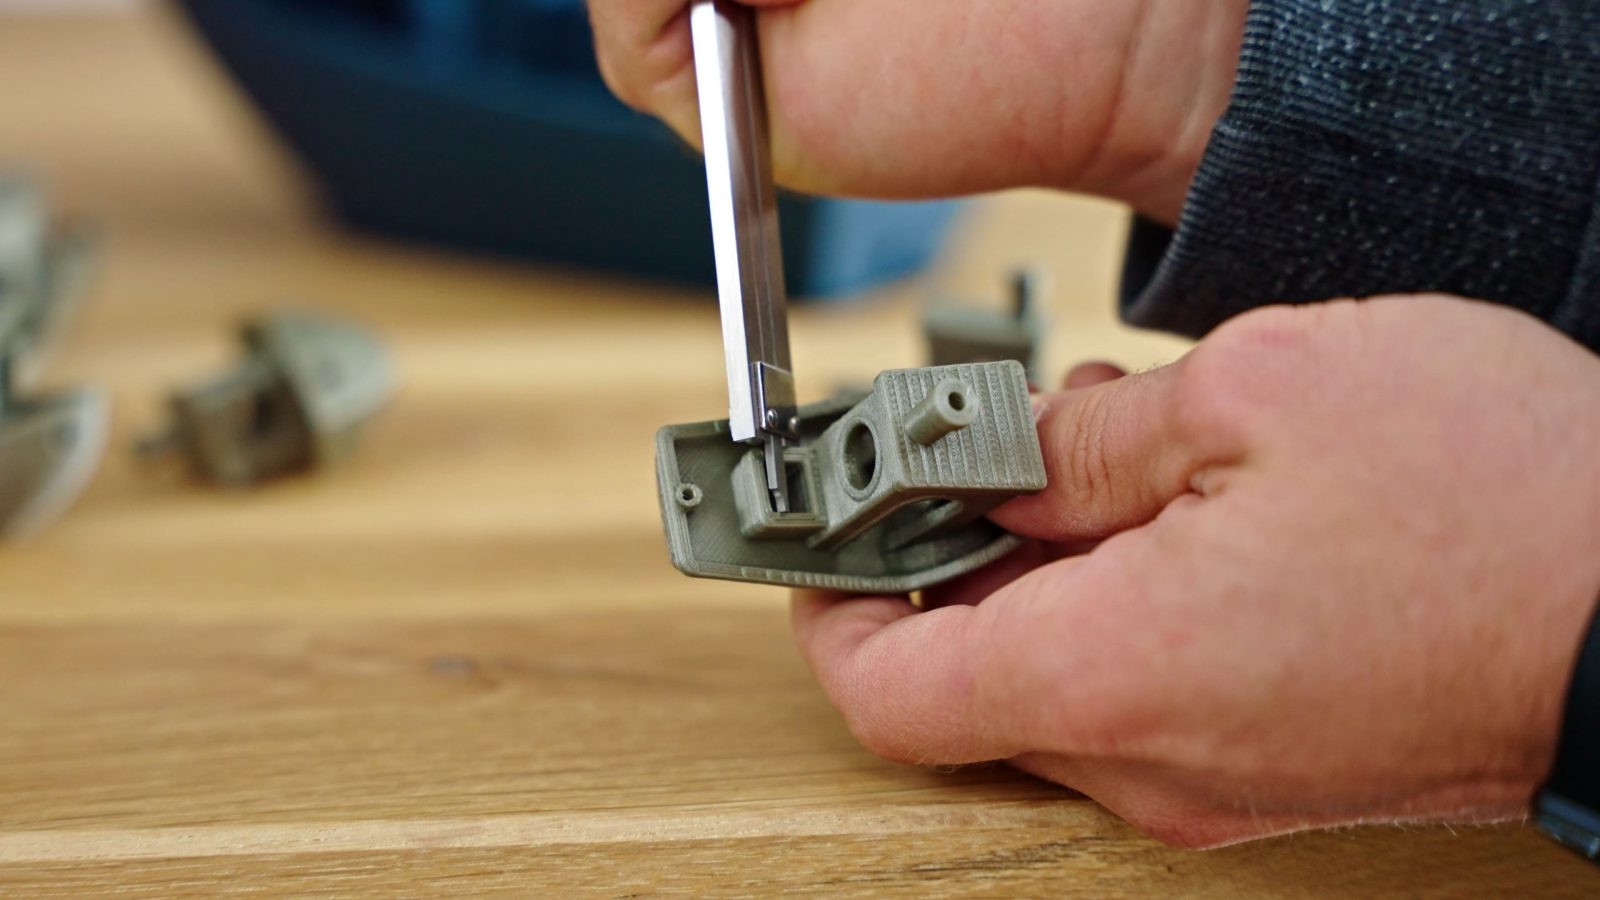
These print quality issues can be reproduced on a Prusa Mini by intentionally mis-slicing or, in this case, loosening the Y-axis belt to induce noticeable play.
 3DBenchy printed with backlash issue
Fourth, look for ringing at corners and, conversely, loss of detail in corners. Ringing is most apparent at the bow, where the printer performs rapid, small movements to create the ridge. This section is highly susceptible to exciting resonances in the motion system. The bow itself, being a large, smooth surface, then clearly displays these ringing artifacts.
 3DBenchy bow – ringing example
Ringing is influenced by printing speed and jerk, the elasticity of the motion system, and the level of damping. Printers with long, flexible rubber belts are more prone to ringing than those with shorter belt paths and higher-quality belts like Gates belts. However, excessively soft and dampened motion systems can lead to rounded corners, though this is generally less noticeable than ringing. While often a visual imperfection, severe ringing can impact print accuracy.
 3DBenchy corner – rounded corner example
The Benchy includes features to assess overhang performance, but it’s not its strongest point. Modern printers excel at overhangs, making the Benchy less challenging in this area. Dedicated overhang test prints are more effective for rigorous evaluation.
Dimensional Accuracy: Measuring Your 3D Benchy
Beyond visual inspection, the 3DBenchy allows for dimensional checks. Every feature has a specified nominal dimension, detailed on the 3DBenchy website.
 3DBenchy dimensions measurement
However, interpreting dimensional measurements on printed models requires understanding two factors. The first is mechanical inaccuracy – when you instruct your printer to move 70mm, it might actually move slightly less or more. Correcting for this is often mistakenly called “calibration,” where adjustments are made to the printer’s movement to achieve precise 70mm dimensions. However, for small features like a 10mm cube, measurements primarily reflect material behavior – how much the plastic expands or contracts in the XY plane due to the printing process itself. This “bloating” or “shrinking” is distinct from overall printer scaling inaccuracies. Correcting scaling based on small features can lead to inaccurate dimensions in larger prints.
For accurate scaling calibration, it’s recommended to print the largest possible scale checker. Calibration sticks, as demonstrated in a previous video, are a good approach. Once overall scaling is accurate, fine-tune the “bloat” effect using the XY offset setting in your slicer. Drastic adjustments in either scaling or XY offset often point to underlying mechanical issues that should be addressed first.
When measuring a 3DBenchy, always measure between surfaces facing the same direction. This minimizes the impact of “bloat,” as it affects both surfaces equally and cancels out in the measurement. For example, measure the 32.5mm distance between the chimney tip and the deck, or the 10mm width of the box sections.
 3DBenchy measuring chimney to deck
 3DBenchy measuring box width
Measuring the overall 12mm box width largely reflects the contour correction needed to achieve dimensional accuracy. For detailed nominal dimensions, consult the official 3DBenchy website.
3DBenchy Limitations: When to Go Beyond
While invaluable, the 3DBenchy has limitations. For a comprehensive printer assessment, consider these aspects that it doesn’t fully address:
Dimensional accuracy assessment is better served by larger calibration tools for overall scaling. The Benchy is more effective at highlighting issues when correcting dimensions based on small features, which can distort larger print accuracy.
Vertical build height issues, such as Z-wobble, particularly at mid or upper Z-axis travel, are not readily revealed by the Benchy due to its limited height.
Small feature resolution, critical for resin printers or differentiating nozzle sizes (0.4mm vs. 0.6mm) or slicing engine advancements (like Ultimaker Arachne), are not thoroughly tested by the Benchy.
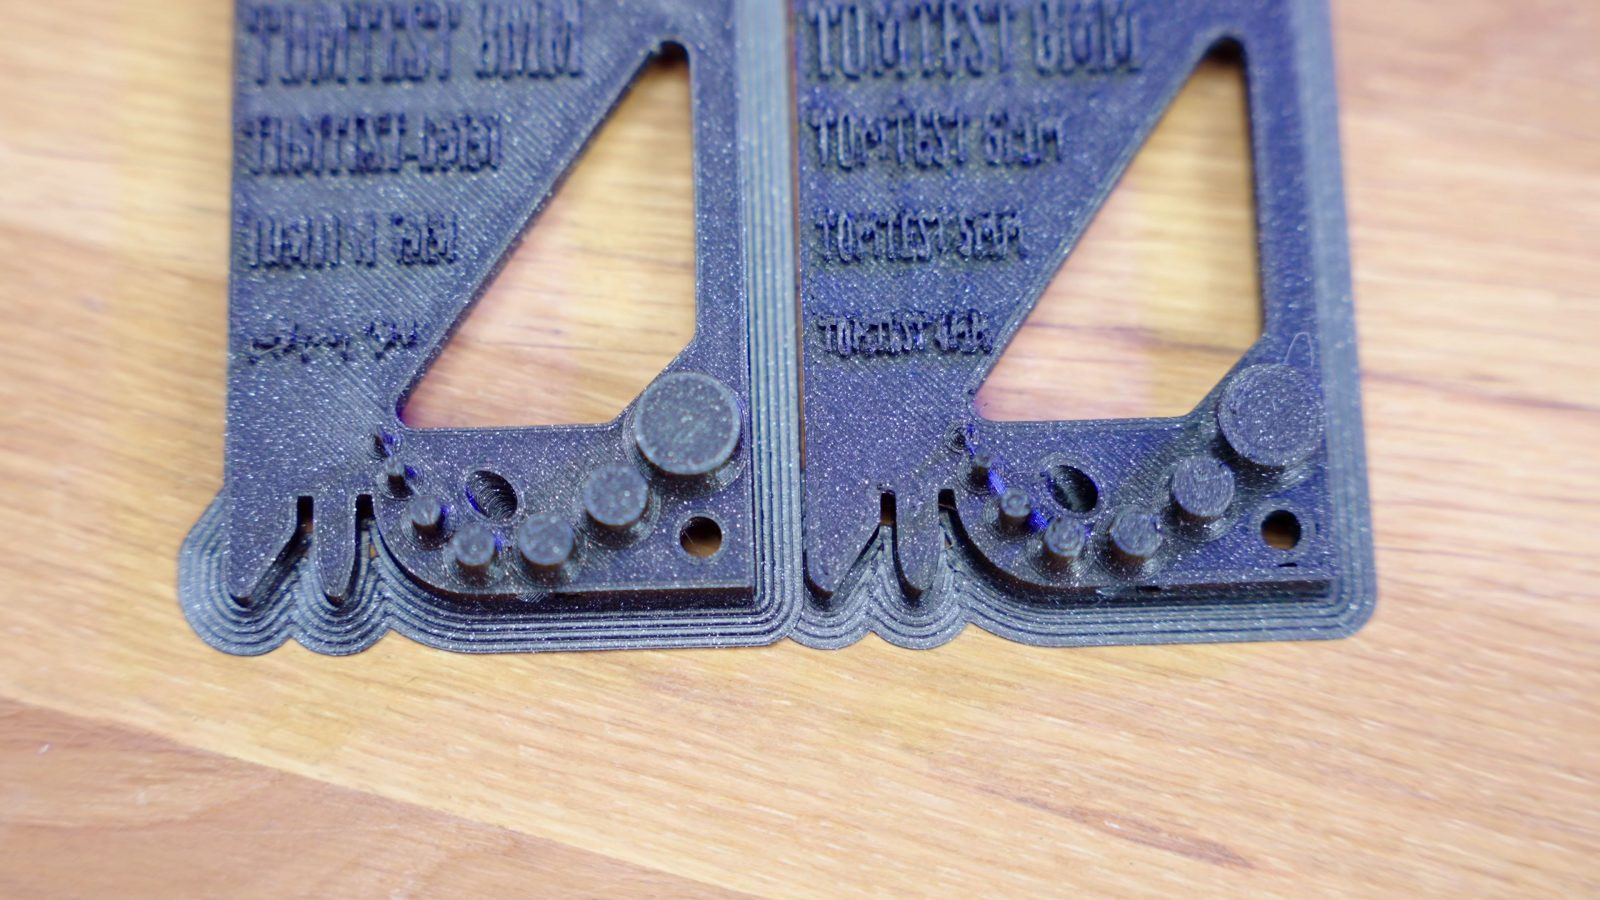
 3DBenchy text detail
The 0.1mm tall text on the Benchy’s rear is a good attempt at small detail, but being integrated into the perimeter, it doesn’t represent a truly challenging, free-standing small feature.
 3DBenchy text close-up
And perhaps, the most significant flaw of the 3DBenchy:
It doesn’t float.
 3DBenchy sinking
Despite its minor shortcomings, the 3DBenchy remains an essential tool for any 3D printing enthusiast. Its comprehensive design efficiently tests and reveals crucial aspects of printer performance, making it the go-to model for calibration and print quality assessment. So, print a Benchy, analyze it carefully, and unlock the full potential of your 3D printer!