Resin 3D printing, also known as vat photopolymerization, stands as a fascinating additive manufacturing process that utilizes liquid resin and a light source to create three-dimensional objects. This technology encompasses various methods like Stereolithography (SLA), Digital Light Processing (DLP), and Liquid Crystal Display (LCD), each offering unique advantages while sharing the core principle of curing liquid resin with light. Renowned for its ability to produce parts with exceptional resolution and intricate details, resin 3D printing has found its place across diverse fields. Hobbyists and gamers leverage it for crafting highly detailed miniatures, jewelry designers for creating prototypes and casting patterns, and dental labs for producing patient-specific models and molds.
This article delves into the workings of resin 3D printing, exploring the different technologies employed and providing insights into the safe handling, storage, and disposal of photopolymer resins. Furthermore, we will cover the essential steps for cleaning and post-processing resin 3D prints to achieve optimal quality and desired properties.
Exploring the Technologies Behind Resin 3D Printing
The realm of resin 3D printing boasts several distinct processes, each with a range of hardware solutions available in the market. Let’s examine some of the most prevalent resin 3D printing methods that illustrate How Does A Resin Printer Work.
Stereolithography (SLA): Precision Curing with Laser Technology
Stereolithography, or SLA, is a widely adopted 3D printing technique, recognized as one of the earliest forms of additive manufacturing. Pioneered in the 1980s by Charles Hull, the founder of 3D Systems, SLA utilizes a UV laser to meticulously trace the cross-section of a 3D model onto a thin layer of liquid photopolymer resin. Upon exposure to the UV laser light, the resin undergoes curing, transforming from liquid to solid. This process is repeated layer by layer, with each layer adhering to the previous one, until the complete 3D object is formed.
SLA 3D printing’s popularity stems from its capacity to produce high-quality, isotropic parts with remarkably smooth surfaces. Unlike Fused Deposition Modeling (FDM) prints, which tend to be porous, SLA parts are watertight. The versatility of materials compatible with SLA further enhances its appeal. Today, SLA technology supports a broad spectrum of resins, including standard resin, transparent resin, tough resin (ABS-like), flexible resin, biocompatible resin, and filled resin options like ceramic-filled resin.[1]
The applications of SLA 3D printing span across numerous industries. The medical and dental sectors utilize SLA for precise models and devices, the jewelry industry for intricate designs, and the consumer goods sector for product development and prototyping. Engineering also benefits from SLA’s ability to create high-quality prototypes.
Recommended reading: What is Resin 3D Printing
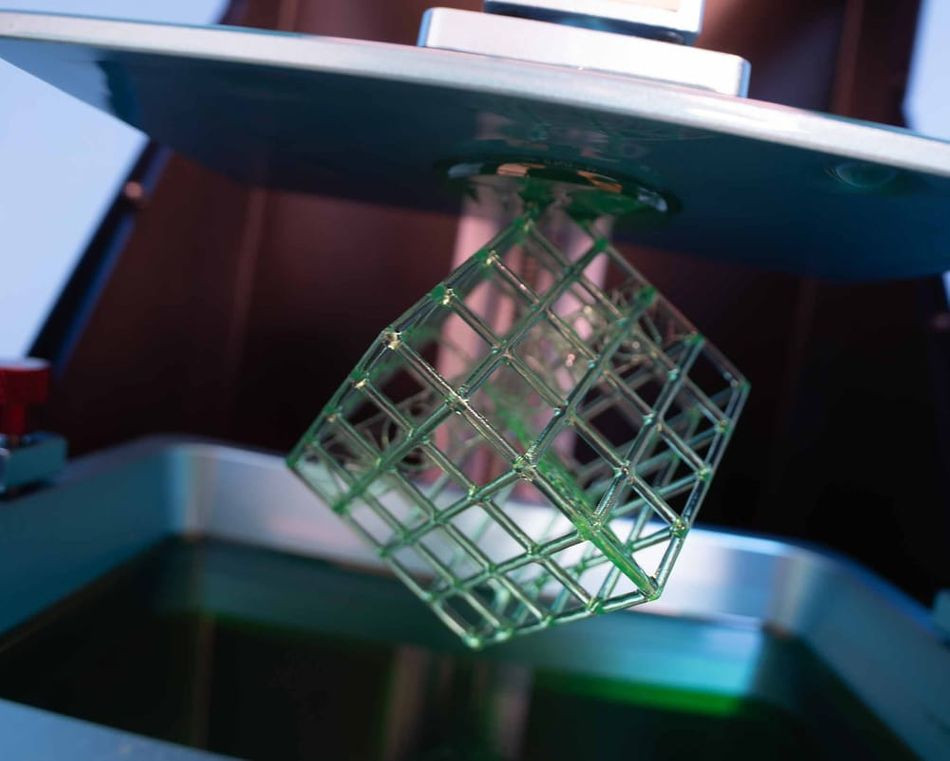 A translucent resin 3D printed cube, showcasing the bottom-up build process common in vat photopolymerization.
Digital Light Processing (DLP): Projecting Layers for Rapid Curing
Digital Light Processing (DLP), another prominent resin 3D printing method, shares similarities with SLA. DLP also employs a light source to selectively cure layers of liquid resin photopolymer. However, instead of a focused UV laser tracing each layer, DLP uses a digital projector to cast a 2D image of each layer onto the resin. This projection cures the entire layer of resin simultaneously. For each subsequent layer, the projector displays a new cross-sectional pattern of the 3D model, solidifying the resin layer by layer.
A key advantage of DLP 3D printing lies in its printing speed. The ability of the digital projector to cure an entire layer at once makes DLP significantly faster than SLA, which relies on laser tracing. However, SLA typically achieves higher resolutions compared to DLP.
Like many SLA printers, DLP systems often adopt a bottom-up approach. The projection system is positioned beneath the resin vat, and the build plate descends into the resin. The digital projector then flashes the layer pattern, curing the resin through the transparent vat bottom. As each layer solidifies, the build platform elevates, ready for the next layer.
A critical component unique to DLP is the Digital Micromirror Device (DMD). This device comprises thousands of microscopic mirrors that direct the light from the digital projector onto the resin. The DMD significantly influences the resolution capabilities of DLP printers.
Recommended reading: Digital Light Processing 3D printing explained
Liquid Crystal Display (LCD) / mSLA: Masked Light Curing for Efficiency
Liquid Crystal Display (LCD) 3D printing, sometimes referred to as masked Stereolithography (mSLA), bears a strong resemblance to DLP. Both utilize a light source to cure resin layers from the bottom up. The primary distinction lies in the light source: DLP uses a digital projector and DMD, while LCD employs an array of LEDs in conjunction with an LCD screen. In LCD printing, LEDs positioned beneath the resin vat emit light that passes through the LCD screen. This screen acts as a mask, selectively allowing light to pass through specific pixels, thus shaping the light pattern for each layer. This masked light exposure enables precise curing of resin layers, similar to DLP’s layer-by-layer curing approach. LCD 3D printing, like DLP, cures an entire layer in a single exposure.
Resolution determination also differs between DLP and LCD. In DLP, resolution is tied to the size of micromirrors in the DMD. In LCD, resolution depends on the pixel density and size of the LCD screen. The resolution of an LCD 3D printer is calculated by dividing the LCD screen’s length by the number of pixels along that length.[2] This explains how does a resin printer work using LCD technology for masking.
A Practical Guide: Printing with Resin
For those new to resin 3D printing, many SLA, DLP, and LCD printers are designed for user-friendliness, offering plug-and-play operation. Setting up and starting a print is generally straightforward. However, material handling requires more attention compared to Fused Deposition Modeling (FDM) filaments. Photopolymer resins demand careful handling and storage due to their properties.
Storing Resins: Maintaining Material Integrity
Proper storage is crucial for preserving the quality and longevity of 3D printing materials. Resin’s sensitivity to UV light is a primary concern. Therefore, resins must be stored in opaque containers, ideally in a dark environment, to prevent unintended curing or degradation. Formlabs, a prominent SLA 3D printer manufacturer, recommends containers made of HDPE or polypropylene for resin storage.[3]
For long-term storage, checking the resin’s expiration date is advisable. While resin doesn’t necessarily “go bad,” its photoreactivity can diminish over time, potentially affecting print quality. To prolong resin lifespan and maintain consistency, periodic shaking of resin containers every few weeks is beneficial to ensure proper mixing.
Temperature is another vital factor in resin storage. Most resins are best stored between 5°C and 30°C (41°F and 86°F). However, specific temperature ranges can vary depending on the resin brand and type. Always consult the manufacturer’s recommendations for optimal storage conditions.
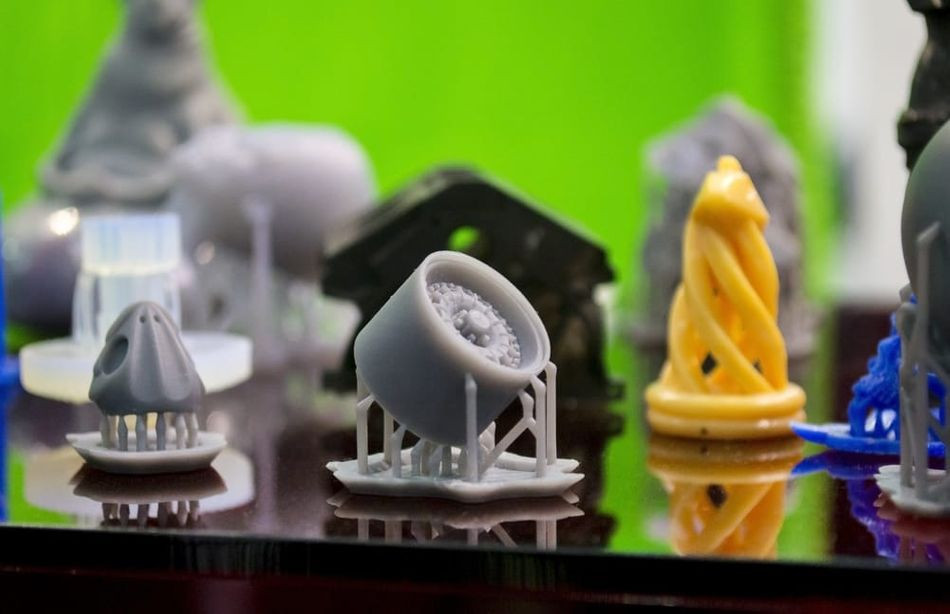 A collection of detailed resin 3D prints, still attached to their support structures, highlighting the fine detail achievable with resin printing.
Handling Resins: Prioritizing Safety
While fully cured resins are typically safe, liquid resin is considered toxic. Therefore, safety precautions are paramount when handling uncured resins, whether filling the resin tank or disposing of leftover material.
Always wear protective gloves and clothing when handling liquid resin to prevent skin contact and potential irritation. Chemical-resistant nitrile or neoprene gloves are recommended for optimal protection. If skin contact occurs, wash thoroughly with soap and water, avoiding alcohol-based cleaners.[3] Eye goggles are also recommended to protect against resin splashes.
Some users opt to wear a mask during resin 3D printing due to potential odors emitted during the process. While most resins are not highly volatile, printing in a well-ventilated area is generally recommended. Always refer to the manufacturer’s Safety Data Sheet (SDS) for each resin for specific safety guidelines and ventilation requirements.
Cleaning Resin Prints: Removing Residue for Quality
Resin 3D printing excels at producing parts with smooth surface finishes and fine details, often minimizing the need for extensive post-processing. However, cleaning resin prints is essential to remove sticky, uncured resin residue from their surface.
Various cleaning methods are available, including dedicated washing stations designed as 3D printer accessories. A common and effective method is using a bath of Isopropyl Alcohol (IPA). Submerge the 3D print in IPA and gently agitate it for about 30 seconds, or allow it to soak. Repeat this process until the sticky resin residue is completely removed. Typically, a double rinse in IPA is sufficient.
When using IPA, always observe safety precautions, including wearing gloves and eye protection and protecting your work area from spills. Silicone tools are advantageous for cleaning as resin residue does not readily adhere to silicone. If IPA is unavailable, denatured alcohol, acetone, or Mean Green can serve as alternative cleaning solutions.
Post-Processing Resin Prints: Enhancing Properties and Finish
Beyond cleaning, post-curing is an optional but beneficial post-processing step. Post-curing further solidifies the resin, leading to enhanced mechanical properties, such as increased strength and durability. It is particularly recommended for functional parts or prototypes requiring robustness and is mandatory for biocompatible resins used in medical applications. Many SLA and DLP 3D printer manufacturers offer dedicated post-curing stations. Alternatively, a DIY post-curing setup can be created using a UV light source and a rotating platform. Sunlight can also be used for post-curing resin prints.
Recommended reading: Knowing How Long to Cure Resin Prints
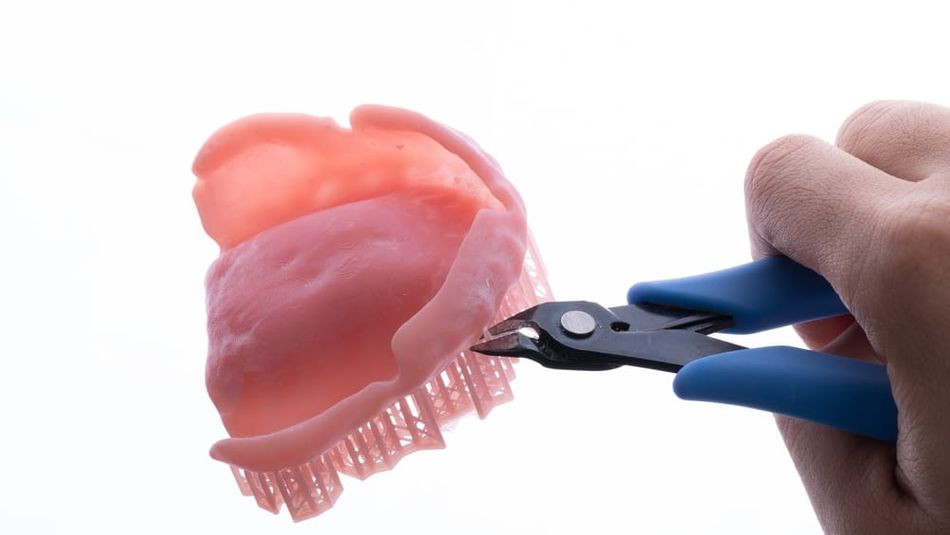
If support structures were used during printing, support removal is a necessary post-processing step. After cleaning, carefully remove supports using flush cutters. Position the cutters as close as possible to the print surface to minimize scarring and reduce the need for extensive sanding. Tweezers can be helpful for removing supports in delicate areas. If sanding is required to smooth support marks, start with coarse-grit sandpaper and gradually transition to finer grits for a smooth finish. Optimizing support orientation during print setup can also minimize support usage and simplify removal.
Resin Disposal: Responsible Waste Management
Proper resin disposal is crucial due to the toxicity of uncured resins. Leftover resin and cleaning solvents contaminated with resin must be disposed of safely and in compliance with environmental regulations. Never pour resins or contaminated solvents down the drain or dispose of them with household waste. Consult local waste management organizations for guidelines on chemical waste disposal in your area.
Another safe disposal method involves curing leftover resin. Expose the resin to UV light or sunlight until it solidifies completely. Once cured, the resin becomes non-toxic and can be disposed of with regular trash. Similarly, paper towels or gloves contaminated with liquid resin should be placed in sunlight to cure any residue before disposal. Empty resin containers should also be cured by cutting them open and exposing them to UV light to solidify any remaining resin traces before discarding.
Key Advantages of Resin 3D Printing
Resin 3D printing technologies like SLA, DLP, and LCD are excellent choices for producing high-resolution prints with smooth surfaces and intricate features. Here are key takeaways about resin 3D printing:
- The primary difference between resin 3D printing processes lies in the light source: SLA uses a laser beam, DLP utilizes digital projection, and LCD employs LEDs and an LCD screen for masking. Understanding these differences is crucial to grasping how does a resin printer work.
- Storing photopolymer resins away from sunlight and in appropriate containers is vital for maintaining their quality and extending their lifespan.
- Uncured resins are toxic and require careful handling. Always wear nitrile gloves and protective clothing when handling liquid resin.
- Proper disposal of uncured resin is essential for environmental safety. Cure leftover resin before disposal or follow chemical waste disposal protocols.
References
[1] https://www.hubs.com/knowledge-base/sla-3d-printing-materials-compared/#overview
[2] https://phrozen3d.com/blogs/guides/sla-vs-dlp-vs-lcd-which-resin-3d-printer-is-the-best-for-you
[3] https://support.formlabs.com/s/article/Resin-Care?language=en_US#storage