
Creating professional-looking labels, cards, and more has never been easier thanks to Avery Design & Print Online. This user-friendly online tool empowers you to personalize Avery products with your own designs, text, and images, all from the convenience of your web browser. Whether you’re crafting labels for your business, designing invitations for a special event, or organizing your home, Avery Design & Print Online provides the templates and customization options you need to bring your vision to life. Let’s explore how to get started and create your first project.
Finding Your Perfect Avery Template
The first step in your design journey is finding the right template for your Avery product. Avery Design & Print Online offers a vast library of templates to suit various needs. Here’s how to find the perfect one:
- Navigate to Avery Templates: Begin by visiting the Avery templates page at avery.com/templates. This is your central hub for accessing all available templates.
- Enter Your Product Number: Locate the search box prominently displayed in the center of the page. Your Avery product number is a 4 or 5-digit code printed on the front of your Avery product packaging. Type this number into the search box.
- Search for Your Template: Click the small magnifying glass icon or press Enter on your keyboard to initiate the search.
- Access the Template Page: A dedicated template page will appear, specifically for your Avery product number.
- Start Designing: Click the red Start Designing button on the template page to proceed to the design interface.
- Sign In or Create an Account: You’ll be prompted to sign in to your Avery account or create a free one using your email address and password. Having an account allows you to save your projects and access them later.
- Choose Your Design: In Step #2 Choose Design, you’ll discover a range of options. You can select from pre-designed templates to jumpstart your creativity or opt for blank templates for a completely custom design. Browse the available designs and click on the one that best suits your needs.
- Customize Your Chosen Design: In the Choose Design – Preview window, click Customize Design to begin personalizing your selected template. If you don’t see the Customize button, try zooming out slightly using Ctrl – (Windows) or Cmd – (Apple) on your keyboard.
- Welcome to the Customize Screen: You’ve now arrived at Step #3 Customize, where you can fully personalize your Avery project.
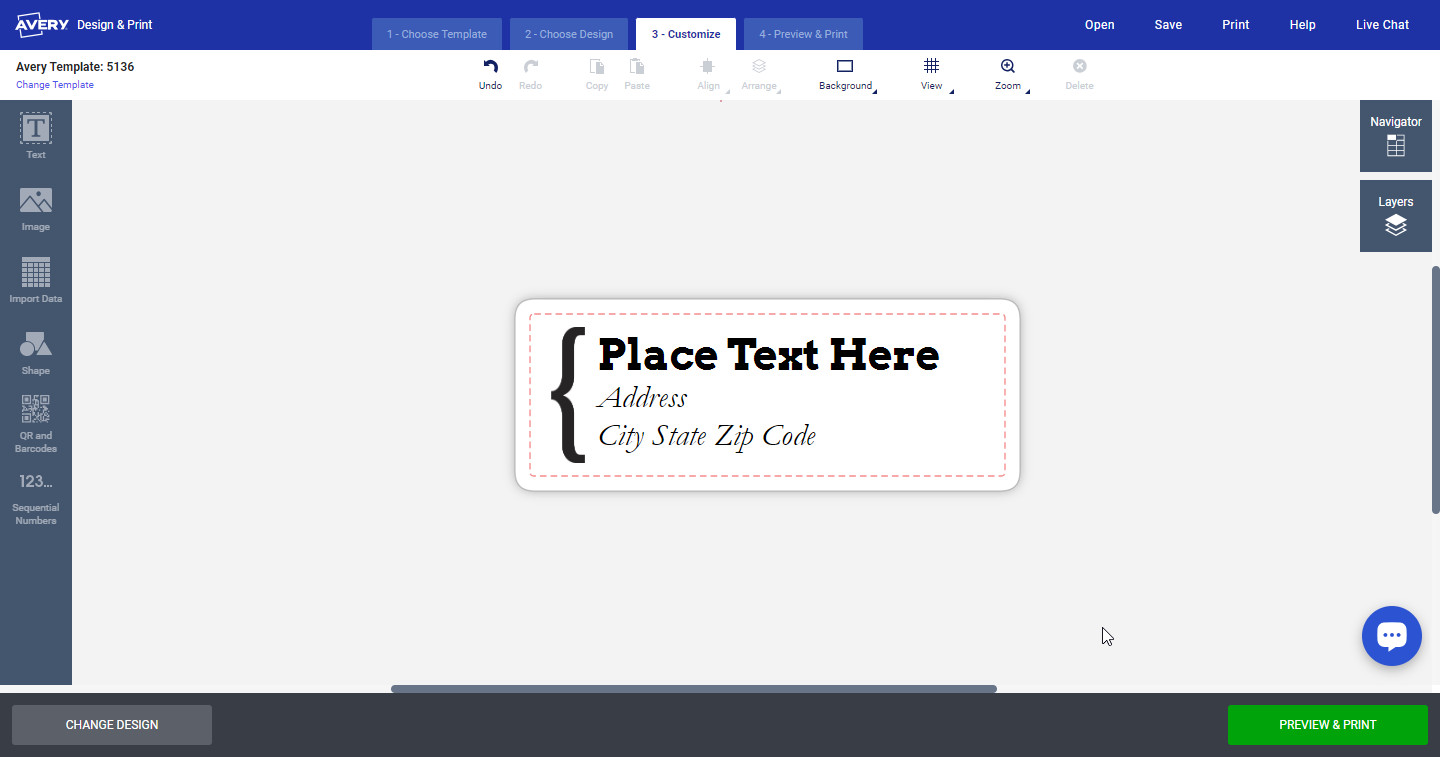 Avery Design and Print Online Customize Screen showing text editing options.
Adding and Formatting Text to Your Avery Project
Once you’re in the customization screen, you’ll see a single label displayed, along with a Navigator preview on the right showing the entire label sheet. Adding text is straightforward:
- Select the Text Tool: On the left side of the screen, click the T icon, which represents the text tool. Then, click Add Text Box.
- Insert a Text Box: A text box will appear on your label.
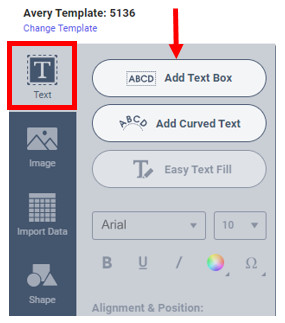 Add Text Box button in Avery Design and Print Online for adding text to your project.
- Format Your Text: To change the font, size, alignment, and other text attributes, click inside the text box. Click and drag to highlight the placeholder text Type your Text in blue.
- Apply Formatting Changes: With your text highlighted, use the formatting options available on the left side of the screen to customize your text’s appearance. You can explore various fonts, adjust the size, change colors, and choose alignment options to achieve your desired look. For more detailed instructions, you can refer to Avery’s guide on formatting text.
- Edit All or Edit One: If you want the same information to appear on every label on the sheet, ensure Edit All is selected on the right side in the Navigator. This is ideal for projects like return address labels or product labels with consistent information.
For projects requiring different information on each label, such as name tags or personalized address labels, you’ll want to use the Edit One feature. Learn more about this in Avery’s article on Edit One / Edit All. To further personalize your projects with variable data, Avery Design & Print Online also supports Mail Merge. Discover how to use this powerful feature with the Mail Merge guide.
Printing Your Avery Designs
Once you’ve perfected your design, it’s time to print! Follow these steps to ensure a successful print:
- Preview and Print: Click on Step #4 Preview & Print at the top of the screen.
- Full Page View: This will display a full-page preview of your project, showing how it will look when printed on a sheet.
- Get Your PDF: On the right side, click the blue Get PDF To Print button to generate a printable PDF file. Alternatively, you can click the green Let Us Print For You button to use Avery WePrint professional printing services.
- Save Your Project: Remember to save your project to your online Avery account or your computer for future use or modifications.
- Printing Tips: A Printing Tips page will appear with important instructions. Follow these guidelines carefully for optimal printing results.
Printing with Google Chrome: If you are using Google Chrome, click Open PDF after generating the PDF. A new browser tab (preview.pdf) will open with your project. Click the printer icon in the top right corner of the PDF viewer to print. For instructions specific to other browsers, search Avery’s help articles for detailed guidance.
For more in-depth information and to explore other features of Avery Design & Print Online, such as Mail Merge, Sequential Numbering, and Adding Images, visit the Avery Help page.
Start creating stunning labels and projects today with Avery Design & Print Online and unlock your creative potential!