
Gone are the days of needing to transfer files to a computer just to print them. Now, printing directly from your smartphone or tablet is easier than ever. Whether you’re using an Android or iOS device, you can seamlessly connect to your printer via Wi-Fi, Bluetooth, or even email.
This guide will walk you through the simple steps to connect your printer to your phone, so you can print documents and photos with ease.
Setting Up Your Printer for Wireless Connection
Before connecting your phone, ensure your printer is set up for wireless use. This usually involves connecting your printer to your Wi-Fi network. The exact steps vary depending on your printer brand and model. Refer to your printer’s manual for specific instructions on network setup.
If you’ve misplaced the physical manual, a digital version (PDF) is often available online. Simply search for your printer’s brand and model number on the manufacturer’s website. This information is typically found on a sticker on the bottom or side of your printer.
Once your printer is connected to your Wi-Fi, you can proceed with connecting your Android or iOS phone.
Connecting a Printer to an Android Phone
Android devices offer a straightforward way to connect to compatible printers using the Default Print Service. This built-in service replaced Google Cloud Print and simplifies wireless printing.
Connecting via Wi-Fi: Using Default Print Service
The Android Default Print Service allows your phone or tablet to automatically detect printers on the same Wi-Fi network. Most major printer manufacturers like Canon and Epson support this service, ensuring a smooth connection process.
Make sure both your printer and Android phone are connected to the same Wi-Fi network. This method will not work if your phone is using mobile data (4G or 5G).
To connect via Wi-Fi using the Default Print Service:
-
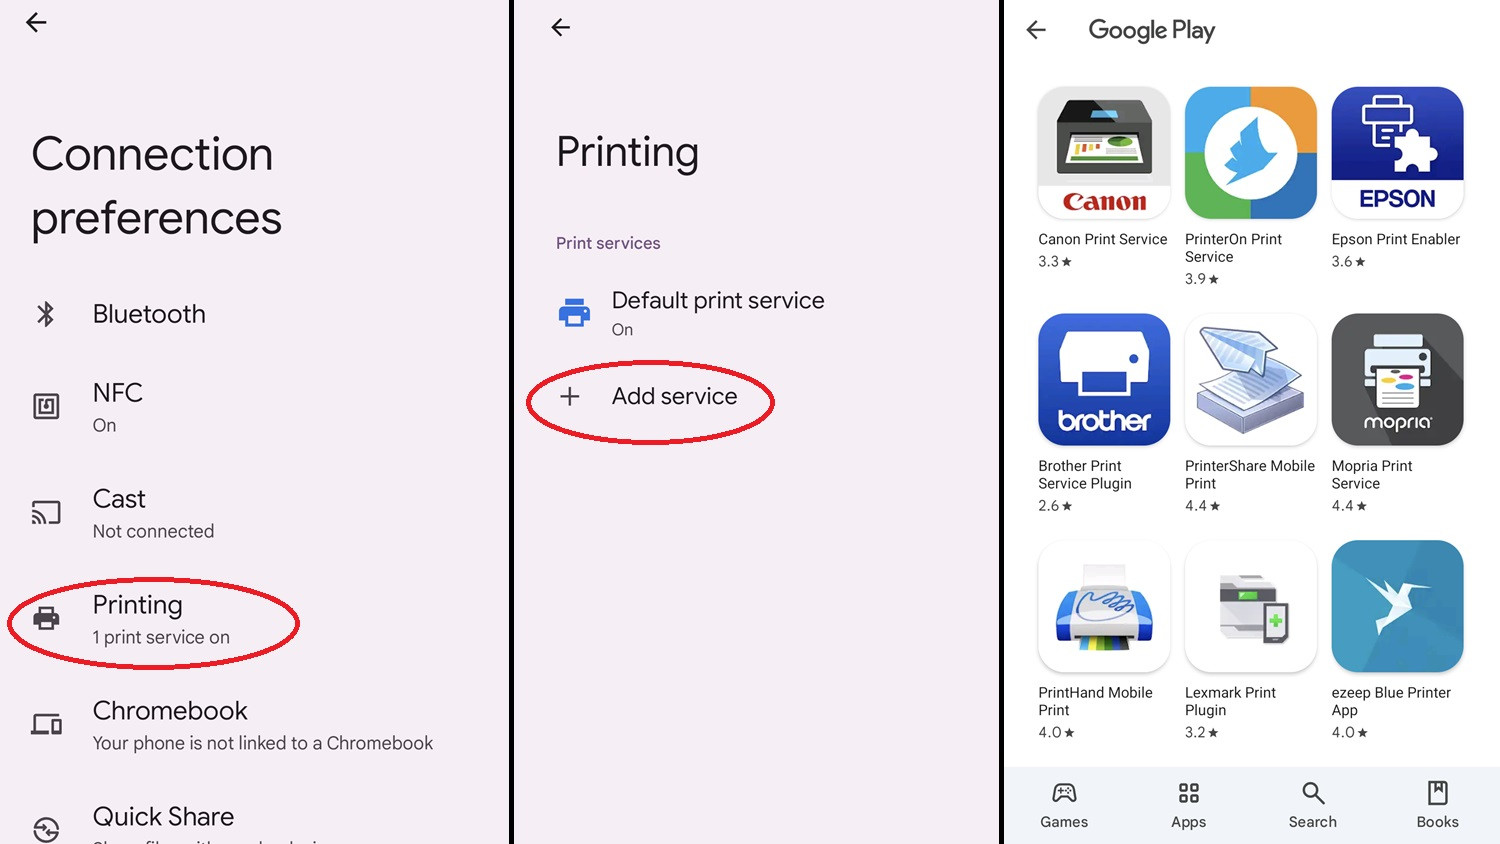
Open your phone’s Settings app.
-
Search for “Printing” in the settings search bar and select it.
-
Tap on Printing within Connection preferences.
-
Choose Default Print Service and toggle it On.
 Android default print service
Android Default Print Service settings showing a list of available printers on the network.
Your phone should automatically display a list of compatible printers available on your Wi-Fi network. Select your printer from this list to establish the connection.
Troubleshooting Wi-Fi Connection:
If your printer doesn’t appear in the list, here are a few solutions:
-
Add Manufacturer-Specific Service: In the Printing settings, instead of Default Print Service, tap Add service. This will direct you to the Google Play Store, listing printer services from various manufacturers. Select your printer’s brand, download the corresponding service plugin, and then return to the Printing settings to locate your printer model. Follow the plugin’s instructions to connect.
 Android print service
Android Print Service settings showing the “Add service” option to find manufacturer-specific printer plugins.
-
Utilize Third-Party Print Services: If a manufacturer-specific plugin isn’t available, or doesn’t work, consider using a third-party print service app. These apps, also found on the Google Play Store, scan your network for printers regardless of the brand. Popular options include PrinterOn and PrinterShare Mobile Print.
-
Manually Add Printer via IP Address or Wi-Fi Direct: You can manually add your printer to the Default Print Service using its IP address or Wi-Fi Direct.
-
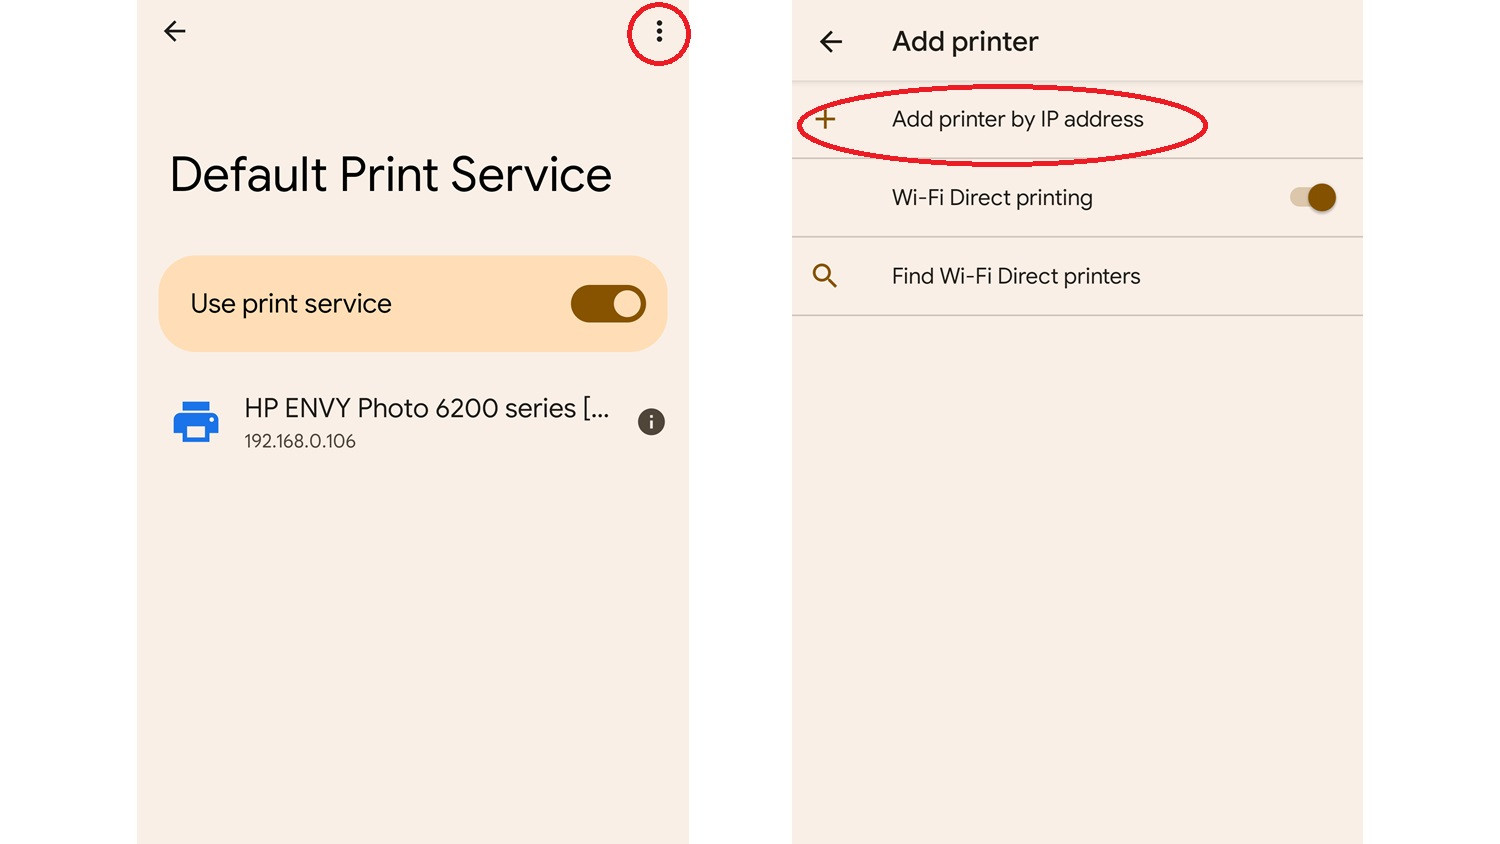
IP Address: Access your router’s settings (steps vary by router brand). Look for a section like “Attached Devices” or “Device List.” Find your printer in the list and note its IP address (e.g., 192.168.1.100). In Default Print Service, tap the three vertical dots (menu) in the top right corner, select Add printer, then Add printer by IP address. Enter the IP address and tap Add.
 Android WiFi direct 1
Android Default Print Service menu showing the “Add printer” option for manual setup.
-
Wi-Fi Direct: In the Add printer menu, turn on Wi-Fi Direct printing. This will scan for printers supporting Wi-Fi Direct, enabling a direct connection without needing an internet network.
 Android WiFi direct 2
Android “Add printer” screen showing options to add by IP address or Wi-Fi Direct.
-
Connecting via Bluetooth
While less common, some printers support Bluetooth connectivity. This method is simpler as it doesn’t require a Wi-Fi network. The process is similar to connecting to a Bluetooth speaker.
-
Activate Bluetooth scanning on your printer. Consult your printer’s manual for specific instructions as this varies by brand and model.
-
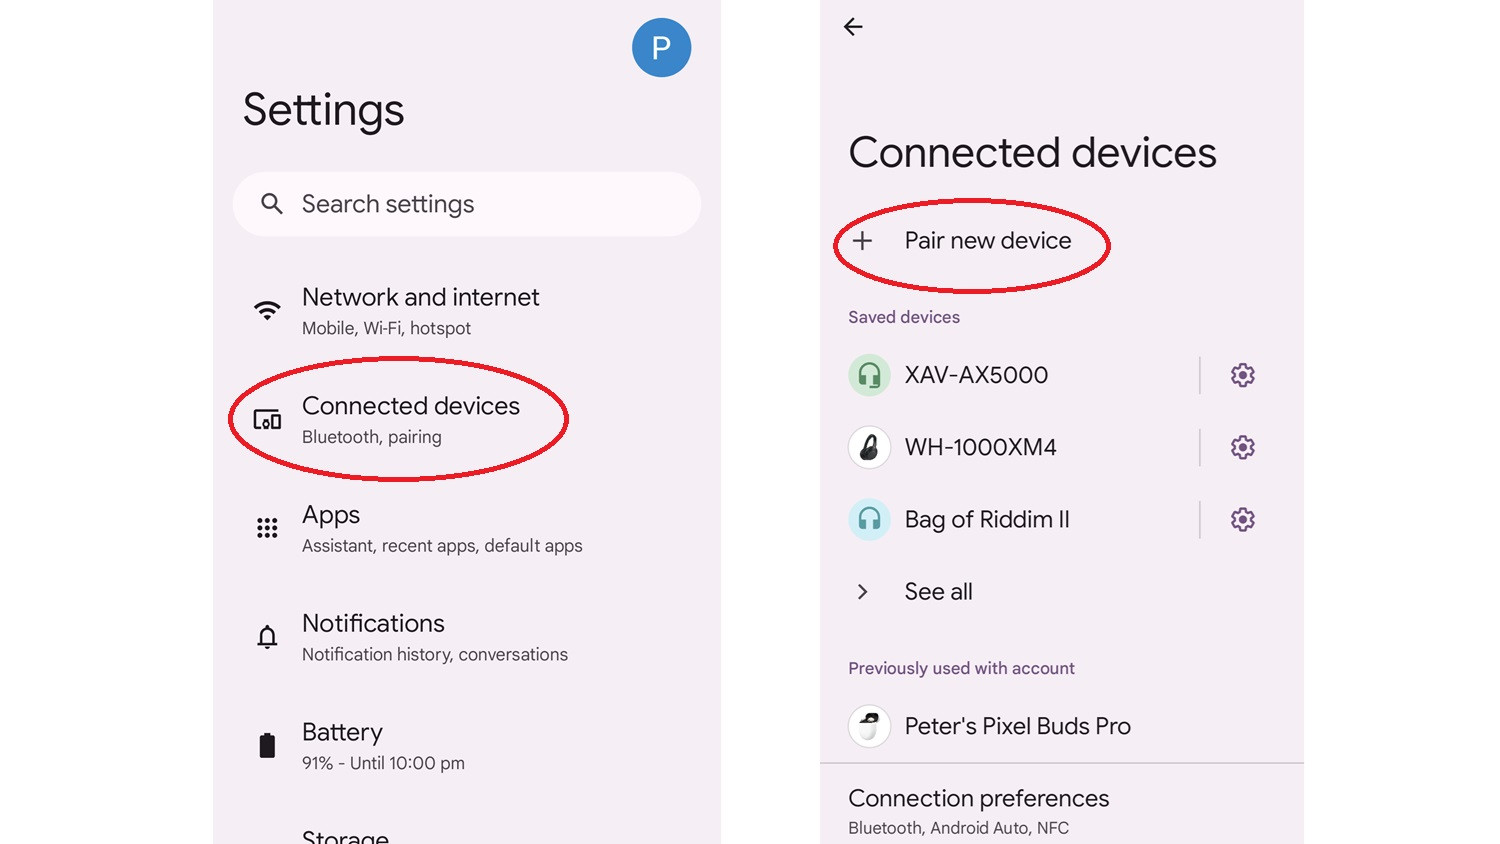
On your Android phone, go to Settings, then Connections or Connected devices, and select Pair new device. This will initiate a scan for nearby Bluetooth devices.
-
When your printer appears in the list of available devices, tap to connect.
 Android Bluetooth
Android Bluetooth settings showing the “Pair new device” option to connect to a nearby Bluetooth printer.
Once connected, your printer will appear in the list of paired devices. Bluetooth connections are typically short-range, and disconnection may occur if the devices are too far apart or Bluetooth is turned off. Reconnection should be automatic when Bluetooth is active and devices are in range. If not, manually select your printer from the list of paired devices.
You can rename your printer in Bluetooth settings for easier identification. Tap the cog icon next to the printer name, then the pencil icon to edit the name, and select “Rename” to save changes.
How to Print from an Android Phone
Once your printer is connected via Wi-Fi or Bluetooth, printing from your Android phone is straightforward. The printing process is the same regardless of the connection type.
To print an image:
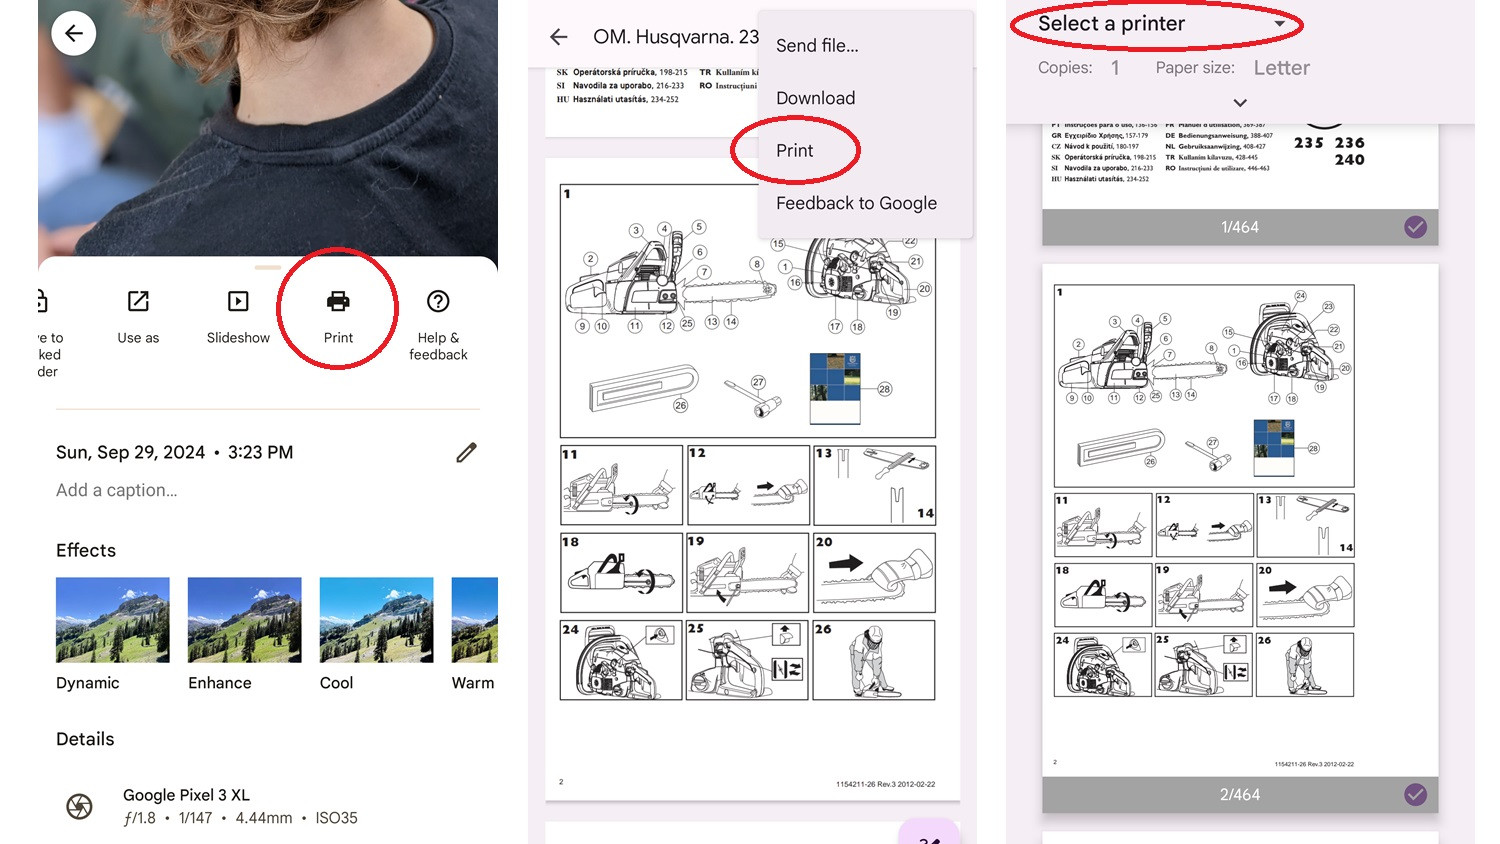
- Open the image in your gallery app.
- Tap the three vertical dots (menu icon), often located in the top right corner.
- Scroll through the horizontal menu options and tap Print.
To print a document (e.g., PDF):
-
Open the document in a document viewer app.
-
Tap the three vertical dots (menu icon).
-
Select Print from the menu options.
 Android print 1
Android interface showing how to access the print option from an image or document using the three vertical dots menu.
In the print preview screen:
-
Tap Select a printer and choose your connected printer from the list.
-
Adjust print settings as needed (e.g., paper size, color, number of copies).
-
Preview the document to ensure it looks correct.
-
Tap the print icon to start printing.
 Android print 2
Android print preview screen showing print options and the print icon to initiate the printing process.
Connecting and Printing from an iOS Device (iPhone or iPad)
Similar to Android, iOS devices have a built-in print service called AirPrint, which simplifies connecting to compatible printers over Wi-Fi. Apple provides a comprehensive list of AirPrint-compatible printers on their website.
Using AirPrint (Wi-Fi Connection):
When purchasing a new printer for use with your iPhone or iPad, look for the AirPrint logo on the packaging to ensure compatibility.
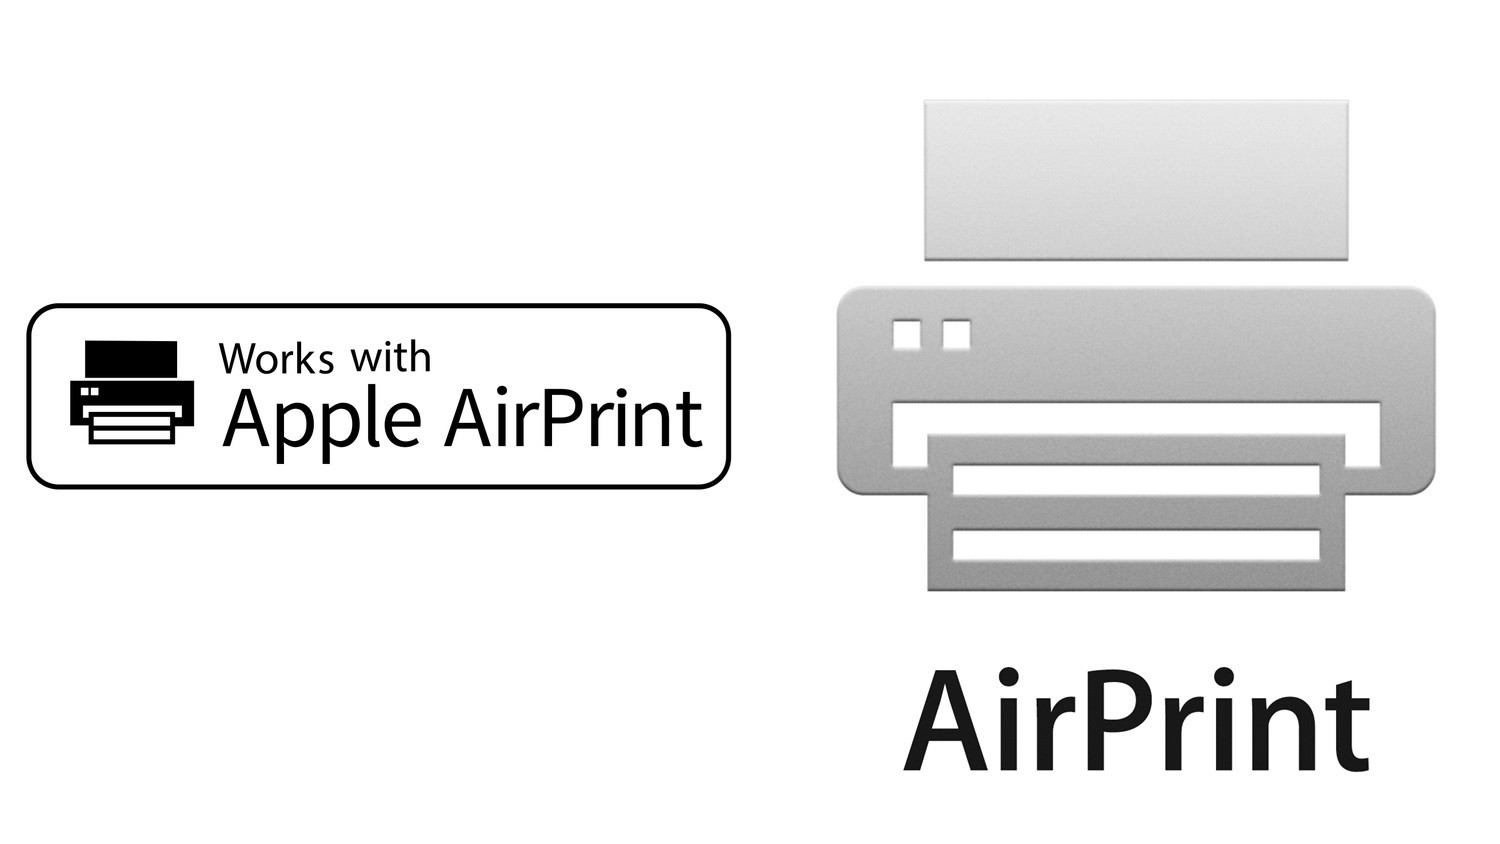 Airprint icons
AirPrint logos to look for when purchasing a printer, indicating compatibility with iOS devices.
- Connect your AirPrint-enabled printer to your Wi-Fi network.
- Ensure AirPrint is enabled in your printer’s settings. Access printer settings through a web browser by entering your printer’s IP address. Navigate to the Network settings (or similar) and find the AirPrint section to enable it.
Printing with AirPrint:
(Note: Steps are based on iOS 18, and may be similar for recent iOS versions.)
-
Open the document, photo, or webpage you want to print on your iPhone or iPad.
-
Tap the share icon (a square with an upward arrow), usually located at the bottom of the screen.
-
Scroll down the share options and select Print. This will open the Printer Options screen.
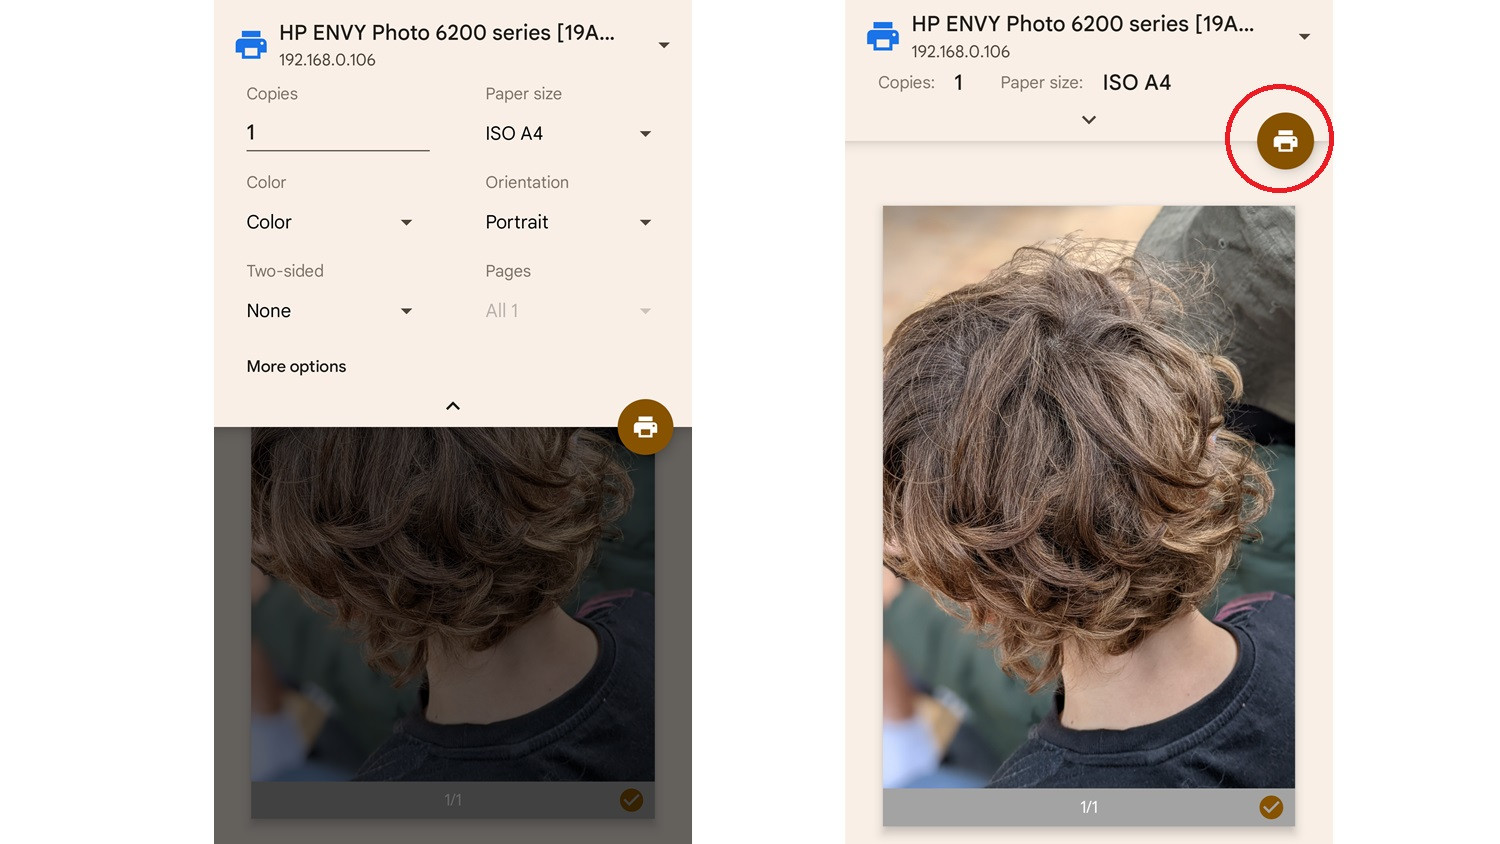
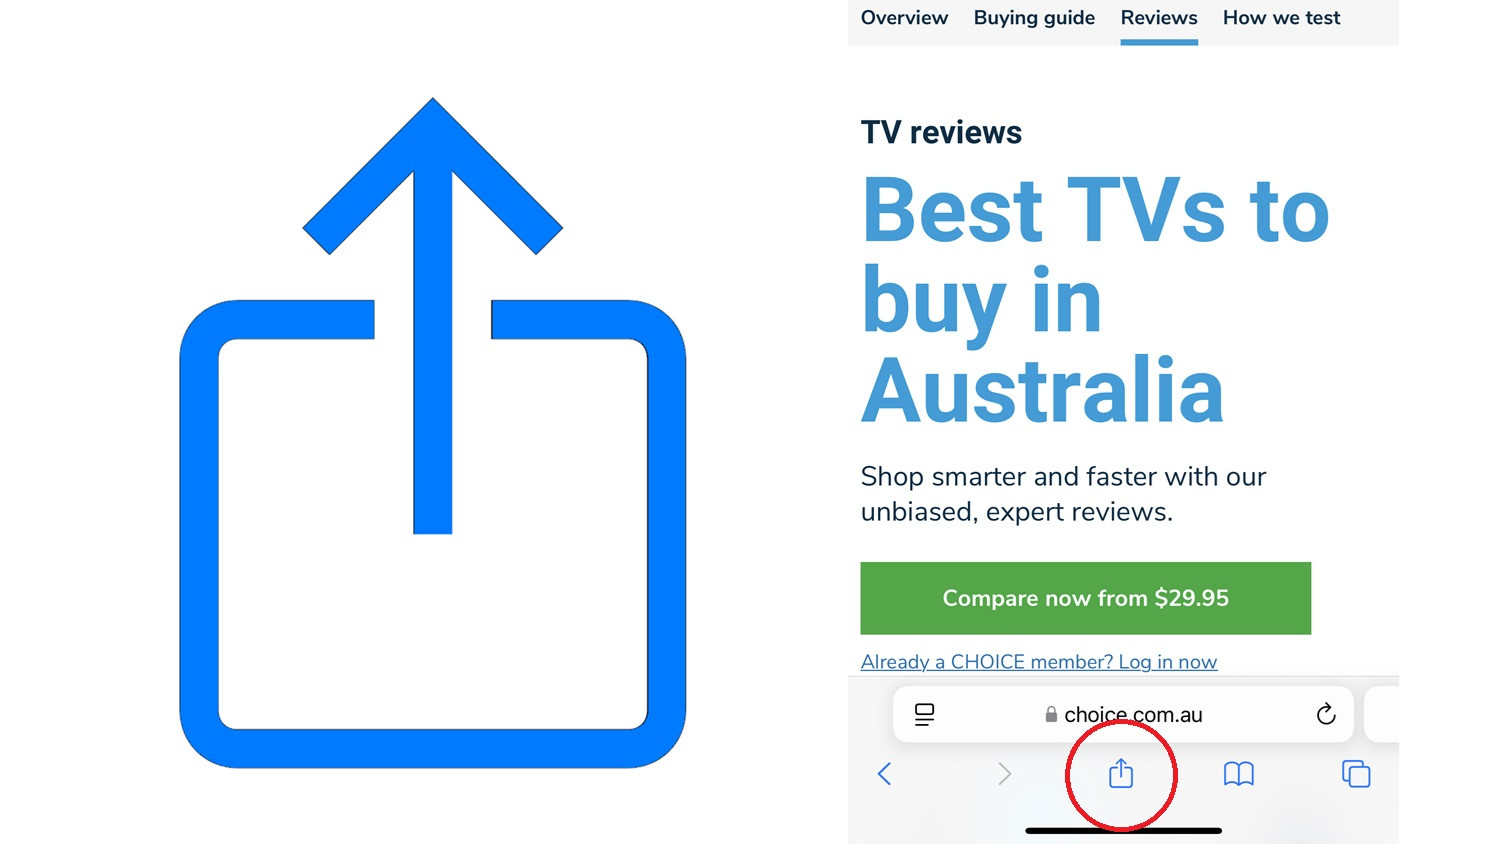 Print from iOS 18 – 1
iOS share sheet showing the “Print” option to access printer settings.
-
If this is your first time using Printer Options, “No Printer Selected” will appear. Tap Select Printer and choose your AirPrint printer from the list of detected printers on your network. Your selected printer will be saved as the default for future use.
-
Adjust print options as needed.
-
Tap Print in the top right corner to send the print job to your printer.
 Print from iOS 18 – 2
iOS Printer Options screen showing printer selection and the “Print” button.
Printing with Non-AirPrint Printers:
If your printer doesn’t support AirPrint, you’ll need to use a manufacturer-provided app.
- Search for your printer brand in the App Store.
- Download and install the official app.
- Follow the app’s instructions to connect to your printer. Some apps require you to open and print files directly through the app, while others may add a shortcut to the iOS share sheet for printing from other apps.
Alternatively, consider third-party printing apps like Printopia 3 or Print n Share, which may offer broader compatibility or additional features.
Bluetooth Connection with iOS
While some sources suggest Bluetooth printing from iOS is possible, Apple doesn’t officially support it, and reliable Bluetooth printing may be limited. AirPrint over Wi-Fi is the recommended method for iOS devices.
Tap and Print with NFC
Some printers offer NFC (Near Field Communication) for simplified Bluetooth pairing.
-
Ensure both your printer and phone are connected to the same Wi-Fi network.
-
Enable NFC on your iPhone.
-
Tap your iPhone to the NFC touchpoint on the printer (usually marked with an ‘NFC’ logo).
 NFC
NFCNFC logo on a printer indicating the touchpoint for NFC pairing with mobile devices.
NFC should automate the connection process, allowing you to print as usual afterward.
Printing from Your Phone via Email
Certain printer brands offer an email printing feature. This allows you to print documents and photos by simply emailing them to your printer’s designated email address. This method works even when you’re not on the same network as your printer, as long as the printer is powered on and connected to the internet.
Setting up email printing varies by printer brand. Some, like HP, require software installation or product registration. Refer to your printer manufacturer’s instructions for specific setup details. They may assign an email address automatically or allow you to create one for your printer.
Conclusion
Connecting your printer to your phone opens up convenient mobile printing possibilities. Whether you’re using an Android or iOS device, Wi-Fi, Bluetooth, and email options provide flexible solutions to suit your needs. By following these simple steps, you can easily print documents and photos directly from your smartphone or tablet, making printing on the go a breeze.