
3D printers once seemed like futuristic technology, but the reality is that they are surprisingly simple machines. A combination of stepper motors, switches, a control board, a heating element, and a nozzle is essentially all that’s needed. The real revolution in 3D printing was sparked by advancements in software and the expiration of key patents, making the technology more accessible than ever.
But the question remains: Can you truly create a functional 3D printer by piecing together components for under $100? iNSTONE believes it’s possible, and they might just be right.
Introducing the iNSTONE Desktop DIY.
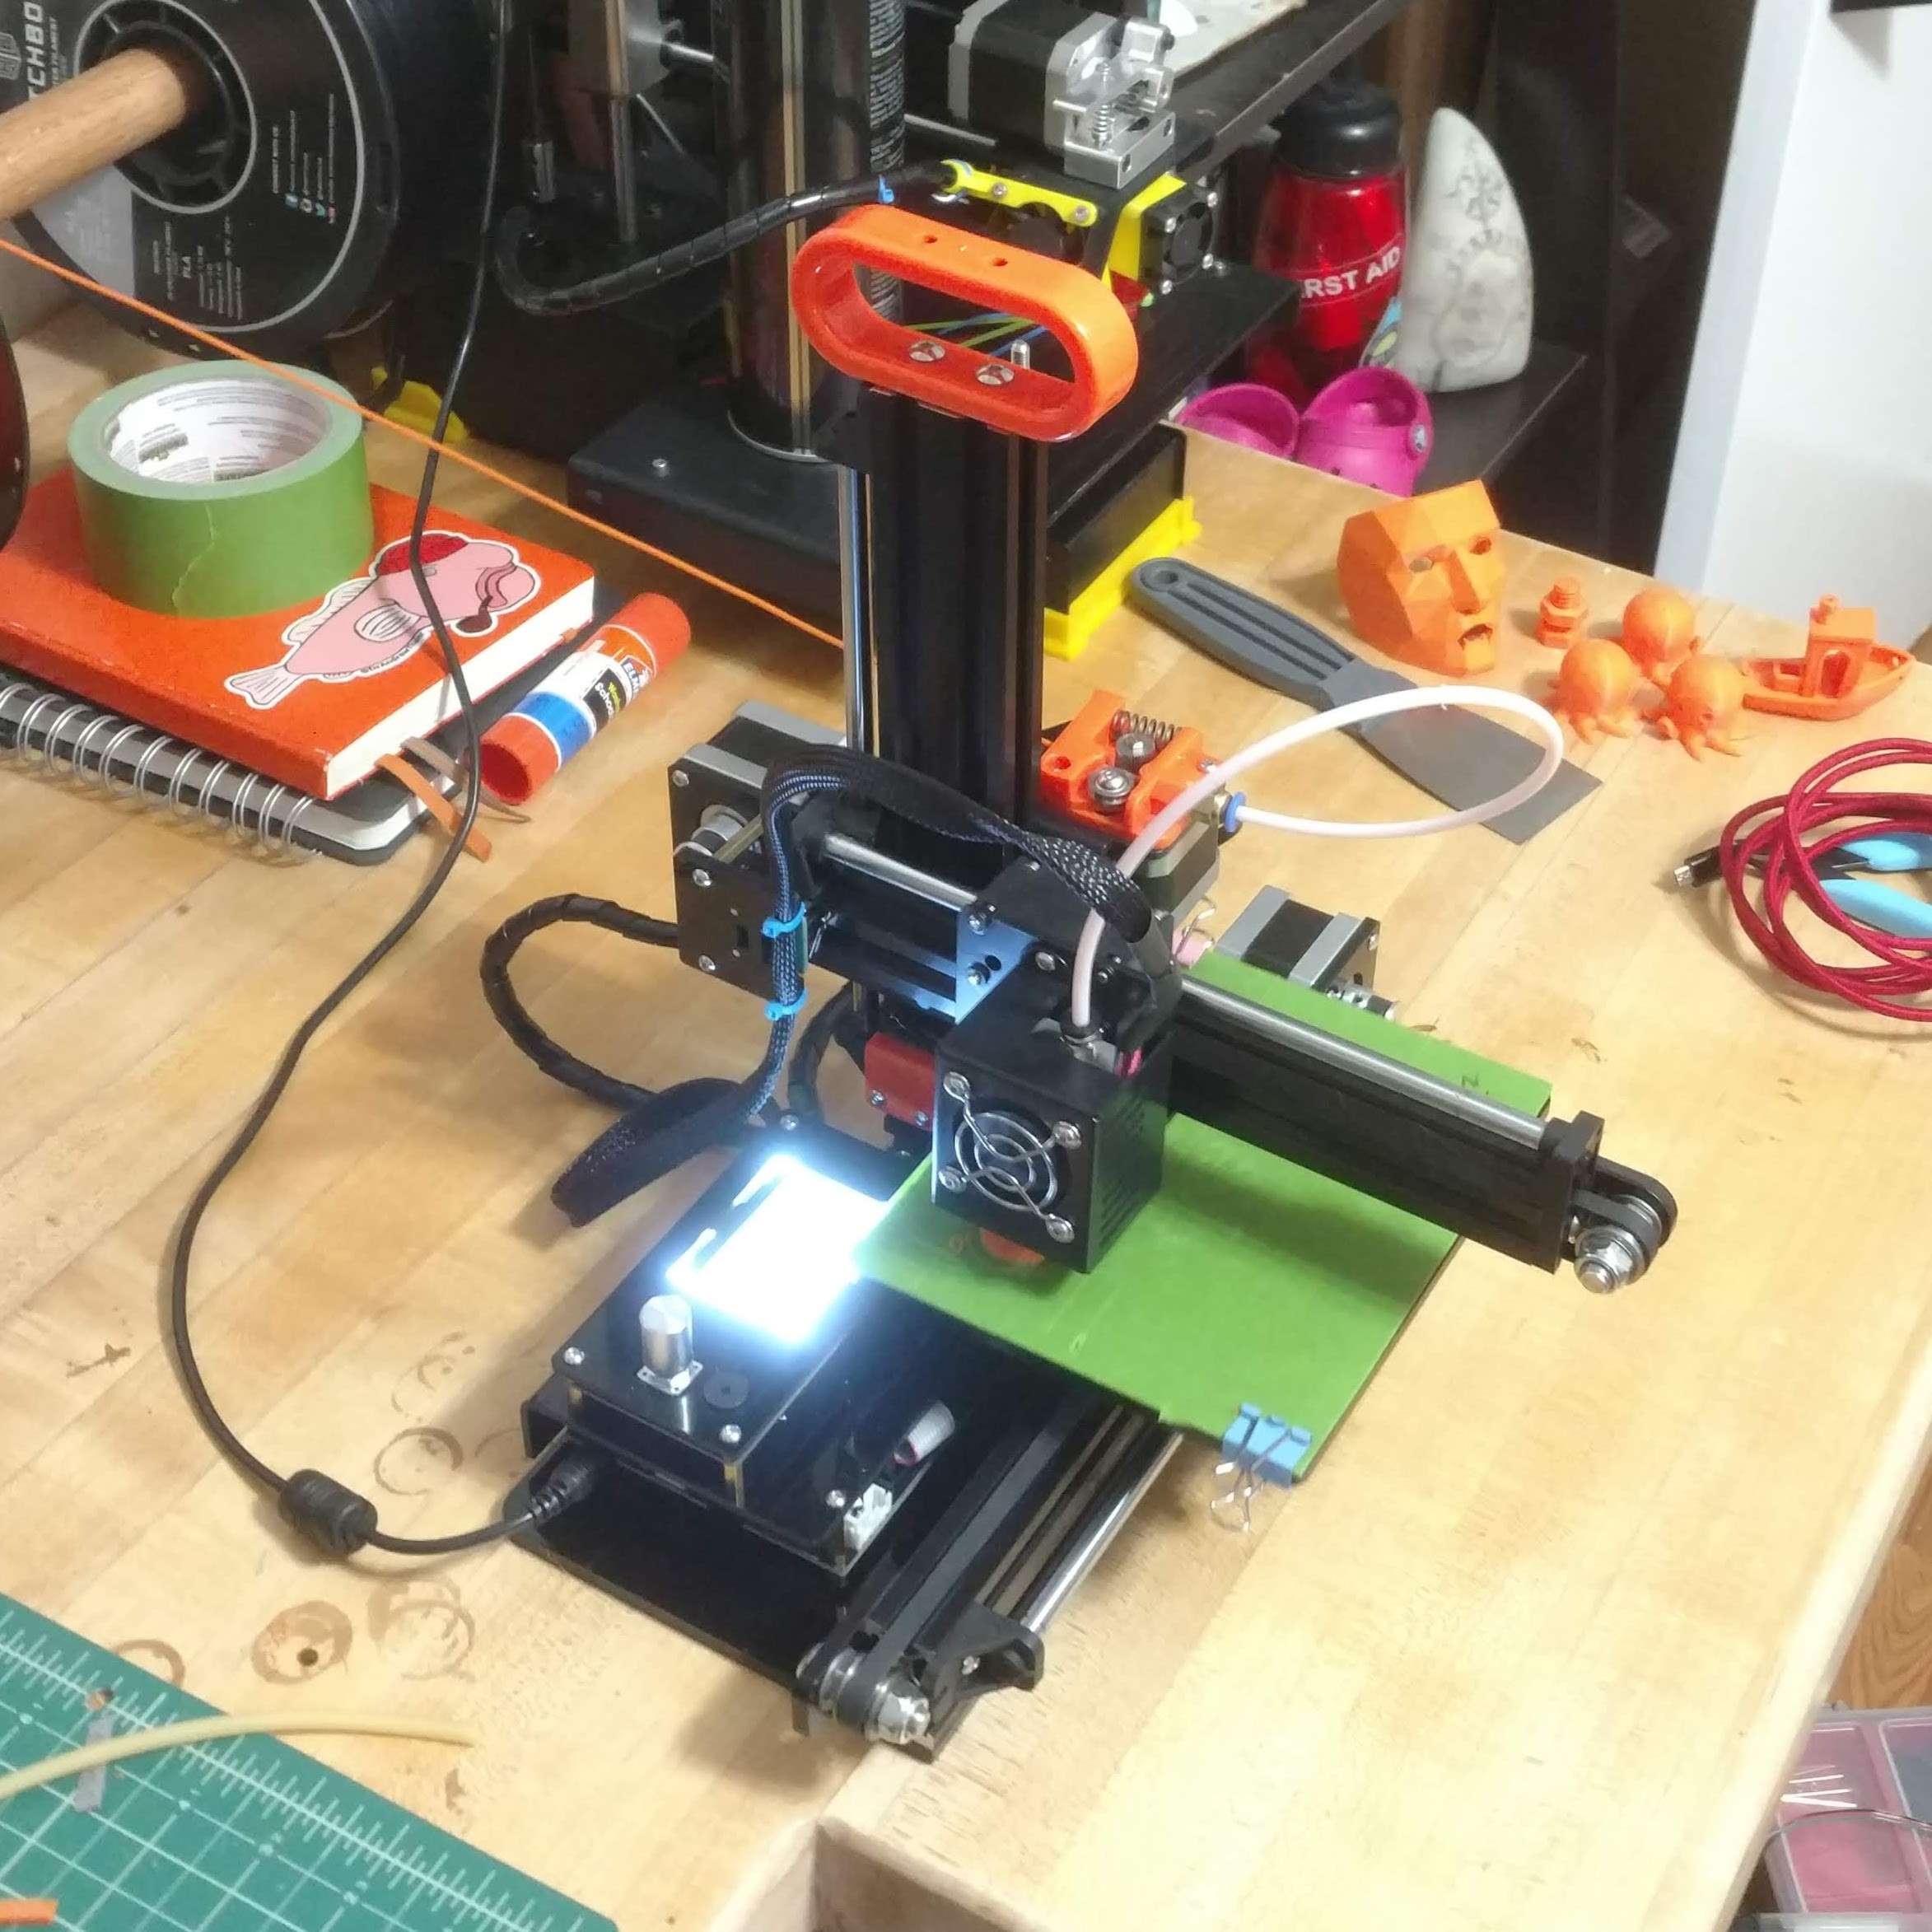 Image alt text: The iNSTONE Desktop DIY 3D printer, a budget-friendly kit, showcased as an example of a very cheap 3D printer option.
This is arguably the most functional printer you can assemble for just $99. While it’s far from perfect – in fact, it’s quite terrible in some aspects – it’s also strangely captivating. However, for most users, it’s definitely not a recommended purchase.
This cantilever printer features a small build area, lacks a heated bed, and operates with a somewhat outdated OS that connects via a Type-B USB port, a connection rarely seen in consumer electronics since 2015. It’s a machine stripped down to its bare essentials, and even the included power supply is underwhelming.
If the Anet A6’s design principle aimed to maximize 3D printer capability for $200, the iNSTONE’s philosophy seems to be: “How do we create the best possible 3D printer for under $100?” Surprisingly, they might have succeeded within that extremely limited scope. Despite having only a quarter of the build volume, the iNSTONE contains more metal in its construction than the Anet A6. Its primary structural elements are made of extruded aluminum, the stepper motors are of acceptable quality, and the hot end is a budget-friendly clone of the E3D. The Bowden extruder mechanism is constructed from robust injection-molded plastic. You can even move the printer without the constant worry of needing recalibration.
It also includes a rotary encoder on the control board, a feature absent in the Monoprice Mini Delta.
The kit also comes with a more comprehensive set of tools than other printer kits, including useful snippers and a selection of wrenches – although some of these wrenches don’t actually fit any of the printer’s bolts.
If you were tasked with assembling the best possible 3D printer for around $100 in a market like Shenzhen, it’s highly unlikely you could surpass the iNSTONE Desktop DIY. It incorporates numerous clever design elements that highlight the significant engineering effort invested in making this ultra-cheap 3D printer functional. This printer, despite its flaws, has earned a spot of honor in the workshop, representing the extreme end of budget 3D printing.
A post shared by Andrew David Thaler (@drandrewthaler) on
However, it’s crucial to acknowledge that the iNSTONE Desktop DIY is objectively a poor 3D printer in terms of print quality and user experience. Unless you are a 3D printing enthusiast seeking a unique, low-cost curiosity for your collection – and enjoy a challenging build process – you should definitely avoid purchasing this as your primary or only 3D printer.
For a detailed understanding of the testing procedures applied to this and other budget 3D printers, refer to: We’re gonna beat the heck out of these machines: The search for the best dirt-cheap 3D printer for fieldwork.
The Burn In
Assembling the iNSTONE Desktop DIY was an enjoyable experience, particularly for those familiar with 3D printer construction. The instructions were reasonably clear for experienced builders, though potentially too vague for complete beginners. The printer’s structure is built around an extruded aluminum frame, utilizing t-nuts for mounting components, resulting in a surprisingly robust and stable framework. While the kit was missing a few minor parts, replacements were readily available in a typical workshop.
Simple adjustment mechanisms are included for each axis. Notably, the z-axis features a very unusual coupler. Instead of a machined aluminum piece or even a 3D-printed component to connect the threaded rod, the iNSTONE DIY uses a short section of PVC tubing – a design choice that would later reveal its significant limitations.
Beyond these points, the printer is quite basic. It lacks both a heated bed and a blower fan for print cooling. The fiberglass build plate is held in place with standard binder clips.
A post shared by Andrew David Thaler (@drandrewthaler) on
Achieving a successful print from this machine demands considerable patience. The build plate is leveled using three thumbscrews, one of which is positioned almost impossibly to access. The three-point leveling system itself is inherently unstable, and the build plate frequently loses alignment, sometimes even mid-print. It required nearly a week of daily adjustments, tightening, and recalibrations to reach a point where the printer could consistently lay down a solid first layer and proceed with printing.
Many initial test prints failed due to z-axis wobble, a recurring issue that would become more apparent. After a significant effort, the first acceptable print finally emerged, using the provided g-code: a somewhat eerie mask.
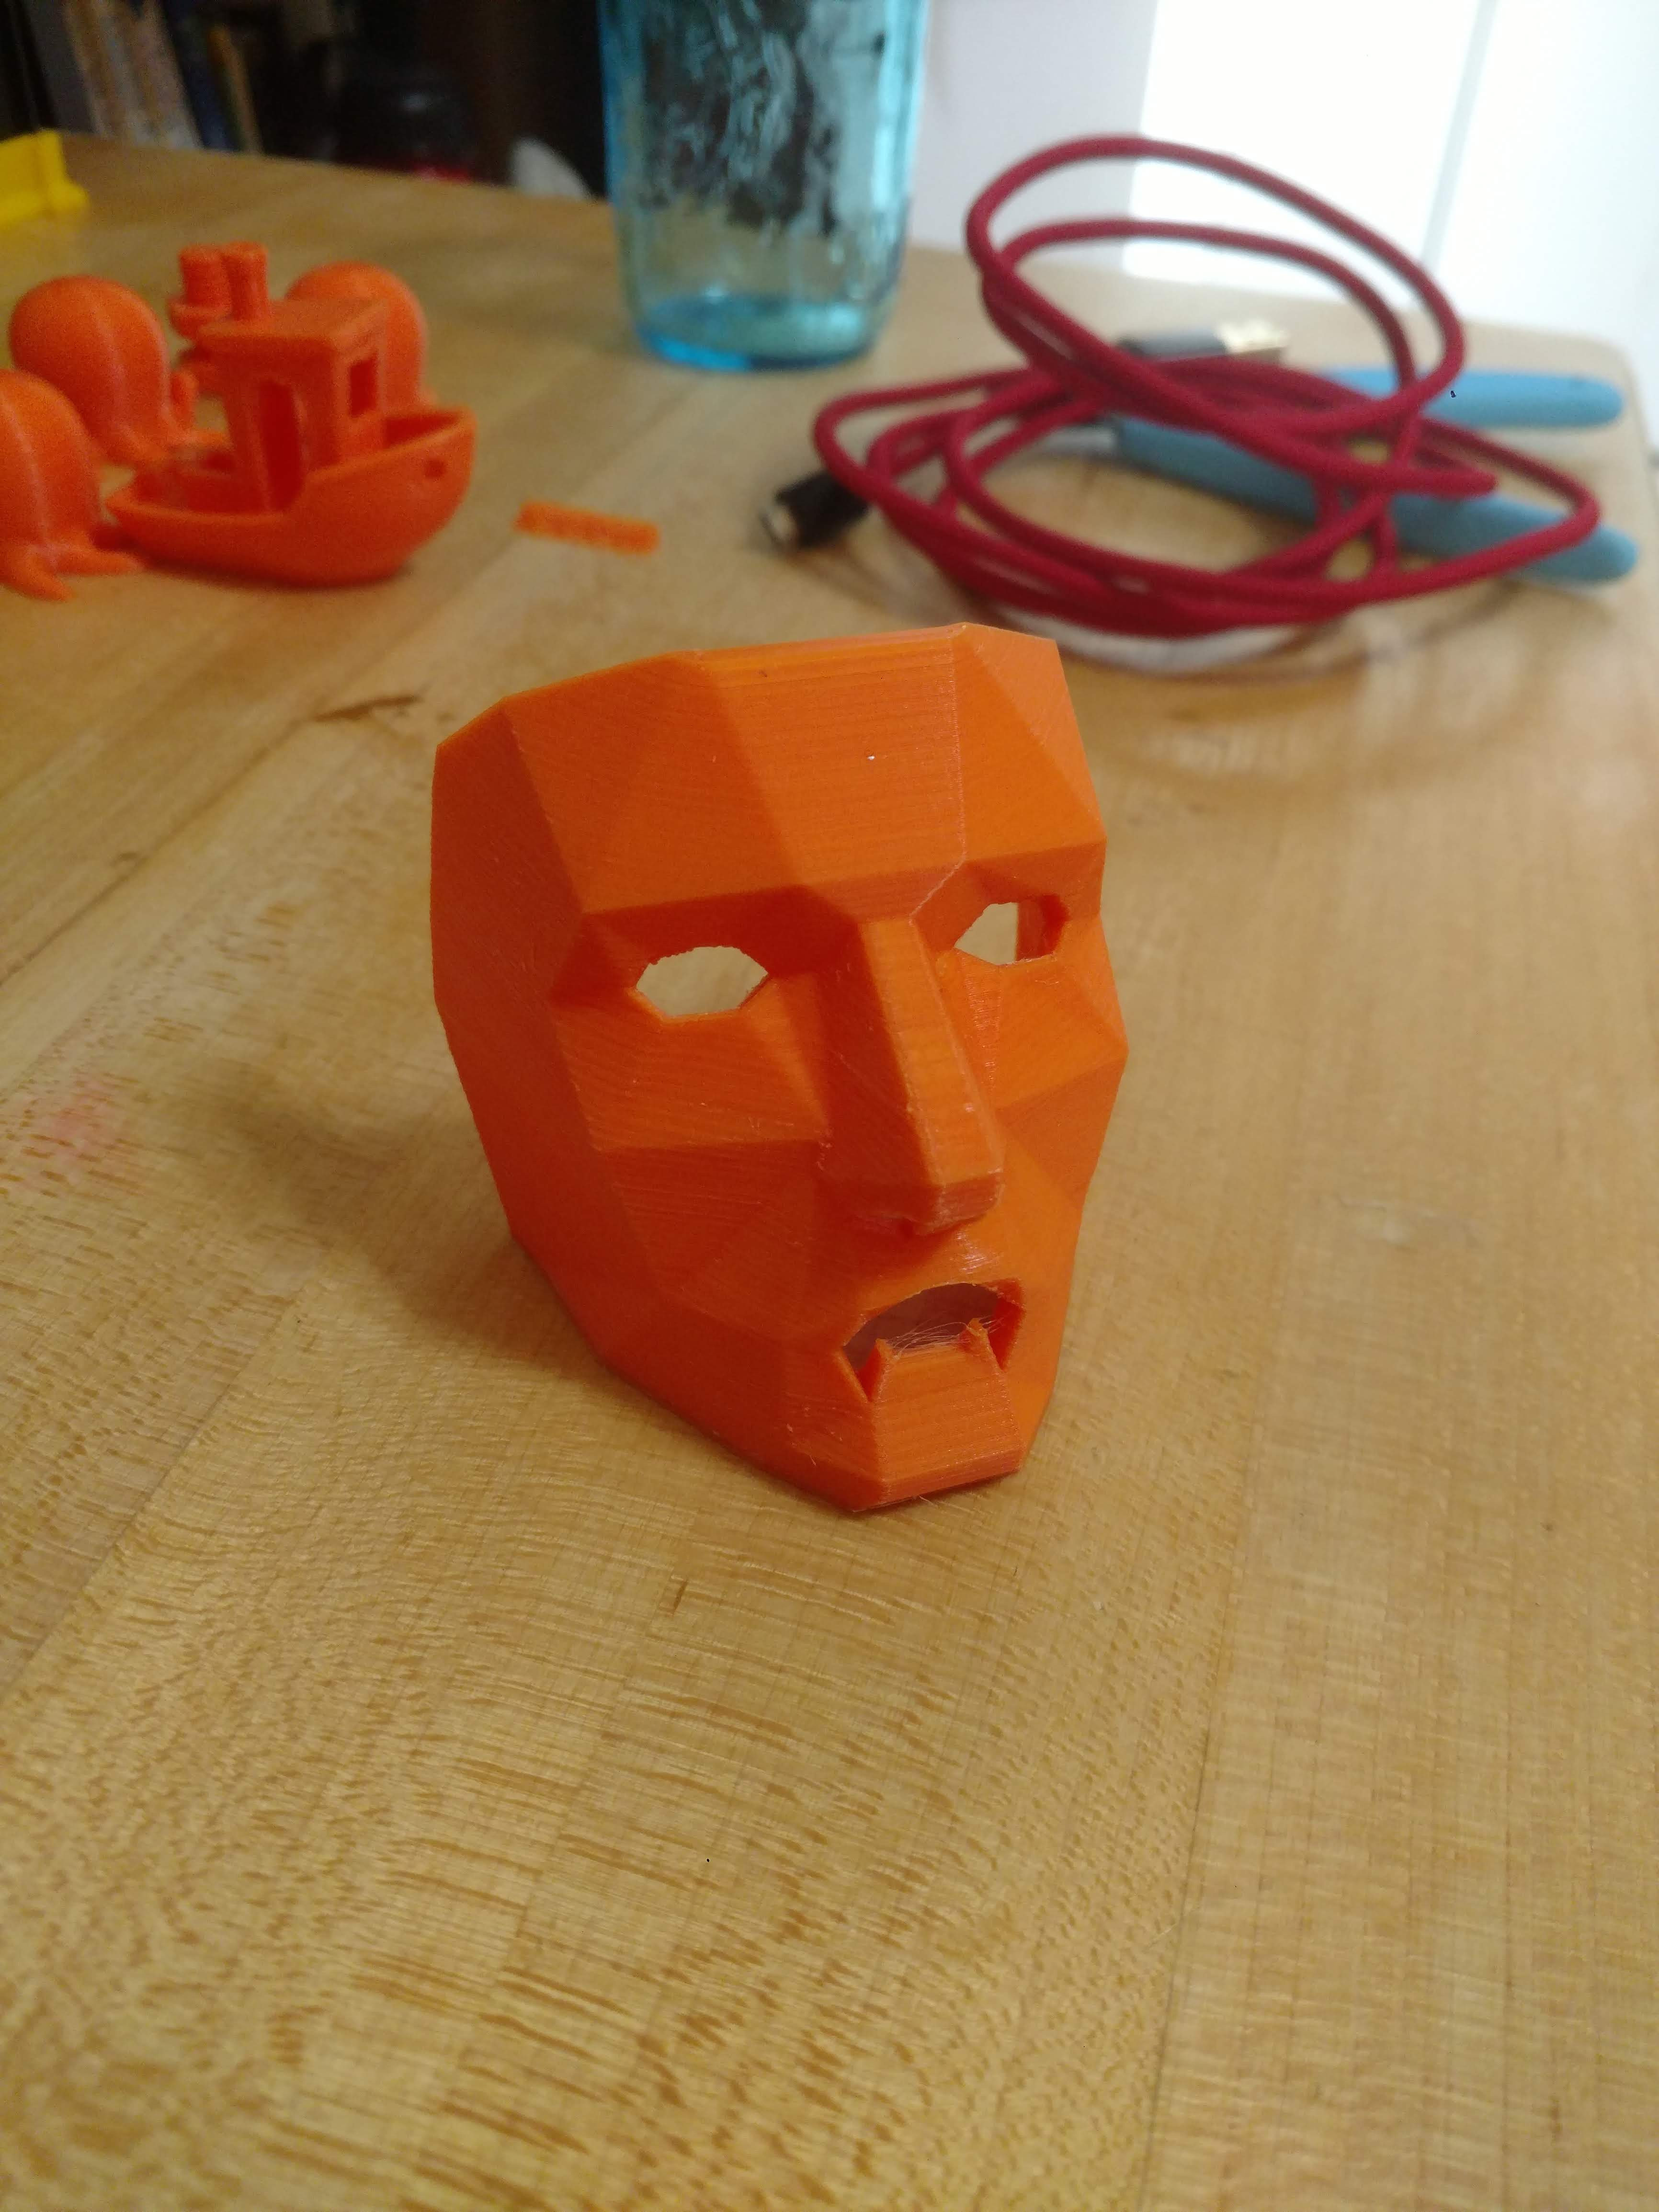 Image alt text: A 3D printed mask produced by the cheapest 3D printer, the iNSTONE Desktop DIY, illustrating the print quality achievable after extensive calibration.
Burn-in Score: C
The Benchmark Test
Image alt text: A 3D printed Benchy test model produced by the iNSTONE Desktop DIY, a very cheap 3D printer, revealing print quality issues like wobble and over-extrusion.
The Benchy test print, a standard benchmark for 3D printers, highlighted the iNSTONE’s limitations. While it did complete the print, the pervasive wobble was evident throughout the model. Over-extrusion and the unstable build plate resulted in a loss of detail on the bottom layers and slight elephant’s foot effect. A noticeable vertical shift near the top indicated z-axis slippage, confirming the issues encountered during the burn-in phase. While not entirely disastrous, the Benchy print was undeniably sloppy across the board, typical of what might be expected from the Cheapest 3d Printer options.
Benchmark Score: C
The Replication Test
The goal of the replication test is to assess a printer’s ability to produce consistent prints, not just single acceptable ones. In this case, printing three Cute Octo models was the challenge. The iNSTONE Desktop DIY’s lack of cooling, unstable build plate, and unheated bed led to each Octo warping and deforming in unique ways.
Image alt text: Three 3D printed Cute Octo models produced by the iNSTONE Desktop DIY, demonstrating inconsistent results typical of a very cheap 3D printer lacking stability and cooling.
This test was unequivocally a failure, highlighting the inconsistencies inherent in using such a basic and cheap 3D printer for repeatable results.
Replication Score: F
The Functional Parts Test
Creating functional parts, particularly those with threads, heavily relies on precise z-axis control. This test immediately exposed one of the core weaknesses of the iNSTONE Desktop DIY. The printed threads were loose and poorly defined due to the z-axis instability. Significant wobble between mating parts meant they didn’t fit securely. While they technically functioned, their performance was marginal and unreliable for any practical application demanding precision.
Image alt text: Close-up of 3D printed functional parts with threads from the iNSTONE Desktop DIY, a very cheap 3D printer, showing poor thread quality and lack of precision.
Functional Part Score: D
The Complex System Test
It was time to directly confront the most significant issue: the z-axis. While flexible couplers on other budget printers like the Anet A6 were problematic, the iNSTONE Desktop DIY presented an even more rudimentary solution for connecting the z-axis motor:
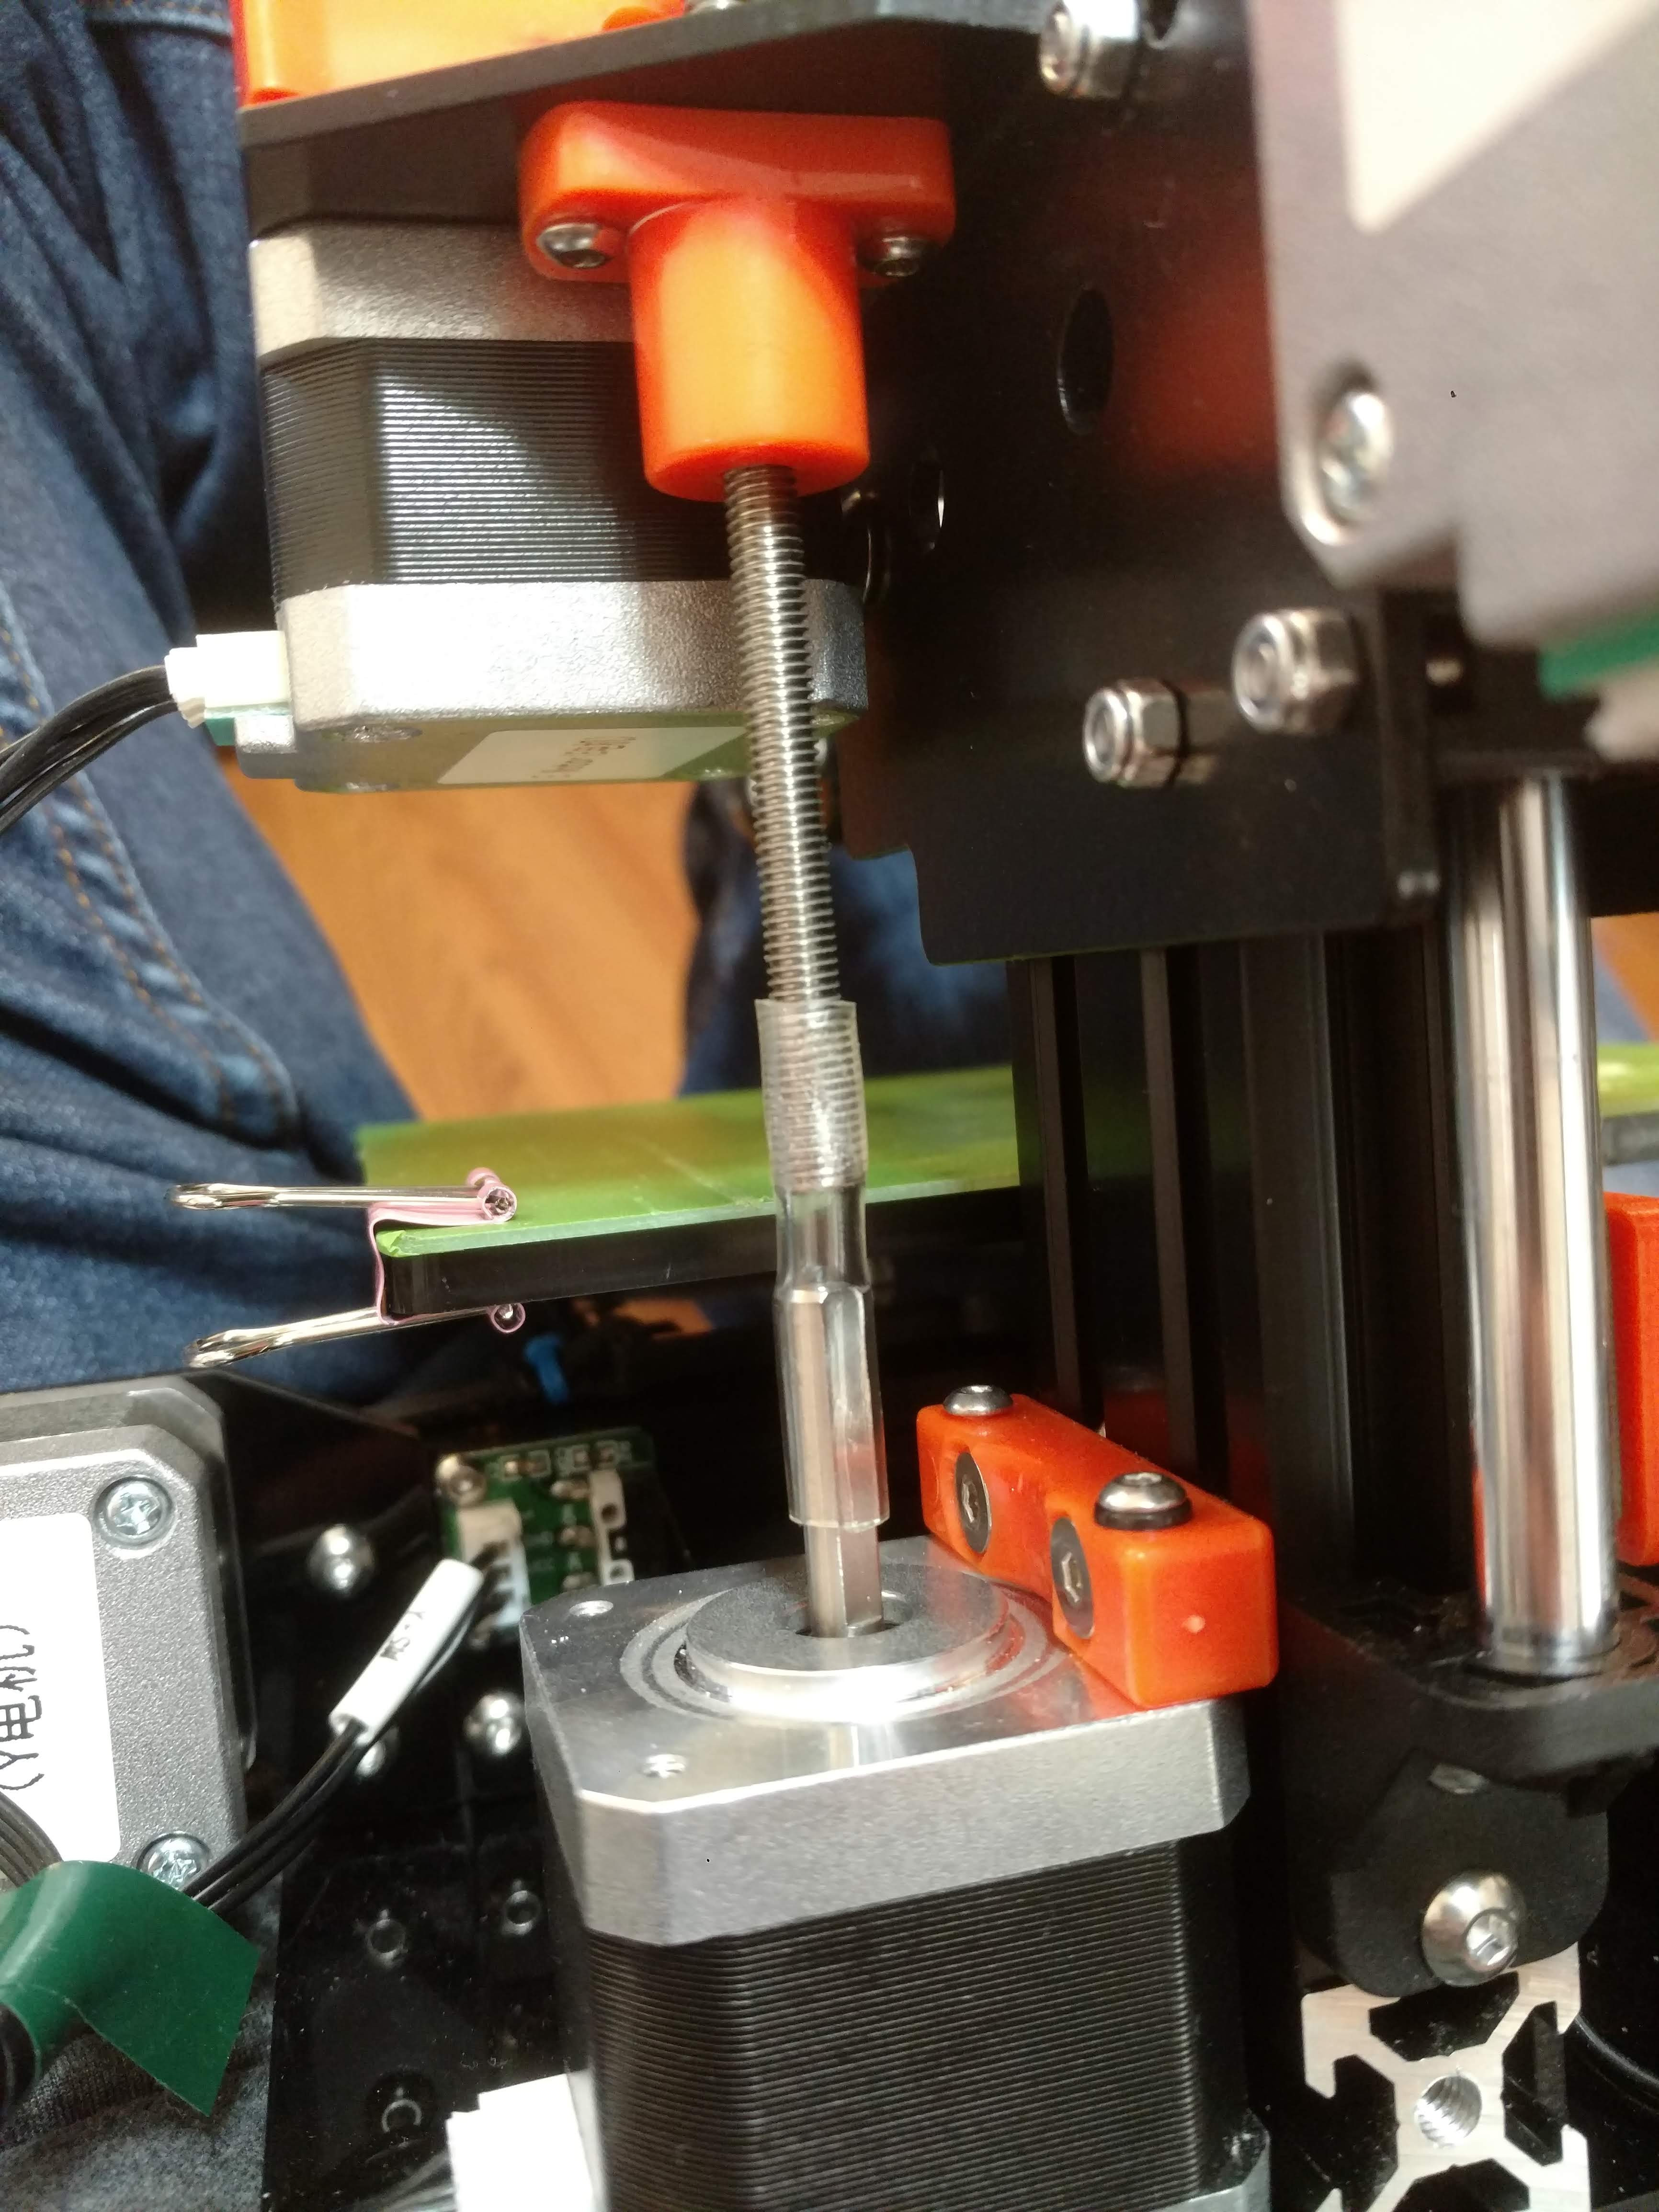 Image alt text: The Z-axis coupler of the iNSTONE Desktop DIY, the cheapest 3D printer being reviewed, revealing a piece of PVC tubing used as a coupler, highlighting a critical design flaw.
A simple piece of PVC tubing, held in place by friction, served as the z-axis coupler. For a printer that showed surprising ingenuity in other areas, this was a major disappointment. This makeshift coupler is the primary cause of the printer’s lack of z-axis control, leading to gaps in vertical surfaces and severely impacting print quality, especially at finer resolutions like 200 microns. Prints at this resolution exhibited significant layer inconsistencies and poor surface finish.
 Image alt text: A 3D printed object at 200-micron resolution from the iNSTONE Desktop DIY, the cheapest 3D printer, demonstrating severe layer inconsistencies and print quality issues due to z-axis instability.
Even at a coarser 100-micron resolution, printing a Niskin receiver (a component for a water sampler) took an excessive 11 hours, compared to the 2-4 hour average on other tested printers. The resulting part was flimsy, the servo motor didn’t fit correctly, and all components had excessive play. Despite the design brilliance of the Niskin3D team, the water sampler barely functioned and felt extremely fragile, precluding any in-water testing.
A post shared by Andrew David Thaler (@drandrewthaler) on
Complex System Score: D
The Precision Instrument Test
Could a $99 3D printer create a precision scale suitable for a navigational instrument at a demanding 50-micron resolution?
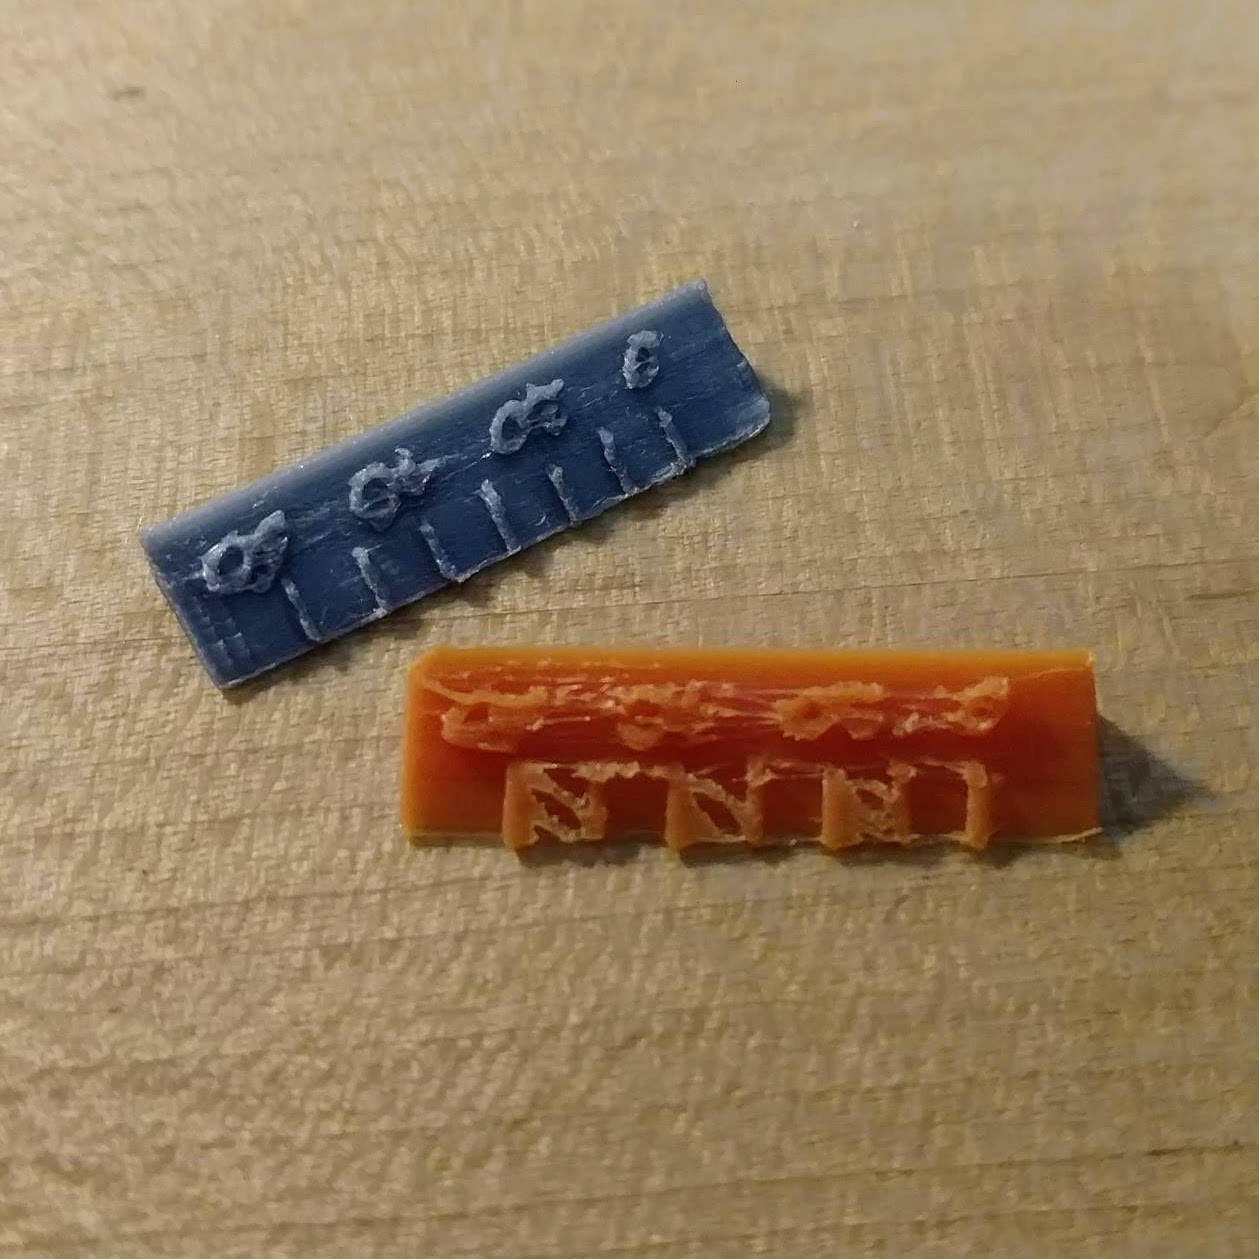 Image alt text: Comparison of 3D printed precision scales, with a scale from a Printrbot (silver) and a scale from the iNSTONE Desktop DIY (orange), illustrating the lack of precision in the cheapest 3D printer’s output.
Unsurprisingly, the iNSTONE Desktop DIY failed this test. Achieving precision at 50 microns is beyond the capabilities of such a fundamentally limited machine.
Precision score: F
The Educator’s Test
There was some initial hope for the Educator’s Test, the final print in this review. Printer settings were optimized as much as possible, and the Isopod model was chosen for its printability on even basic 3D printers.
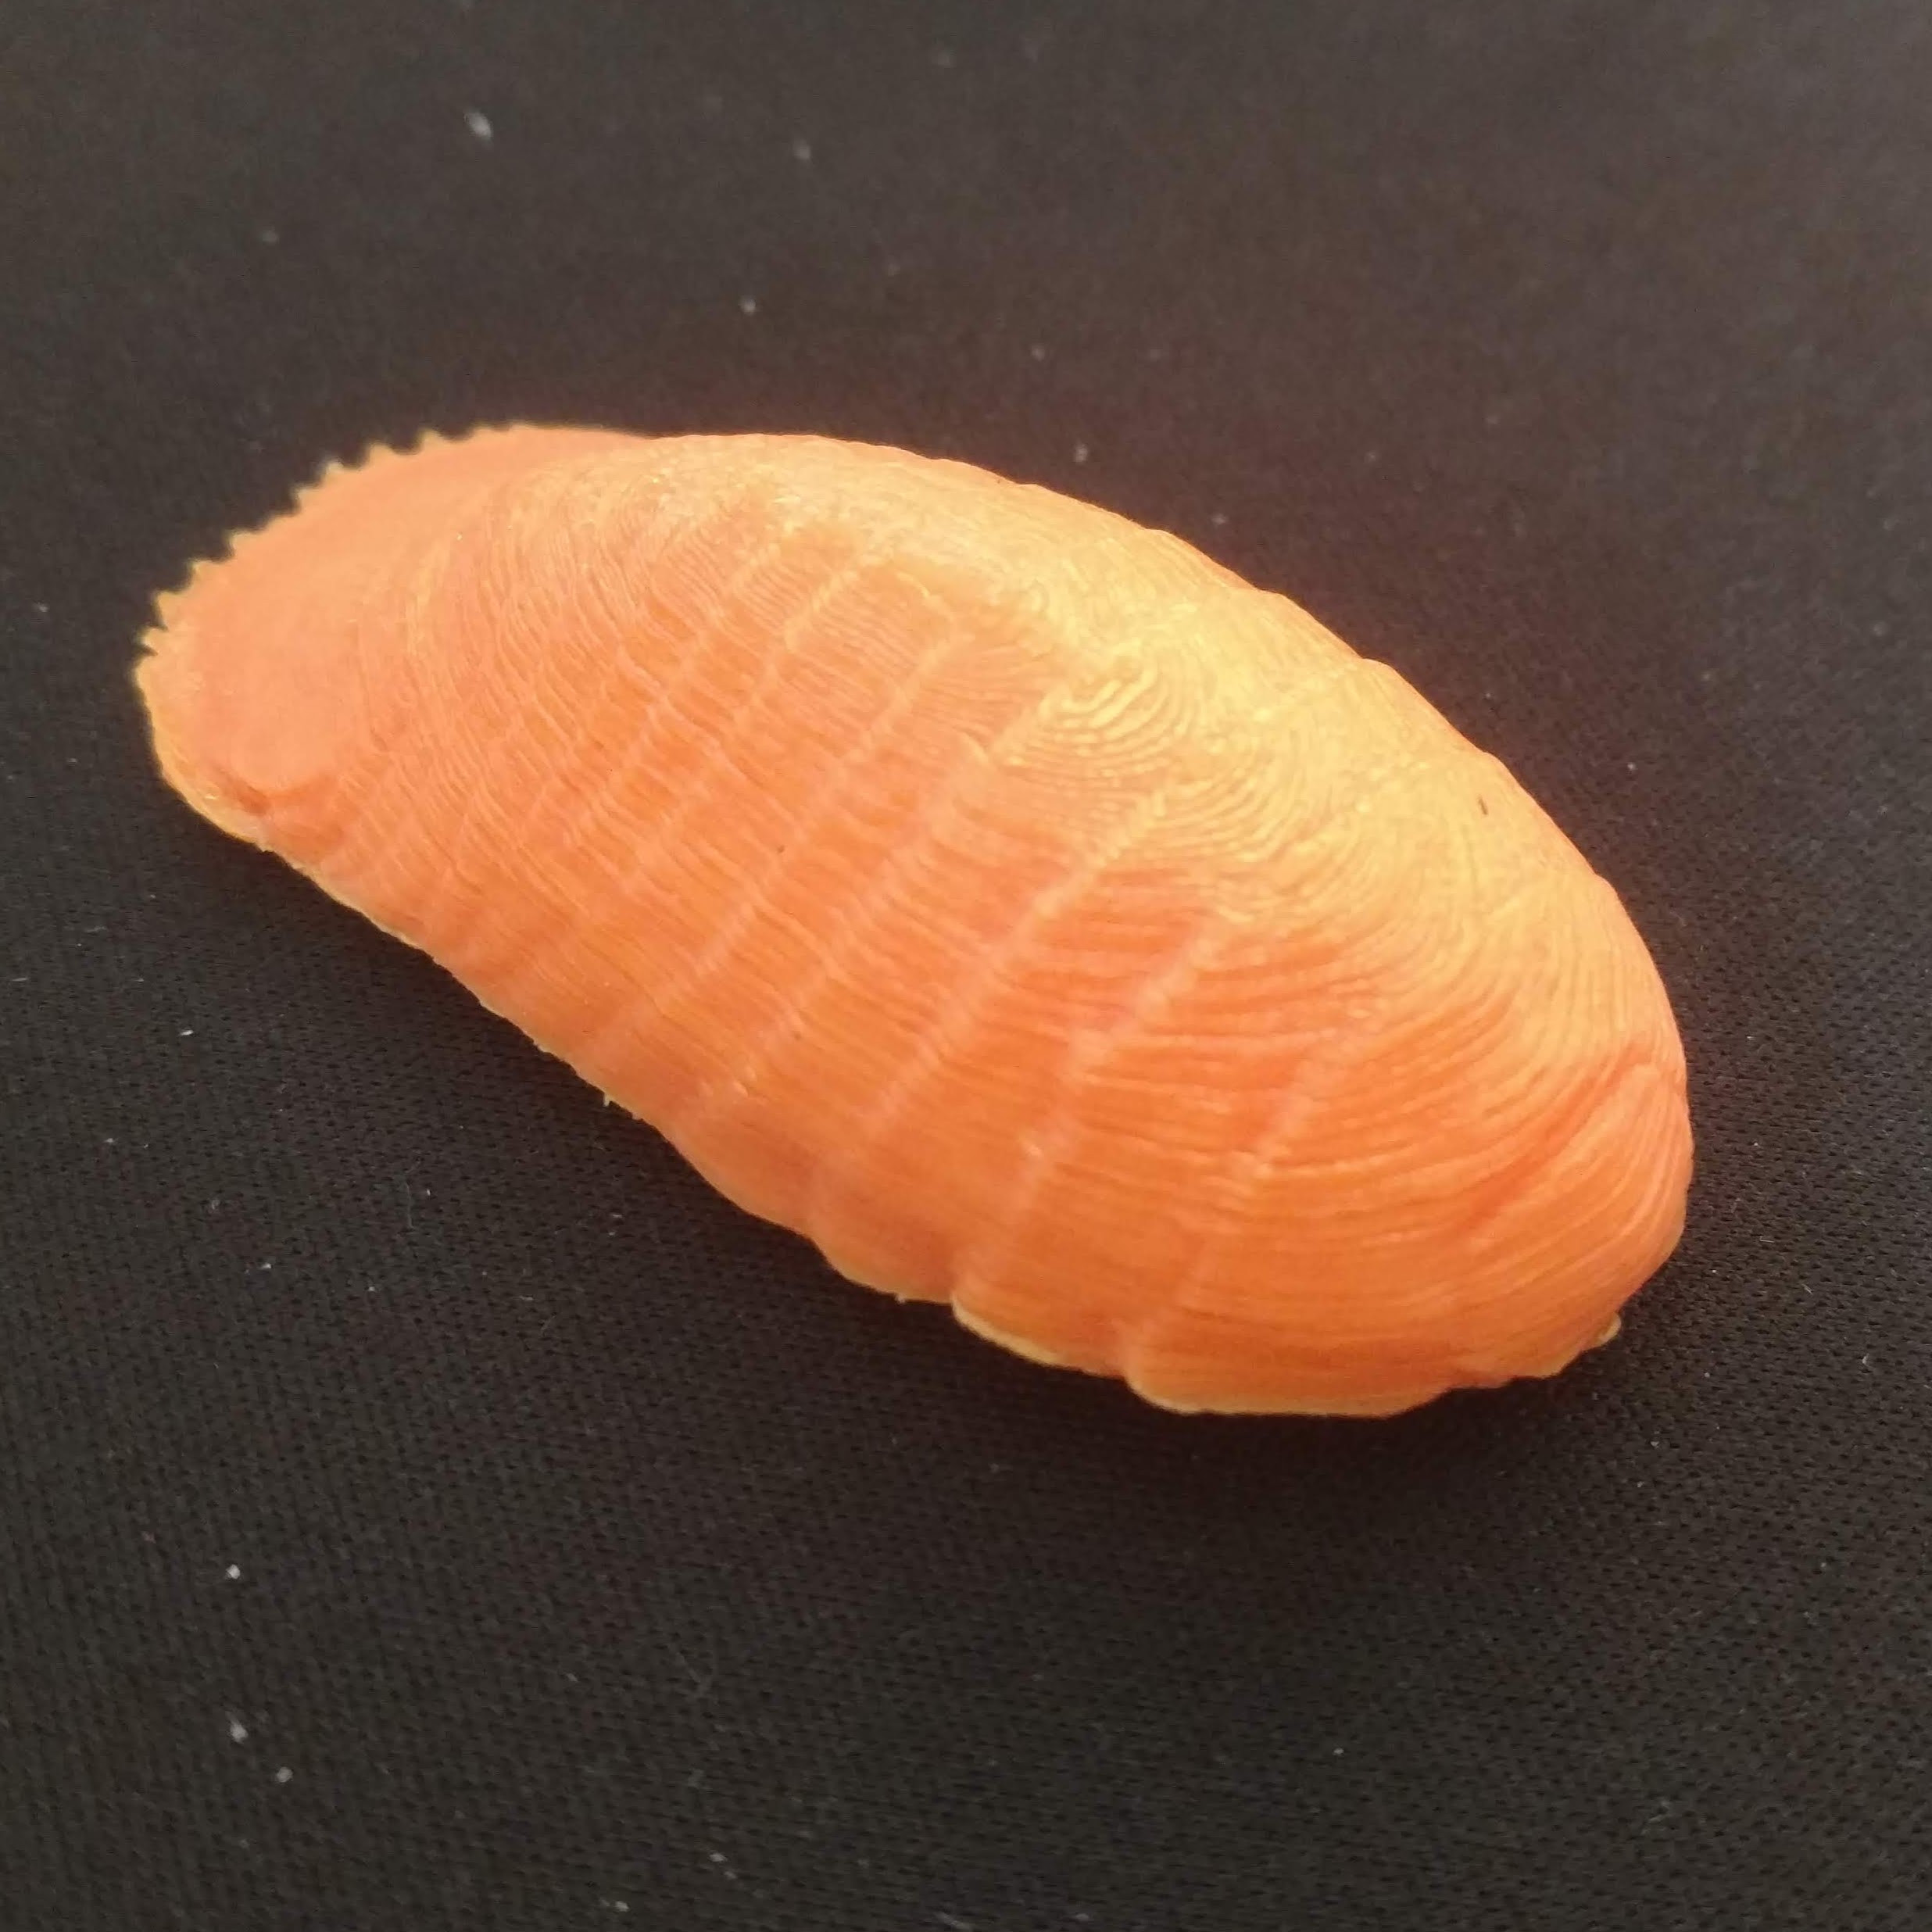 Image alt text: A 3D printed Isopod model from the iNSTONE Desktop DIY, the cheapest 3D printer tested, showing significant z-wobble and loss of detail, unsuitable for educational purposes requiring quality prints.
Unfortunately, the z-axis wobble once again undermined the print quality. Vertical layers were inconsistent with large gaps, much of the fine detail was lost, the base was poorly formed, and warping occurred on the telson (tail-like appendage). While the print was recognizably an isopod, its overall quality was insufficient for educational purposes where detail and accuracy are important.
Educator’s Score: D
The Tear-down
Similar to the Anet A6, the iNSTONE Desktop DIY has an open design, making tear-down straightforward. After extensive use over several weeks, the printer’s internal components were very familiar. Despite its performance limitations, the iNSTONE is surprisingly well-designed and constructed for its price point. The Bowden extruder showed minor signs of stress from filament movement, but otherwise, no significant wear, rubbing, or potential failure points were evident.
For what it is – an incredibly cheap 3D printer – it’s remarkably well-engineered. However, “what it is” is ultimately not very practical for most users seeking reliable 3D printing.
Note: The Burn In and Tear Down tests are often somewhat redundant in these reviews. Kit printers typically receive extensive Burn In analysis and briefer Tear Downs, while pre-built printers are assessed in reverse. The overall evaluation is balanced across both types.
Tear-down Score: A
The Trash Test
The iNSTONE Desktop DIY produced significantly more waste filament than any other printer tested, even excluding the numerous failed prints during the initial burn-in and calibration phase. This highlights another downside of using a very cheap and less reliable 3D printer: increased material waste due to print failures.
Total mass of waste filament: 27.71g
Reviewer’s Discretion
Many potential improvements could be made to the iNSTONE Desktop DIY. Replacing the PVC tubing z-axis coupler with a more robust all-metal or even a 3D-printed coupler would significantly improve z-axis stability and print quality. Redesigning the build plate and adding a heated bed would also greatly enhance its performance and material compatibility. Finally, incorporating a cooling fan directed at the print area is essential for better print quality, especially with materials like PLA.
However, implementing these upgrades would fundamentally alter the nature of the machine. The iNSTONE Desktop DIY is designed to be a $99 3D printer, not a $99 printer requiring significant post-purchase modifications, engineering expertise, and years of 3D printing experience to become truly functional.
The motivation behind building a hundred-dollar 3D printer isn’t necessarily practicality; it’s the challenge and the demonstration that it can be done at all.
Final Assessment
It’s difficult to assign a numerical score to the iNSTONE Desktop DIY because, despite its engineering ingenuity for the price, it is simply not a recommended 3D printer for general use.
Final Score: Stop. Don’t.
The rankings so far:
The review series will continue with the highly recommended $194 Creality Ender 3, providing a comparison point at a slightly higher budget. Stay tuned for the final results and further explorations into the world of budget 3D printing!
Depending on the success of this project, reviews may expand to include printers in the $200 to $400 price range. To support this ongoing work, consider using the provided Amazon Affiliate links for purchases or *[sign up for Patreon to support Southern Fried Science*](https://www.patreon.com/Andrew_Thaler)**.