
Navigating the Microsoft 365 suite efficiently often involves mastering keyboard shortcuts. For tasks you perform frequently, like printing, knowing the right keyboard shortcut can significantly boost your productivity. This guide, tailored for English-speaking users, will delve into the essential “Print Keyboard Shortcut” within Microsoft 365 applications, helping you streamline your workflow and enhance your overall experience.
The File menu in Microsoft 365 applications, often referred to as the ‘Backstage view,’ is your central hub for managing files, adjusting app settings, and handling account configurations. Accessing this menu and its various options through keyboard shortcuts can be a game-changer, especially for users seeking efficiency or those who find touchscreens or mice less accessible.
Whether you’re aiming to quickly print a document in Word, an Excel spreadsheet, or an Outlook email, understanding and utilizing the print keyboard shortcut is a fundamental skill. Let’s explore how to leverage these shortcuts to optimize your printing process and overall productivity within Microsoft 365.
Understanding the File Menu and KeyTips
To effectively use print keyboard shortcuts, it’s crucial to understand the File menu and the KeyTips system within Microsoft 365. The File menu is your command center for operations that occur behind the scenes, such as saving, opening, sharing, and, of course, printing your files.
Microsoft 365 employs a system called KeyTips to make keyboard navigation within the File menu intuitive. KeyTips are small badges displaying letters or numbers that appear over menu options when you press the Alt key. These KeyTips act as shortcuts, allowing you to select commands and navigate menus without relying on a mouse.
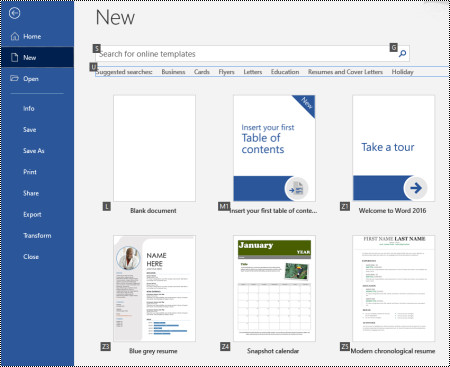 New page in the File menu of Word for Windows
Using KeyTips to Access Print Options:
- Open the File Menu: Begin by pressing Alt + F in any Microsoft 365 application (Word, Excel, PowerPoint, Outlook, etc.). This action will open the File menu, and you’ll notice KeyTips appearing over the various page options like ‘Home’, ‘New’, ‘Open’, ‘Info’, ‘Save’, ‘Print’, ‘Share’, ‘Export’, ‘Account’, ‘Feedback’, and ‘Options’.
- Navigate to the Print Page: To access the Print options, look for the KeyTip associated with ‘Print’. In most Microsoft 365 apps, this KeyTip is P. Press the P key. This will take you directly to the Print page within the File menu.
- Utilize Print Page Shortcuts: Once on the Print page, you’ll see another set of KeyTips associated with different print settings like choosing a printer, setting print ranges, page orientation, and paper size. You can then use these KeyTips to further refine your print job using only your keyboard.
For instance, after pressing Alt + F, P to reach the Print page, you can quickly select a different printer by pressing I (KeyTip for Printer menu), or adjust the printing range by pressing A (KeyTip for printing range options).
Frequently Used File Menu Shortcuts Including Print
While the KeyTip system offers flexibility, some keyboard shortcuts are used so frequently that memorizing them can significantly enhance your workflow. Here are some of the most common File menu shortcuts in Microsoft 365, with a strong focus on the “print keyboard shortcut”:
| To do this | Press |
|---|---|
| Open the File menu | Alt + F |
| Open the Home page (access recent files, templates, search) | H |
| Open the New page (create new files or use templates) | N |
| Save a file (with default settings, when AutoSave is off) | S |
| Open the Save As dialog box (save with a different name or location) | A, 1 or A, O |
| Open the Print page (access print settings and print) | P |
| Quick Print (print with default settings) | Ctrl + P, P |
| Exit the File menu (return to the document editing view) | Esc |
As you can see, the direct shortcut to open the Print page from anywhere in your Microsoft 365 application is Alt + F, P. For an even faster printing process using default settings, Ctrl + P, P is the ultimate “print keyboard shortcut.”
Mastering Print Options with Keyboard Shortcuts
Once you’ve accessed the Print page using Alt + F, P, you can further control your printing parameters using additional keyboard shortcuts. These shortcuts allow you to adjust settings without touching your mouse, maintaining a streamlined, keyboard-centric workflow.
| To do this | Press |
|---|---|
| Open the printer menu (select a printer) | I |
| Open the menu for printing range | A |
| Set printing range by page numbers | S |
| Set page orientation (portrait/landscape) | O |
| Set paper size | L |
For example, if you need to quickly change the paper orientation to landscape before printing, you would:
- Press Alt + F, P to open the Print page.
- Press O to access the page orientation settings.
- Use the arrow keys to select ‘Landscape’ and press Enter.
- Finally, press P again to initiate the print job with the new landscape orientation.
Saving Files: Shortcuts for “Save” and “Save As”
While the focus is on “print keyboard shortcut”, efficient file management is also crucial for productivity. The File menu offers shortcuts for saving your work quickly:
| To do this | Press |
|---|---|
| Save a file (default values, AutoSave off) | S |
| Open the Save or Save As page | A |
| Open the Save As dialog box (different name/location) | A, 1 or A, O |
| Quick Save | Ctrl + S |
The “Save As” shortcut (A, 1 or A, O) is particularly useful when you need to create a copy of your document, save it in a different format, or choose a specific save location.
Exploring Other Useful File Menu Shortcuts
Beyond printing and saving, the File menu provides access to a range of functionalities, all accessible via keyboard shortcuts. Here’s a glimpse into other useful shortcuts within the File menu:
- Export Options (Alt + F, E): Create PDFs or XPS files (A), change file types (C).
- Account Information (Alt + F, D or Alt + F, I in Outlook): Manage your Microsoft 365 account, change your profile picture (C), check for updates (R, U).
- Options Dialog Box (Alt + F, T): Customize application settings like proofing (P) and theme (G, then Tab, T).
- Feedback (Alt + F, K): Send positive (L) or negative (D) feedback to Microsoft, or suggest features (S).
Conclusion: Embrace Keyboard Shortcuts for Enhanced Productivity
Mastering the “print keyboard shortcut” and other File menu shortcuts in Microsoft 365 can transform the way you work. By integrating these shortcuts into your daily routine, you’ll experience a significant boost in efficiency, smoother workflows, and a more streamlined interaction with Microsoft 365 applications.
Whether you are looking to speed up your tasks, improve accessibility, or simply prefer keyboard navigation, learning these shortcuts is a worthwhile investment. Start with the essential “print keyboard shortcut” (Ctrl + P, P or Alt + F, P) and gradually explore other File menu shortcuts to unlock the full potential of keyboard-driven productivity within Microsoft 365.