
Technology is undeniably shaping our world, and coding skills are becoming increasingly valuable for future generations. While complex programming might seem distant for young children, the fundamental principles can be introduced early and in engaging ways. My own journey into coding began later in life, but it has become an invaluable skill, allowing me to work flexibly and spend more time with my children. I believe even preschoolers can grasp basic coding concepts through playful activities.
 Coding a LEGO Maze
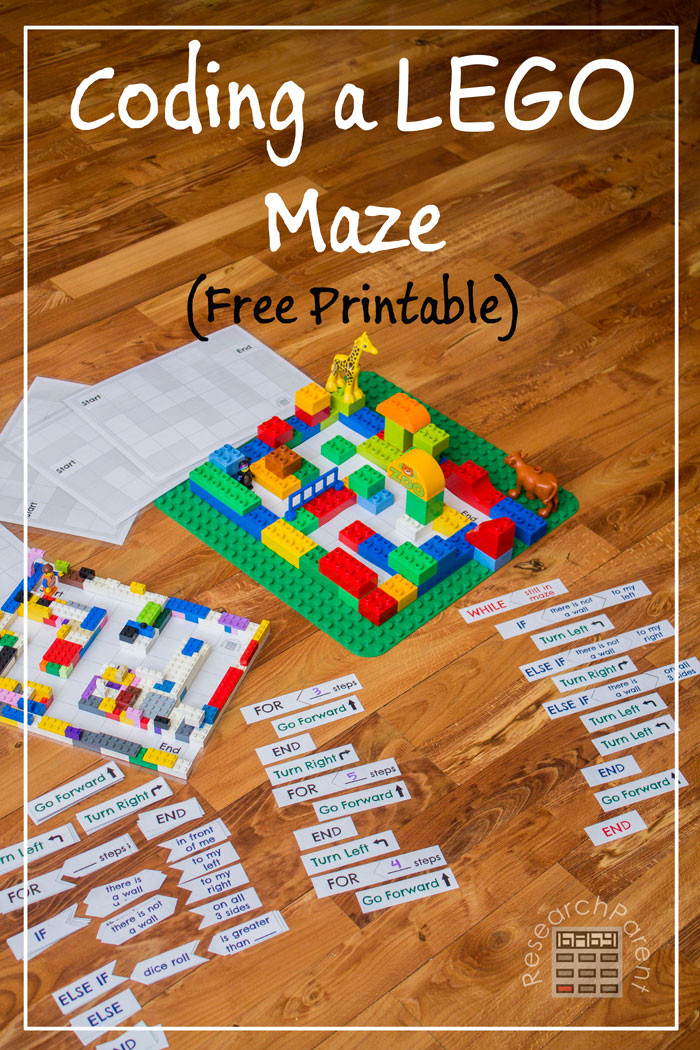
This printable children’s maze activity offers a fantastic, hands-on introduction to coding without requiring computers. It’s part of a series focused on STEM activities and is designed to grow with your child. Starting from simple challenges suitable for 5-6 year olds, the activity progresses to cover concepts found in introductory programming courses.
Learning to think like a programmer involves many steps. Having worked with various programming languages, I’ve realized that the core logic transcends specific syntax. This LEGO maze activity uses paper-based “code” to illustrate four difficulty levels, each introducing essential programming concepts in an accessible way. Here’s a quick overview of these levels:
- Level 1: Step-by-Step Navigation: Children learn to solve a maze by physically tracing a path, understanding directions from a different perspective. This level, similar to games like Robot Turtles, helps children shift their point of view and understand directional commands relative to the maze character, not themselves.
- Level 2: Introducing Loops: Once comfortable with Level 1, children discover the efficiency of loops. Instead of repeating commands, they learn to use “for loops” to repeat a sequence of actions a specified number of times, simplifying their code.
- Level 3: Conditional Logic: Older children can tackle more complex mazes by using “while loops” and “if statements.” This level encourages them to create shorter, more efficient code by considering different scenarios and defining actions based on conditions, such as what to do if there’s an opening to the left or a dead end.
- Level 4: Randomness and Problem Solving: Children learn that code designed for one maze might not work for another, potentially leading to infinite loops. By incorporating a random element, they can create code that solves any maze, though perhaps not in the most direct path. This introduces the concept of randomness in algorithms.
Eventually, children might realize the benefit of the character “remembering” previous steps to avoid aimless wandering, leading to discussions on more advanced programming ideas like memory and variables.
Recommended Age Range: Kindergarten, Elementary, Middle School, High School
Time Required: Approximately 1 hour if laminating
Difficulty: Easy preparation, Level 3 and 4 are better suited for late elementary and older.
Cost: Free printable children’s maze, minimal cost for lamination (LEGO/DUPLO bricks are optional).
 Coding a LEGO Maze Supplies
Materials:
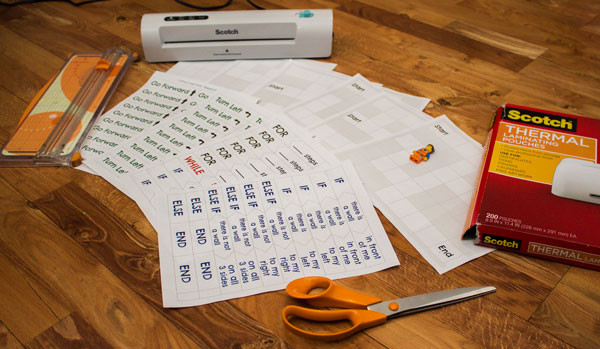
- Printable “Coding a LEGO Maze” sheets (free download available)
- Laminating pouches (optional, but recommended for durability)
Supplies & Tools:
- Thermal laminator
- Scissors
- Paper cutter (optional for cleaner cuts)
- LEGO figure (or similar small toy figure)
- LEGO or DUPLO bricks (optional for building physical maze walls)
Instructions:
- Prepare the Pieces: Print, laminate (optional), and cut out all components from the free printable children’s maze activity sheets.
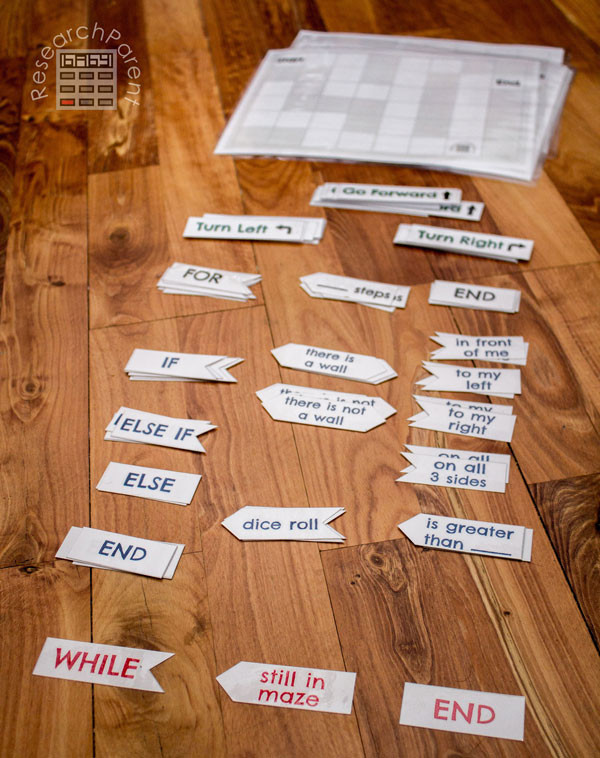 Laminated Coding a LEGO Maze Pieces
-
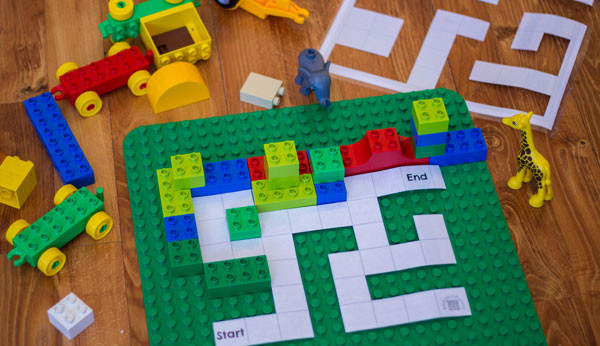
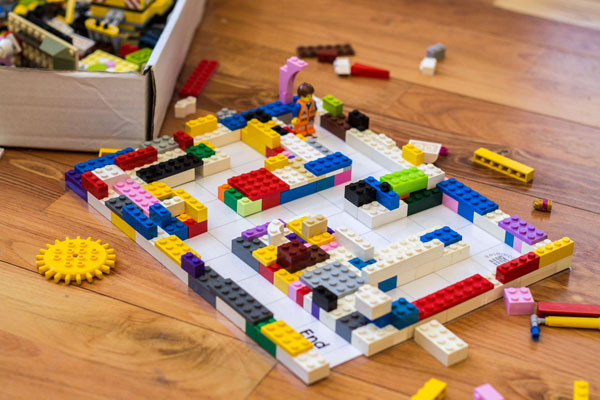
Set Up Your Maze: Choose from the five pre-designed mazes or create your own on the blank grid provided. There are three setup options:
- Option 1: Paper Maze Only: Use the printed maze as is. You’ll only need a figure with a clear front direction.
- Option 2: LEGO Brick Walls: Cover the gray lines on the printed mazes with LEGO bricks to create raised walls.
 Place LEGO Pieces on LEGO Maze
- Option 3: DUPLO Brick Walls: Cut out the white maze area and place it on a DUPLO baseplate. Build walls using DUPLO bricks. This option provides taller, sturdier walls, which can be easier for younger children to manage, although direct placement on the laminated sheet is also possible.
 Place DUPLO Pieces on DUPLO Maze
Completed mazes might look like these examples:
 LEGO Maze Ready for Coding
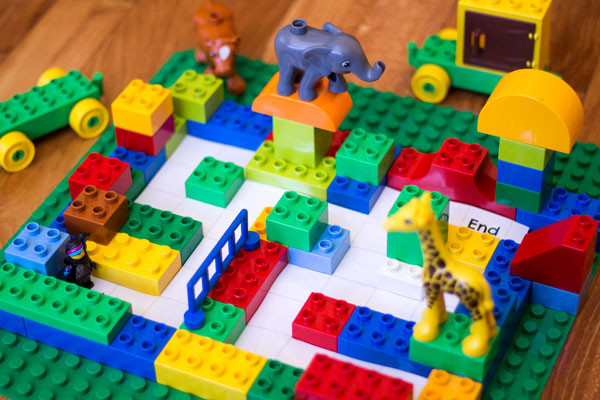 DUPLO Maze Ready for Coding
Level 1: Navigating the Maze – Understanding Directions
For younger children, the first step is to grasp the concept of perspective. Place the figure at the maze’s starting point and give your child the green command cards (Go Forward, Turn Right, Turn Left). Have them arrange these cards in a sequence they believe will guide the figure out of the maze. For example, in the LEGO maze shown, Emmet the construction worker needs to: Go Forward, Go Forward, Go Forward, Turn Right, Go Forward, and so on.
Initially, I intended to move the figure myself based on my 6-year-old’s “code.” However, he was eager to control the figure directly. He followed each command card in his sequence, flipping them over as he executed each step. This hands-on approach proved highly effective. The key point to watch is left and right confusion. When Emmet faced him, my son initially placed a “Turn Right” card when “Turn Left” was needed. By having him physically place the card in Emmet’s hand as he encountered the error, he quickly understood and corrected himself.
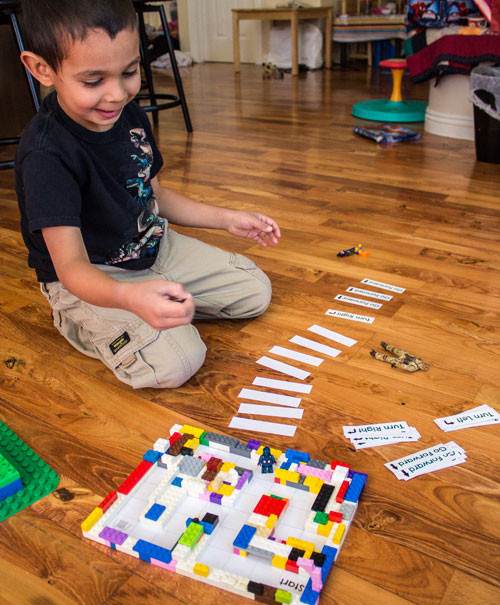 Level 1 of Coding a LEGO Maze
Level 2: Loops – Repeating Commands Efficiently
Once your child masters Level 1, introduce the “For ____ Steps” loop card. This teaches them to repeat a command multiple times, replacing repetitive cards. For the maze example, the code would be streamlined as shown. Notice the indentation of commands within the “for” loop, a common practice for code readability, and the “End” card marking the loop’s conclusion. While not all programming languages strictly require indentation or “end” commands, they enhance code clarity and are good habits to learn.
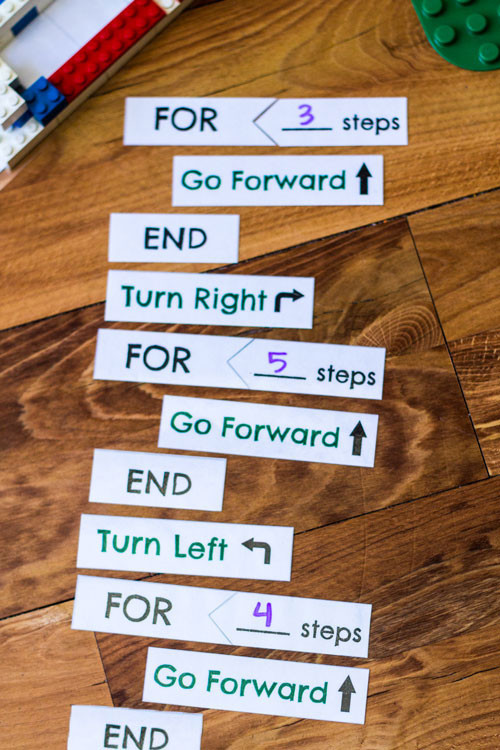 Level 2 of Coding a LEGO Maze
Level 3: Conditional Statements – Making Decisions in Code
While perhaps advanced for preschoolers, introducing conditional “if” statements opens up abstract thinking. “If” statements, which I discovered in college, felt like decision trees applicable to everyday choices. For instance, deciding on dinner could be coded as: “IF Kelly is free, THEN Thai food with her. ELSE IF cafeteria food is edible, THEN eat there. ELSE cereal and ice cream at home. END IF.”
While that level of algorithmic thinking for dinner choices might be a bit much, “if” statements are powerful in programming. In the maze context, the character faces limited options: walls or openings ahead, left, or right. Children can devise codes based on these conditions. A simple code like “IF no wall in front, go forward. END” can solve some mazes. More complex mazes might require code like the example below.
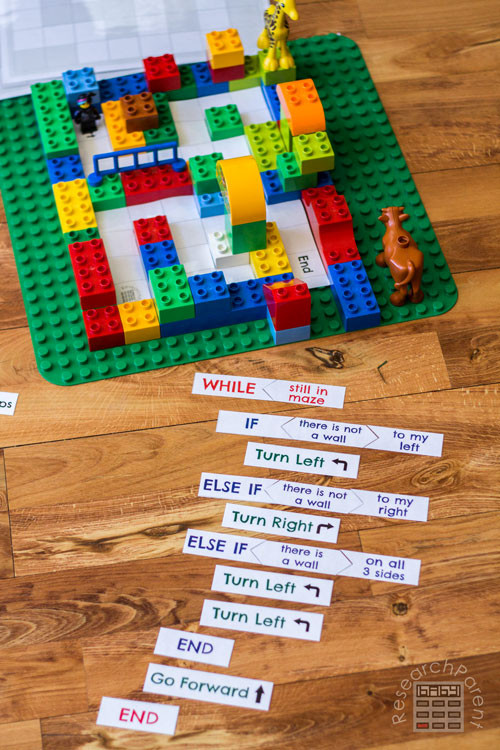 Level 3 of Coding a LEGO Maze
This code translates to: “IF can turn left, turn left. ELSE IF can turn right, turn right. ELSE IF dead end, turn around. After checking conditions, go forward. REPEAT.” The red “while” loop encompassing the code means “repeat this code while still in the maze, until you escape.” “IF” means execute if the condition is true. “ELSE IF” means execute if the condition is true AND preceding “IF” and “ELSE IF” conditions were false. “ELSE” is the fallback if all prior conditions fail. “END” concludes the “if,” “while,” or “for” block.
Level 4: Randomness – Solving Any Maze
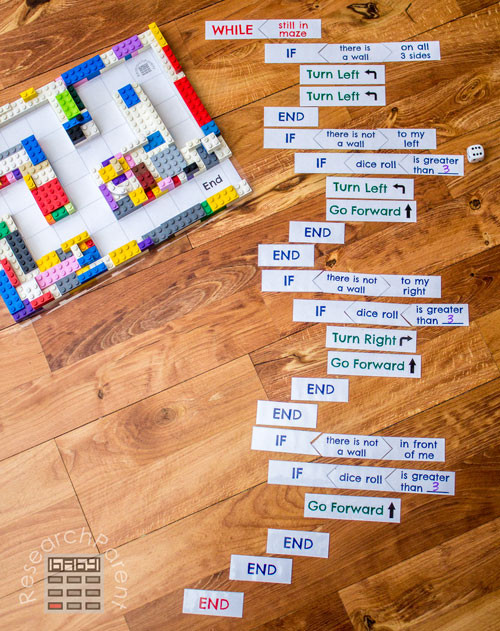
Children will find that Level 3 code might not solve every maze. Prioritizing left turns, for example, can cause infinite loops. To overcome this without complex memory concepts, randomness can be introduced. Instead of “IF can turn left, turn left,” use “IF can turn left, turn left HALF the time.” Using a dice roll instead of a random number generator function in a real computer, kids can implement this randomness. While not always the most direct route, it prevents infinite loops. Here’s a sample code that should work for any maze, though it’s not the only, or necessarily the best, solution. Encourage children to experiment and create their own code before revealing this example. Coding is about trial, error, and testing.
 Level 4 of Coding a LEGO Maze
Explore the 28 Days of Hands-On STEM Activities for more STEM inspiration! Consider subscribing to our newsletter for exclusive free educational printables!
HAPPY “PROGRAMMING”!
 Coding a LEGO Maze
 Coding a LEGO Maze
Discover more Technology and Engineering activities for kids.
Popular Posts
 DIY No Pedal Balance Bike
 Homemade Wobblebot
 Coding a LEGO Maze
 Super Long Lasting Play Dough
 Color-changing invisible ink no heat required
 Super Easy Bottle Rocket
 Cloud in a Jar Experiment
 Homemade Wigglebot
Related Links
Free Printables
Learning Activities for Kids
Best Books for Kids