In today’s digital age, while we strive for paperless environments, printing remains a necessary task for many. Whether it’s important documents, invoices, or travel tickets, a record of what has been printed can be invaluable. Knowing your Print History can be useful for tracking document workflows, managing printer usage, or even for security audits. Windows operating systems, both Windows 10 and 11, offer capabilities to log and view your print history, although these features are not always enabled by default. This comprehensive guide will walk you through different methods to access and manage your print history on Windows, ensuring you have the insights you need.
Short-Term Print History: Utilizing the Print Queue
The quickest way to see a recent print history is through the Print Queue. By default, Windows clears the print queue after each print job is completed. However, you can easily adjust settings to retain a short-term log of your printed documents directly within the print queue interface. This method is ideal for quickly checking recently printed items.
Enabling “Keep Printed Documents” on Windows 10
To activate short-term print history logging on Windows 10, you’ll need to modify the settings for each printer you want to monitor. Here’s how:
-
Access Settings: Right-click on the Windows Start Menu button and select “Settings.”
-
Navigate to Devices: In the Settings window, click on “Devices” and then select “Printers & Scanners” from the left-hand menu.
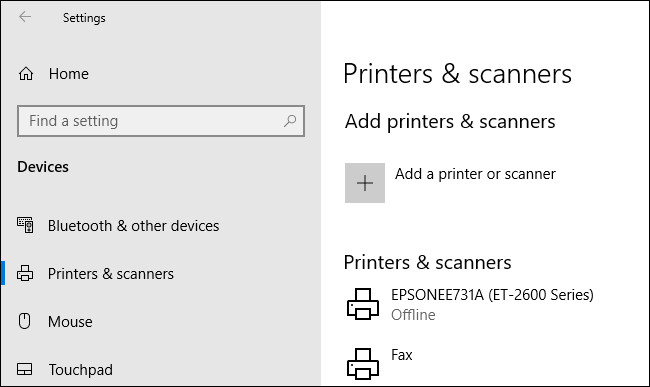 Access your Windows printer settings through the Settings menu.
 -
Open Print Queue: Find your printer in the “Printers & scanners” list, click on it, and then select “Open queue.” This will open the print queue window for the selected printer.
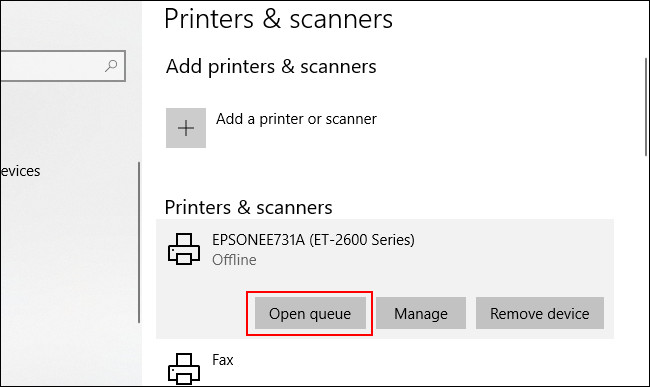 Open the printer queue to manage print jobs and settings.
 -
Access Printer Properties: In the print queue window, click on “Printer” in the menu bar, and then select “Properties” from the dropdown menu. Alternatively, from the “Printers & scanners” settings menu, you can select your printer and click “Manage,” which also provides access to “Printer properties.”
 Access printer properties from the print queue to configure advanced settings.
 -
Enable Document History: In the Printer Properties window, navigate to the “Advanced” tab. Here, you will find a checkbox labeled “Keep printed documents.” Check this box to enable print history logging.
 Enable 'Keep printed documents' in the Advanced tab of printer properties to log print history.
 -
Apply Settings: Click “OK” to save your changes and close the Printer Properties window.
With this setting enabled, documents will remain in the print queue even after they have been printed, providing a readily accessible list of your recent print history.
Enabling “Keep Printed Documents” on Windows 11
The process for enabling short-term print history in Windows 11 is very similar to Windows 10. Follow these steps:
-
Open Settings: Press the Windows key + i to open the Settings app. Alternatively, you can find Settings in the Start Menu.
-
Navigate to Printers & Scanners: Go to “Bluetooth & devices” and then click on “Printers & scanners.”
-
Select Your Printer: Choose the printer for which you want to enable print history logging.
-
Open Printer Properties: Scroll down the printer settings page and click on “Printer properties.”
-
Advanced Settings: In the Printer Properties window, select the “Advanced” tab.
-
Keep Printed Documents: Check the box next to “Keep printed documents.”
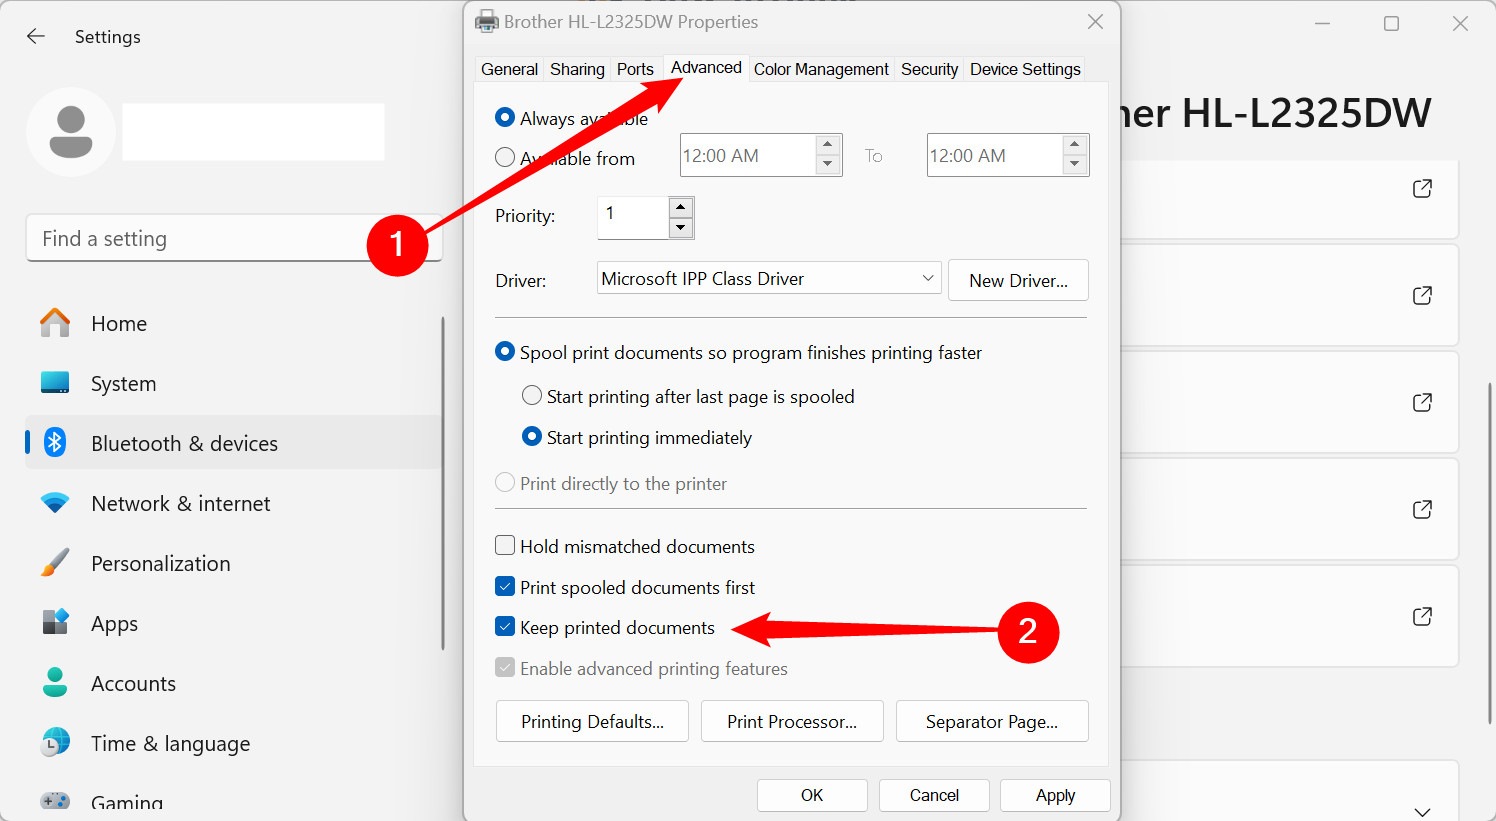 Enable Keep printed documents in Windows 11 printer properties to maintain a short-term print history.
 -
Apply and Close: Click “Apply” and then “OK” to save the setting. You can then close all open windows.
To view your short-term print history at any time, simply navigate back to Settings > Bluetooth & devices > Printers & scanners, select your printer, and click “Open print queue.”
Long-Term Print History: Leveraging Event Viewer
For a more comprehensive and long-term print history, Windows Event Viewer is the built-in tool you need. Event Viewer logs various system events, including print jobs. However, print service logging is not enabled by default. You need to configure Event Viewer to start recording your print history for long-term tracking and analysis.
Enabling Print Service Logging in Event Viewer
Here’s how to enable long-term print history logging using Event Viewer:
-
Open Event Viewer: Right-click on the Windows Start Menu button and select “Event Viewer.”
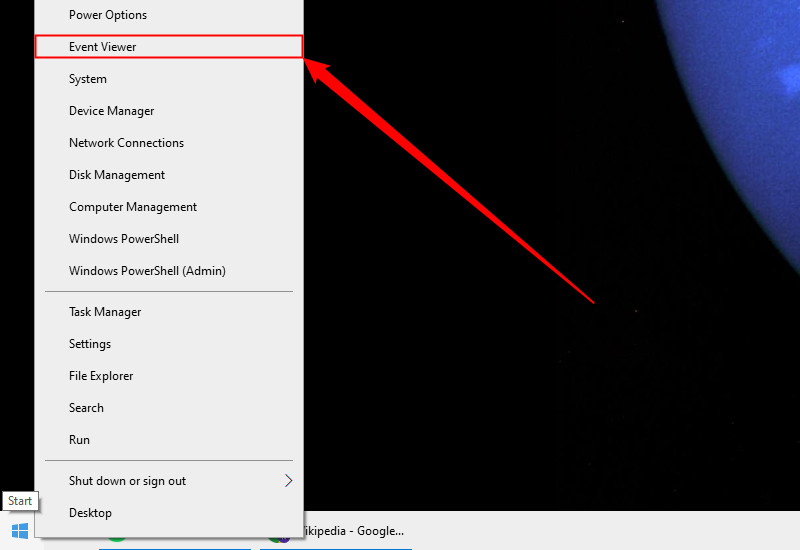 Open Event Viewer from the Power User Menu to access system logs.
 -
Navigate to PrintService Logs: In the Event Viewer (Local) menu on the left, expand “Applications and Services Logs,” then “Microsoft,” and then “Windows.” Scroll down to find and expand the “PrintService” category.
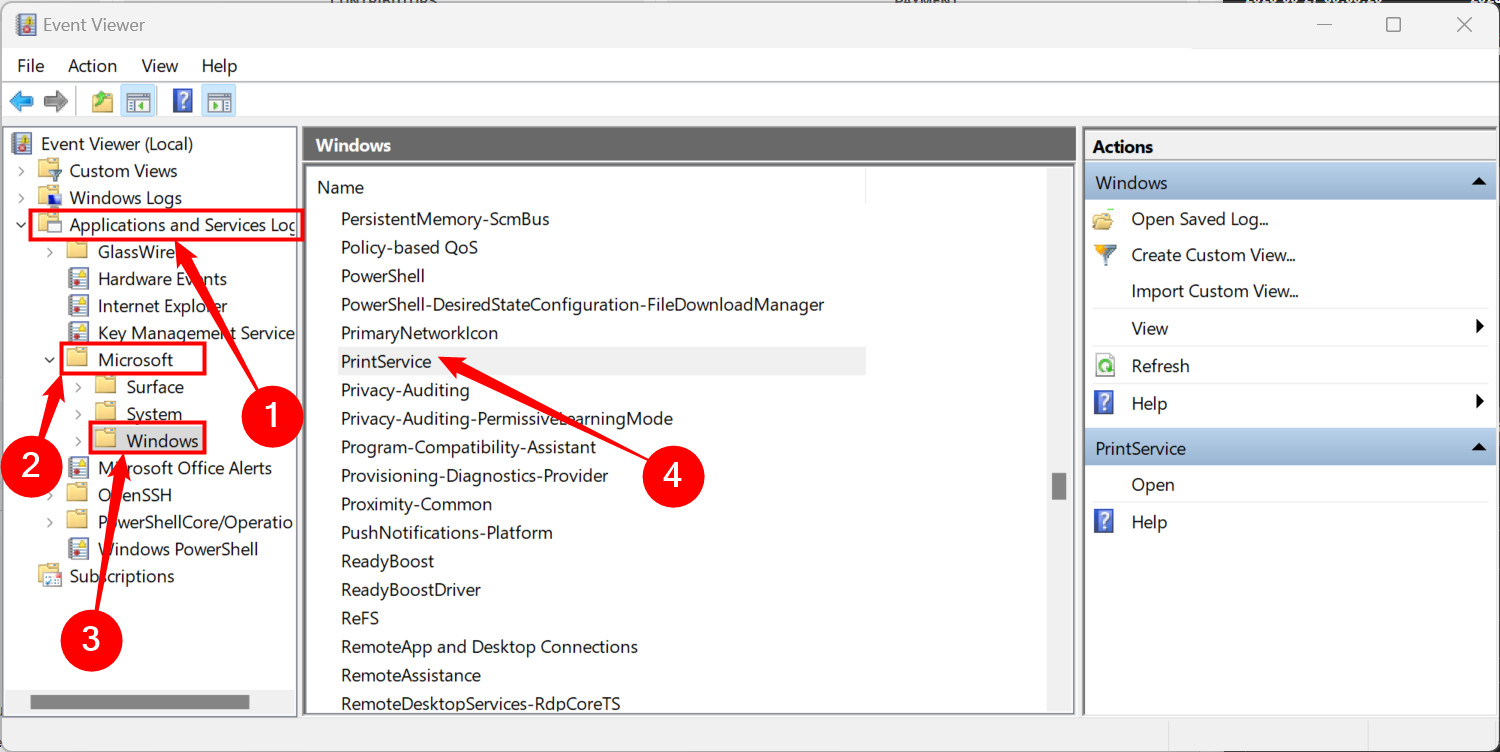 Navigate to PrintService logs within Event Viewer to manage printer event logging.
 -
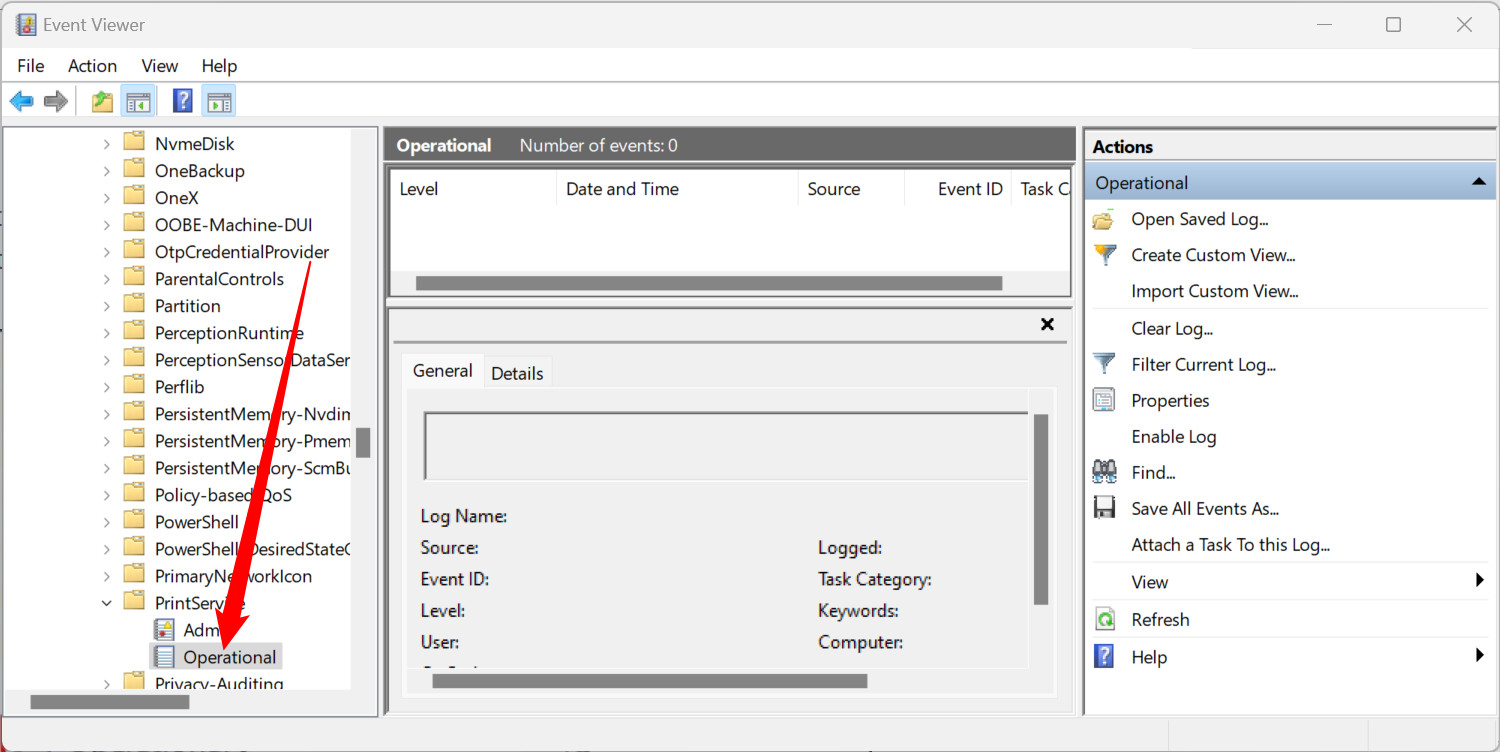
Open Operational Log Properties: Right-click on the “Operational” log under PrintService and select “Properties.”
 Access the properties of the Operational log to enable print service logging.
 -
Enable Logging: In the Operational Log Properties window, check the “Enable Logging” checkbox. You can also set a “Maximum log size” to manage the disk space used for storing print history logs. A larger size allows for a longer retention period.
 Enable logging and set maximum log size in Operational Log Properties for PrintService.
 -
Apply Settings: Click “Apply” and then “OK” to save the changes.
From this point onward, Windows will automatically record print history events for all installed printers in the Event Viewer logs.
Viewing Print History Logs in Event Viewer
Once print service logging is enabled, you can view your long-term print history in Event Viewer at any time.
-
Access Operational Log: Open Event Viewer and navigate to “Applications and Services Logs > Microsoft > Windows > PrintService” and select the “Operational” log.
 Access the Operational log under PrintService to view recorded print history events.
 -
Review Print Events: The Operational log will display a chronological list of all print service events, including spooling, successful prints, and print failures.
-
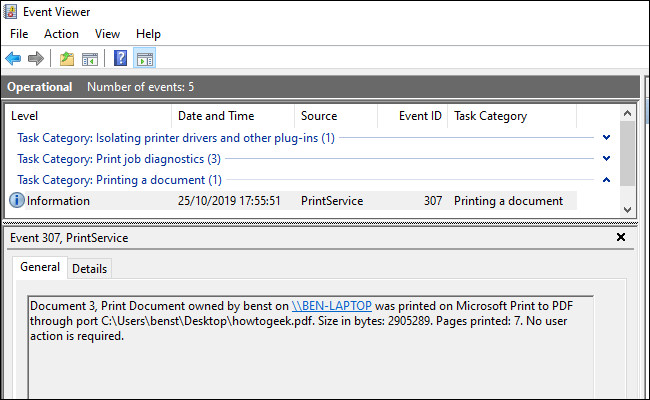
Filter for “Printing a Document”: To easily find successful print jobs, look at the “Task Category” column. Entries listed as “Printing a Document” indicate successfully printed documents. Failed prints will also be logged in this category.
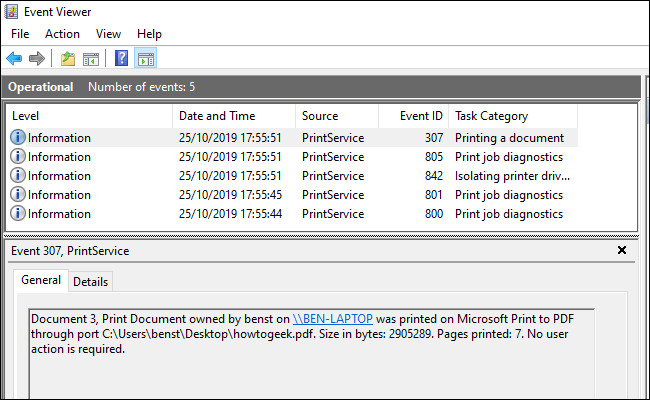 The PrintService Operational log displaying a list of print history events, including 'Printing a Document'.
 -
Group by Task Category (Optional): For better organization, you can group events by category. Right-click on the “Task Category” column header and select “Group Events by This Column.”
-
Minimize Categories: After grouping, you can minimize other categories to focus solely on the “Printing a Document” category, providing a cleaner view of your print history.
 Event Viewer log grouped by Task Category, highlighting 'Printing a Document' events for easier print history review.
Event Viewer provides a robust, long-term solution for tracking print history, although the interface may not be as user-friendly for quick reviews.
Advanced Print History Management: Third-Party Software
While Windows built-in tools offer basic print history logging, third-party software can provide a more user-friendly and feature-rich experience. Software like PaperCut Print Logger offers a more accessible way to view and manage your print history.
Using PaperCut Print Logger
PaperCut Print Logger is a free tool that provides a clear and detailed view of your print history. It logs essential information such as the time of printing, the user who printed, the document name, and page count.
-
Installation: Download and install PaperCut Print Logger from the official website.
-
Access Admin Interface: Once installed, you can access the admin interface by navigating to the PaperCut Print Logger directory. On Windows 10, this is typically
C:Program Files (x86)PaperCut Print Logger. Double-click the “ViewLogs” shortcut to open the admin panel in your web browser.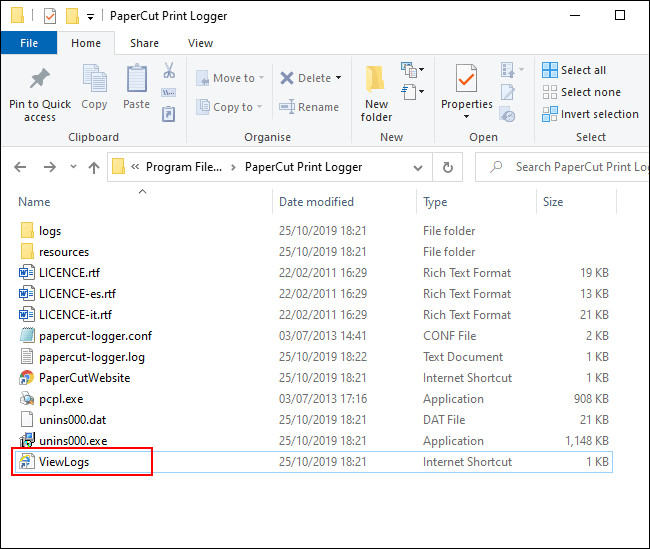 Access the PaperCut Print Logger admin panel by running the ViewLogs shortcut in the installation directory.
 -
View Print Logs: In the admin panel, under the “View” section, click “HTML” for the desired date to view the print history for that day in a readable HTML format.
-
Export Logs: PaperCut Print Logger also allows you to export print history data in CSV or Excel (XLS) format. Under the “Date (Day)” or “Date (Month)” categories, click the “CSV/Excel” button to export daily or monthly logs for further analysis or record-keeping. These logs can also be found directly in the
Logs > CSVfolder within the PaperCut Print Logger installation directory.
PaperCut Print Logger simplifies print history management with its user-friendly interface and export capabilities, making it an excellent option for users who need more than basic logging.
Conclusion
Understanding and accessing your print history in Windows is crucial for various reasons, from personal tracking to professional auditing. Whether you choose the short-term convenience of the Print Queue, the long-term logging capability of Event Viewer, or the user-friendly interface of third-party tools like PaperCut Print Logger, Windows provides you with the means to monitor and manage your printed documents effectively. By implementing these methods, you can gain better control and insight into your printing activities, enhancing both efficiency and security.