Printing documents and photos directly from your iPhone can be incredibly convenient. Whether it’s tickets, important documents, or cherished photos, the ability to print on the go enhances your mobile productivity. Fortunately, setting up a printer to work with your iPhone is straightforward, especially if you have an AirPrint-compatible printer. This guide will walk you through the process of setting up your printer on your iPhone, ensuring a smooth and efficient printing experience.
The most seamless way to print from your iPhone is by using AirPrint, Apple’s built-in technology that allows for wireless printing without the need for additional drivers or software. Before you begin, ensure you have an AirPrint-enabled printer and that both your printer and iPhone are connected to the same Wi-Fi network.
Preparing for AirPrint Setup
Before diving into the setup process, there are a couple of essential checks to perform:
-
AirPrint Compatibility: Verify that your printer supports AirPrint. You can usually find this information on the printer manufacturer’s website or in the printer’s manual. Many modern printers from brands like HP, Canon, Epson, and Brother support AirPrint.
-
Wi-Fi Connection: Ensure that both your iPhone and the printer are connected to the same Wi-Fi network. This is crucial for AirPrint to function correctly as it relies on a wireless connection to communicate between your devices.
Once you’ve confirmed these prerequisites, you’re ready to proceed with printing.
Printing from Your iPhone Using AirPrint
The process of printing with AirPrint is remarkably simple and consistent across most apps. Here’s how to do it:
-
Open the Document or Photo: Begin by opening the document, photo, email, or webpage that you wish to print from your iPhone. This could be in apps like Safari, Photos, Mail, Files, or productivity apps like Pages or Google Docs.
-
Access the Print Option: Locate the Share button within the app. This button typically looks like a square with an arrow pointing upwards or a Share button labeled “Share”. Tap on this button to reveal a menu of options.
Alt text: The share icon on an iPhone, a square with an upward arrow, used to access the print function.
-
Find the Print Icon: Scroll through the options in the Share menu until you find the “Print” icon or the word “Print”. It usually looks like a printer icon. Tap on “Print” to proceed to the printer options screen.
Alt text: The print icon on an iPhone, a printer symbol, indicating the print function within the share menu.
Note: If you cannot find the print option, it’s possible that the app you are using does not support AirPrint. In such cases, you may need to use a different app or method.
-
Select Your Printer: On the Printer Options screen, you will see “No Printer Selected” by default. Tap on “No Printer Selected” to view a list of available AirPrint-enabled printers on your Wi-Fi network. Choose your printer from the list.
-
Adjust Print Settings: Once you’ve selected your printer, you can adjust various print settings such as:
- Copies: Choose the number of copies you want to print.
- Page Range: Specify which pages you want to print.
- Double-sided Printing: If your printer supports it, you might see an option for double-sided printing.
- Color or Black & White: Select your preferred color mode.
- Paper Size: Choose the appropriate paper size if needed.
-
Print: After configuring your desired settings, tap the “Print” button located in the upper-right corner of the screen. Your iPhone will then send the print job wirelessly to your selected printer.
Managing Your Print Jobs
Once you’ve initiated a print job, you can monitor its progress or cancel it if needed through the Print Center.
Viewing a Print Job
To check the status of your print job, you can access the App Switcher on your iPhone while printing is in progress.
-
Open App Switcher: Swipe up from the bottom of your iPhone screen and hold in the middle of the screen, or double-click the Home button on older models, to open the App Switcher.
-
Access Print Center: In the App Switcher, look for “Print Center”. Tap on it to open and view the current print queue. Here, you’ll see the documents currently printing or waiting to be printed.
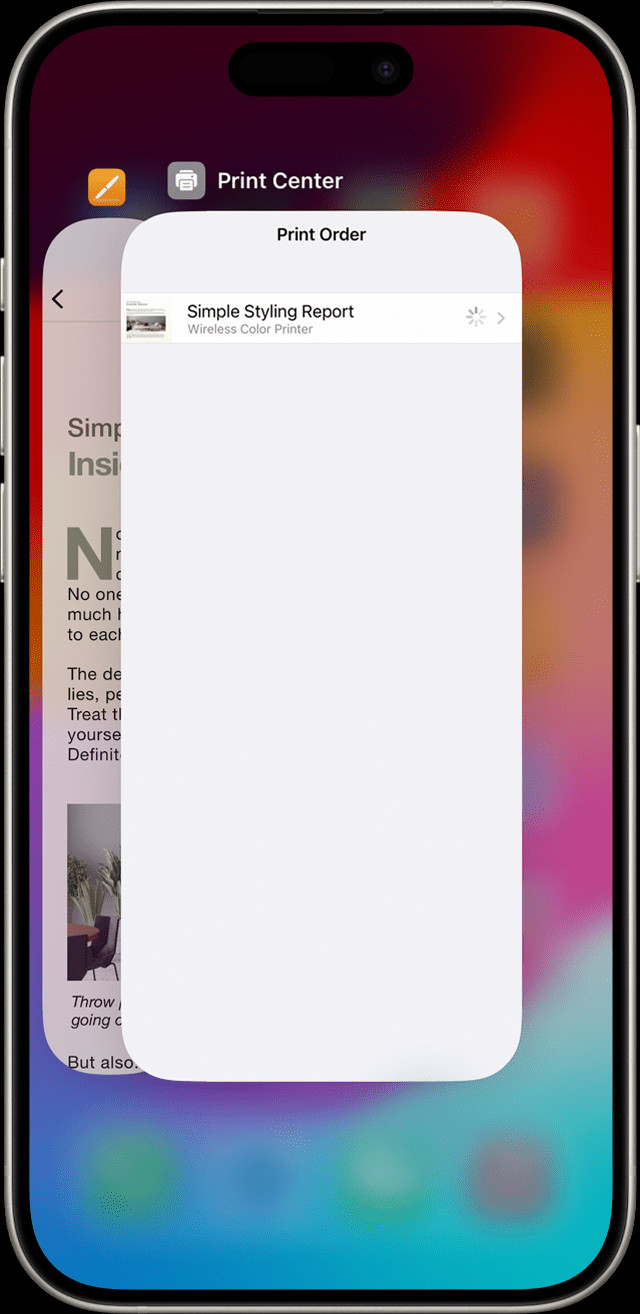 View print jobs in Print Center
Canceling a Print Job
If you need to cancel a print job for any reason, you can do so easily through the Print Center:
-
Open Print Center: Follow the steps above to open the Print Center via the App Switcher.
-
Cancel Printing: In the Print Center, locate the print job you wish to cancel. Tap on it, and then tap “Cancel Printing”. This will stop the print job from proceeding.
Important Considerations for AirPrint
While AirPrint offers a convenient wireless printing solution, it’s important to note a few limitations:
- Network Requirement: AirPrint relies on a Wi-Fi network. Both your iPhone and printer must be on the same network.
- USB or Bluetooth Connections: AirPrint does not work with printers connected to the USB port of an Apple AirPort Base Station or AirPort Time Capsule, or to your computer via Bluetooth. AirPrint is designed for network-connected printers.
By following these steps, you can easily set up and use your printer with your iPhone, leveraging the convenience of AirPrint for all your mobile printing needs. Enjoy the ease of printing directly from your iPhone without the hassle of cables or complex setups.