
Achieving professional-quality, full bleed prints starts with correctly setting up your document in Adobe InDesign. Full Bleed Printing, where your artwork extends all the way to the edge of the printed page, is a sought-after finish for brochures, flyers, magazines, and many other print materials. This guide will walk you through the simple steps to ensure your InDesign files are print-ready with full bleed.
Setting up bleed in InDesign is a straightforward process that can be done either when you initially create your document or at any point during your design process. Let’s explore both methods to give you a comprehensive understanding.
Setting Bleed When Creating a New Document
If you’re starting a new project and know from the outset that you require full bleed printing, you can set this up right away in the new document dialog box. This proactive approach ensures your design canvas is correctly configured from the beginning.
When you launch InDesign and choose to create a new document, select the Print document option to ensure your color settings and output are optimized for printing. Under the Print preset details, you’ll find the “Bleed and Slug” section near the bottom.
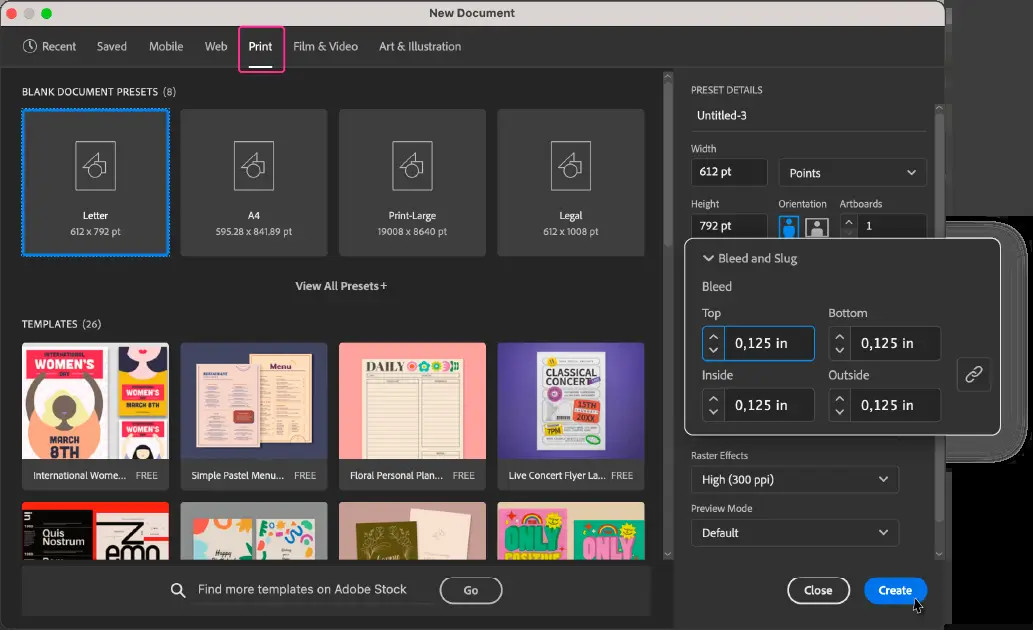 InDesign Print Preset Details Bleed and Slug
In the Bleed fields (Top, Bottom, Left, Right), enter 0.125 in (which is equivalent to 1/8 inch). This is the standard bleed amount for most commercial printing projects. By setting this value, you’re instructing InDesign to extend the document boundaries beyond the trim edge, providing space for bleed.
Once you’ve entered the bleed value, InDesign visually represents this on your document canvas. You’ll notice a red line appearing 1/8 inch outside the document’s trim edge, acting as your bleed guide.
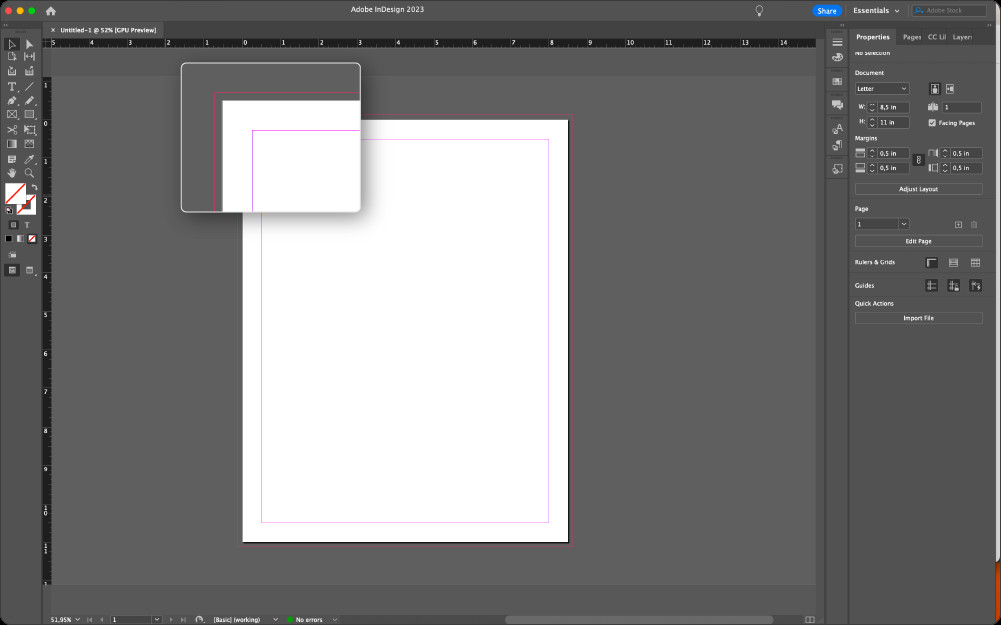 InDesign bleed line red border
Adding Bleed to an Existing Document
What if you’re working on a pre-existing InDesign document and realize you need to add bleed? Don’t worry, InDesign makes it easy to retroactively apply bleed settings without having to start over.
To add bleed to an existing document, navigate to the File menu and select Document Setup. This will open a dialog box where you can adjust various document parameters, including bleed.
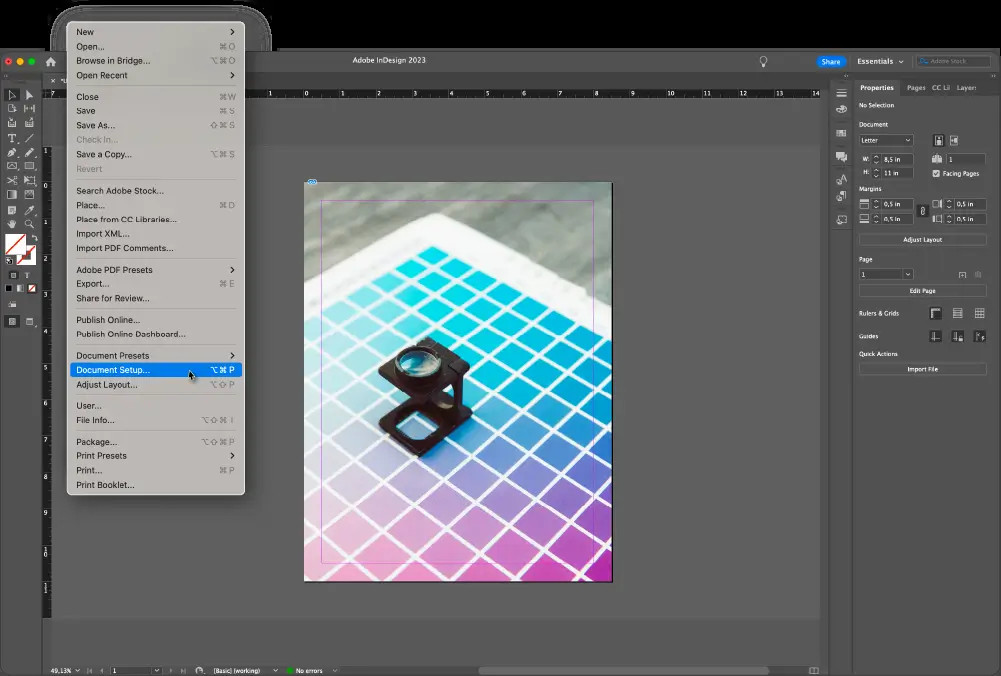 InDesign File Document Setup
Within the Document Setup dialog, locate the “Bleed and Slug” section, typically found at the bottom. Similar to creating a new document, enter 0.125 in into the Top, Bottom, Left, and Right bleed fields.
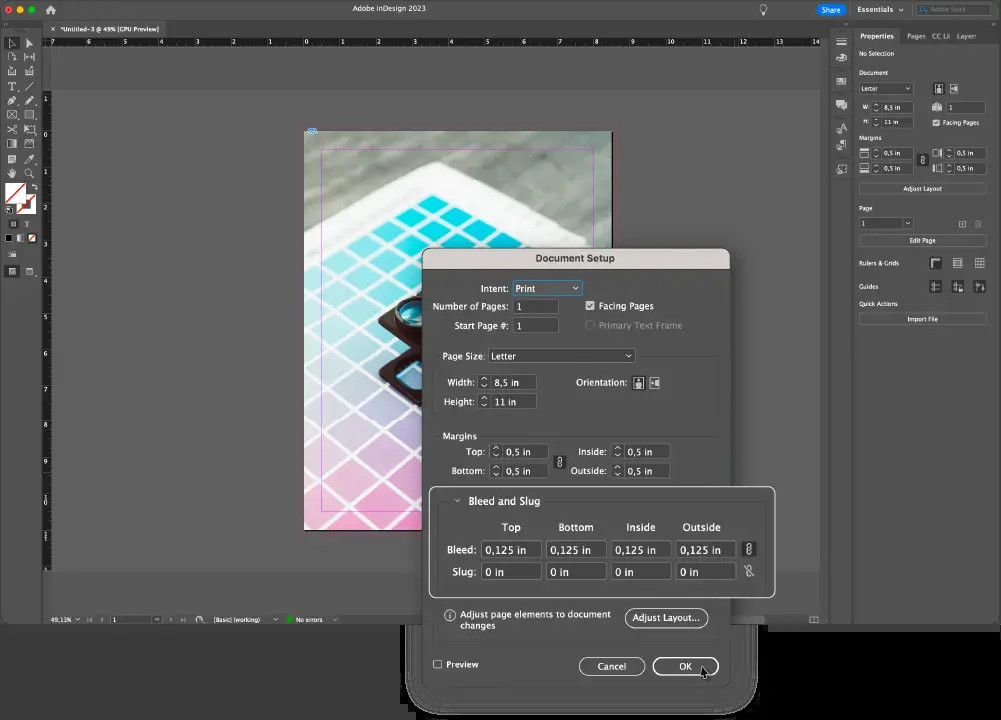 InDesign Bleed and Slug options
After confirming these settings, InDesign will update your document view to include the bleed guides, represented by the red line, just as if you had set it up from the beginning. If you don’t immediately see the red bleed lines, try toggling your guides view by pressing W on your keyboard to switch between preview and guides mode. You should see the black trim line indicating the final document edge, and the red bleed line just outside of it.
Extending Artwork to the Bleed Line is Crucial
Simply setting the bleed in your document settings is only half the battle. To truly achieve full bleed printing, you must ensure your artwork extends beyond the trim line and reaches all the way to the bleed guides. This is a critical step often overlooked, leading to unwanted white edges in the final printed piece.
Any design elements that you want to bleed, such as photos, background colors, or graphic elements, must extend into this bleed area. InDesign’s snap-to-guide feature is helpful here; as you drag your artwork, it will naturally snap to the bleed guides when you position it correctly.
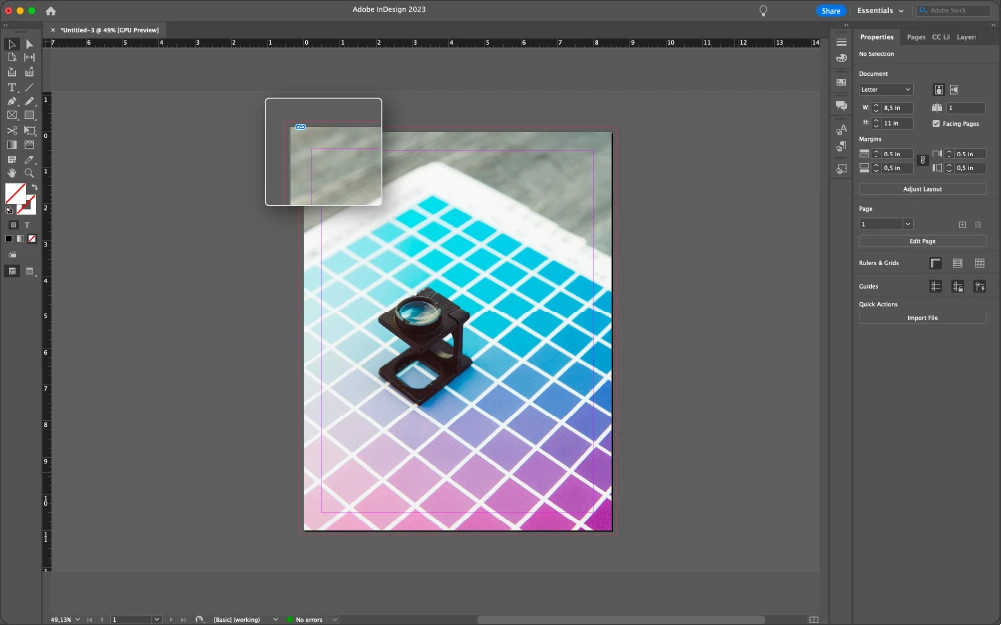
Take a look at the example below of a document with incorrectly set bleed. Notice how the image stops at the trim line. If printed as is, the final product would likely have unsightly white borders around the image edges.
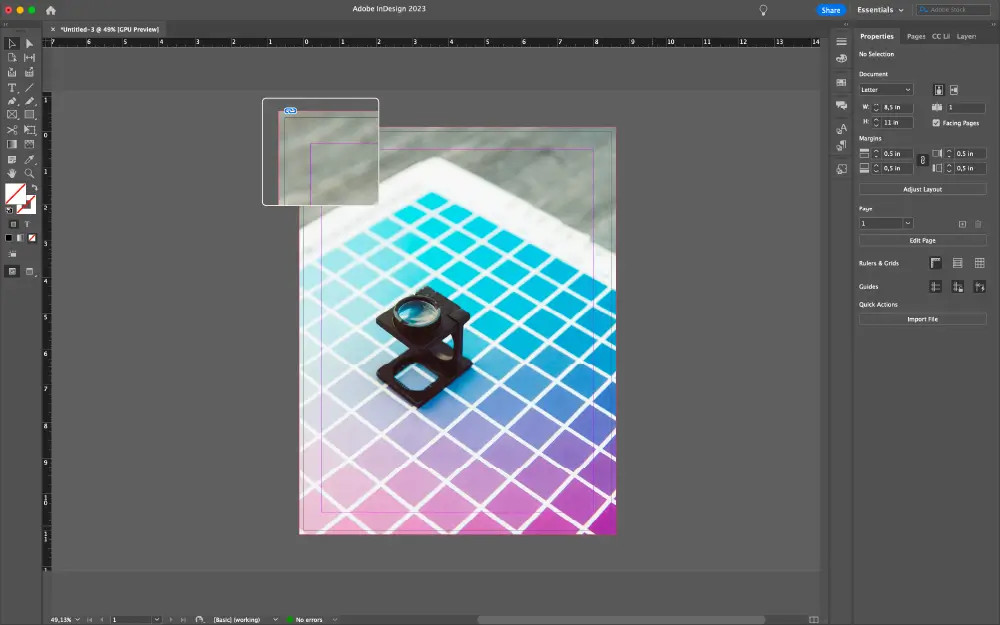
Now, compare that to the correct way to prepare your artwork for full bleed. In the example below, the image is extended outwards to meet the red bleed lines. This ensures that when the document is trimmed after printing, the image will run right to the edge of the page, creating a professional full bleed effect.
 An example of an InDesign document that has incorrectly set bleed
Remember, while extending artwork to the bleed is essential for elements intended to bleed, it’s equally important to keep critical design elements like text and logos inside the trim line. Anything positioned in the bleed area will be trimmed off.
Exporting Your PDF with Bleed Settings
The final step in preparing your InDesign file for full bleed printing is to correctly export it as a PDF. When exporting, it’s vital to specify that you want to include the bleed information so that your printer understands how to handle the file.
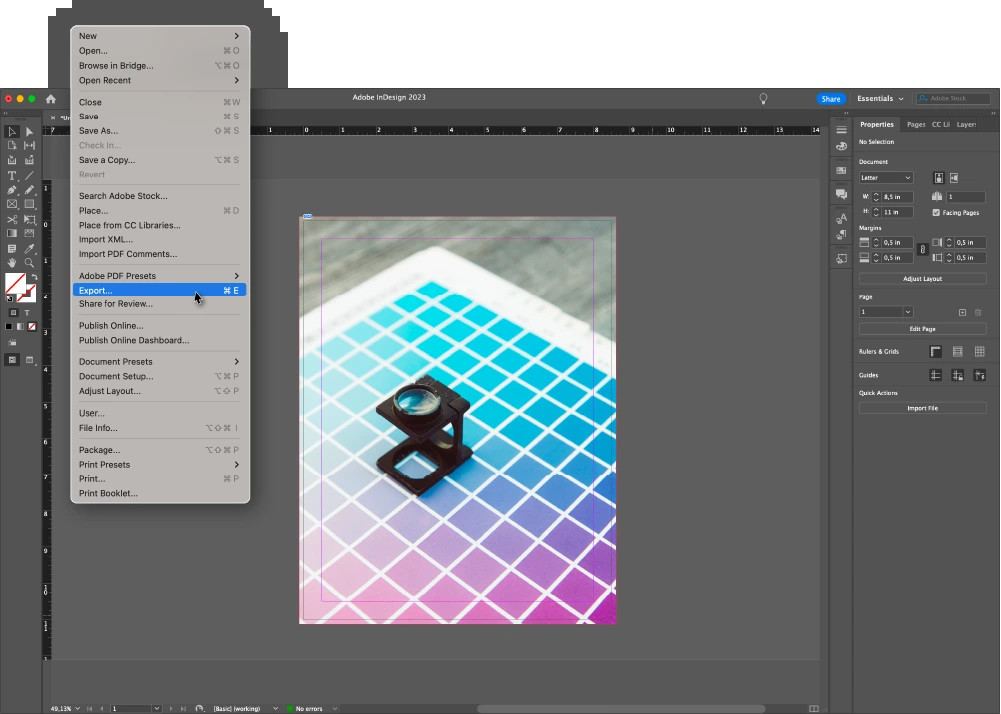
When you’re ready to export, go to File > Export and choose Adobe PDF (Print) as the format. In the Export Adobe PDF dialog box, navigate to the “Marks and Bleeds” section on the left-hand side.
Check the box for “All Printer’s Marks” to include essential printer’s marks like crop marks, bleed marks, and registration marks. Crucially, under “Bleed and Slug“, select “Use Document Bleed Settings“. This option ensures that the 0.125 inch bleed you set up in your document settings is carried through to the exported PDF file.
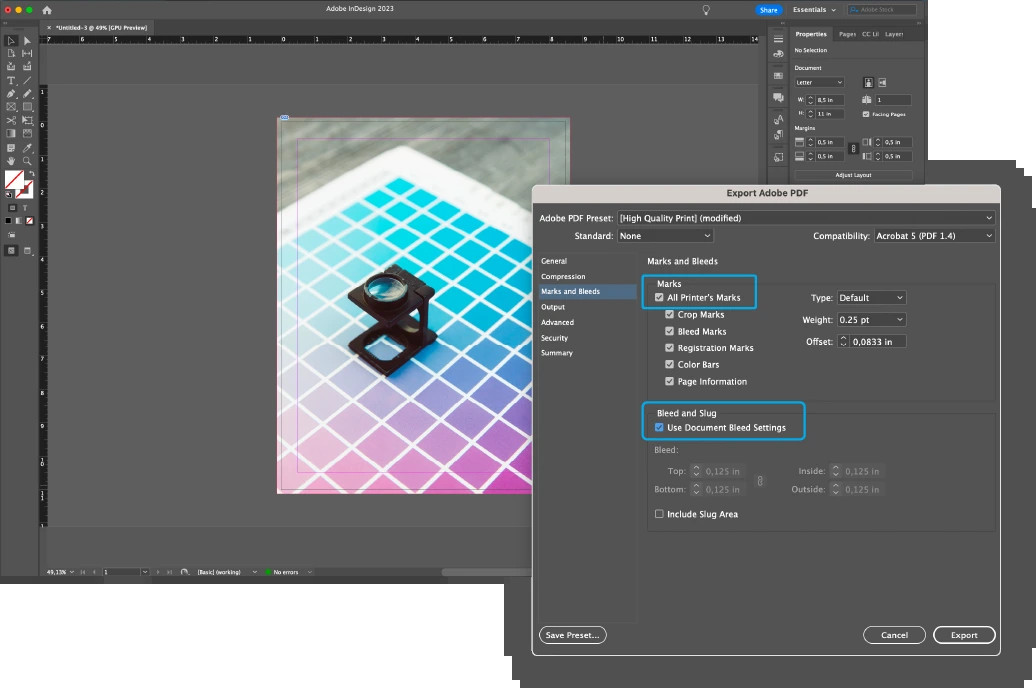
It’s generally a good practice to ensure that the offset value is equal to or greater than your bleed amount to prevent crop marks from encroaching too close to the trim edge in the final print.
By following these steps, you can confidently set up full bleed printing in InDesign, ensuring your printed projects look polished and professional every time. Correct bleed settings are a cornerstone of high-quality print production, and mastering this technique is essential for any designer working with print.